Category: Home Wi-Fi & Digital Safety

  • How to Isolate Smart Home Appliances on a Separate Network Band

    How to Isolate Smart Home Appliances on a Separate Network Band

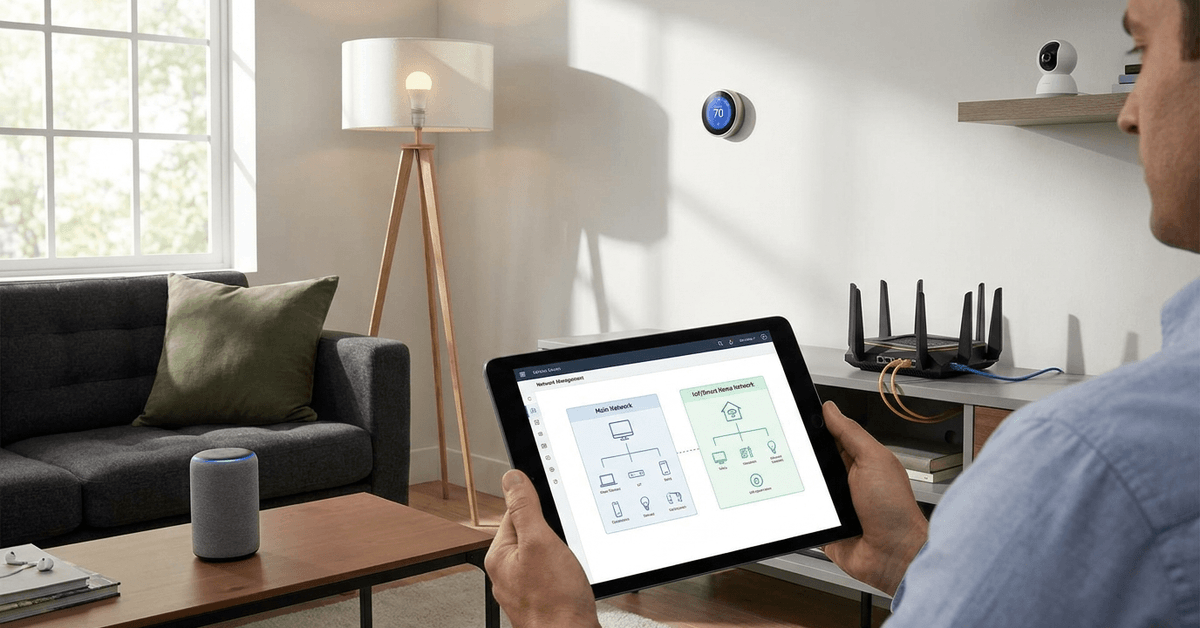
    Managing a modern smart home system can seem simple at first. However, as devices multiply, network congestion and security risks tend to increase.

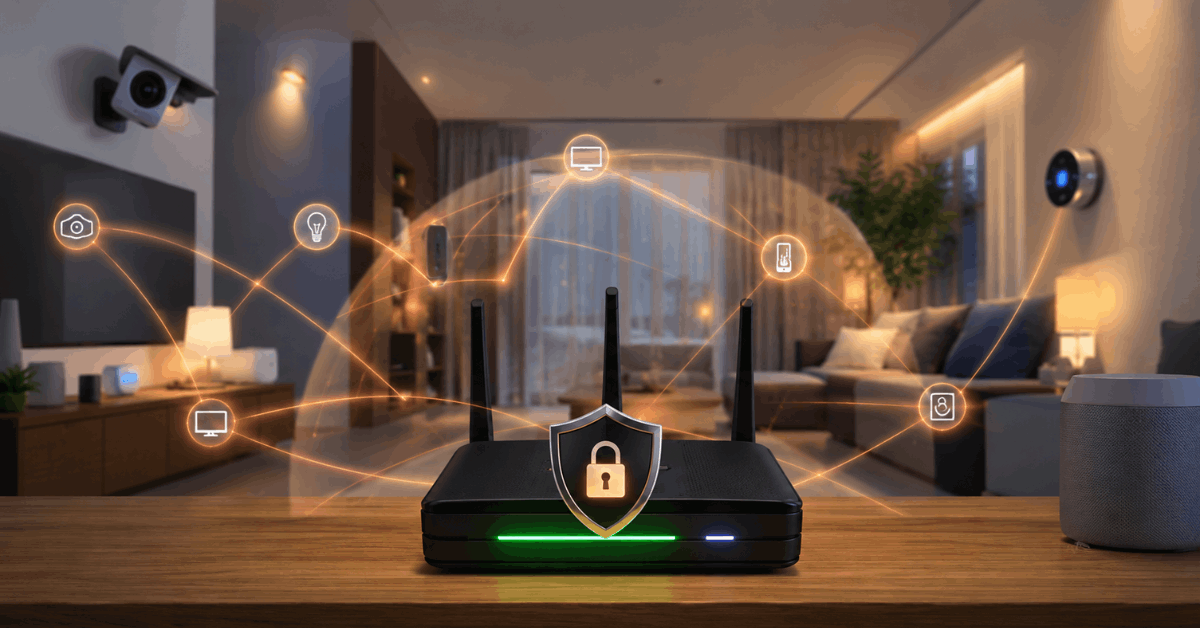
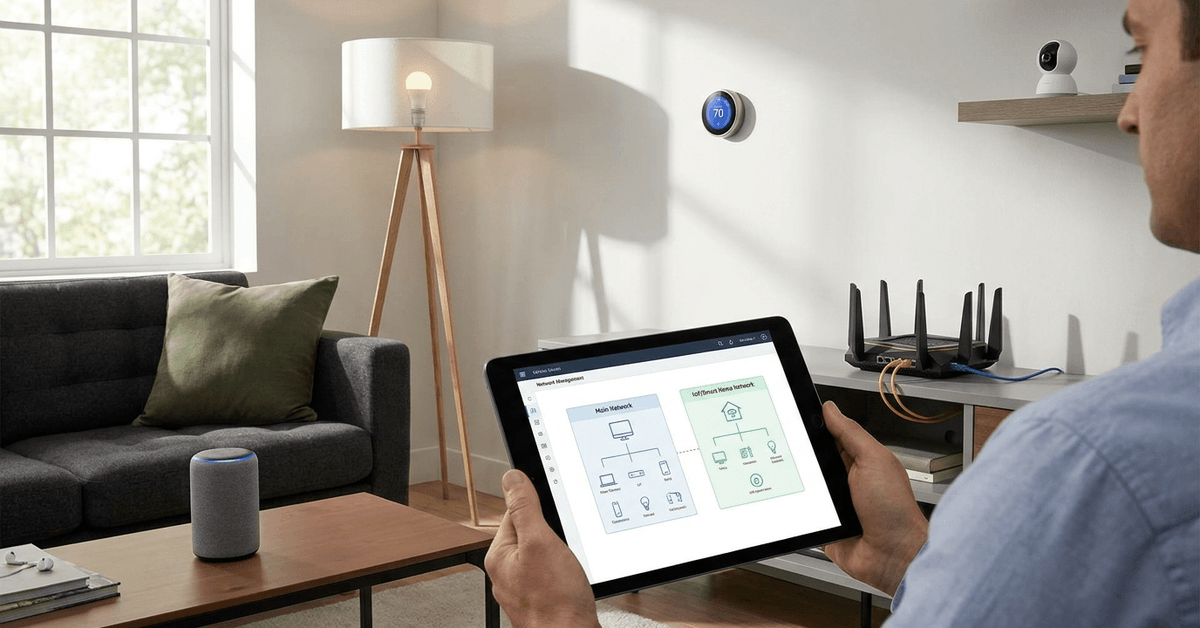
    For homeowners keen on both privacy and performance, isolating smart home appliances onto a separate network band is a best practice. This approach creates a more stable environment for automation and reduces the impact of potential security vulnerabilities.

    Why Isolating Smart Home Devices Matters?

    Smart devices such as cameras, locks, and bulbs often have limited security features compared to laptops or smartphones. This creates opportunities for threats to enter your main network.
    How to Isolate Smart Home Appliances on a Separate Network Band

    A separate network band keeps these risks isolated. The main benefit here is minimizing exposure, especially since these devices communicate frequently with the cloud.

    Reducing Network Congestion

    Appliances chat with cloud services continuously. Having them on your main Wi-Fi band can create occasional slowdowns or strange interference issues for your computers and mobile devices.

    A dedicated smart device band helps prioritize traffic. It can also help ensure lag-free video streaming and faster downloads on your personal network.

    Enhancing Security and Privacy

    Network segmentation keeps threats away from sensitive personal files. Homeowners sometimes worry about vulnerabilities found in third-party IoT gear, so there is peace of mind in knowing these devices cannot see laptops or file shares.

    A separate band also guards against spread if one appliance gets compromised. This layer of protection is particularly valuable as malware targeting smart tech becomes more common.

    Understanding Network Bands and Segmentation

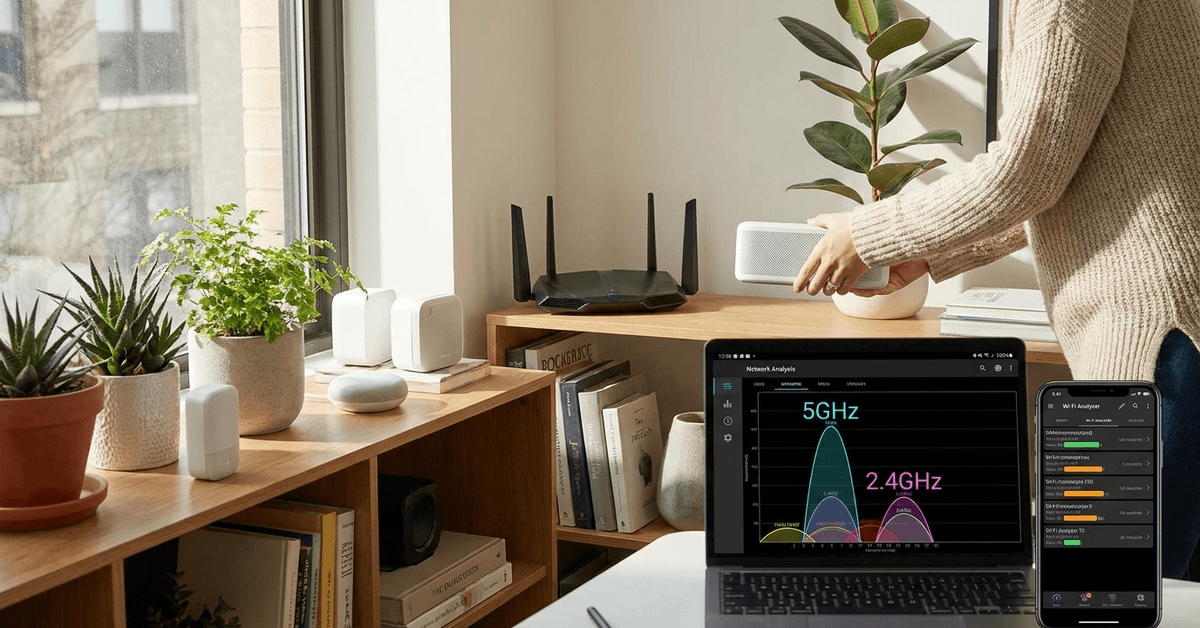
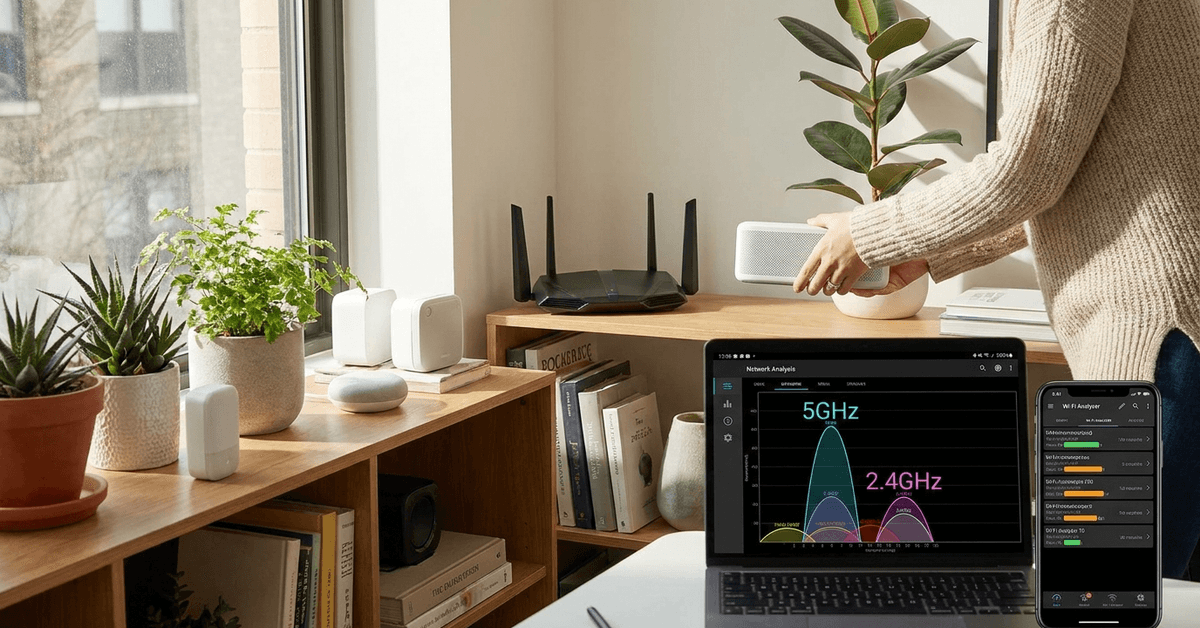
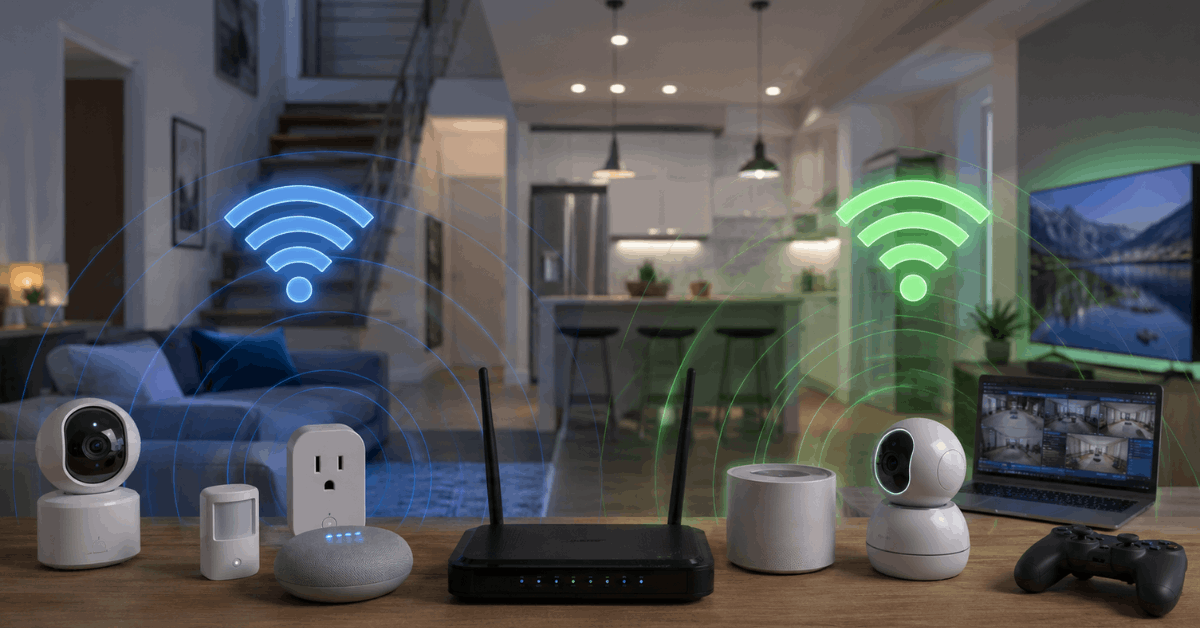
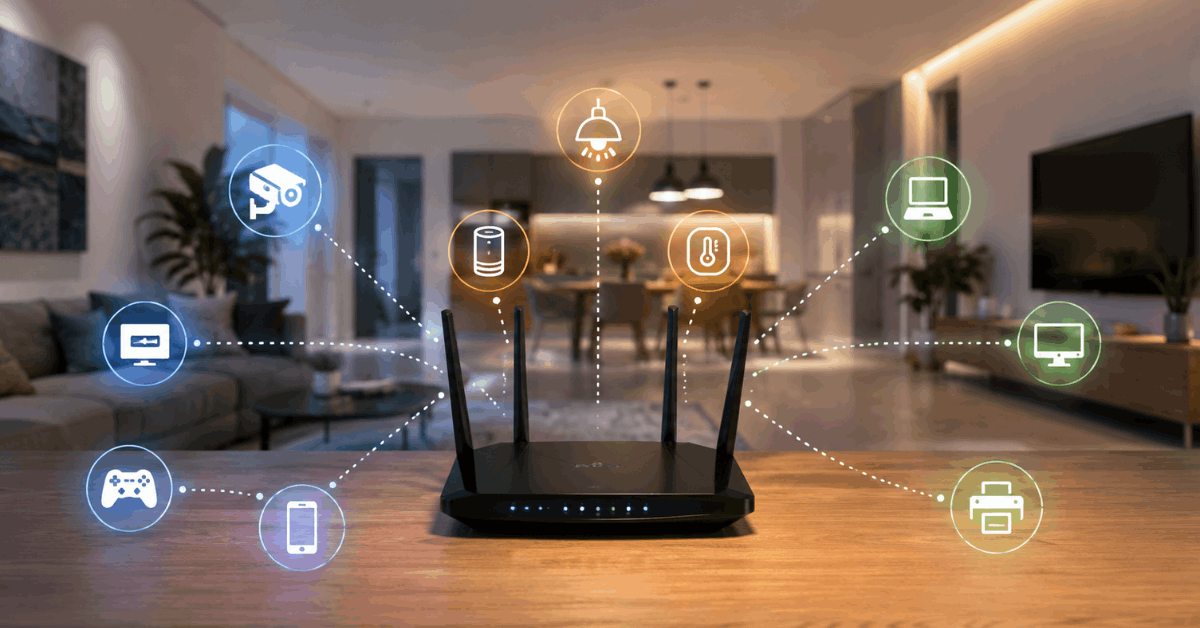
    Most modern routers support dual-band or tri-band wireless. Bands operate at specific frequencies, like 2.4GHz or 5GHz, each offering distinct benefits for different device types.
    How to Isolate Smart Home Appliances on a Separate Network Band

    Segmenting networks uses these bands or establishes a guest network to separate device groups physically or virtually. Many routers even offer VLAN configuration for power users.

    Wi-Fi Band Types and Their Uses

    • 2.4GHz: Best for range; older and lower-bandwidth smart devices typically use this band.
    • 5GHz: Faster speeds, less interference; some modern smart gear supports this as well.
    • 6GHz (Wi-Fi 6E): The newest standard, for future-proofing new homes.

    Placing smart appliances on 2.4GHz is still the most common practice because of broader compatibility. However, separate 5GHz guest networks are also growing in popularity.

    Setting Up a Separate Network Band for Smart Devices

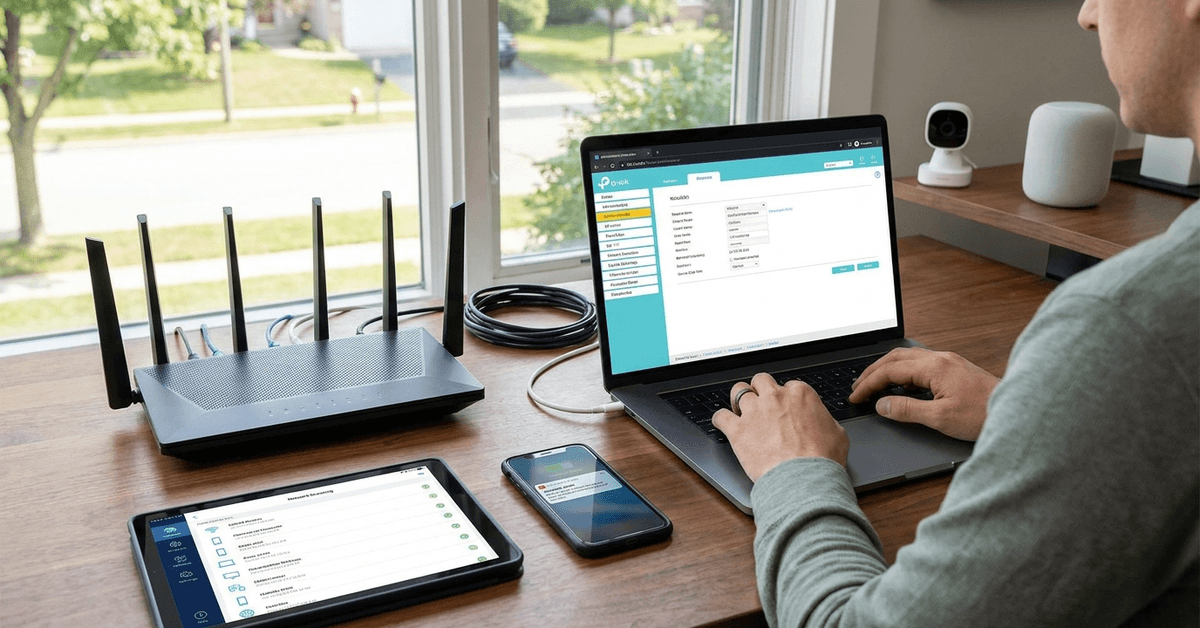
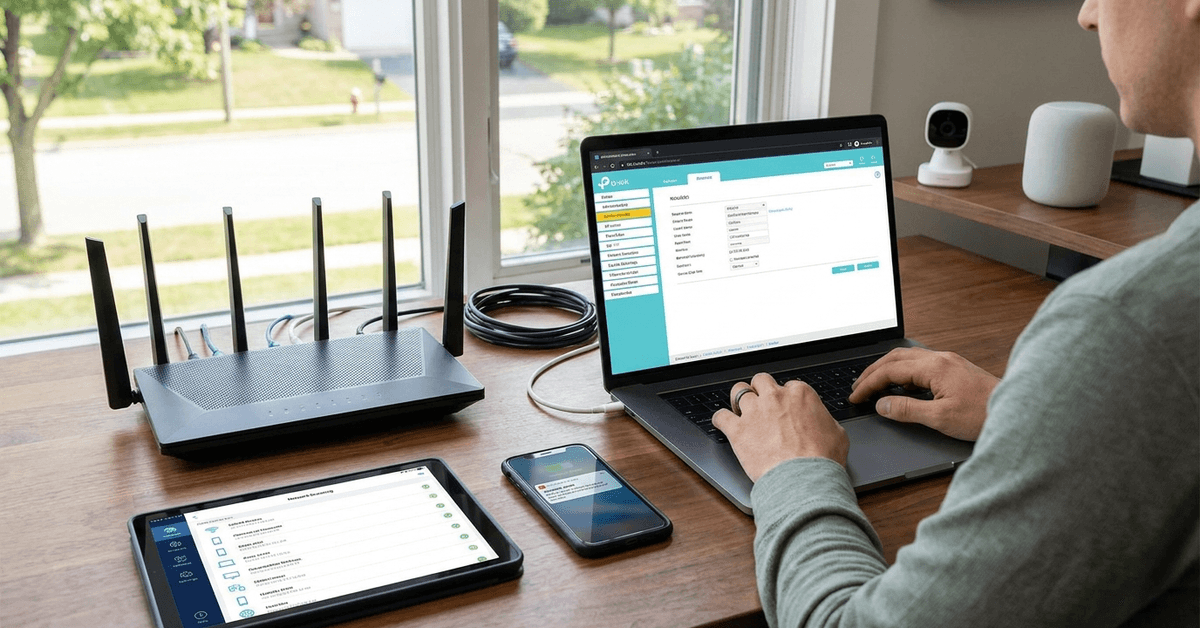
    A commonly used method is to set up a guest network or dedicated SSID on your existing router. This can often be done within the device’s web configuration panel or app.

    Step-by-Step: Creating and Configuring a Guest Network

    1. Log in to your router’s admin interface (usually at 192.168.1.1 or 192.168.0.1 via a browser).
    2. Locate the Wireless or Wi-Fi settings. Look for an option called “Guest Network” or “Add Network”.
    3. Enable the guest network feature. Assign a unique SSID such as “Home_Appliances_Only”.
    4. Set a strong password. WPA2 or WPA3 encryption is recommended for smart device traffic.
    5. Check the option “Isolate guests from main network” if available. This keeps traffic fully separated.

    Many brands like TP-Link Deco and ASUS ZenWiFi use intuitive mobile apps for these steps. The process takes just a few minutes, even for first-timers.

    Assigning Devices to the Right Band

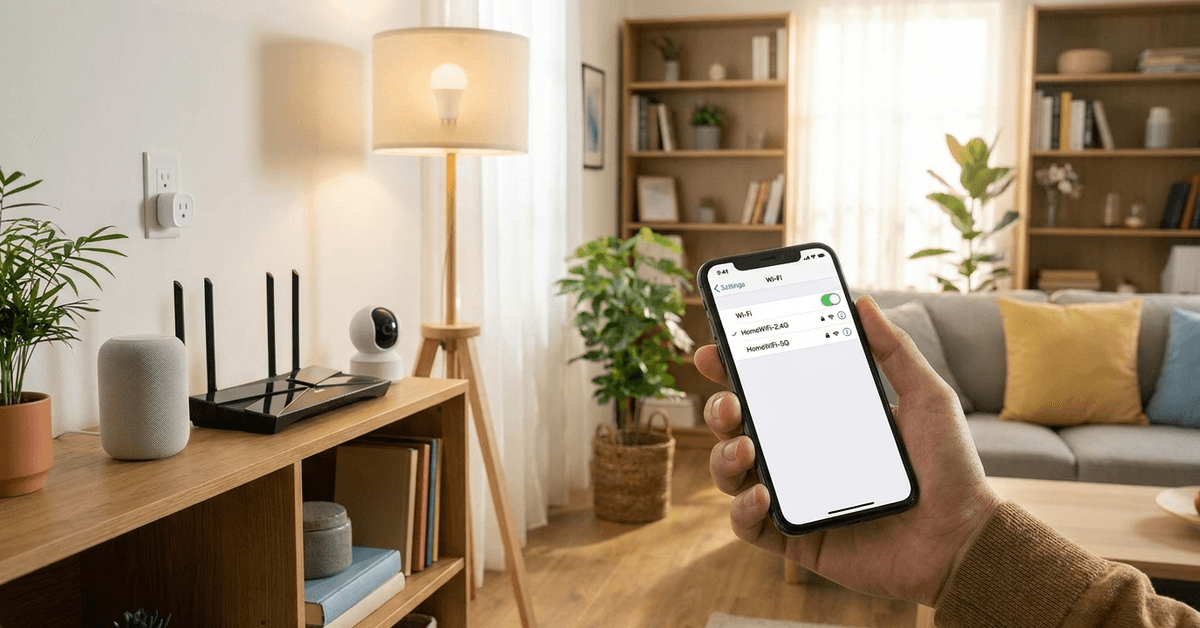
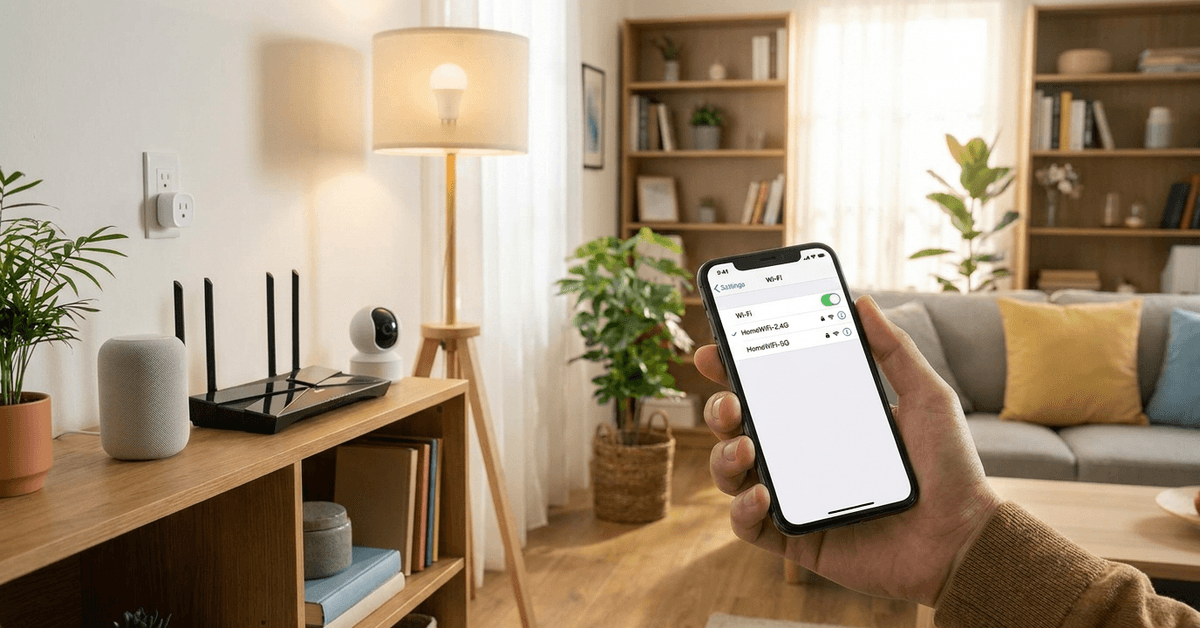
    Each smart home device (bulb, plug, or camera) often connects over 2.4GHz. During setup, select the dedicated SSID when prompted. If a phone uses 5GHz, temporarily switch it to the 2.4GHz band to complete onboarding.

    Advanced Isolation: VLANs and Mesh Networking Solutions

    Experienced homeowners sometimes use VLANs (Virtual LANs) for more granular network control. This can further limit which devices talk to one another, providing a strong isolation mechanism.

    Mesh Wi-Fi systems like Ubiquiti UniFi and Google Nest Wifi can support native VLAN configuration. These add a commercial-grade layer of isolation that many security enthusiasts prefer.

    VLAN Configuration Overview

    • Access advanced router/mesh system settings (often via a web console).
    • Create a VLAN profile specifically for smart devices (for example, VLAN10).
    • Assign selected ports or SSIDs to that VLAN.
    • Apply firewall or routing rules to block access between VLANs for extra protection.

    This setup takes a bit of networking know-how. The benefit is full logical separation enforced at the hardware level.

    Device Management and Monitoring Tools

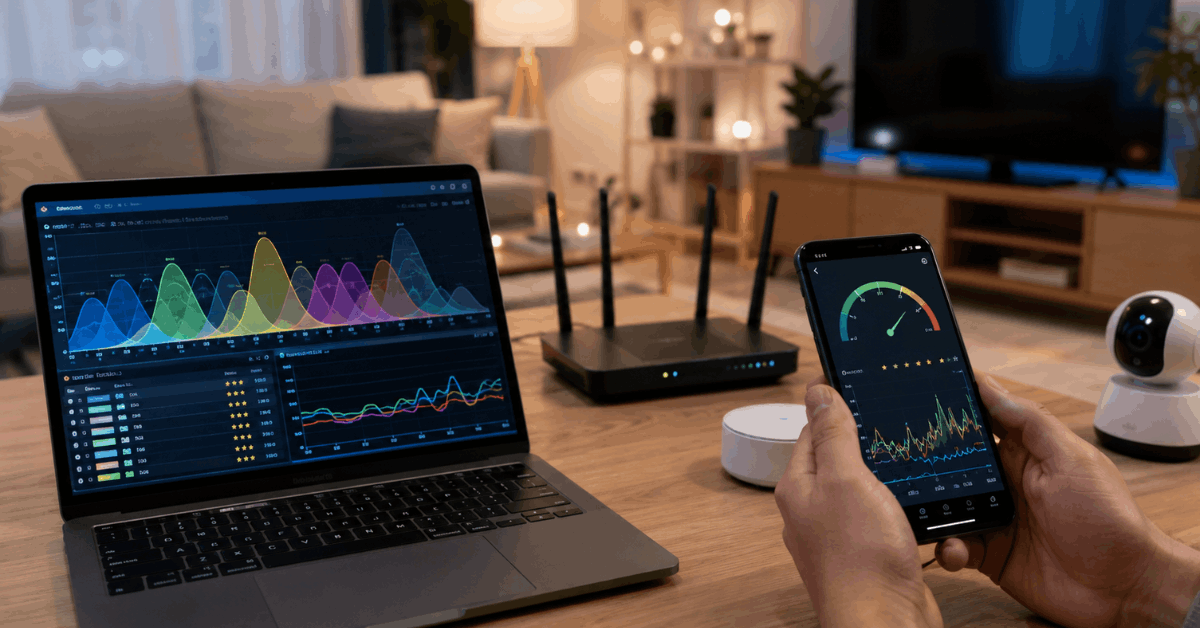
    After moving devices to a separate band, it is helpful to use network monitoring apps. This ensures connections remain stable and any suspicious device activity is immediately flagged.

    Notable Software for At-Home Network Visibility

    • Fing: Scans your Wi-Fi for connected devices, offering notifications if new appliances join unexpectedly.
    • NetAnalyzer: Offers real-time signal quality and speed metrics for your segmented bands.
    • Router-integrated tools from brands like Linksys or Synology often display all network devices and their bandwidth use at a glance.

    Checking these apps regularly can surface unusual traffic. This acts as an extra layer of peace of mind for anyone serious about smart home security.

    Tips for Maintaining Security and Performance

    Security is not a one-time process. It needs ongoing attention to ensure that, as the network grows, vulnerabilities do not multiply.

    Simple Steps for Ongoing Network Health

    • Update the router firmware and all smart appliance software regularly to patch new threats.
    • Review connected devices on your dedicated band once a month to ensure everything is recognized.
    • Create unique, strong passwords for both primary and guest smart device networks.
    • For homes with many appliances, consider periodic speed tests to verify that isolation is improving throughput.

    Homeowners may occasionally forget that smart appliances are running outdated software. Automated update features, if available, should be enabled to help things stay current with minimal effort.

    Potential Pitfalls and Real-World Insights

    Occasionally, device manufacturers only support 2.4GHz and do not mention compatible guest setup steps. Reviewing the manual ahead of time can help avoid setup headaches.

    It’s not uncommon for specific appliances to lose connectivity if the router reboots. Keeping a list of which appliances belong to each network can save troubleshooting time later.

    Occasional minor glitches, like a device not appearing on a monitoring app, might resolve with a network rescan or router firmware update. Perfection sometimes requires a bit of patience in real-world home tech setups.

    Conclusion: Smarter, Safer Homes Through Network Band Isolation

    Isolating smart home appliances onto a separate network band is one of the most powerful yet approachable ways to secure a modern home.

    This practice protects personal data, reduces the risk from compromised devices, and keeps both automation routines and household internet running smoothly.

    Whether using simple guest networks or advanced VLAN segmentation, even incremental steps toward isolation can yield substantial security and performance benefits. Homeowners and enthusiasts alike find it a worthy investment for safer, smarter living.
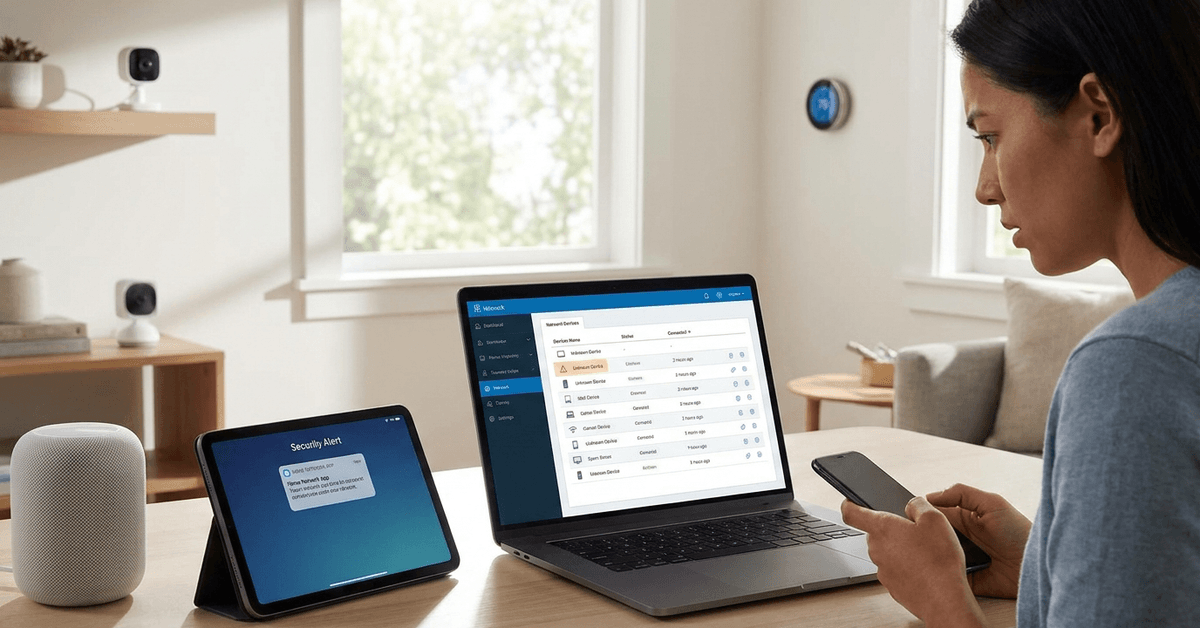
  • Red Flags That Show Your Home Wi-Fi Network Might Be Compromised

    Red Flags That Show Your Home Wi-Fi Network Might Be Compromised

    Your home Wi-Fi network is the backbone of smart security and convenience. If compromised, every connected device could be vulnerable. Recognizing red flags early helps protect your privacy and peace of mind.

    This article is designed for smart homeowners and tech enthusiasts who want practical, real-world strategies to detect and address suspicious activity. Spotting these signs early means you can enjoy your smart devices worry-free while keeping your home fortress secure.

    Unusual Internet Slowdowns and Device Lag

    Sporadic lag or sudden drops in speed might feel inconvenient, but they could signal deeper issues. An overloaded network sometimes means outsiders have gained access.

    Red Flags That Show Your Home Wi-Fi Network Might Be Compromised

    Consistent Drops in Speed

    If your network slows even when only a few household devices are active, that creates suspicion. It’s different from regular congestion or evening slowdowns.

    Unexpected Online Device Activity

    Some routers, like the Netgear Nighthawk, log all connected devices. Late-night connection spikes or devices you don’t recognize may appear in these logs.

    Unknown Devices are Showing Up on Your Network

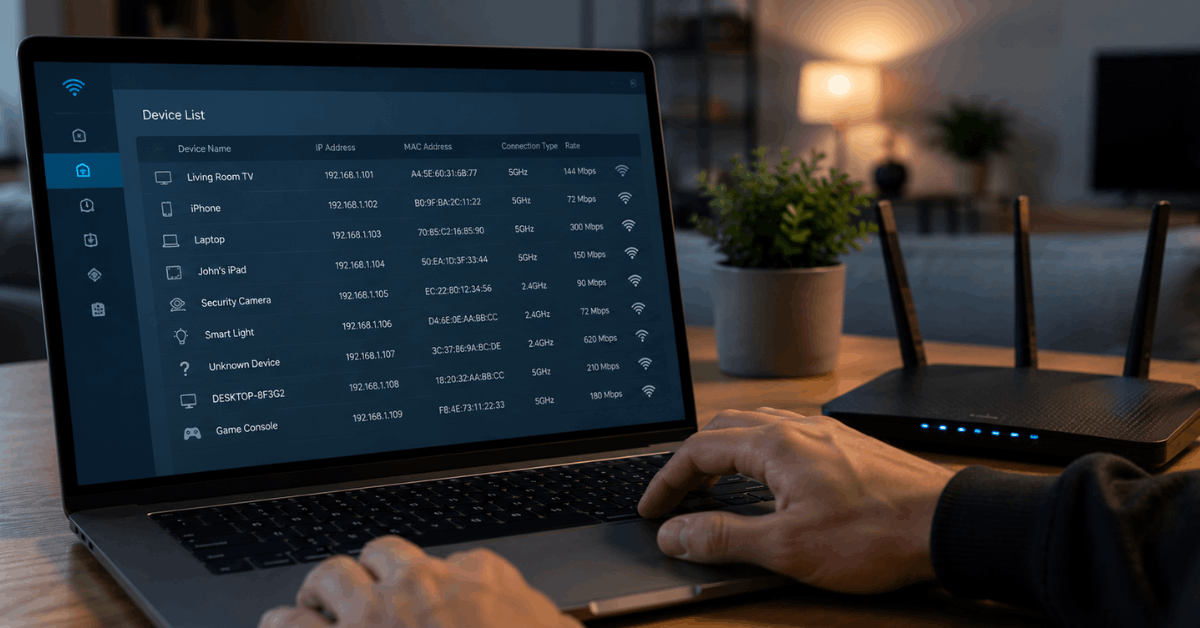
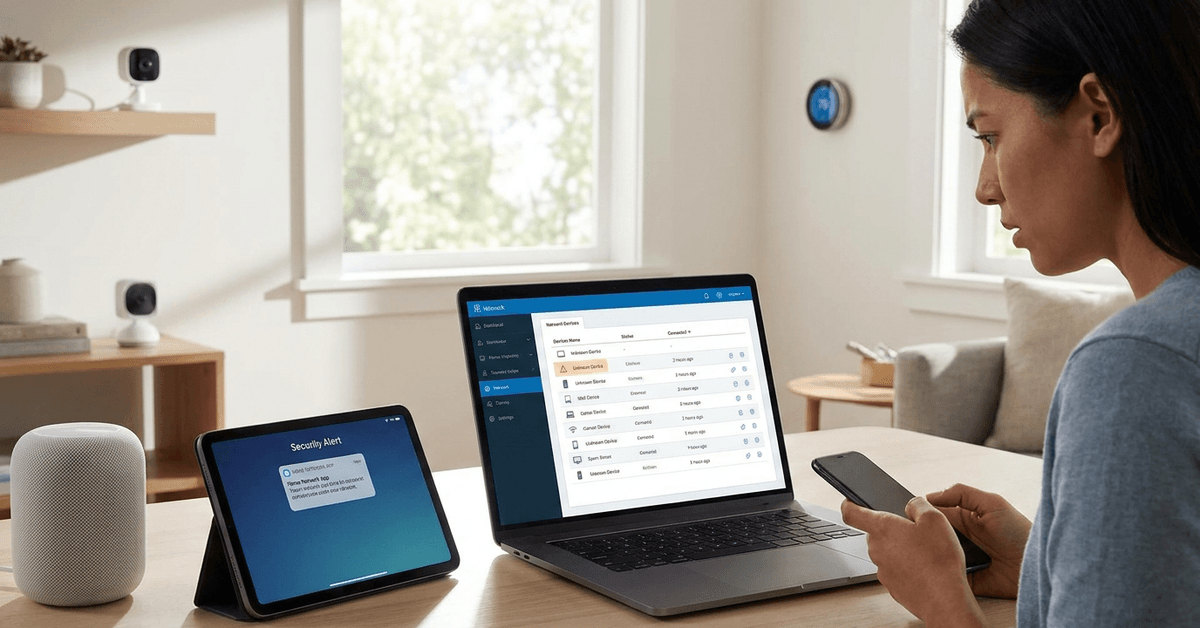
    Many routers have a device management dashboard. Unfamiliar device names or odd manufacturer labels might indicate unauthorized connections.

    Steps to Check for Unknown Devices

    • Log into your router’s admin dashboard using its official app or browser URL (usually found on the router label).
    • Navigate to the ‘Connected Devices’ or ‘Attached Devices’ section.
    • Look for names you cannot match to your household items. It’s common to see generic names for new gadgets but persistent unknowns are a risk.

    Router Settings Change Without Your Consent

    Any changes to your router’s network name, admin credentials, or firewall settings could point to compromise. These changes might go unnoticed until a problem occurs.

    Red Flags That Show Your Home Wi-Fi Network Might Be Compromised

    Indicators of Modified Settings

    • The Wi-Fi network (SSID) suddenly has a new name, especially one you never created.
    • Admin passwords or security keys require resetting unexpectedly.
    • Firewall, guest network, or parental controls are altered without your approval.

    Frequent Disconnections or Restarts

    Some malware and hackers kick users off the Wi-Fi repeatedly. Frequent router reboots without warning can indicate intrusion attempts or configuration sabotage.

    Difference Between Glitches and Threats

    Occasional restarts happen. Consistency is suspicious. Especially if power is stable and there are no firmware updates in progress.

    Security Software Raises Repeated Alerts

    Reliable antivirus or monitoring tools like Bitdefender Home Scanner scan for rogue devices and data leaks. Persistent warnings or pop-ups are rarely just false alarms.

    Examples of Useful Scanning Tools

    • Fing mobile app for identifying connected devices and open ports.
    • GlassWire for Windows, which helps visualize network activity and track data spikes.
    • Dedicated router firewalls, such as those found in Asus AiProtection.

    Pop-Ups and Redirects on Every Device

    Malicious actors often try to intercept network traffic, causing browser redirects or pop-ups on all devices sharing the same Wi-Fi.

    Symptoms of DNS Hijacking

    A pattern of being routed to unexpected websites or seeing ads on every device—even in apps—signals DNS tampering.

    How to Confirm Suspicious Activity

    • Run a DNS leak test using trusted websites like dnsleaktest.com.
    • Compare results to your intended DNS provider (many ISPs or Cloudflare/Google DNS).

    Increase in Smart Device Malfunctions

    Smart plugs, bulbs, or cameras acting flaky or disconnecting more than usual could be reacting to outside interference. Most devices are stable on a secure network.

    Common Warning Signs With Smart Gadgets

    • Random restarts or constant need to re-pair.
    • Loss of control via their dedicated apps, particularly for brands like TP-Link Kasa or Philips Hue.

    High Data Usage When You’re Away

    Continuous uploads or downloads in your internet usage log, even when nobody is home, could mean an outsider is using your bandwidth or transferring stolen data.

    How to Track Data Usage

    • Access your ISP dashboard or router usage statistics.
    • Cross-reference with periods when your home is empty or all legitimate devices are off.

    Strange Port Activity and Network Logs

    Advanced users sometimes review router logs or use scanning tools. Odd IP addresses making repeated requests or opening irregular network ports suggest probing or intrusion attempts.

    Basic Log Monitoring Tips

    • Many routers log inbound/outbound traffic. Review unfamiliar IPs regularly.
    • Tools like Wireshark let you sniff network packets for deeper analysis, though some technical skill is helpful.

    Your Credentials or Identity Appear in Breach Databases

    If your home Wi-Fi password turns up on security breach notification tools like Have I Been Pwned, it’s worth resetting all router and device passwords at once.

    Recommended Actions if You Spot Red Flags

    If multiple warning signs appear, the most reliable option is to secure your system immediately and contact your ISP if needed. The following steps build a strong response.

    Core Wi-Fi Recovery Steps

    • Change all router admin and Wi-Fi passwords to new, complex codes.
    • Enable WPA3 security if your router supports it, since this blocks most modern hacks.
    • Disconnect all unknown devices via your router admin panel, then restart the router.
    • Update the router firmware using the official vendor’s website or support app.
    • Run a full device scan with an updated antivirus or security suite.

    How Smart Home Owners Optimize Prevention?

    Diligent homeowners often schedule regular reviews of device lists and update passwords quarterly. Using two-factor authentication on router dashboards adds an extra security layer.

    Top Practical Tips for Everyday Defense

    • Label and document all household smart devices and app logins, so unknowns stand out.
    • Set up a guest network for visitors and IoT gadgets to isolate sensitive data.
    • Check router and ISP app dashboards for new device alerts.
    • Enable automatic software updates for routers, cameras, and smart hubs whenever possible.

    Conclusion: Building Long-Term Security Mindset

    Staying alert to small issues lets homeowners catch major threats before real damage occurs. Compromise rarely starts with blinking warnings—it’s usually the pattern of small, persistent oddities that points toward intrusion.

    Consistently monitoring your device list, updating credentials, and responding swiftly to suspicious activity keeps your home network in fortress condition. It’s not about being paranoid, but about enjoying your connected lifestyle with lasting confidence and reliability.

  • How to Block Unauthorized Devices From Accessing Your Home Network

    How to Block Unauthorized Devices From Accessing Your Home Network

    Protecting your home network from unwanted devices is more vital than ever. Every smart gadget, phone, and PC in your home can be a potential doorway. 

    This guide addresses how everyday users can secure their Wi-Fi against unauthorized access, keeping families and data safe. 

    Anyone looking to enhance their smart home security or simply avoid slowdowns from freeloaders will gain practical, easy-to-apply steps below.

    Understanding How Unauthorized Devices Get Access

    Most devices sneak onto home networks through weak Wi-Fi passwords or outdated security. Sometimes, it is accidental—a guest reconnects without your notice. Other times, it is more deliberate.

    High-traffic homes with many gadgets are especially tempting. Small slip-ups, like using the default router login, can open doors to intruders.

    How to Block Unauthorized Devices From Accessing Your Home Network

    Main Weak Points in Home Network Security

    Weak or Shared Wi-Fi Passwords

    Using simple words or the factory password puts homeowners at risk. Even someone parked nearby could guess it if it is too easy.

    Outdated Router Firmware

    Router makers release updates to close security holes. If your router’s software is behind, it is like leaving a window unlocked.

    No Device Management

    Many users do not track which devices are connecting. Over time, forgotten phones or smart gadgets can stay linked and unmonitored.

    How to Quickly Spot Unauthorized Devices?

    Bring up your router’s device list by logging into its admin panel. Most brands show a page named Device List, Attached Devices, or something similar.

    How to Block Unauthorized Devices From Accessing Your Home Network

    A few notable device names are easy to recognize. Anything unfamiliar calls for closer inspection. Household members sometimes forget their own devices, which can be confusing.

    • Check for odd manufacturer names or generic device IDs.
    • Look for high-traffic usage—intruders often consume a lot of data.
    • Review frequently for new or renamed items.

    Changing Your Wi-Fi Password: First Line of Defense

    The most effective quick step is to update the main Wi-Fi password. This action disconnects all devices, so each must reconnect using the new one.

    Choose a passphrase over short words, mixing upper/lowercase letters and symbols. Avoid pet names, birthdays, or anything public.

    Enabling Network Encryption

    Modern routers support different encryption standards. It’s usually best to use WPA3 if your devices support it. Otherwise, WPA2 is a solid option.

    Older standards like WEP are not secure. Changing encryption settings is found in your router’s wireless security section.

    Setting Up a Guest Network

    A practical method for frequent visitors is enabling a guest Wi-Fi. This isolates devices that are not your own from those you trust.

    Most routers allow simple toggling of a Guest Network. Set a unique password and turn it off outside guest hours for better control.

    MAC Address Filtering for Tighter Control

    Every device has a unique identifier called a MAC address. Routers can block or allow only approved MAC addresses—providing another layer of control.

    The process looks like this:

    • Check the MAC address in device settings (on phones, PCs, smart TVs, usually found under network info).
    • Add allowed MAC addresses to your router’s Approved or Whitelist section.
    • Turn on MAC address filtering—some routers call this Access Control or Network Filtering.

    This method is quite strong for homes with limited devices. However, determined intruders could mimic an allowed address, so it works best alongside other measures.

    Disabling WPS for Extra Safety

    Wi-Fi Protected Setup is convenient, but sometimes a risk. Turning WPS off in router settings reduces the chance of illegal access through this quick-connect feature.

    Keeping Firmware Updated

    Manufacturers regularly fix vulnerabilities in routers. Checking for the latest firmware monthly ensures your device is patched against new threats.

    Most modern routers offer automatic update options, or you can check manually in the admin portal.

    Useful Network Monitoring Tools and Apps

    Fing (Mobile & Desktop)

    Fing provides device detection and alerts when new gadgets join. It is a user-friendly solution for homeowners who want real-time insights.

    Advanced IP Scanner (Windows)

    Used mainly on Windows PCs, Advanced IP Scanner instantly shows all connected devices. This free tool lets you spot intruders fast.

    GlassWire (Windows, Android)

    Offering visual traffic graphs, GlassWire helps track bandwidth and see spikes that may suggest unwanted usage.

    Smart Home Tips: Securing IoT Devices

    Connected speakers, cameras, and other IoT gadgets should never use default factory credentials. Update them to strong, unique passwords on day one.

    Disable remote access and unused services on devices wherever possible. Many hacks succeed because unused functions go unmonitored.

    Step-by-Step: Blocking a Device Using Router Settings

    1. Log into your router’s admin panel using its IP address (found on the back label or in the manual).
    2. Under the list of Connected Devices, find the unfamiliar MAC or device name.
    3. Access the device’s settings page and select Block, Deny, or Remove. Each brand uses its own wording.
    4. Save changes. The unwanted device should lose network access immediately.

    Upgrade to Routers With Automatic Intruder Alerts

    Many recent routers from ASUS, TP-Link, and Netgear include built-in intrusion detection. These alert you by email or app notification if an unknown device connects.

    Consider enabling these features under the router’s Security or Notifications panel for ongoing protection.

    Legal and Privacy Considerations

    Blocking devices is entirely legal within your network at home. Always respect guests’ privacy when reviewing connected devices, and let others know when passwords change or monitoring is active.

    Only use authorized apps and avoid scanning neighbors’ signals. Responsible management supports both security and trust.

    Best Practice Checklist: Keep Unauthorized Devices Away

    • Change Wi-Fi passwords every few months or after many guests visit.
    • Enable strong encryption like WPA3 or WPA2.
    • Scan for new devices weekly using Fing or your router.
    • Set up a guest network for non-regular devices.
    • Apply firmware updates and disable unused router features.
    • Update smart device passwords and remove unused gadgets from your network.

    Conclusion: Building a Fortress for Your Home Network

    Blocking unauthorized devices from accessing your home network is an essential step toward keeping your data, privacy, and smart home safe.

    Layering strong passwords, advanced tools, and regular checks means every device in your home is under your control—not someone else’s. With a few practical habits, homeowners on Fortressmate.com can enjoy the comfort of a connected home without worry.

  • The Beginner’s Guide to Home Network Firewalls

    The Beginner’s Guide to Home Network Firewalls

    Keeping your smart home safe requires more than just locking doors. Home network firewalls are now essential for stopping cyber threats before they reach your devices.

    This guide is designed for everyday homeowners getting started with home tech. Whether your network has a few gadgets or lots of smart automation, understanding network firewalls brings lasting security.

    What Is a Home Network Firewall?

    A firewall is a filter that stands between your home network and the internet. It blocks unwanted traffic and allows safe data to pass through.

    The Beginner’s Guide to Home Network Firewalls

    Most routers today include basic firewall functionality. Standalone devices and software also exist. Firewall security is the first line of defense against hackers, malware, and untrusted web activity.

    Why Every Smart Home Needs a Firewall?

    Smart homes connect many gadgets: cameras, TVs, thermostats, and more. Each one can become a hacker’s entry point.

    The Beginner’s Guide to Home Network Firewalls

    A firewall will:

    • Block suspicious connections before they reach home devices.
    • Hide your smart systems from curious outsiders.
    • Reduce the risk of ransomware or data theft attacks.

    As more devices are added, homeowners often underestimate the exposure each one creates.

    Types of Home Network Firewalls

    Hardware Firewalls

    These are physical boxes installed between the modem and your network router. They operate independently of your devices.

    Popular hardware options for home use include Firewalla, Ubiquiti UniFi Security Gateway, and Zyxel ZyWALL series.

    Software Firewalls

    Software firewalls install on individual computers or devices. Common on Windows and macOS, they filter network traffic at the device level.

    • Some smart home hubs, like Home Assistant OS, support built-in firewall tools.

    Router-Based Firewalls

    Many routers come with firewall features enabled by default. These block standard attacks but may need to be manually configured for more advanced protection.

    Popular router brands with built-in firewalls are Asus, Netgear, TP-Link, and Synology.

    How Home Firewalls Protect You in Real Life?

    Picture a smart doorbell camera. Without firewall protection, anyone could attempt to connect from outside.

    When a firewall is active, it quietly checks each incoming request. Only safe, expected requests—like from your smartphone app—are allowed through.

    This happens for every device: lamps, speakers, sensors, or even a smart garage opener. This keeps automation running smoothly with fewer interruptions.

    Key Features to Look For in a Firewall

    • Intrusion prevention —blocks known hacks and attack patterns
    • Parental controls—limits kids’ access to risky sites
    • Automatic firmware updates—keeps protection current
    • User-friendly dashboard—shows blocked threats at a glance
    • Device profiles—lets you isolate smart home devices from regular computers

    Some models also support VPN passthrough or ad filtering.

    Setting Up Your Home Network Firewall: A Step-by-Step Guide

    Step 1: Choose the Right Type for Your Home

    • Hardware firewalls suit larger homes or those with many gadgets.
    • Router-based firewalls work for compact setups or beginners.

    Step 2: Connect and Position the Device

    • Hardware firewall: Connect it between the modem and the router. Check lights or display screen for power-on.
    • Software firewall: Download and install the application on each device you want to protect.
    • Router firewall: Access the router’s settings via a web browser—often at 192.168.1.1—and look for security or firewall menus.

    Step 3: Update Firmware or Software

    Many new firewall devices require an update to fix bugs or add features. The control panel should offer an update option.

    Step 4: Configure Security Rules

    • Create device groupings—separate smart home devices from personal laptops or phones.
    • Enable parental or guest controls as needed.
    • Set alerts for blocked intrusion attempts, which can appear as pop-ups or daily summaries.

    Changes are often applied with a “Save” or “Apply Changes” button.

    Step 5: Test Your Protection

    • With your phone’s Wi-Fi off, try connecting remotely to a smart device. If you can’t, your firewall is blocking unauthorized requests.
    • Sites like ShieldsUP! (by GRC) let you test for open ports and see what’s visible from the web.

    Review logs occasionally to check for repeated suspicious activity.

    Popular Firewall Apps and Devices for Home Networks

    • Firewalla Blue Plus: Small but powerful with intrusion protection and family filters.
    • pfSense: Open-source, very customizable on older PCs or dedicated appliances.
    • Bitdefender Box 2: Pairs with mobile devices for easy setup and live alerts.
    • Asus AiProtection: Bundled in many Asus routers, with malicious site blocking.

    Every tool fits a specific home. Some are set-and-forget, while others let you tweak fine-grained controls.

    When to Replace or Upgrade Your Firewall?

    • Noticeable slowdowns in network speed—old hardware can throttle gigabit plans.
    • Limited update support or lack of new threat definitions.
    • Difficulty in isolating smart devices from guest networks.

    Replacing your firewall every few years ensures better compatibility with newer devices and up-to-date security standards.

    Firewall Best Practices for Smart Homes

    • Regularly update firmware or software components.
    • Change default passwords—most home breaches start with weak login details.
    • Limit remote access features to essential users only.
    • Enable notifications for high-risk block events.

    It’s easy to think things are safe if nothing looks wrong. Still, background threats are always evolving.

    Common Firewall Misconceptions

    • Firewalls make you invisible online. In reality, they just reduce exposed entry points.
    • Only tech-savvy users need firewalls. Any smart home benefits from added protection.
    • Once installed, they’re set forever. Ongoing updates and monitoring are required for real safety.

    No single tool solves every risk. Instead, firewalls shield your network as a core security layer.

    Conclusion: Building Strong Digital Walls for Your Home

    Home network firewalls quietly keep families and gadgets safer every day. The right setup deters many common threats—sometimes before you even know they existed.

    Smart homes are always evolving. So is cybersecurity. Investing time in a reliable firewall pays off through peace of mind and fewer headaches.

    There are many options and setups, but the fundamentals stay the same: isolate, update, and monitor. With a little effort, anyone can build a powerful digital barrier—regardless of their tech background.

  • Tips for Creating Strong Passwords for Home Automation Accounts

    Tips for Creating Strong Passwords for Home Automation Accounts

    Securing smart home systems starts with well-chosen passwords. Homeowners managing smart locks, thermostats, and security cameras need digital protection as robust as their hardware. Strong passwords help prevent unwanted access and protect sensitive automation data.

    Why Smart Home Password Security Matters?

    Most home automation devices are connected to the internet. Weak passwords expose private routines, unlock codes, and even personal information to cybercriminals. Attackers often target easy targets: default or re-used passwords.

    With the growing use of apps like Google Home and Amazon Alexa, accounts risk being compromised if password security is overlooked. 

    Even experienced users sometimes underestimate the risk. Perhaps it’s easy to forget how quickly cyberthreats develop.

    Tips for Creating Strong Passwords for Home Automation Accounts

    Core Components of a Strong Password

    Length and Complexity

    Password security improves with length. A general guideline is to use at least 12 characters, incorporating uppercase, lowercase, numbers, and symbols. Longer, unpredictable passwords frustrate brute force attacks.

    Unpredictability and Uniqueness

    Including unrelated words or phrases boosts security. Avoid family names, addresses, or common words. Unpredictable combinations make passwords harder to guess. Re-using passwords on multiple devices weakens every account.

    Avoiding Common Pitfalls

    • Skipping over simple sequences like “1234” or “password.”
    • Not using personal information found on social media.
    • Avoiding device or brand names, such as “Nest123.”

    Practical Password Creation Strategies

    Passphrases for Smart Home Accounts

    Many users find passphrases easy to remember but hard to crack. This method uses a sequence of random words or phrases, sometimes linked by symbols or numbers. For example: “Crimson!Table98+Garden”

    Tips for Creating Strong Passwords for Home Automation Accounts

    Password Managers in Practice

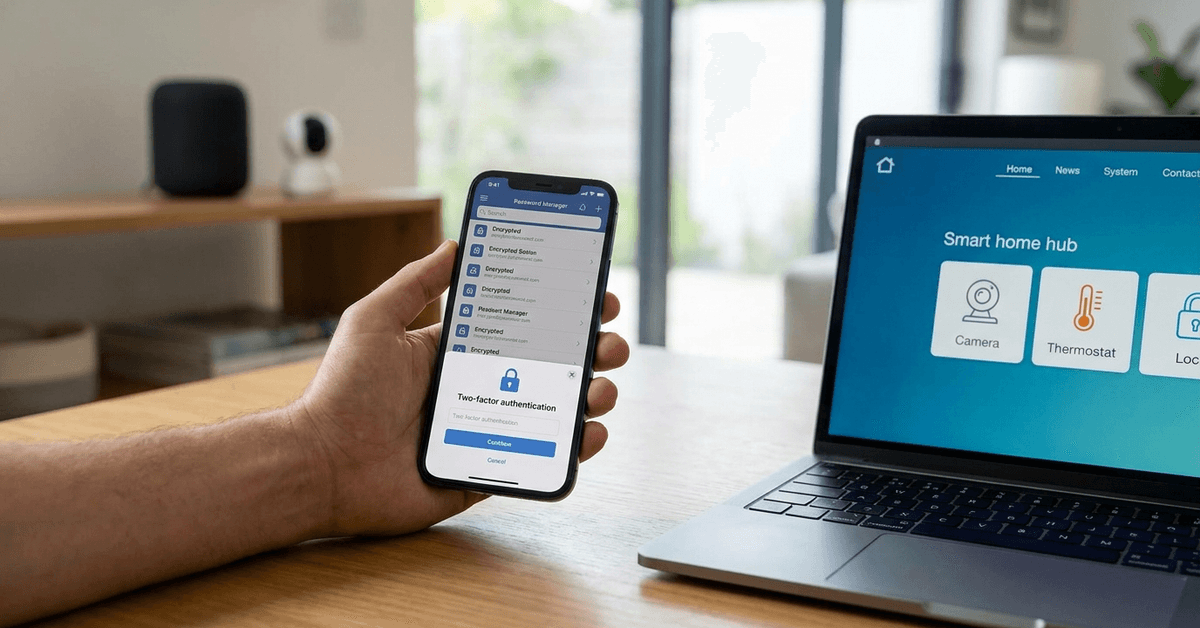
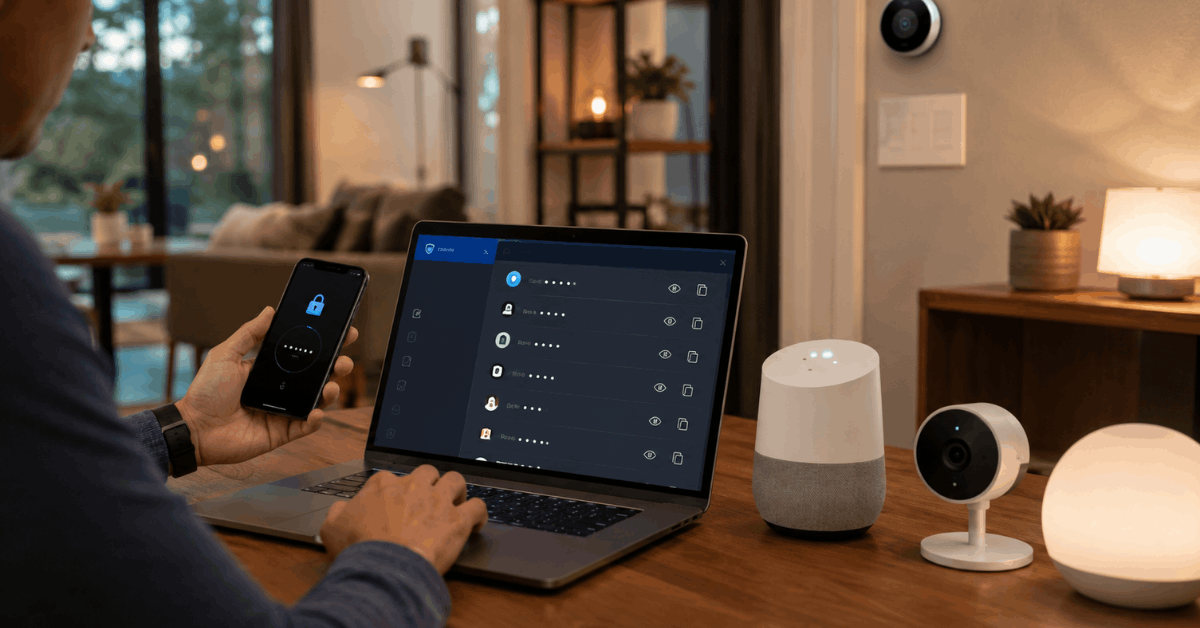
    Software like Bitwarden, 1Password, and LastPass can create and store strong, unique passwords. These tools securely sync across devices, which is especially useful for families or shared smart homes. 

    Occasionally, installations might seem intimidating, but setup wizards make things smoother.

    • Download and install your chosen manager’s app.
    • Create a master password (this must be memorable and strong).
    • Let the app generate passwords for each home automation login.
    • Enable biometric authentication if possible for added security.

    Only the master password needs to be remembered—the manager handles every login after that.

    Two-Factor Authentication Support

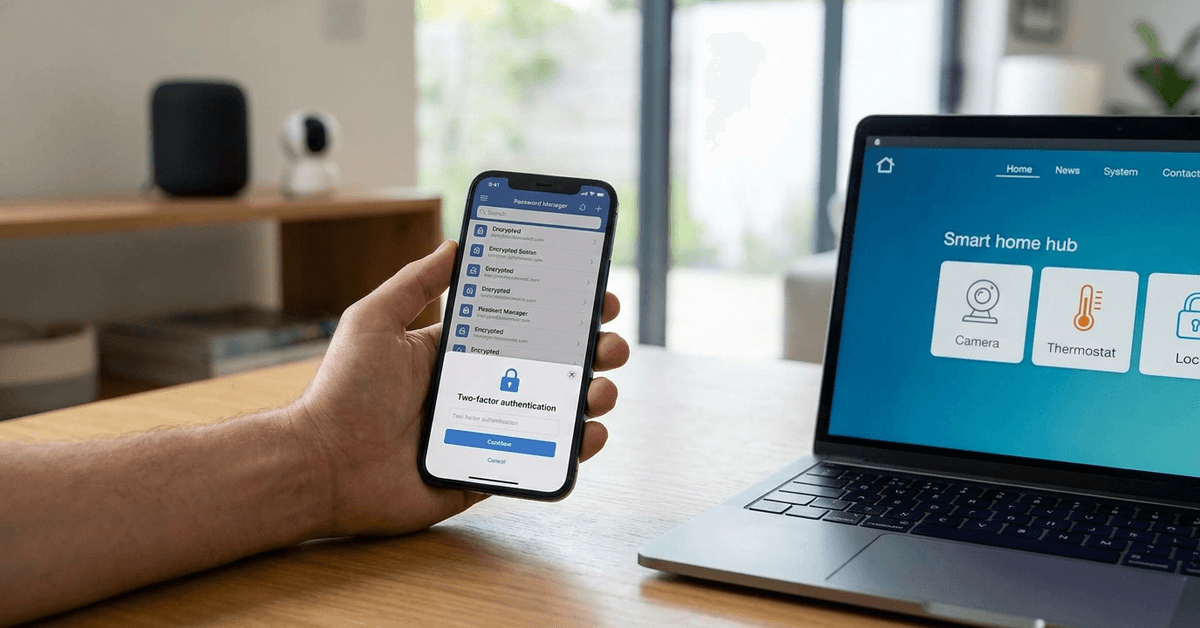
    Many platforms now offer two-factor authentication (2FA). Adding a layer beyond the password, 2FA requires a second code—sent to a mobile phone or generated via app. Homeowners gain extra peace of mind from this extra hurdle.

    • Google Home, SmartThings, and Ring support 2FA in their account settings.
    • Authenticator apps like Google Authenticator or Authy generate time-limited codes.
    • SMS text-based 2FA is an option, though app-based is usually stronger.

    Best Practices for Smart Device Password Management

    Changing Default Credentials

    During initial setup, many smart devices use factory default usernames and passwords. Changing these immediately is crucial. Attackers use automated scripts to scan devices using well-known defaults.

    Device-Specific Passwords

    Each home automation device or associated app should have a unique password. If a hacker cracks one password, the rest remain protected. This might seem tedious at first, but digital safety increases significantly.

    Frequent Updates and Password Rotation

    Rotating passwords every six to twelve months limits damage if credentials leak. Most reputable password managers can remind users when to review and update their passwords. Sometimes, even changing a few characters can make a difference.

    Installation and Configuration Walkthrough

    Step-by-Step: Using Bitwarden with Google Home

    1. Install Bitwarden on your computer and mobile device.
    2. Create your Bitwarden master password, choosing a mix of words, numbers, and symbols.
    3. Open Google Home and visit “Manage your Google Account.”
    4. Go to “Security,” then “Password.”
    5. Use Bitwarden’s password generator to create a new password for Google Home.
    6. Save the login in Bitwarden and optionally enable biometric access for faster use.

    Enabling Two-Factor Authentication

    1. In your smart home app (such as Ring), navigate to “Account Settings.”
    2. Select “2-Step Verification” or “Two-Factor Authentication.”
    3. Register your mobile number or scan the QR code with your authenticator app.
    4. Enter the code from your app to finalize activation.
    5. Make sure backup codes are saved in a secure location, separate from your main devices.

    Important Smart Home Platforms and Their Security Features

    • Google Home: Supports both 2FA and password change reminders. Integration with major password managers offers smooth experience.
    • Amazon Alexa: Two-step authentication by SMS or authenticator app. Device access history shows recent activity.
    • Samsung SmartThings: Account-based security, regular update prompts, and compatibility with unique passphrases.
    • Nest, Ring, and Philips Hue also provide layered protections, including device-specific account credentials.

    How to Tell if a Password Is Compromised?

    • Unexpected device activity, such as lights switching on or accounts being locked out.
    • Security notifications from the platform about strange logins or password resets.
    • Receiving emails about account changes you did not initiate.

    If any signs appear, changing passwords promptly and reviewing connected email or recovery settings is wise. In rare cases, disconnecting a suspicious device may prevent further access until things are resolved.

    Tips for Stronger Smart Home Passwords

    These simple steps can improve protection across your connected devices.

    • Replace all default passwords.
    • Create long, random passphrases.
    • Store logins securely.
    • Turn on app-based 2FA.
    • Review unfamiliar account activity.

    Conclusion

    Home automation makes lives easier but reinforces the need for vigilant security. Using unique, complex passwords is a practical, first-line defense against cyber risks. 

    Employing password managers and enabling two-factor authentication safeguards families and devices alike. Staying alert for suspicious activity and updating credentials regularly keeps smart homes private and secure. 

    Fortressmate.com encourages every homeowner to treat password protection as part of their everyday home routine. Future security—and peace of mind—begins with each login.

  • How to Fix Interference Issues Between Bluetooth and Wi-Fi Gadgets

    How to Fix Interference Issues Between Bluetooth and Wi-Fi Gadgets

    Wireless connectivity has made smart homes more flexible and convenient. Many people, however, experience frustrating glitches when Bluetooth and Wi-Fi gadgets run together.

    These issues can lead to dropped connections, sluggish response, or total device failure. Homeowners keen on reliable smart tech benefit most from understanding how interference works—and how to resolve it for good.

    Understanding Bluetooth and Wi-Fi Interference

    A common trait of modern wireless standards is operating in the crowded 2.4GHz band. This overlap is where most problems start.

    How to Fix Interference Issues Between Bluetooth and Wi-Fi Gadgets

    Why Overlap Happens?

    Both Bluetooth and many Wi-Fi networks, especially legacy routers, use the 2.4GHz frequency. Signals can clash, creating unpredictable disruptions.

    This is more prominent in apartments or dense neighborhoods, where many wireless devices compete for the same spectrum space.

    Typical Signs of Interference

    • Intermittent audio drops on Bluetooth headphones.
    • Lag or disconnects in smart speakers or cameras.
    • Wi-Fi speed dips when Bluetooth is active nearby.

    Assessing Your Home Wireless Environment

    A strategic approach starts with knowing which devices and networks are crowding your airwaves. Tools help with this process.

    How to Fix Interference Issues Between Bluetooth and Wi-Fi Gadgets

    Best Scanner Apps and Tools

    • WiFi Analyzer (Android): Visualizes occupied channels.
    • inSSIDer: Scans for overlapping Wi-Fi networks on PC/Mac.
    • Bluetility (for Bluetooth): Shows Bluetooth signal strength and congestion.

    Routine scanning provides a snapshot of the invisible issues impacting performance. A scan before and after any adjustment confirms what works.

    Adopting 5GHz Wi-Fi for Reduced Bluetooth Interference

    Modern routers often support both 2.4GHz and 5GHz Wi-Fi bands. The 5GHz band does not interfere with Bluetooth signals.

    Benefits of 5GHz

    • Less congestion from neighbors’ Wi-Fi or cordless phones.
    • Better channel segregation, resulting in fewer signal collisions.
    • Faster overall Wi-Fi speeds for newer devices.

    Switching Devices to 5GHz

    1. Check your router’s name (SSID) for a “5G” or “5GHz” option.
    2. Connect capable devices (laptops, phones, smart TVs) exclusively to the 5GHz network.
    3. Ensure older “2.4GHz only” devices remain on the original network.

    If a device cannot connect to 5GHz, it may require replacement or firmware updates for compatibility.

    Repositioning Devices to Minimize Physical Interference

    Tangible obstacles often boost the risk of disruption. Simple tweaks in placement reduce overlap between gadgets.

    Building a Separation Buffer

    • Keep Wi-Fi routers away from Bluetooth speakers or smart hubs.
    • Position gadgets with antennas (like cameras) at least 1 meter apart.
    • Move metal objects or thick walls away from the wireless signal corridor.

    This spacing lowers interference and creates a more stable connection for all wireless technology at home.

    Upgrading Bluetooth Devices to Newer Standards

    Older Bluetooth gear can unintentionally create more interference issues. Current models, using Bluetooth 5.0+ , leverage advanced technology to limit channel conflicts.

    Advantages of Bluetooth 5.0 and Later

    • Better channel hopping, so the signal switches away from Wi-Fi congestion spots.
    • Greater range and consistent connectivity, even if some overlap remains.
    • Lower latency for real-time gadgets like lock controllers or security panels.

    Upgrading just the most problematic gadgets often noticeably smooths out the rest of your network without a complete overhaul.

    Manually Selecting Wi-Fi Channels for Better Reliability

    Most routers auto-select Wi-Fi channels, but manual selection can sometimes dramatically reduce overlap with Bluetooth signals.

    Recommended Channels

    • Channels 1, 6, and 11 (2.4GHz): Do not overlap with each other, minimizing neighboring Wi-Fi interference.

    Changing Your Router’s Channel

    1. Sign in to the router’s control panel (usually by entering the IP 192.168.1.1 in a web browser).
    2. Look for the Wi-Fi or Wireless Setup section.
    3. Switch the wireless channel to 1, 6, or 11, then save settings.

    Experimenting with each channel and observing device performance sometimes makes a significant difference.

    Adjusting Bluetooth Device Settings and Firmware

    The right settings and up-to-date firmware can greatly reduce glitching. Occasional updates are released to tackle exactly this sort of problem.

    Steps for Device Updates

    • Check regularly for firmware updates via the device’s companion app or support page.
    • Apply updates and restart both the gadget and host device (phone, tablet, etc.).

    Making sure Bluetooth devices use the latest firmware guards against many known bugs. Factory resets are rarely needed but can help if updates alone do not work.

    Disabling Unused Connections for Smoother Networks

    Many smart home devices activate both Wi-Fi and Bluetooth features, even if only one is in use. Disabling the unneeded mode often frees up bandwidth and reduces interference.

    How to Manage Connection Modes

    • Review settings on each device to disable unused wireless radios (like turning off Bluetooth on smart TVs not using it).
    • On smartphones, turn off Wi-Fi or Bluetooth temporarily if only one connection is required.

    This selective usage minimizes background chatter and lowers overall congestion.

    Shielding and Smart Placement as an Extra Layer

    If interference is persistent, shielding methods might help. While less common, these approaches are sometimes used in home offices.

    Options for Shielding

    • Install wireless signal shields or metal mesh barriers between conflicting devices.
    • Use furniture or purpose-built router cases to block direct interference paths.

    These tactics are best for extreme environments, like when routers and Bluetooth hubs are forced into proximity for practical reasons.

    Conclusion: Reliable Connectivity for Smarter Homes

    Cross-interference between Bluetooth and Wi-Fi can be frustrating but predictable. Most homeowners achieve fast and stable connections by combining several of the strategies above. 

    Upgrading to newer standards, careful repositioning, and regular scanning ensure smoother performance for every gadget.

    For ongoing issues, consulting device support forums or a smart home technician adds an extra layer of problem-solving. The end goal—strong, uninterrupted wireless connectivity for the whole home—remains within reach for anyone willing to make small adjustments.

  • What to do when your smart home hub goes offline unexpectedly

    What to do when your smart home hub goes offline unexpectedly

    Smart home hubs rarely go offline without warning, yet it happens in many modern homes. For homeowners relying on automation for security, comfort, or energy savings, sudden outages can be both unsettling and disruptive.

    This guide examines the most common causes of hub disconnection and practical steps for a safe, reliable recovery. Homeowners using platforms like Fortressmate.com often encounter these issues with hubs from Samsung SmartThings, Amazon Echo, Google Nest Hub, or Apple HomePod.

    Why Smart Home Hubs Go Offline?

    Understanding why hubs lose connectivity helps address the problem efficiently and protects system stability moving forward.

    What to do when your smart home hub goes offline unexpectedly

    Network Interruptions

    Most smart hubs are highly dependent on a steady Wi-Fi connection. Even minor router changes, outages, or firmware updates cause temporary disruptions.

    A static IP configuration or poor wireless signal are typical culprits when the network is the source of the issue.

    Power Loss or Hardware Glitches

    Sudden power cuts or failing hardware components can disconnect a hub unexpectedly. Power surges and faulty wall adapters are also possible reasons.

    Some systems may reboot automatically, while others require manual intervention before restoring service.

    Cloud Service Outages

    Many hubs depend on remote servers for automation routines and device communication. If major cloud providers experience downtime, local hub operations are often disrupted as a result.

    Specific platforms such as SmartThings or Alexa notify users via status pages or apps if a known outage is ongoing.

    Firmware or App Updates

    Updating firmware or mobile apps sometimes triggers compatibility issues, causing devices to drop from the local network.

    A mismatch between hub and device software versions is another potential reason for connectivity loss.

    Initial Checks When Your Hub Goes Offline

    Most connectivity problems can be identified within minutes using a systematic approach. Here’s a practical checklist:

    What to do when your smart home hub goes offline unexpectedly
    • Check the indicator lights on the hub for normal operation, such as green or steady blue status LEDs.
    • Look for warning messages in your automation app or email alerts about the hub’s status.
    • Confirm the Wi-Fi router is on and functioning by testing another connected device.
    • Examine the power supply and wall plug for visible issues.
    • Check for ongoing internet or service outages via your ISP status page.

    If all of these basic elements appear normal, the next steps involve deeper troubleshooting.

    Step-by-Step Recovery Process

    Rebooting the Hub and Router

    Gently restarting the hardware is usually a safe starting point. Smart home technicians often:

    1. Disconnect power from the hub for 30 seconds before reconnecting.
    2. Restart the Wi-Fi router by unplugging it briefly, then powering it back on.
    3. Wait 2–3 minutes after rebooting to allow all systems to renegotiate network settings.

    Verifying Network Credentials

    Network name or password changes require manual updates in the hub interface. For hubs that use Ethernet, checking the cable connection is simple but often overlooked.

    Advanced users sometimes set their hub to a static IP address to prevent dynamic changes from a router reboot.

    Examining Device Placement

    Physical location affects wireless performance. Thick walls, metal appliances, or distance from the router can all interfere with connectivity.

    • Consider moving the hub closer to the Wi-Fi router or switching to a 2.4GHz band for better reach in larger homes.
    • Avoid placing the hub near microwaves or cordless phones, as they may cause interference.

    Checking for Firmware Updates

    Smart home apps such as SmartThings, Google Home, or Alexa all allow you to check for firmware or system updates directly within their settings menus.

    Homeowners frequently find it effective to update the hub software, reboot all devices, then attempt to reconnect.

    Inspecting the Mobile App Connection

    Most hubs require ongoing communication with a companion mobile app. If the app itself is out of sync, users might need to:

    • Log out and log back in to their hub account.
    • Ensure both phone and hub are on the same Wi-Fi network.
    • Delete and reinstall the app if persistent syncing issues occur.

    Contacting Support Channels

    When standard checks do not resolve an offline issue, reaching out to the manufacturer is a reliable option. Support agents for Samsung SmartThings, Google, Amazon, and Apple are accustomed to hub outages and can often spot configuration problems quickly.

    Protocols and Standards: Compatibility Matters

    Hubs interact with dozens of devices using various protocols, such as:

    • Zigbee 
    • Z-Wave
    • Wi-Fi
    • Bluetooth Low Energy
    • Thread (Matter-ready devices)

    Incompatibility or network changes affecting one protocol may impact only certain devices, not the hub as a whole. Firmware issues can sometimes disable a single protocol temporarily until patched.

    Advanced Troubleshooting Options

    Restoring Factory Settings

    Resetting the hub to factory default is a last-resort option when other solutions fail. This removes custom automations and device pairings, so it’s rarely advisable unless a backup is available.

    Homeowners usually need to re-add all devices from scratch and restore automation routines step by step after a factory reset.

    Examining Local vs. Cloud Automation

    Some advanced hubs, like Home Assistant or Hubitat, offer local automation. This means core functions continue even if cloud connectivity breaks. 

    However, most mainstream hubs depend on a cloud connection, so any outage disables both remote control and automation until restored.

    Device-Specific Apps and Third-Party Tools

    Several platforms, such as Philips Hue or LIFX, operate with their own dedicated apps. In offline hub scenarios, these can be used temporarily for direct device control until the hub rejoins the network.

    Preventive Measures for Future Reliability

    Once the hub returns online, several practices support lasting stability:

    • Adopt an uninterruptible power supply for both your router and smart hub to avoid power-related shutdowns.
    • Update all software and firmware regularly through official channels to maintain compatibility.
    • Document custom automation and device pairings to streamline setup if outages occur again.
    • Consider breaking up the network into dedicated 2.4GHz and 5GHz SSIDs for legacy and modern devices.

    When to Seek Professional Assistance?

    If repeated outages persist despite all troubleshooting efforts, homeowners may want to consult a certified smart home technician through platforms like Fortressmate.com or request direct support from hub manufacturers.

    Intermittent offline events can signal deeper wiring, firmware, or environmental issues that may need in-person diagnostics.

    Conclusion: Restore, Secure, and Strengthen Your Smart Home

    Smart home hub outages can be stressful, especially when essential security features or routines are disrupted. A stepwise process focused on network, power, and software troubleshooting handles most incidents efficiently.

    For persistent problems, leveraging manufacturer support and detailed network documentation proves invaluable over time. 

    As smart home automation continues to advance, a proactive maintenance habit will keep systems running smoothly and ensure peace of mind for every homeowner.

  • How to Choose Between 2.4 Ghz and 5 Ghz for Smart Gadgets

    How to Choose Between 2.4 Ghz and 5 Ghz for Smart Gadgets

    Smart gadgets are everywhere in modern homes. Choosing the right Wi-Fi band can shape how smoothly they work together. 

    For homeowners setting up new gadgets, this decision often feels confusing. Yet, the right choice leads to a more stable, hassle-free smart home experience.

    Understanding Wi-Fi Bands in Home Gadget Setups

    Home Wi-Fi networks mainly offer two frequency options. Each brings its own benefits for smart devices. The most common are 2.4 GHz and 5 GHz bands.

    What is the 2.4 GHz Band?

    The 2.4 GHz frequency is found in almost every home Wi-Fi router. Many older and budget-friendly smart devices connect only to this band. It provides broad range and can travel through walls.

    How to Choose Between 2.4 Ghz and 5 Ghz for Smart Gadgets
    • Longer coverage means fewer dead zones.
    • Compatible with most Wi-Fi-enabled gadgets from brands like Wyze, TP-Link, and older Ring models.
    • Supports wireless protocols like Wi-Fi 4 (802.11n) and some low-powered Zigbee bridges.

    What is the 5 GHz Band?

    Modern routers often support 5 GHz. This higher frequency supports faster data rates and less interference in dense environments. However, its range is usually shorter.

    • Best for devices needing high-speed streaming, such as security cameras or smart displays.
    • Less crowded airwaves reduce signal dropouts in busy areas.
    • Common in premium gear like Nest Hub, Google Home Max, or Arlo Pro cams.

    Key Differences: 2.4 GHz vs. 5 GHz for Smart Devices

    Range and Signal Penetration

    The 2.4 GHz band has an advantage in coverage. It offers stable connections even through thick walls or multi-story layouts. 5 GHz often struggles to reach distant rooms or basements.

    How to Choose Between 2.4 Ghz and 5 Ghz for Smart Gadgets

    Network Speed and Data Rates

    While the 2.4 GHz band rarely goes above 100 Mbps in the real world, 5 GHz can hit several hundred Mbps. Devices with high video or audio demands typically perform better on 5 GHz.

    Compatibility with Smart Gadgets

    Many security cameras, older sensors, and budget switches only support 2.4 GHz. Newer, premium gadgets increasingly support both bands. Dual-band gear gives more connection flexibility.

    Interference and Network Congestion

    2.4 GHz can feel busier. It’s shared with things like cordless phones or microwaves. This can slow devices or randomly disconnect them. 5 GHz faces less interference except in high-rise or crowded apartments.

    How to Check Your Smart Gadget’s Band Requirements?

    • Start with the packaging or quick-start guide. Most brands print “2.4 GHz only” or “Dual Band” clearly.
    • Visit the official support webpage for models from brands like Philips Hue or Wyze. Look for network compatibility lists.
    • On your phone, scan for your Wi-Fi network using apps such as WiFi Analyzer (Android) or AirPort Utility (iOS). This reveals the band in use for connected devices.

    Steps to Separate or Combine Your Wi-Fi Bands

    Why Separation Matters

    Most routers offer the option to combine (use one SSID for both bands) or separate them into distinct network names. Some devices have trouble connecting to a combined SSID.

    How to Manage Bands in Your Router?

    1. Open your router’s admin page with a browser. Common IPs are 192.168.1.1 or 192.168.0.1.
    2. Login (default credentials often on the back of the device).
    3. Locate the wireless settings panel. Routers from Asus, TP-Link, Netgear, or Eero all offer this.
    4. Assign different SSID names for 2.4 GHz and 5 GHz (for example, HomeNet2G and HomeNet5G).
    5. Save changes. Reconnect each smart gadget to its suitable band.

    Which Band is Best for Each Smart Home Scenario?

    Security Cameras and Video Doorbells

    Devices needing consistent, HD streams often work better on 5 GHz if close to the router. However, many doorbells require 2.4 GHz for wider range outdoors.

    Sensors, Smart Plugs, and Bulbs

    Entry sensors, plugs, and simple bulbs (from brands like Kasa, Feit, or Sengled) almost always use 2.4 GHz. These devices don’t send much data, so lower speeds are fine.

    Smart Speakers, Displays, and Hubs

    Devices supporting both bands (like Google Nest Hub or Amazon Echo Show) can benefit from 5 GHz, especially in entertainment spaces. For rooms farther away, 2.4 GHz ensures fewer dropouts.

    Troubleshooting: Devices Won’t Connect to the Right Band

    • Toggling Wi-Fi off and on in device setup mode sometimes helps. This is especially true for 2.4 GHz-only gadgets trying to connect while a phone clings to 5 GHz.
    • Temporarily disable your 5 GHz network in the router settings. Connect your gadget, then turn it back on. This is a trick some users find practical when initial pairing stalls.
    • Check if the device requires WPA2-PSK security (which is standard). Some low-cost gadgets won’t work with newer protocols like WPA3 yet.

    Technical Features Worth Considering

    Mesh Wi-Fi and Band Steering

    Modern homes may use mesh systems like Google Nest Wifi or Eero. These solutions can route each device automatically to its best band with features like “band steering.”

    • If certain gadgets repeatedly disconnect, many mesh platforms allow locking a device to 2.4 GHz from their admin panel or mobile app.
    • Pro tip: Use a guest network for 2.4 GHz smart gadgets if your main mesh network keeps booting them from 5 GHz.

    Channel Selection and Interference Reduction

    Interference from neighbors can ruin smart gadget performance. Router setup menus often allow picking Wi-Fi channels manually (1, 6, or 11 are best for 2.4 GHz).

    • Apps such as NetSpot or WiFi Analyzer help identify less congested channels.
    • Placing the router centrally and away from metal objects or thick walls improves both bands’ stability.

    Security Considerations for Both Bands

    Regardless of band, keep firmware updated. Unpatched routers and devices are a risk. Most modern routers auto-update, but a double-check every few months is a good habit.

    • Stick with WPA2-PSK for device compatibility. WPA3 is more secure but still not supported by many entry-level gadgets.
    • Monitor device lists through your router dashboard. Remove unknown connections quickly to protect your network.

    Conclusion: Making the Right Band Choice for Your Smart Home

    Choosing between 2.4 GHz and 5 GHz comes down to device type, home size, and placement. For most smart bulbs, sensors, or plugs, 2.4 GHz is reliable and widely compatible. 

    However, advanced gear—like streaming security cams or smart displays—shines on 5 GHz when range isn’t an issue.

    Combining bands with a modern router, regularly checking device compatibility, and updating security settings fosters a resilient, responsive smart home. A thoughtful Wi-Fi band setup supports stable automations and strong gadget security for years to come.

  • How to Manage Data Privacy Settings on Popular Smart Assistants

    How to Manage Data Privacy Settings on Popular Smart Assistants

    With smart assistants growing more common in homes, understanding their privacy controls has become a real priority. Many homeowners want convenience but worry about who hears their data and how it is used afterward.

    This article walks through realistic steps for managing privacy settings on top-tier smart assistants. The aim is practical: anyone setting up Google Assistant, Amazon Alexa, or Apple Siri can reduce unwanted data retention or sharing.

    Why Data Privacy Is Essential for Smart Assistant Owners?

    Homeowners increasingly rely on voice commands to manage devices or check info. However, those same commands are often recorded and stored in the cloud for algorithm improvements.

    Image 1

    Without proper privacy configuration, conversations might stay accessible for months or even get analyzed for targeted advertising. This, to many people, feels intrusive and concerning.

    The Risks of Default Settings

    Default settings for Google Assistant, Alexa, and Siri tend to be open. This means that some recordings or data might be reviewed manually by employees for quality control.

    Such access is believed to optimize user experience. Still, it might expose sensitive keywords or routines to others. Adjusting these options offers more peace of mind.

    How to Control Privacy on Google Assistant?

    Google Assistant is available on Nest speakers, smartphones, and many third-party devices. Controlling what data is stored or reviewed is possible through Google’s privacy dashboard.

    Accessing the Google Account Dashboard

    • Open myaccount.google.com on a laptop or smartphone browser.
    • Sign in with the main Google account used on all smart devices.
    • Navigate to Data & Privacy from the side menu.

    This section houses the hub for adjusting privacy across Google services, including Assistant.

    Managing Your Activity Controls

    • Scroll to ‘History Settings.’
    • Locate Web & App Activity and tap on it.
    • Turn off voice and audio recordings if greater privacy is preferred.
    • Choose ‘Manage Activity’ to review past commands that have been stored.

    Regularly deleting old activity is a best practice. It helps prevent any potentially sensitive information from remaining stored unnecessarily long.

    Setting Auto-Deletion Timelines

    • From ‘History Settings,’ select Auto-delete activity older than option.
    • Pick a time frame (like 3, 18, or 36 months) that feels acceptable.

    This way, Google will delete information after the selected period, reducing data buildup.

    Using the Google Home App for Device-Level Privacy

    • Open the Google Home app.
    • Tap on the target device.
    • Select the gear icon, then ‘Recognition & sharing.’
    • Disable ‘Personal results’ or similar options for more privacy on shared devices.

    This is particularly useful in homes with multiple users or guests.

    Controlling Data Privacy on Amazon Alexa

    Alexa-enabled devices like Echo and Fire TV offer control over how voice commands are managed. The Alexa app serves as a hub for adjusting privacy settings.

    Reviewing Voice History

    • Open the Amazon Alexa app.
    • Go to ‘More’ at the bottom right, then Settings.
    • Tap on Alexa Privacy – this dashboard helps manage data usage.
    • Select ‘Review Voice History’ to inspect or delete recordings.

    Reviewing this log is occasionally overlooked, but it often highlights just how much is retained by default.

    Managing Voice Data Settings

    • Inside Alexa Privacy, find ‘Manage Your Alexa Data.’
    • Adjust ‘Choose how long to save recordings’ according to preference.
    • Options include 3 months, 18 months, or ‘Don’t save recordings.’

    Not saving any recordings provides the strongest privacy, but may slightly impact Alexa’s ability to tailor responses.

    Limiting Human Review and Use of Data

    • Scroll to ‘Help Improve Alexa’ and switch off permission for Amazon to use voice recordings for research.
    • Also toggle off options like ‘Use messages to improve transcription.’

    This helps guarantee voice data isn’t reviewed for training or development purposes.

    How Apple Siri Handles Privacy and How to Configure It

    Siri, available on HomePods and iOS devices, generally collects less data than rivals by default. Still, it stores some audio to enhance performance.

    Disabling Siri Data Storage

    • On an iPhone or iPad, go to Settings > Siri & Search.
    • Tap ‘Siri & Dictation History.’
    • Delete all Siri recordings associated with the Apple ID.

    A clean slate ensures that older requests aren’t archived.

    Managing Voice Interaction Settings

    • Within Settings, revisit Siri & Search.
    • Scroll to ‘Improve Siri & Dictation.’
    • Disable ‘Share Audio Recordings’ to prevent recordings being kept for review.

    This opt-out keeps future commands private and unshared for research.

    Account Privacy and Device Access

    • From Settings, navigate to Privacy & Security.
    • Review Microphone settings to control which apps access voice input.
    • Toggle off any app permissions that don’t seem strictly necessary.

    Pruning app access reduces the risk of background listening by third-party applications.

    Advanced Tips for All Smart Assistant Owners

    A few extra measures can help keep conversations and routines private, no matter the platform.

    Managing Third-Party Skills and Apps

    • Periodically review enabled ‘skills’ (Alexa) or linked services (Google, Apple).
    • Disable those not actively used.

    Sometimes, third-party add-ons request wider data access than initially assumed.

    Muting and Physical Controls

    • Most smart speakers offer a microphone mute button —usually on the device itself.
    • Activate this when privacy is doubly important (for example, during private family discussions).

    Physically disconnecting a mic is always safer than relying on software settings alone.

    Separate Profiles and Guest Modes

    • Set up voice profiles for individual users to limit cross-account data.
    • Enable guest/visitor modes to avoid storing guests’ voice history.

    Shared homes benefit from account separation, keeping personal queries more confidential.

    Table: Key Privacy Settings Cheat Sheet

    Assistant  Main Privacy Tool  Critical Mitigation 
    Google Assistant  Google Account Dashboard  Auto-delete Activity, Voice Activity History Off 
    Amazon Alexa  Alexa Privacy Center  No Recording Storage, Disable Research Access 
    Apple Siri  Siri & Search in Settings  Delete Siri Data, Restrict Microphone Access 

    Conclusion: Taking Control of Your Digital Privacy

    Smart assistants add easy, hands-free control to modern homes, but balanced privacy requires ongoing review. Adjusting settings for your main assistant considerably limits unnecessary data storage and sharing risks.

    Regular account audits, housekeeping of old recordings, and occasional checks on third-party access keep controls tight. While no system feels flawless, taking these steps goes a long way toward keeping conversations and routines private within your smart home.

  • What Is a Wi-Fi Mesh Network and Do You Need One for a Smart Home

    What Is a Wi-Fi Mesh Network and Do You Need One for a Smart Home

    Living with smart home devices usually means relying on a strong internet connection. Many homes struggle with Wi-Fi dead zones.

    Wi-Fi mesh networks aim to solve this common issue. These systems can be especially helpful for smart home setups with lots of connected gadgets. The article below explores how they work and whether investing in one makes sense.

    What is a Wi-Fi Mesh Network?

    Traditional Wi-Fi routers broadcast a signal from a single point. This can leave areas of the house with weak connectivity.

    What Is a Wi-Fi Mesh Network and Do You Need One for a Smart Home

    A mesh network uses several devices, called nodes, placed around your home. These nodes work together to blanket every corner in Wi-Fi.

    How Mesh Networks Differ from Routers and Extenders

    • Wi-Fi Mesh System: Several nodes automatically communicate for seamless coverage.
    • Router Only: Covers a single area, and signal gets weaker further away.
    • Range Extender: Repeats the existing Wi-Fi but often halves your speed in the process.

    Mesh nodes hand off devices between themselves. There’s typically only one network name. This means your smartphone or camera doesn’t need to reconnect when you walk through your house.

    Why Smart Homes Benefit from Mesh Wi-Fi?

    Most smart home devices need a stable, constant connection. Appliances like security cameras, smart locks, and voice assistants all rely on Wi-Fi.

    A mesh network helps ensure reliability in any room, including out-of-the-way places like basements or attics.

    Eliminating Dead Zones

    Placing mesh nodes in hard-to-reach areas helps keep connectivity stable. This is useful for devices like door sensors in garages or smart bulbs in patios.

    What Is a Wi-Fi Mesh Network and Do You Need One for a Smart Home

    Consistent Performance

    Devices rarely drop offline when a mesh network is present. This stability is crucial for security systems and real-time notifications.

    Flexibility for Growth

    Mesh systems are scalable. Adding a new smart device is simple because you can add another node if needed.

    Core Components of a Mesh Network

    • Main Node: The hub connected to your modem. It shares your internet across all nodes.
    • Satellite Nodes: Additional devices plug into power elsewhere in your home.
    • App or Web Dashboard: Allows network management and monitoring from any phone or PC.

    Popular Mesh Wi-Fi Brands

    • Google Nest Wifi
    • Netgear Orbi
    • Eero by Amazon
    • TP-Link Deco

    Each of these options has its own app for easy setup and troubleshooting.

    Setting Up a Wi-Fi Mesh System: A Real-World Walkthrough

    Installation typically takes 15 to 30 minutes. Most companies offer intuitive setup processes.

    1. Download the Brand App: This is where setup starts. Examples include Google Home for Nest Wifi or the Eero app for Amazon’s system.
    2. Connect the Main Node: Plug this node into your modem with an Ethernet cable. Power it up.
    3. Position Satellite Nodes: Place other nodes in different rooms, starting with areas where you notice weak Wi-Fi.
    4. Follow Prompts: Use the app to link each node to the system, name your network, and set a password.
    5. Optimize Placement: If a node shows weak signal (usually color-coded in the app), try moving it closer to another node or to a different room.

    Smart Home Security Concerns and Mesh Wi-Fi

    Security should be a priority in any connected home. Mesh networks add several protection tools.

    • Automatic Firmware Updates : Most mesh brands keep themselves updated to patch vulnerabilities.
    • Guest Networks: You can set up a separate network for visitors or smart home appliances, keeping them isolated from personal data.
    • Parental Controls: Some systems let users restrict access to specific sites or limit usage times for certain devices.

    Extra Tip: WPA3 Protocol

    Many new mesh systems support WPA3. This is currently the most secure Wi-Fi standard for home use. It protects against brute-force attacks and keeps smart devices safe.

    When Is a Mesh Network the Right Choice?

    Not every home requires a mesh setup. Certain conditions make mesh the more practical route.

    • Larger Homes: Buildings with multiple levels or extended layouts see the most benefit.
    • Smart Device Density: If there are many smart gadgets spread out, better coverage matters.
    • Dead Zone Frustrations: Homeowners who constantly lose signal in specific rooms will find a mesh system a relief.
    • No Central Router Location: If your home’s internet must connect at one end, nodes fill in the coverage elsewhere.

    Things to Consider Before Upgrading

    • Monthly Internet Speed: Mesh can’t make a slow plan faster but helps distribute it evenly.
    • Hardware Cost: Starter mesh kits range from $150–$400 depending on the features and number of nodes.
    • App Ecosystem: Features, like remote management, compatibility with Amazon Alexa, or Google Assistant, can differ by brand.

    Mesh Wi-Fi and Smart Device Compatibility

    Most smart home setups mix devices from several brands. Appliances often use 2.4GHz Wi-Fi while phones, TVs, and laptops use both 2.4GHz and 5GHz bands.

    Mesh systems generally offer both frequencies on a single network. This allows simple device management.

    Potential Issues with Older Devices

    Some legacy smart home gadgets struggle to connect to mesh networks. This is rare but can happen, especially with older 2.4GHz-only equipment.

    Many mesh brands allow the user to temporarily separate frequencies during setup or provide a guest network that only uses 2.4GHz for compatibility.

    Useful Apps and Mesh Network Tools

    • Fing: A network scanner that finds out which devices connect to your mesh network.
    • NetSpot: For checking signal strength and identifying optimal node locations.
    • Speedtest by Ookla: Confirms your actual download and upload performance throughout your house.

    Managing Devices for Smart Home Efficiency

    Mesh network apps usually let users group and name devices. This detail helps organize automations or quickly spot unusual activity.

    This is useful for parents who want to check which child’s phone or which TV is on the network late at night.

    Conclusion: Should You Get a Mesh Network for Your Smart Home?

    Mesh Wi-Fi can make a big difference in homes with many connected devices. Homes with thick walls, long layouts, or numerous smart sensors experience fewer disruptions and more seamless automations once mesh is installed.

    For urban apartments or one-level homes with just a few devices, a mesh network may not be a big improvement over a strong single router. Yet, for growing smart home ecosystems, mesh provides reliability, flexibility, and security.

    Making the switch helps solidify the backbone of a secure, smooth smart home.