Category: Everyday Protection & Automation

  • How to Set Up a Notification for When the Garage Door Is Left Open

    How to Set Up a Notification for When the Garage Door Is Left Open

    Leaving a garage door open is surprisingly easy, especially during busy routines. Yet, an open garage creates obvious risks, from theft to energy waste. Many homeowners look for a way to get notch-smart notifications if their garage is left ajar.

    This guide explains how anyone can set up a reliable alert system using smart home technology. If security, automation, and peace of mind matter, these steps will help transform your garage safety habits.

    Why Garage Door Notifications Matter for Home Security?

    An open garage is more than a minor oversight. It permits access to tools, bikes, and even your main living area. Most break-ins that start from the garage are simply a result of forgotten doors.
    How to Set Up a Notification for When the Garage Door Is Left Open

    Smart notifications fill this gap. With the right setup, a garage left open too long sends a phone alert. Fast, practical, and hard to overlook. This extra layer of awareness often prevents loss and stress.

    Main Components Needed for Smart Garage Door Alerts

    A notification system relies on both hardware and software. The pieces must work together for seamless alerts.

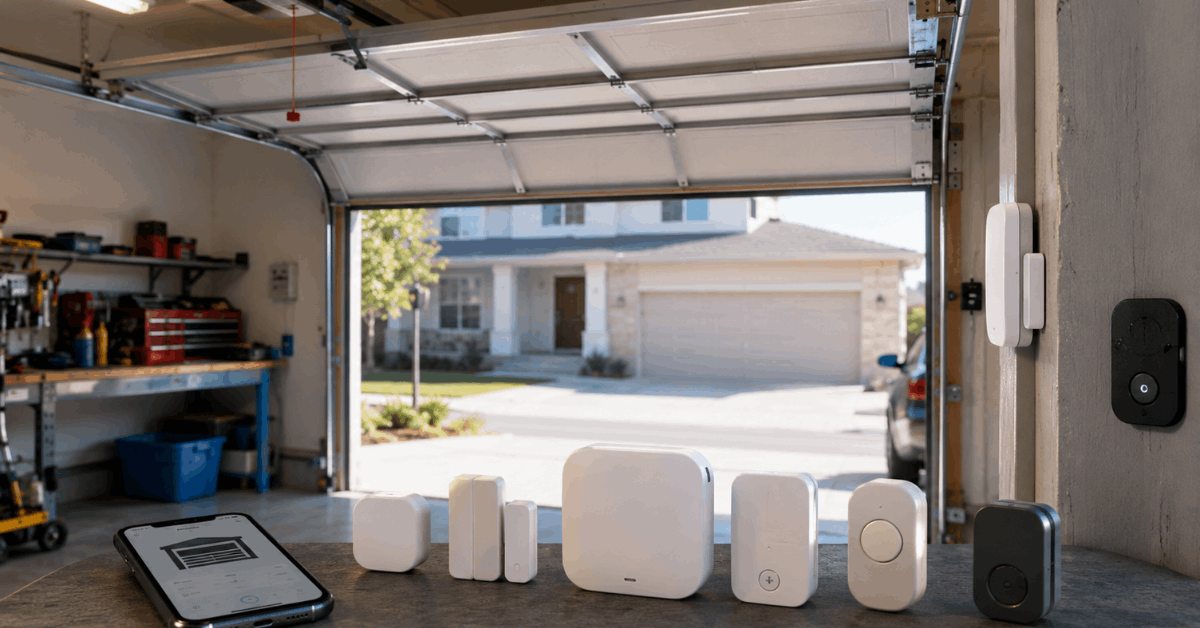
    • Garage Door Sensor: Senses open/closed status. Most often, magnetic door contacts or tilt sensors.
    • Smart Hub or Bridge: Connects the sensor to the internet and the notification app.
    • Smartphone or Tablet: Receives and displays the alert.
    • Automation App: Sends notifications or triggers routines, using the sensor’s signals.

    Each component is widely available. Compatibility is the one challenge homeowners mention.

    Choosing the Right Sensor: Compatibility and Features

    Garage sensors come in various shapes. Entry-level options include Zigbee or Z-Wave magnetic sensors. Some, like the MyQ Garage Door Sensor, are designed just for garage use and connect via Wi-Fi.
    How to Set Up a Notification for When the Garage Door Is Left Open

    Consider These Sensor Factors

    • Wireless technology: Wi-Fi, Zigbee, Z-Wave, or Bluetooth
    • Battery life: Most good models last a year or longer before needing a cell swap
    • Weather rating: Garages can be damp or drafty, so moisture resistance is crucial
    • Brand ecosystem: If your home uses SmartThings, Apple HomeKit, or Alexa, choose a sensor that easily integrates

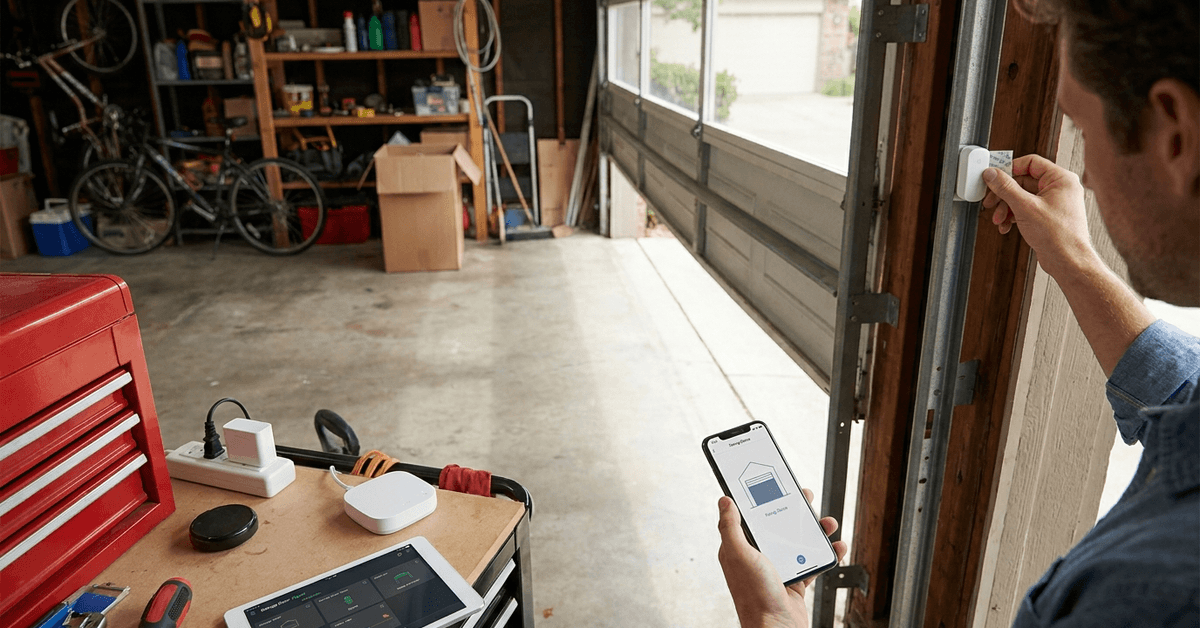
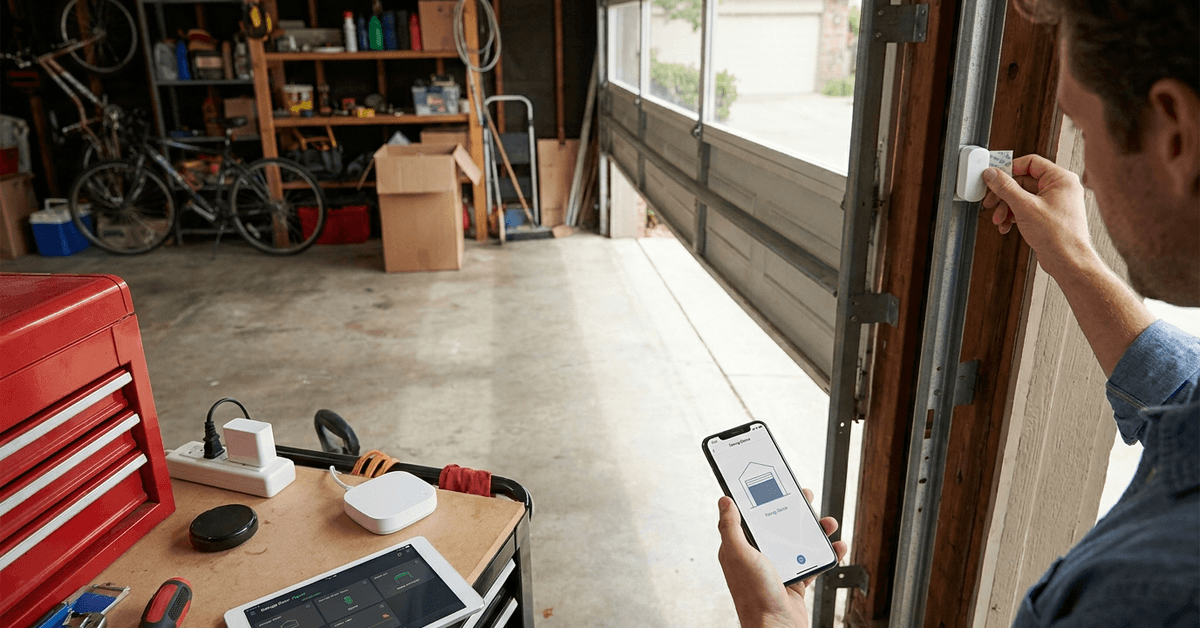
    Step-by-Step: Installing a Garage Door Sensor

    Sensor installation is usually straightforward. Always follow the manufacturer’s instructions for best results.

    1. Clean the mounting surface of the door with rubbing alcohol.
    2. Attach the sensor and its magnet, aligning both on the moving part (door) and a fixed surface (frame), separated by the recommended gap.
    3. Insert the batteries as directed. Wait for the indicator light or beep confirming power.
    4. Test the sensor by manually opening and closing the door several times. The unit’s LED indicator should change as the door moves.

    Most sensors pair wirelessly to their hub within a few minutes. If needed, reset and try again, but this is rare for quality brands.

    Integrating Sensors with a Smart Hub or Platform

    Connecting a garage door sensor to a hub allows notifications on your device. Popular hubs include Samsung SmartThings, Apple HomeKit, and Amazon Alexa with compatible skills.

    Typical Integration Workflow

    1. Activate pairing mode on the sensor per instructions.
    2. Use the smart hub app (like SmartThings) to add a new device.
    3. Select sensor type and follow prompts to detect and register the sensor.
    4. Test device status updates from the hub dashboard. Open the garage and ensure status changes to “Open” appear.

    Some sensors work directly with Wi-Fi and don’t require a physical hub. MyQ, for instance, uses its own bridge and smartphone app for direct alerts.

    Setting Up Notifications Using Automation Apps

    Once paired, the real power comes from smart automation software. These pieces translate sensor status into actionable alerts for your phone or smart speaker.

    Trusted Notification Platforms

    • IFTTT: Links garage sensors to phone notifications via applets.
    • SmartThings: Built-in notification options for all connected devices.
    • HomeKit: Sends Apple notifications if the garage is left open after a certain time.
    • MyQ App: Custom rules for door status and time-based alerts.

    Basic Notification Rule Example

    1. Create a new routine or automation in the chosen platform.
    2. Set the trigger as: When garage sensor status = Open.
    3. Add a condition or delay (e.g., “If still open after 10 minutes”).
    4. Select the action: Send notification to mobile device or make a voice announcement on a smart speaker.

    This logic works with Alexa Routines, SmartThings Automations, and most popular systems. Test each rule before trusting it. Settings sometimes require a tweak for your home’s Wi-Fi or device limitations.

    Customizing Notifications for Your Schedule

    Some users worry about notification overload. Too many alerts can train you to ignore them. Most platforms include options to set schedules or quiet times for notifications.

    Typical Customization Options

    • Restrict alerts to specific hours (e.g., only evenings or when everyone leaves the house)
    • Set repeat reminders if the garage remains open for longer periods
    • Combine with geolocation features, so notifications only trigger if all household members are away

    Combining schedules and conditions ensures alerts are always relevant. Not everyone realizes how easy this feature is to use until after setup.

    Popular Apps and Platforms for Garage Door Alerts

    Certain names dominate the home automation market. Compatibility and reliability often determine the best app for your household.

    Notable Garage Alert Solutions

    • MyQ: Purpose-built for garage monitoring, direct Wi-Fi, and rich native notification options. Seen by many as the standard for DIY garage security.
    • Samsung SmartThings: Connects to a wide ecosystem of sensors and offers robust automation through its app.
    • Apple HomeKit: Deep integration for Apple device users, including secure notifications and automations.
    • IFTTT: Ideal for tying different brands and services together using simple “if this then that” rules.

    Testing and Troubleshooting Your Notification Setup

    Testing each part of the system avoids one common source of frustration: false confidence. Even small misconfigurations may leave your property vulnerable.

    Effective Testing Steps

    1. Simulate normal use by leaving the garage door open for varying intervals.
    2. Monitor your phone and tab for incoming notifications.
    3. If alerts do not arrive, check the sensor’s battery and Wi-Fi signal strength.
    4. Revisit app permissions: push notifications must be enabled in both the automation app and your phone settings.

    Most issues stem from battery failure or Wi-Fi dead zones in the garage. Relocating hubs or using Wi-Fi extenders can minimize such problems.

    Privacy and Security Considerations

    Smart home devices share network access and sometimes sensitive data. Choose brands with established security reputations.

    • Encrypted communication: Look for AES or TLS protocols in device specs.
    • Regular firmware updates: Keep sensors and apps current to patch vulnerabilities.
    • Reputable cloud providers: Trust brands that do not sell or leak user data as a business model.

    It is also wise to separate smart home networks from work or entertainment Wi-Fi, just for added peace of mind.

    Conclusion

    Setting up a notification for when the garage door is left open is a straightforward smart home upgrade. Homeowners gain practical security, ongoing peace of mind, and more control over their home’s safety. 

    By choosing the right sensor, integrating it with proven automation platforms, and customizing alerts for a busy schedule, it’s easier to catch mistakes before they lead to trouble. 

    Testing and fine-tuning the system ensures it operates dependably—in real life, not just in theory. Combined with secure brands and privacy-conscious setups, these alerts provide a confident first line of home defense.
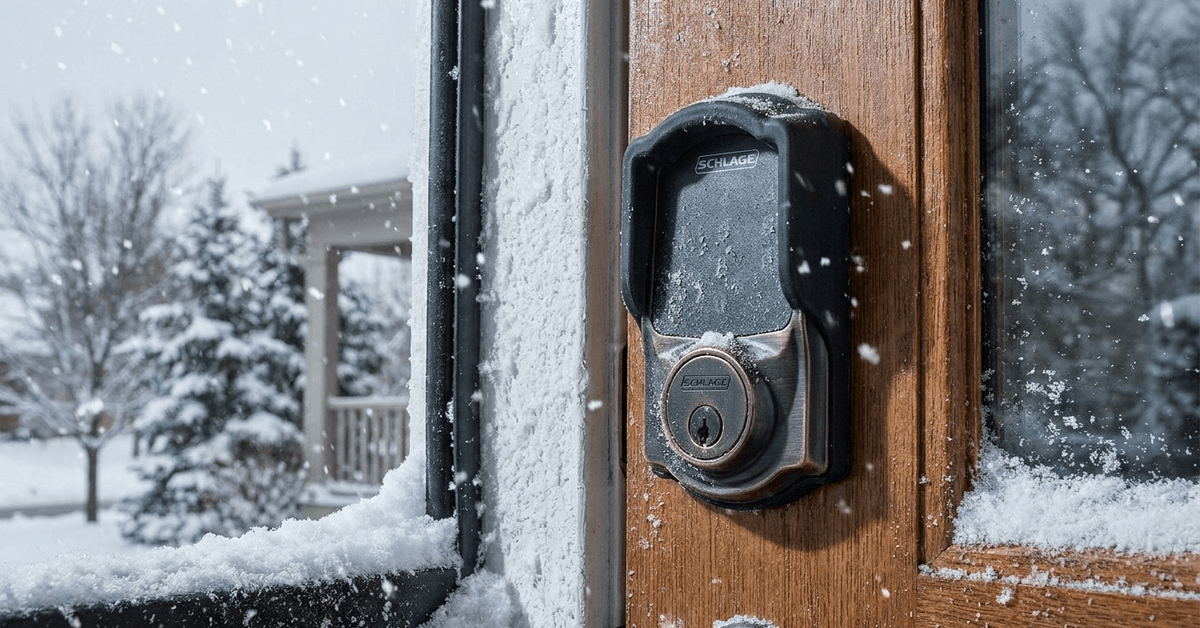
  • Tips for Protecting Outdoor Smart Locks From Freezing Temperatures

    Tips for Protecting Outdoor Smart Locks From Freezing Temperatures

    Outdoor smart locks offer outstanding convenience and security. However, freezing temperatures can impact their performance for many homeowners.

    This guide aims to help anyone with outdoor smart locks protect their investment during harsh winter conditions. The focus is actionable, real-world techniques for maximum reliability.

    How Freezing Temperatures Affect Smart Locks

    Cold weather places unique stress on electronic locks. Batteries, internal moving parts, and circuit boards are all vulnerable to the effects of frost and moisture.

    Tips for Protecting Outdoor Smart Locks From Freezing Temperatures

    Battery Efficiency Drops

    The colder it gets, the more battery power drains. Lithium-ion batteries, commonly used in smart locks, can lose up to 50% of capacity below freezing.

    This drop shortens unlocking cycles and may leave the lock unresponsive if not checked regularly.

    Mechanical Components Freeze

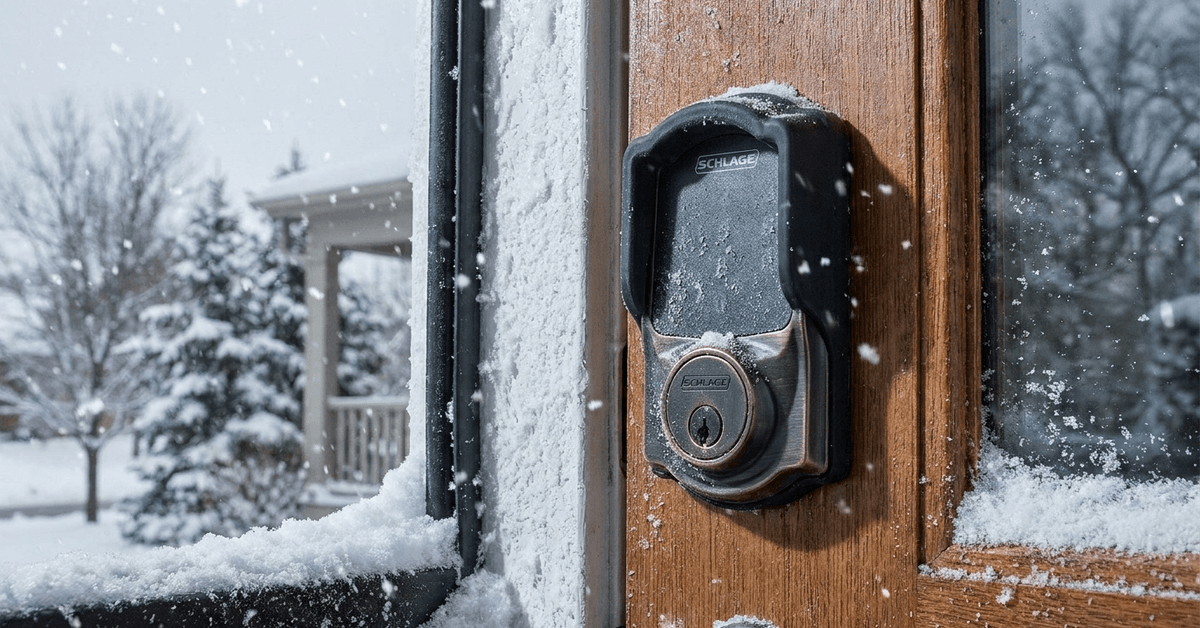
    Condensation or snow can seep into seams. When temperatures drop, internal gears and the motor can jam, preventing any movement by keypad or app.

    Choosing Smart Locks Built for Cold Weather

    Selecting the proper lock makes a big difference. Devices rated for extreme climates include extra seals, robust hardware, and cold-tolerant batteries.

    • August Wi-Fi Smart Lock (some models): Designed to work from -20°C to 50°C. Seek models with a stated cold rating in the technical section.
    • Schlage Encode and Yale Assure lines list durability information on official sites.

    A model with an IP65 or IP66 weather rating resists both dust and water incursion—which is critical for winter.

    Installing Weather Protection for Maximum Reliability

    Physical protection is a first line of defense. Homeowners sometimes overlook these simple but crucial steps:

    Tips for Protecting Outdoor Smart Locks From Freezing Temperatures

    Add Exterior Protective Covers

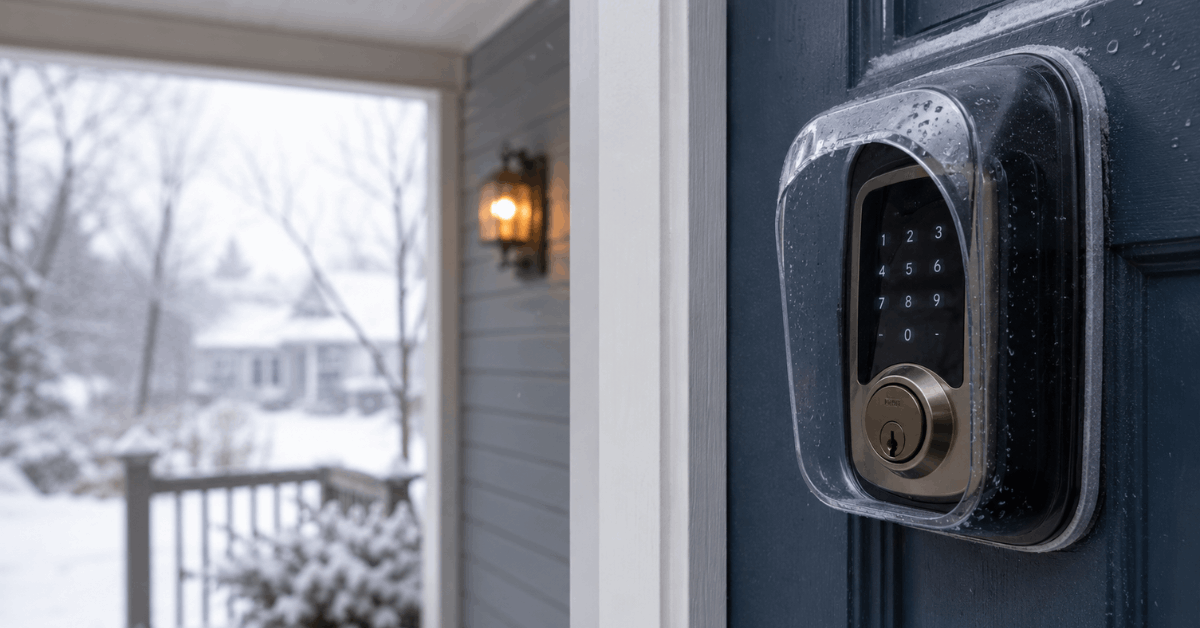
    • Use a dedicated weather shield or rain cover. These guards directly block wind, snow, and sleet from critical components.
    • Universal lock covers are sold by most hardware shops and online retailers. Clear covers offer good visibility for keypads.

    Apply Gasket Seals

    • Rubber or silicone gaskets under the lock flange minimize water ingress. Some locks include these, but after-market options can boost performance if needed.

    Review Mounting Location

    If possible, mount the lock where it gets some protection from walls, awnings, or porch roofs. Direct exposure to wind chill increases the freeze risk substantially.

    Battery Management in Winter

    Battery failures are by far the most common smart lock issue in winter. Consistent habits can greatly extend battery life during cold months.

    Use High-Quality, Winter-Grade Batteries

    • Consider switching to Energizer Ultimate Lithium batteries for double or triple-A powered locks. These hold up better in below-zero situations compared to standard alkaline options.

    Schedule Regular Battery Checks

    • Check battery levels weekly during cold spells. Most smart lock apps notify you as levels drop, but the built-in indicator is sometimes more accurate than the software in freezing conditions.

    Keep Spare Batteries Indoors

    • Store fully charged spares somewhere warm. Swapping a battery straight from the cold can deliver unreliable performance.

    Preventing Moisture and Ice Build-Up

    Moisture is the chief reason internal lock parts freeze or corrode. Proactive steps help minimize this risk dramatically.

    Use De-Icing Lubricants Safely

    • Lock de-icer sprays (like WD-40 Specialist Water Resistant Silicone) applied sparingly prevent latch freezing. Avoid excess lubricant, which attracts grit and dust.

    Seal Exposed Edges

    • Apply a thin bead of clear, non-corrosive silicone along vulnerable mounting seams. This stops melted snow from seeping in and freezing inside the body.

    Clear Snow Promptly

    • Brushing snow and ice off the unit after storms is often enough to keep electronics clear and reliable.

    Leverage Smart Features and Monitoring

    Most smart locks feature tools or companion apps that can reduce cold-weather surprises. These security features are often underused in real-world setups.

    Enable App Battery Alerts

    • Check your lock’s app, such as the August Home or Yale Access apps. Turn on push notifications for low battery or connectivity warnings.

    Monitor Lock Status Remotely

    • Many models display live status in-app. A periodic check confirms your lock responds as expected rather than jamming or disconnecting after a deep freeze.

    Integrate with Home Automation

    • Combine smart lock routines with Alexa, Google Home, or Apple HomeKit. Set automations to alert if your lock doesn’t report a status for long periods, especially in mid-winter.

    Backup and Emergency Plans

    No system is truly fail-safe in extreme conditions. Smart home experts often develop backup access options as an extra layer of security for outdoor locks.

    Physical Key Override

    • Choose a lock with a physical backup key . Store the spare somewhere safe but accessible during emergencies or lockouts.

    Share Digital Access

    • Grant trusted contacts temporary app credentials during travel. This prevents lockouts if frigid conditions halt your own connection.

    Keep De-Icing Tools Handy

    • Store a portable lock de-icer and a basic toolkit indoors. Quick access to these reduces downtime after unexpected freeze events.

    Routine Maintenance for Long-Term Protection

    Frequent, simple upkeep makes a substantial difference in cold weather performance, especially for aging devices.

    Monthly Inspection

    • Gently test the lock for sluggish responses. Remove the case and check for any moisture or corrosion around the battery chamber and circuits.

    Clean Contact Points

    • Wipe battery contacts and visible metal with a dry microfiber cloth. Avoid water near exposed wiring.

    Update Firmware Regularly

    • App prompt? Run firmware updates during a warm spell to avoid software bugs that can appear after temperature-related battery resets.

    Conclusion

    Smart locks for outdoor use confront unique challenges in freezing environments. With careful product selection, routine checks, and protective measures, most common winter failures become rare events rather than frustrating surprises.

    Relying on weather-resistant models, managing batteries proactively, sealing exposed parts, and integrating smart alerts helps maximize security and minimize downtime.

    Planning ahead ensures continuous, worry-free access for the entire winter season. For homeowners in cold climates, a few practical habits are the best guarantee that convenience and security remain uncompromised—regardless of what the weather brings.

  • The Best Battery Backups to Keep Routers Running During Outages

    The Best Battery Backups to Keep Routers Running During Outages

    Power outages don’t just halt lights and appliances. They disrupt smart home automation, security monitoring, and everyday web access. 

    For families and remote workers, keeping an internet connection is crucial, especially during storms or grid failures. Homeowners looking for uninterrupted Wi-Fi performance often rely on dedicated battery backup systems designed for routers and network hubs.

    Why Battery Backups Are Vital for Home Routers?

    Modern homes use cloud-based cameras, smart assistants, and always-connected gadgets. Even a brief internet drop can mean missed alerts or lost video history. 

    A battery backup lets routers bridge the gap during power outages, ensuring security and automation tasks keep running.

    Some users might consider using old laptop power banks, but these often lack the required voltage or plug types for steady router operation.

    The Best Battery Backups to Keep Routers Running During Outages

    Dedicated battery units offer tailored voltage outputs, longer runtimes, and reliable surge protection. For anyone managing a smart home environment, this stability can be a real stress-saver.

    Types of Battery Backup Systems for Routers

    There are a few principal categories when it comes to router-friendly battery backup solutions. Each has unique benefits, depending on home size or equipment type.

    The Best Battery Backups to Keep Routers Running During Outages

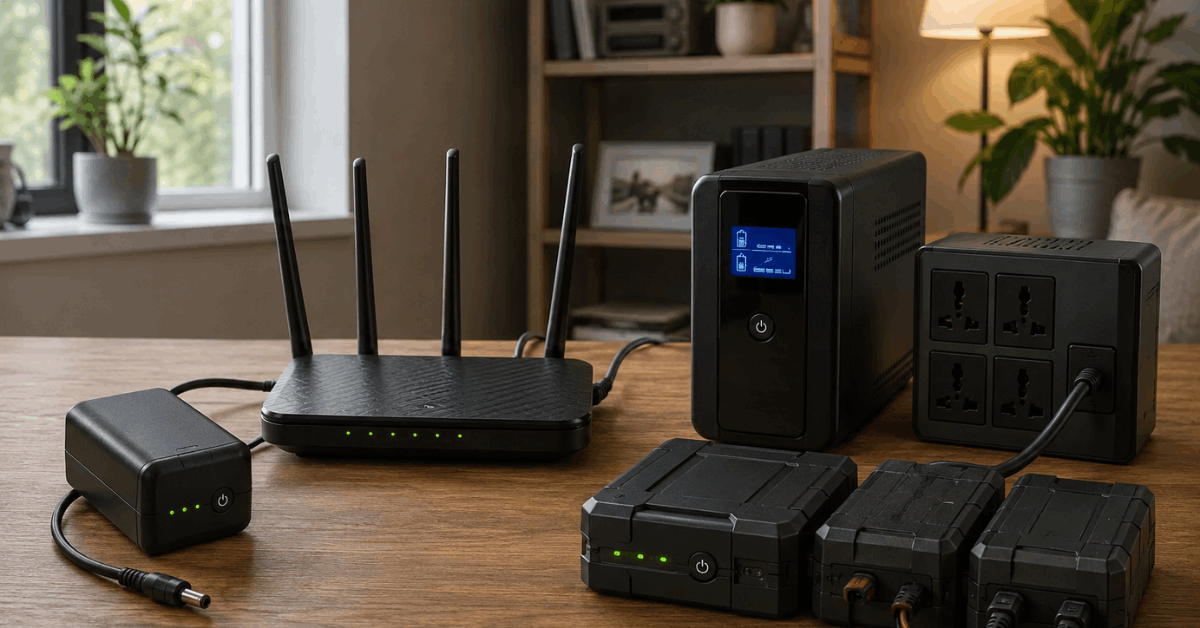
    Mini uninterruptible power supplies (UPS)

    These palm-sized UPS devices are popular because they’re compact and easy to hide near your router. Models like the APC Back-UPS Connect or TalentCell Mini UPS come with barrel plug adapters to fit common router makes.

    Most mini UPS offerings provide around three to six hours of runtime for a single device. Homeowners value the auto-switching feature, which seamlessly moves to battery without a Wi-Fi reboot.

    Traditional desktop UPS

    A traditional desktop UPS, such as the CyberPower EC650LCD or APC BE600M1, delivers more capacity. These tend to protect additional gear like switches, modems, or mesh hubs.

    Benefits include extra surge outlets, status LCDs, and longer runtimes—sometimes up to eight hours with only a router attached.

    Modular battery backup units

    Some newer units, like the Eaton 3S Mini UPS or OpenWrt-compatible UPS models, can be paired with expansion batteries for longer protection. These are suited to users needing days rather than hours of uptime.

    Key Features to Evaluate

    Real-world battery backup performance depends on several essential features. Selecting the right unit saves hassle and ensures safety during outages.

    Wattage and voltage compatibility

    Routers typically require 9V, 12V, or 24V inputs, at 1A to 3A currents. Matching your model’s power adapter rating is the safest approach. 

    A mis-matched power supply can result in malfunctions or even router damage. Double-check the device’s label or user manual for exact requirements.

    Battery capacity (measured in Wh or mAh)

    Bigger capacity (expressed as Wh or mAh) translates into longer run times. Yet, a very large capacity isn’t always necessary for basic routers, which often draw as little as 7W to 15W per hour.

    Many users find a 36Wh mini UPS will support a common router and modem for two to five hours on battery. Heavier setups with mesh nodes or smart hubs demand more.

    Auto-switching speed and seamless failover

    Look for battery backups with a switching speed below 10ms. This feature keeps the router’s session alive and avoids network reboots. A quick failover is the secret behind uninterrupted smart home routines during outages.

    Surge and lightning protection

    Some backup devices double as surge protectors. Another layer of defense for your valuable network hardware. Not all mini UPS units offer this, so it’s a good idea to check specs before purchasing.

    Top Battery Backup Options to Consider

    A variety of models stand out for performance, reliability, and ease of installation. The following choices address different home or small office scenarios.

    • APC Back-UPS Connect BGE50ML: Compact, 50Wh, supports routers and VoIP gear, lithium battery, offers USB charging for mobile backup.
    • CyberPower EC650LCD: Compact desktop UPS, useful for routers plus a few smart devices, integrated LCD display.
    • TalentCell Mini UPS: Flexible output support (5V/9V/12V); runs cameras, mesh points, or even Raspberry Pi-based automations.
    • Eaton 3S Mini UPS: Rugged, expandable, tailored for networking gear, supports daisy-chaining battery packs.
    • Vertiv Liebert PSA5-500MT120: Trusted performance for medium setups, longer runtime and surge protection features.

    Simple Installation and Setup Tips

    Router backup units install with minimal technical steps. Following careful procedures helps ensure safe and reliable operation:

    1. Disconnect your router’s original power adapter from the wall.
    2. Plug the battery backup’s adapter into your router’s DC power port.
    3. Use the correct voltage setting if your backup device allows it.
    4. Plug the backup unit into a wall outlet so it charges while the power is on.
    5. Check for LED indicators that show active battery readiness.

    For traditional desktop UPS, simply plug your router’s power adapter into the battery-backed outlet, not the surge-only outlets. Many homeowners find it helpful to label cables for quick troubleshooting later.

    Advanced Options: Monitoring and Alerts

    Some battery backups support app or web-based status monitoring. For example, the CyberPower PowerPanel Personal software gives battery health updates and logs outage events on select models.

    Integrating alerts with home automation tasks boosts security. Owners sometimes set up push notifications through IFTTT, Home Assistant, or custom Telegram bots to notify if battery power triggers. 

    Realistically, this might be more effort than most need, but it’s popular among more tech-inclined homeowners.

    Maintenance and Best Practices

    Regular checks extend the life and reliability of battery backups. A simple, practical routine includes:

    • Test the backup each month by unplugging mains power and confirming your Wi-Fi stays live.
    • Keep the device in a shaded, ventilated spot to reduce heat buildup.
    • If using a lithium-based unit, recharge fully every few months, even if unused.
    • Replace batteries every 3-5 years, based on manufacturer guidelines.

    Homeowners sometimes notice capacity drops in cold or overly hot environments. Relocating the unit to an interior room helps maintain runtime.

    Integration with Broader Smart Home Systems

    Battery backup units can be combined with whole-home backup generators or solar systems. This layered approach supports both security and automation hubs during lengthy outages.

    For smart home users, consider adding your UPS status to dashboards like Home Assistant or SmartThings. This helps visualize when devices are on battery, letting users plan manual interventions if needed.

    Conclusion

    Keeping your router powered during outages means more than just having working Wi-Fi. It protects smart home automations, keeps security running, and prevents unnecessary downtime for work or study. 

    With so many battery backup options, there’s a solution for nearly every setup, whether small apartment or multi-zone hub. 

    By matching your device’s power needs, monitoring occasionally, and keeping up with routine maintenance, enjoying truly resilient network connectivity can be straightforward. Practical decisions today lead to less stress during tomorrow’s storms.

  • How to Maintain Automated Pet Doors Safely

    How to Maintain Automated Pet Doors Safely

    Automated pet doors add both convenience and security to smart homes. When maintained properly, they help keep pets healthy and homes secure. Many homeowners notice fewer scratches and broken screens too.

    However, automated doors contain sensitive electronics, moving mechanisms, and weatherproofing features that need attention. 

    This article is for anyone who owns a smart pet door or is planning to upgrade, especially those interested in home automation safety. Here are proven steps to maintain them for optimal performance and safety.

    Understanding Automated Pet Door Components

    Modern automated pet doors are built with sensors, motors, microprocessors, and sometimes Wi-Fi modules. Some models interface with smart home apps for added control.

    How to Maintain Automated Pet Doors Safely

    Key Components Include:

    • RFID/Chip Reader for identifying pets accurately
    • Secure locking mechanism to prevent unwanted entry
    • Motorized flap or sliding panel
    • Backup battery system (optional)
    • Water-resistant housing and weather seals

    Familiarity with these parts helps in spot-checking or troubleshooting minor issues before they become bigger.

    Routine Inspection and Cleaning Protocols

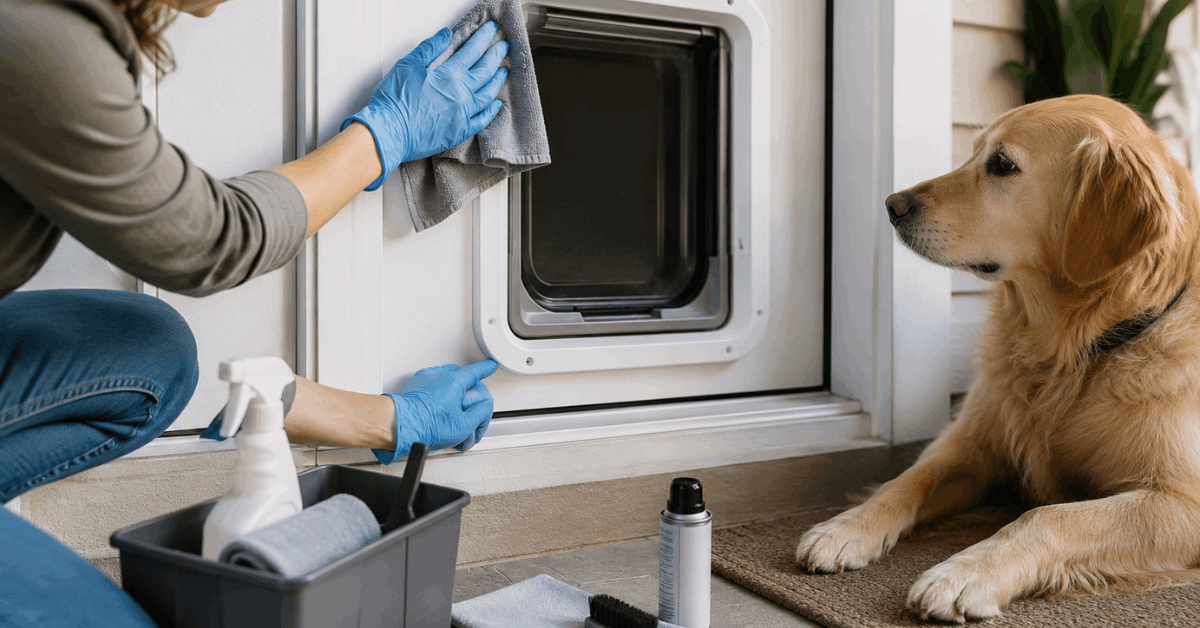
    Consistent inspection keeps doors operating smoothly. Basic cleaning also reduces wear on mechanical parts.

    How to Maintain Automated Pet Doors Safely

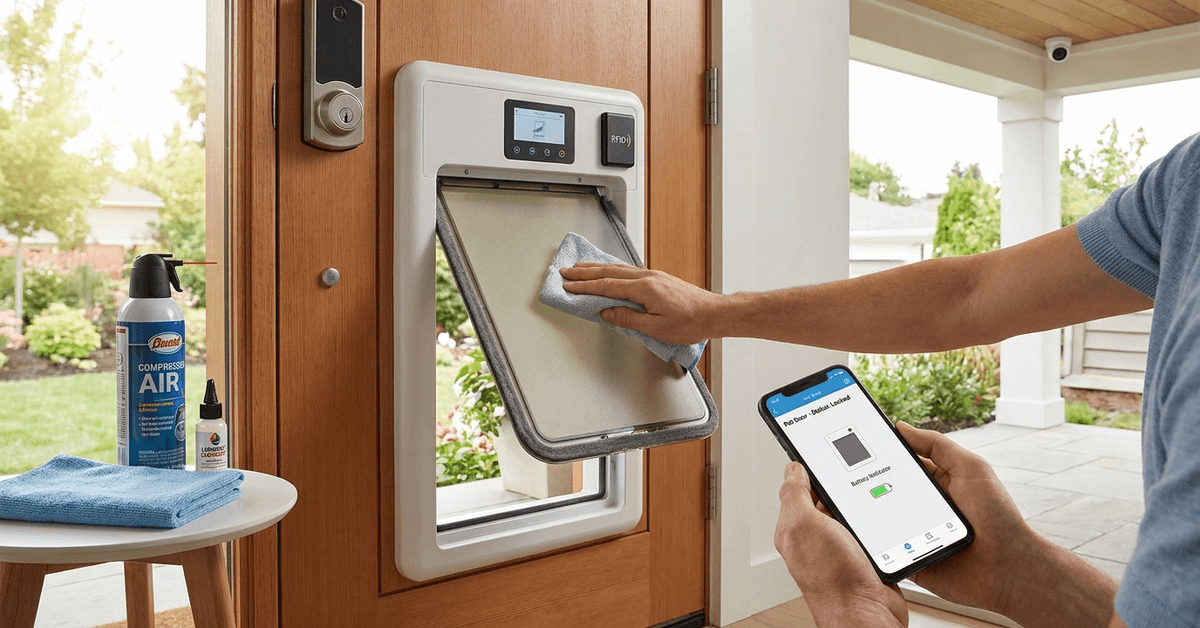
    Weekly Visual Inspection

    • Check for stuck debris or hair around moving parts
    • Ensure the flap or panel closes flat against the seal
    • Test that the locking mechanism engages fully

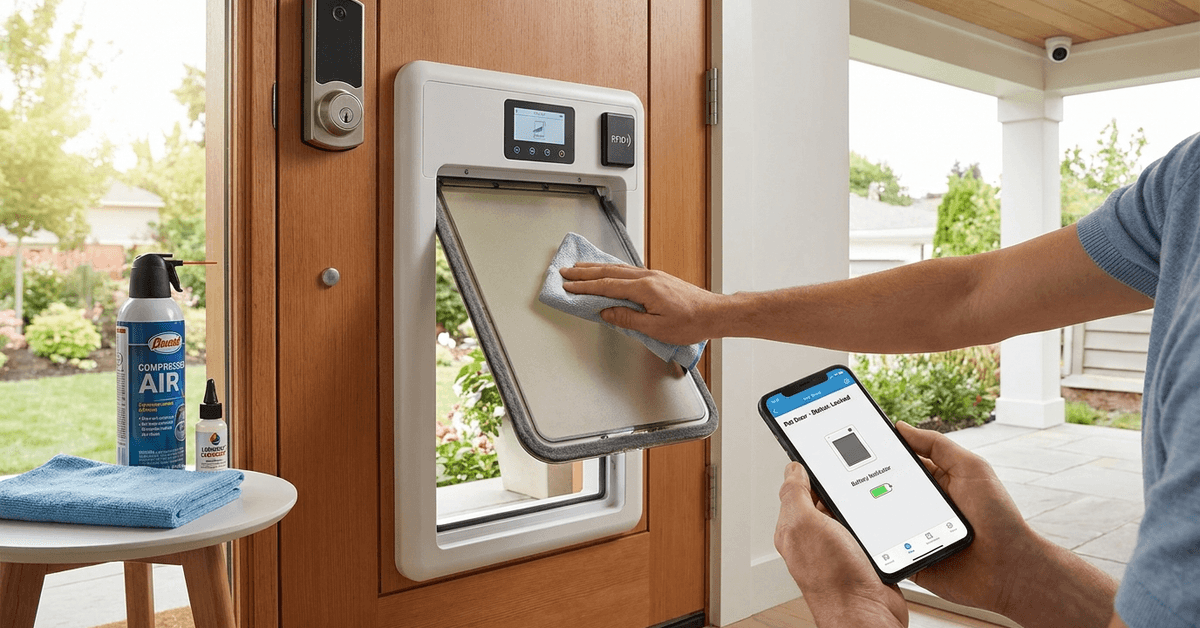
    Monthly Deep Cleaning Guide

    1. Use a soft microfiber cloth to wipe all accessible surfaces
    2. Non-abrasive cleaner is ideal for the pet interface area
    3. Compressed air helps dislodge hair in crevices
    4. Silicone lubricant on hinges ensures smooth movement
    5. Check and gently press on all weather seals for flexibility

    Most damage comes from trapped dirt, so quick cleaning can really preserve sensitive tech over the long run.

    Safety Checks for Electronic and Smart Features

    Functional electronics are the key to security. Regular checks prevent accidental lockouts or system failure.

    Battery and Power Supply Review

    • Look at battery levels monthly (usually displayed in the mobile app or on-unit LEDs)
    • Replace or recharge the power supply as needed to avoid downtime

    Testing RFID and Microchip Readers

    • Use each registered pet’s collar tag or microchip to trigger entry/exit at least once monthly
    • Watch for lag or failed signals, which might indicate sensor wear or interference

    Smart Home Integration Verification

    • Open the compatible app (such as Sure Petcare for SureFlap models) to check event logs
    • Try remote locking/unlocking if your model supports Wi-Fi connectivity
    • Be sure the device firmware is current, usually via notification in the pet door app

    Tracking app logs can reveal minor issues before pets are inconvenienced by a locked door or a disconnection.

    Weatherproofing and Environmental Adaptation

    Pet doors are exposed to a range of weather. Safeguarding components from rain, wind, and sun helps maintain integrity.

    Inspecting Seals and Flaps

    • Look for signs of cracking, stiffness, or gaps along the weather seals weekly
    • Replace any worn flaps using official parts from the manufacturer

    Moisture Mitigation Strategies

    • Install a small overhead canopy outdoors if rain is frequent
    • Check that the sensors remain dry even during storms by touching and visually inspecting the reader

    Poor weatherproofing is a common cause of sensor issues and rust on metallic parts.

    Preventing Pet Door Security Risks

    Security is a major reason homeowners use automated pet doors. Regular protocols help protect against unwanted entry.

    Lock Function Reliability

    • Verify that the auto-lock engages fully after each pet’s use
    • Review the locking schedule or auto-close timer in the app settings

    Credential Management Practices

    • Remove lost or outdated RFID tags from the access list in your pet door app
    • Reset credentials whenever a pet goes missing, just as a precaution

    Firmware and App Updates

    • Enable auto-updates if possible (often found in the app/system menu)
    • Monitor brand websites like PetSafe or Sure Petcare for urgent security advisories

    Maintaining updated software and rotating access tags are real-world steps to reduce risk while keeping daily routines easy for pets.

    Software, Monitoring, and Mobile App Tips

    Smart pet doors rely on apps and cloud platforms. These apps provide control, monitoring, and diagnostic features right from any device.

    Essential Apps and Portals

    • My PetSafe App (for PetSafe doors) – manages entry logs, scheduling, and battery levels
    • Sure Petcare App – used for SureFlap models, allows remote monitoring, lock mode, and multi-pet assignment
    • Manufacturer web portals for warranty and software status

    Using App Logs to Detect Issues

    • Review entry/exit logs monthly to catch abnormal patterns (such as repeated failed entries)
    • Check for firmware update reminders after a system reboot

    App notifications often catch overlooked problems before mechanical breakdowns occur.

    Long-Term Care and Warranty Planning

    Extended care increases longevity. Manufacturers differ in support and warranty coverage, so preparation is key.

    Annual Maintenance Steps

    1. Schedule one full system reset per year following the manual
    2. Inspect all mounting surfaces and screws for shifting or loosening
    3. Note any noise changes or slowing motor sounds
    4. Contact manufacturer support for persistent warning signals (shown on the app or device LED)

    Warranty Registration and Proof of Purchase

    • Register new devices immediately using the manufacturer’s website
    • Store digital receipts in a dedicated smart home folder (cloud storage is a safe bet)

    Finding Spare Parts and Approved Installers

    • Only use brand-recommended repair kits and parts for critical replacements
    • Locate certified installers if major repairs are needed, especially for doors integrated into glass or high-security areas

    This approach supports both hardware longevity and warranty claims in case of a future fault.

    Conclusion

    Automated pet doors can be a lasting, secure feature in any smart home if cared for with tailored, routine strategies. Regular checks on electronic systems, lock reliability, and weatherproofing give the most benefit.

    Smart app use, timely software updates, and prompt attention to wear keep these devices safe and convenient for pets and families alike. 

    If maintenance feels overwhelming, manufacturer support and certified professionals are worthwhile and help extend the lifetime of your investment.

  • Tips for Reducing False Alarms on Window Vibration Sensors

    Tips for Reducing False Alarms on Window Vibration Sensors

    False alarms are a common headache for anyone using window vibration sensors in a smart home setup. These incidents often undermine trust in your security system.

    This article offers practical ways for homeowners and tech enthusiasts to make window vibration sensors far less prone to unnecessary triggers. Improvements can save time, prevent stress, and keep your smart alarm system running optimally.

    Understanding Why Window Vibration Sensors Trigger False Alarms

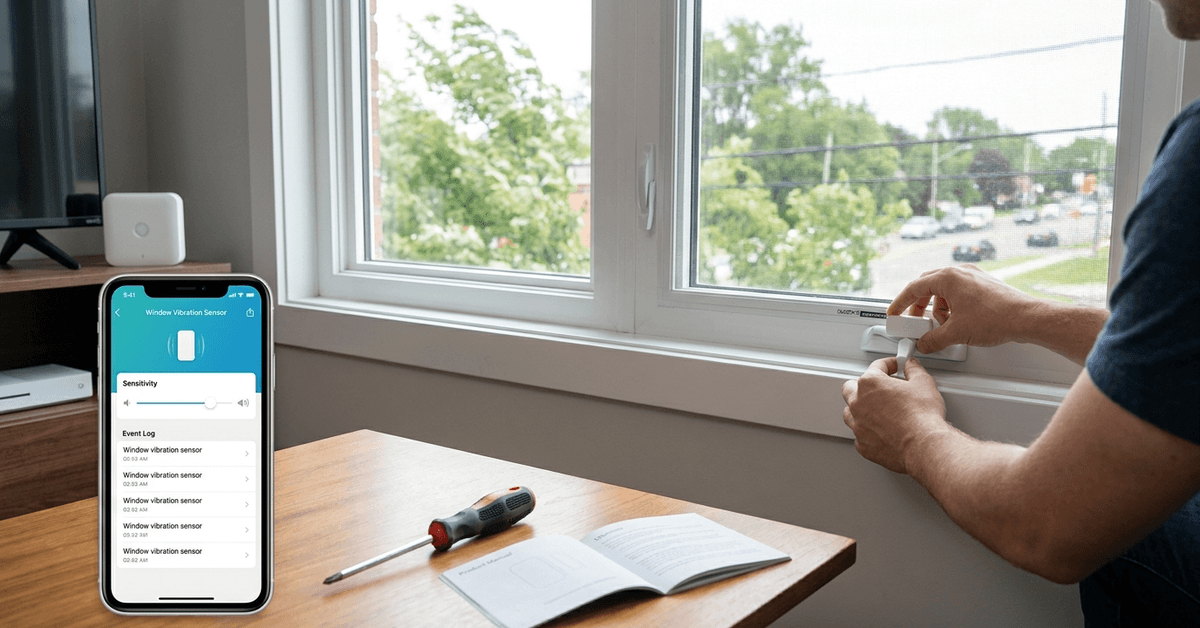
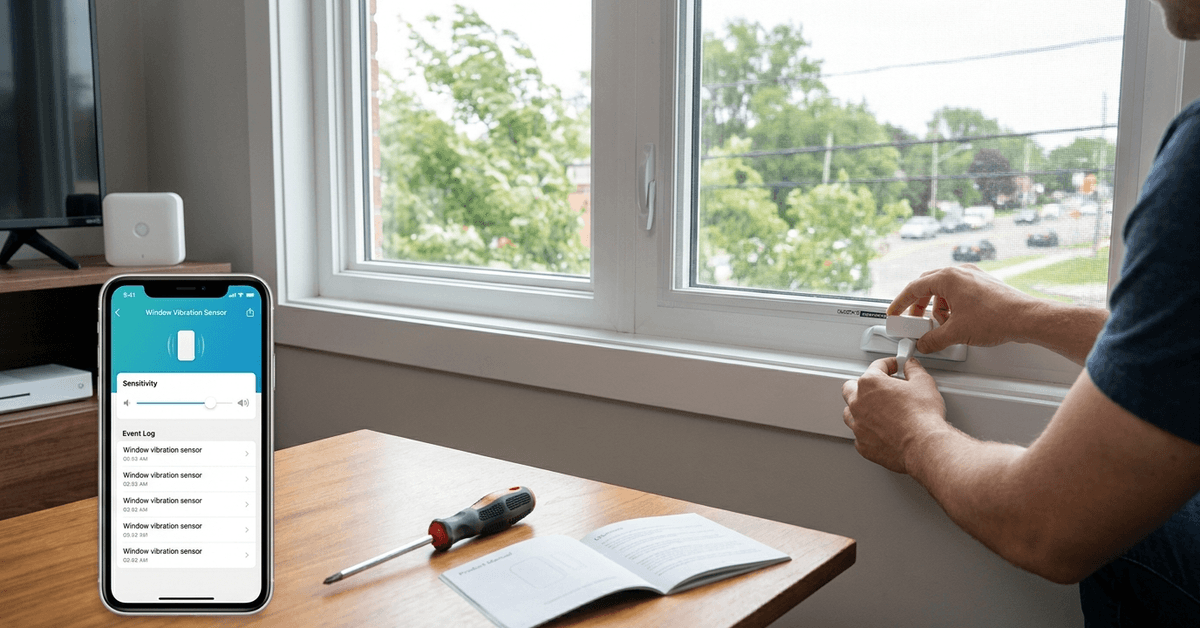
    Window vibration sensors work by detecting movement or pressure changes on glass surfaces. Sensitivity is necessary, but too much sensitivity can cause problems.

    Image 1

    Common Causes of False Alarms

    • Environmental noise: Strong wind, traffic, or loud outdoor sounds may trigger sensors.
    • Poor installation positioning: Minor misplacement on the window can make vibrations more prominent.
    • Structural factors: Loose window frames or rattling glass panes add to unnecessary activations.
    • Electrical interference: Home appliances and Wi-Fi routers nearby may disrupt sensor signals.

    Knowing these causes is key to troubleshooting issues effectively.

    How to Properly Install Window Vibration Sensors?

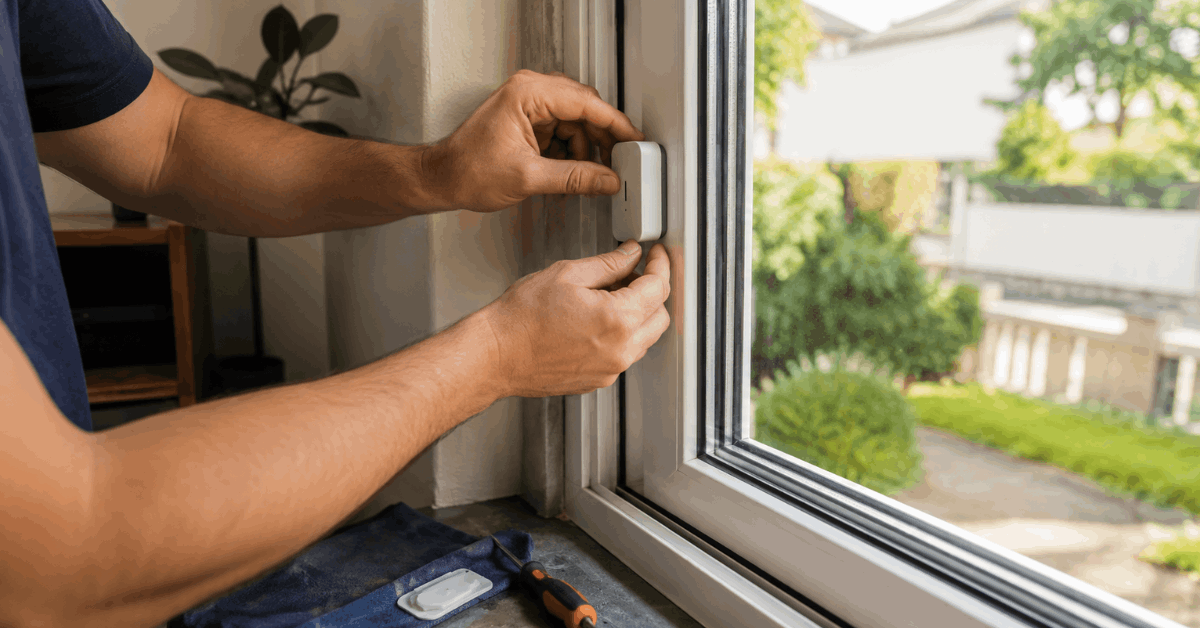
    Many false alarms arise from rushed or careless installation. Taking time with proper placement improves reliability.

    Choosing the Right Mounting Spot

    • Mount sensors at the center or lower third of the window. This position often provides the best sensitivity balance.
    • Avoid placing directly on thin, single-pane windows. Heavier glass is usually less prone to mistaken readings.

    A little patience during installation often makes a big difference down the line.

    Using the Correct Mounting Hardware

    • Adhesive pads are generally recommended for smooth bonding with glass or PVC frames.
    • Avoid screws unless specified by the manufacturer, as excess vibration may result.

    Always check for surface dust or residue before application.

    Optimizing Sensitivity Settings

    Most modern smart sensors offer adjustable settings for vibration sensitivity. This is one area where careful fine-tuning directly impacts the rate of false alarms.

    Accessing Sensitivity Controls

    • Refer to the official product manual for your specific brand. Many models, like Samsung SmartThings Multipurpose Sensor, provide sliders or toggles in their app interface.
    • If using a central hub system, sensitivity may be managed from within the main dashboard (e.g., SmartThings, Home Assistant, or Zigbee2MQTT consoles).

    Start with the default level, then gradually lower sensitivity if accidental triggers persist.

    Testing and Adjusting Sensitivity

    1. Arm your alarm system, then perform mild taps near the sensor to observe its response.
    2. Increase or decrease sensitivity by one level, wait a few minutes, then retest.
    3. Repeat the process until you find a balance between responsiveness and stability.

    Most users do this every few months as seasons or external noise levels change.

    Leveraging Smart Home Integrations

    Some ecosystems let users minimize false alarms through automation rules. Integrating window vibration sensors with broader smart home systems can make them smarter.

    Geofencing and Scheduling Automation

    • Platforms like Home Assistant or Apple HomeKit allow scheduling: The sensor only activates during absence or at night.
    • Geofencing disables or softens alerts when residents are detected at home, preventing harmless routine triggers.

    This kind of smart integration is a strong deterrent against false notifications.

    Custom Notification Rules

    • Using IFTTT, SmartThings, or Eufy Security, create custom actions. For example, ignore a single vibration event, but alert if two occur within thirty seconds.
    • IFTTT applets can filter repeated signals or bundle notifications, making alarms truly meaningful.

    This gives peace of mind that every alert really deserves attention.

    Regular Maintenance and Environmental Checks

    Routine upkeep and attention to your home environment help minimize error triggers.

    Schedule Maintenance Routines

    • Gently clean sensor contacts and window surfaces with a soft cloth at least once a month.
    • Periodically check and tighten window frames and glass panes if needed.
    • Replace batteries in battery-powered models twice per year, unless your system sends low-battery alerts sooner.

    Small regular tasks go a long way in supporting accurate performance.

    Monitor Weather and Structural Changes

    • Extreme temperature swings or ongoing construction nearby may temporarily increase false alarm rates.
    • Seasonal adjustments to insulation and sealing around windows help maintain optimal sensor function.

    Awareness of these factors means fewer surprises from your smart system.

    Recommended Sensor Brands and Useful Apps

    Users may find that investing in proven hardware and trusted apps lowers the need to troubleshoot frequent issues.

    Top-Rated Window Vibration Sensors

    • Samsung SmartThings Multipurpose Sensor: Known for reliable calibration and easy smart home integration.
    • Eve Window Guard: Compatible with Apple HomeKit, offers smart sensitivity tuning features.
    • Aqara Vibration Sensor: Works with Zigbee platforms, widely reported as accurate and customizable.

    Choosing robust products is often the simplest way to reduce false alarms long term.

    Apps for Enhanced Control

    • SmartThings: Gives users detailed status logs and sensitivity tweaks.
    • Home Assistant: Permits advanced automations and historical event tracking.
    • Google Home: Offers basic controls and can link various brands for coordinated security actions.

    These apps allow for better visibility and faster adjustments if false alarms persist.

    Table: Quick Comparison of Sensor Features

    Sensor Model  Compatibility  Adjustable Sensitivity  Battery Powered 
    Samsung SmartThings  SmartThings, Zigbee  Yes  Yes 
    Aqara Vibration  Zigbee, Home Assistant  Yes  Yes 
    Eve Window Guard  HomeKit  Yes  Yes 

    Best Practices for Reliable Performance

    Adopting several strategies together tends to produce the most satisfying results over time.

    • Use specialized mounting adhesives, not general-purpose household glue, for sensor attachment.
    • Keep all nearby electronics free of loose wires or poorly shielded power supplies, as this reduces interference.
    • Configure your automation to require multiple events before sending notifications, if the system supports it.

    Combining these methods leads to fewer false alarms and a smoother smart home experience.

    Conclusion: Making Window Vibration Sensors Accurate and Trustworthy

    Window vibration sensors play a key role in home security, but they can falter without the right setup. Understanding why false alarms happen is the first step to stopping them. 

    Careful installation, regular maintenance, and using advanced app features all work together to keep alerts reliable and meaningful.

    Sensors are there to help you feel safe, not anxious. Small improvements and an attentive approach will make your smart home security system much more dependable. Reliable results are within reach for anyone willing to adjust settings, integrate smart routines, and keep an eye on environmental changes.

  • How to Set Up a Simple Home Workshop Air Filtration Automation

    How to Set Up a Simple Home Workshop Air Filtration Automation

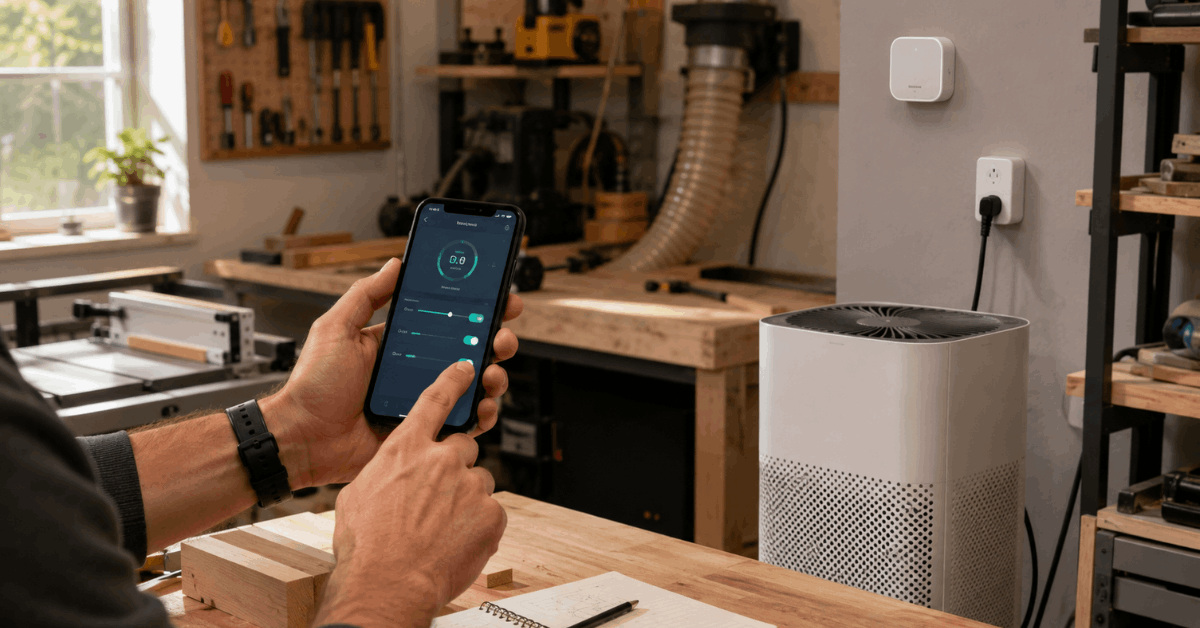
    Clean air is essential for any home workshop, but managing that air quality on your own can be tedious. Smart air filtration automation brings consistent results without constant attention. 

    This guide offers a straightforward approach, ideal for DIYers, hobbyists, or anyone wanting to avoid airborne dust and fumes.

    Why Automate Workshop Air Filtration?

    Wood dust, fumes, and fine particles build up fast. Manual filter control might be easy at first, but it often leads to gaps or wasted energy.

    Automating air management ensures that filtration responds precisely to activity and air quality. This small investment pays off by improving both safety and comfort.

    How to Set Up a Simple Home Workshop Air Filtration Automation

    Key Components for Smart Workshop Air Filtration

    Smart Air Quality Sensors

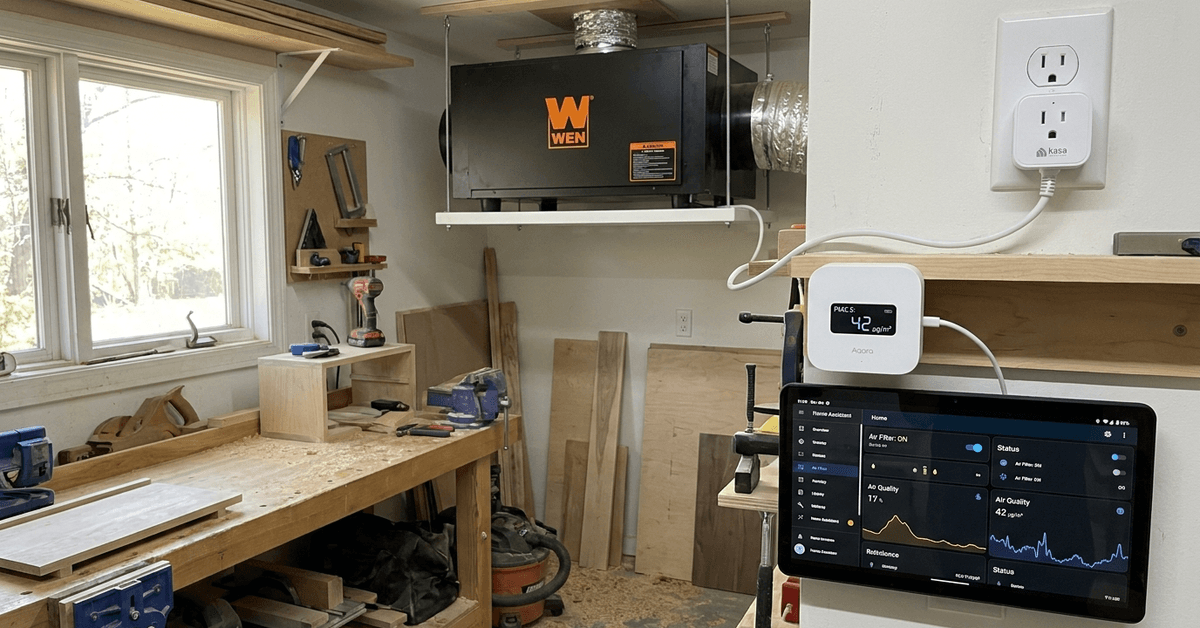
    Aqara TVOC Air Quality Sensor is a compact, reliable pick for real-time monitoring. It tracks particulates, VOCs, and even humidity—critical for adjusting to changing workshop needs.

    Wi-Fi-Enabled Smart Plugs

    Many off-the-shelf air filtration units can be plugged into a Kasa Smart Plug or TP-Link Tapo device. This simple addition helps control power based on sensor readings or routines.

    Compatible Air Filtration Units

    Popular workshop air filters from brands like WEN or Shop Fox generally use standard plugs. Most models respond well to smart plug control, but check wattage to avoid incompatibility.

    Home Automation Controller or Hub

    A hub like Home Assistant or Samsung SmartThings enables seamless coordination. With these, you can create rules and automations that respond instantly to air quality changes.

    Basic Workflow: How the Automation Operates

    1. The air quality sensor continuously measures particulate levels or VOCs.
    2. If pollutants rise above a set limit, an automation triggers the smart plug to power on the filter.
    3. Once the air is back within healthy limits, the plug powers off automatically.
    4. Some setups allow for notifications or manual overrides using a smartphone app.

    Step-By-Step: Setting Up Basic Hardware

    1. Choose and Place an Air Quality Sensor

    • Most DIYers find wall-mounted placement about head height works well for broad detection.
    • Keep the sensor away from direct airflow from the filter for more accurate readings.
    • The Aqara TVOC links to Zigbee or Wi-Fi hubs with minimal setup time.

    2. Integrate a Smart Plug with Your Filtration Unit

    • Ensure your filter’s power rating matches the smart plug’s capacity, especially with larger models.
    • The Kasa Smart Plug app walks users through linking Wi-Fi and setting up device routines.
    • Plug the filter into the smart plug, then into the outlet—done in under two minutes for most models.

    3. Connect Devices to Your Automation Hub

    • Platforms like Home Assistant support unified dashboards for easy monitoring and control.
    • Samsung SmartThings or Aqara Home App both offer pre-made routines for popular workshop scenarios.
    • Picking one central hub helps reduce configuration headaches later on.

    Configuring Automation Rules and Schedules

    Defining Air Quality Thresholds

    Many users opt for a PM2.5 threshold of roughly 35 µg/m³ as a balance between safety and filter lifespan. Settings can be tweaked in the app as needed.

    How to Set Up a Simple Home Workshop Air Filtration Automation

    Creating Basic Automations

    • Set an automation so the smart plug activates the filter when particulate levels hit your upper limit.
    • Program a rule to deactivate the filter once readings fall well below your set threshold.
    • Optional: send push notifications if levels spike or linger above target.

    Testing and Adjusting Routines

    • Run manual tests by producing dust or fumes during light projects (like sanding scrap wood).
    • Observe sensor response and app notifications to confirm automations work as intended.
    • If the filter cycles on or off too frequently, consider widening thresholds slightly.

    Recommended Automation Apps and Integration Tools

    Home Assistant (home-assistant.io)

    The open-source Home Assistant platform supports almost all smart sensors, plugs, and major filtration brands. Extensive documentation and active forums help with troubleshooting in real-world setups.

    Samsung SmartThings

    SmartThings is a friendly choice for more casual users. Its app allows quick automation creation, remote control, and straightforward device linking without steep learning curves.

    Kasa Smart App

    Those using Kasa plugs will appreciate the Kasa Smart App for rapid device onboarding, scheduling, and simple automations for workshop use. While more basic, it does the essentials smoothly.

    Wireless Protocols: Zigbee, Z-Wave, or Wi-Fi?

    Zigbee

    Many sensors, especially from Aqara and Sonoff, depend on Zigbee for reliable, mesh-style networking. Zigbee excels in environments with many smart devices due to its interference resistance.

    Z-Wave

    Some high-end air sensors and plugs use Z-Wave. It offers robust security and local control, though finding compatible products might be trickier for general-purpose workshops.

    Wi-Fi

    Wi-Fi-based devices are the simplest for most beginners. They connect straight to your router and often need no hub. However, in Wi-Fi-congested homes, reliability sometimes dips a bit.

    Safety, Power, and Maintenance Guidance

    Power Handling Considerations

    • Check the filter’s amp and voltage requirements before using it with a smart plug.
    • A surge-protected strip can offer a layer of peace of mind for sensitive equipment.

    Maintaining Reliable Performance

    • Replace or clean air filters regularly—most manufacturers suggest every 3–6 months of consistent use.
    • Smart plugs may need occasional resetting if communication with the hub fails, especially after power outages.

    General Safety Practices

    • Never override manufacturer safety features or bypass device relays.
    • Confirm all wiring and plug connections are secure before leaving automation unattended.

    Advanced Upgrades and Customization Ideas

    • Voice control: Some users integrate Amazon Alexa or Google Home for hands-free filter activation commands.
    • Multi-zone filtration: Larger workshops can use several sensors and plugs to create zone-based automations for targeted cleaning.
    • Energy monitoring: Smart plugs with built-in meters offer insights on power usage and help optimize filter runtimes.

    Tips for Smarter Workshop Air Filtration

    These quick practices can keep the system accurate, safe, and efficient.

    • Place sensors away from vents.
    • Set separate start and stop limits.
    • Check smart plug wattage.
    • Run filters after projects.
    • Clean sensors and filters regularly.

    Conclusion

    Smart automation of workshop air filtration combines safety, comfort, and efficiency in a practical, manageable way. By linking a trusted air quality sensor, a reliable smart plug, and an intelligent automation hub, homeowners can maintain consistently clean air without constant worry. 

    Real-world setups are flexible and adapt to any workshop, whether for professional projects or casual tinkering. Simple upgrades like voice integration or multi-zone monitoring keep the system relevant as your needs grow. 

    Setting up this automation brings lasting health benefits and frees up time, letting you focus on what you enjoy about your workshop.

  • The Ultimate Guide to Eco-Friendly Smart Thermostats

    The Ultimate Guide to Eco-Friendly Smart Thermostats

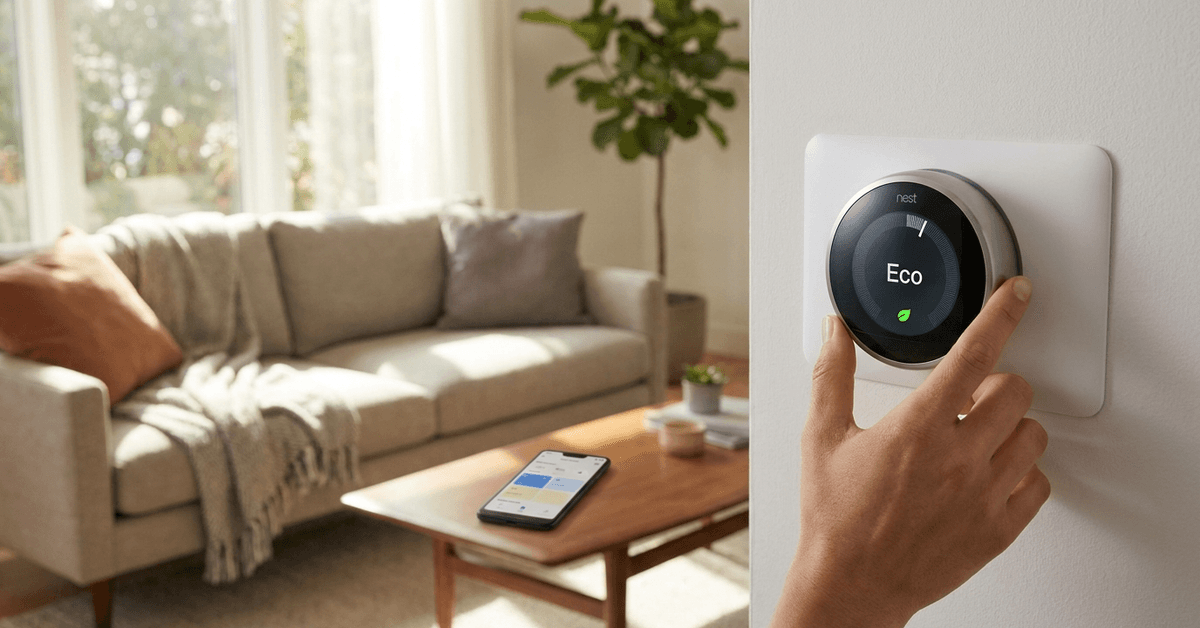
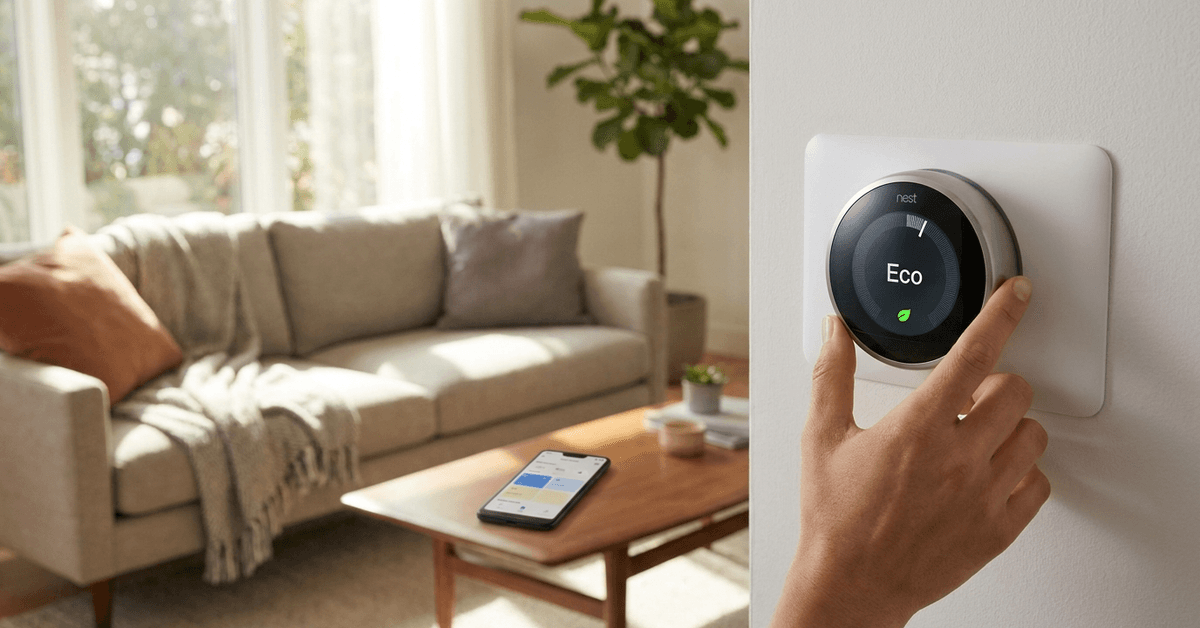
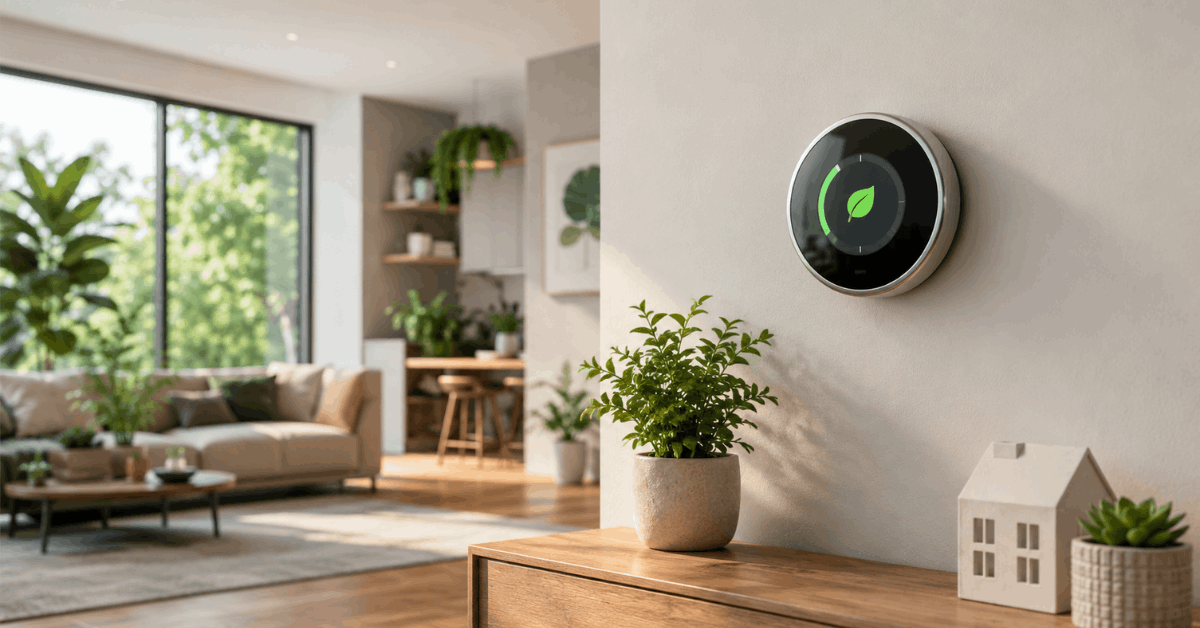
    Eco-friendly smart thermostats are quietly transforming home energy use. More homeowners are searching for genuine ways to lower their utility bills and shrink their environmental impact.

    For those passionate about sustainability, a smart thermostat delivers daily control along with long-term savings. The benefits are both practical and technical—smarter heating and cooling, all in one clean package.

    What Are Eco-Friendly Smart Thermostats?

    Smart thermostats are digital devices linking your heating and cooling system to your Wi-Fi network. This enables remote temperature control and scheduling.

    The Ultimate Guide to Eco-Friendly Smart Thermostats

    The most standout feature: learning capabilities that adjust room temperature based on your habits while aiming to reduce wasted energy.

    Key Benefits of Smart Thermostats for Sustainability

    Automatic Energy Optimization

    Eco-friendly models monitor patterns of use and adapt. They can lower energy draw when houses are empty or during non-peak times.

    • Prevents over-heating or over-cooling when not needed
    • Reduces unnecessary cycling of HVAC equipment
    • Lowers greenhouse gas output tied to power use

    Precise Scheduling and Zoning

    Dividing the home into zones is another key benefit. Many smart thermostats allow specific temperature settings per room or area.

    • Only heat or cool rooms in active use
    • Creates tailored comfort for each part of the home
    The Ultimate Guide to Eco-Friendly Smart Thermostats

    Remote Access and Notifications

    Apps like the Google Home app or Ecobee app allow control from anywhere. Adjustments can happen on the go or from a different floor.

    • Get alerts about open windows or rapid temperature changes
    • Respond to energy emergency signals from utility companies

    Energy Consumption Reporting

    Most leading models offer regular usage reports. These help you see exactly how much energy is being used daily, weekly, or monthly.

    • Track trends and spot wasteful patterns
    • Compare your performance to similar local homes

    How Smart Thermostats Work: Protocols and Compatibility

    Wireless Communication Standards

    Common protocols include Wi-Fi, Zigbee, and Z-Wave. Some thermostats, like those from Honeywell, offer dual-protocol compatibility.

    • Wi-Fi is best for direct app or cloud control
    • Zigbee and Z-Wave integrate easily with smart hubs like Samsung SmartThings

    Smart Platform Integration

    Compatibility with smart speaker platforms drives seamless use. Google Assistant, Amazon Alexa, and Apple HomeKit cover the popular bases.

    • Voice commands for temperature changes
    • Integration with scenes and automations

    Energy Utility Partnership Protocols

    Certain models support utility demand response programs. These connect your thermostat to energy provider systems during peak demand.

    • Receive incentives for participating in energy-saving events
    • Examples: Nest Rush Hour Rewards, Ecobee Eco+

    Choosing the Best Eco-Friendly Smart Thermostat

    Top Models on the Market

    • Google Nest Learning Thermostat – Offers adaptive scheduling and easy setup for most HVAC systems
    • Ecobee Smart Thermostat – Includes built-in Alexa and room sensors for zoned control
    • Tado Smart Thermostat – Capable of geofencing-based adjustments for European homes
    • Honeywell Home T9 – Features multi-room focus and simple mobile app

    Key Selection Criteria

    • HVAC compatibility (check heating/cooling types supported)
    • User interface and app quality
    • Battery life and backup features
    • Level of automation sophistication wanted

    Step-by-Step Smart Thermostat Installation Guide

    Though professional installation is available, many users attempt it themselves. Here’s an actionable breakdown:

    1. Turn off power to existing thermostat at your circuit breaker box
    2. Remove your old thermostat’s faceplate and disconnect wiring
    3. Label wires using the provided stickers, keeping note of where each wire goes
    4. Mount the smart thermostat’s base and reconnect wires to the matching ports
    5. Secure the new faceplate and restore power from the breaker
    6. Download your thermostat’s official app and start the guided setup
    7. Connect the device to your Wi-Fi network and follow in-app calibration prompts

    Recommended Apps and Software

    • Google Home (Android/iOS): Unifies Nest devices and automations
    • Ecobee App: Offers remote control, scheduling, and usage tracking
    • Tado App: Enables location-based automation in Europe

    Practical Tips for Maximizing Eco-Friendly Performance

    Use Geofencing Features

    Enabling geofencing lets your thermostat determine when you’re home or away. It then saves energy automatically during absences.

    Connect to Weather Data

    Many thermostats track outside temperatures in real-time. This allows appliances to adjust preemptively, cutting use on milder days.

    Optimize Schedules for Your Routines

    • Set bedtime and wake-up cycles for maximum comfort and savings
    • Review schedules each season for ongoing efficiency

    Participate in Utility Energy Programs

    Joining demand response programs often offers financial rewards. Your usage adapts to grid needs, and environmental impact drops.

    Security and Data Privacy Considerations

    Smart thermostats, like any connected device, require ongoing care to remain secure.

    • Regularly update firmware via the official app
    • Use strong Wi-Fi passwords and two-factor authentication where available
    • Avoid sharing account credentials with others

    Common Mistakes to Avoid

    • Overriding the schedule too often—this undoes efficiency gains
    • Skipping firmware updates and missing new features or security fixes
    • Ignoring compatibility requirements before purchase

    Conclusion

    Eco-friendly smart thermostats are reshaping home comfort and carbon responsibility. With the right model and thoughtful setup, homeowners enjoy lower bills, improved climate control, and the satisfaction of a sustainable lifestyle. 

    Exploring the latest smart tech, learning each device’s features, and staying engaged with software updates can unlock even greater energy savings. 

    For anyone building a fortress of safety and efficiency at Fortressmate.com, adopting these tools is probably the smartest upgrade available today.

  • How to Set Up Emergency Lighting Paths for Sudden Power Outages

    How to Set Up Emergency Lighting Paths for Sudden Power Outages

    Sudden power outages often catch households off guard, creating safety hazards as people try to navigate in the dark. A well-designed emergency lighting path can make all the difference during these critical moments.

    This guide shares strategies for homeowners interested in setting up reliable lighting that activates automatically when needed. It’s ideal for anyone prioritizing safety or wanting more control over their home’s resilience during power disruptions.

    Understanding Emergency Lighting Paths

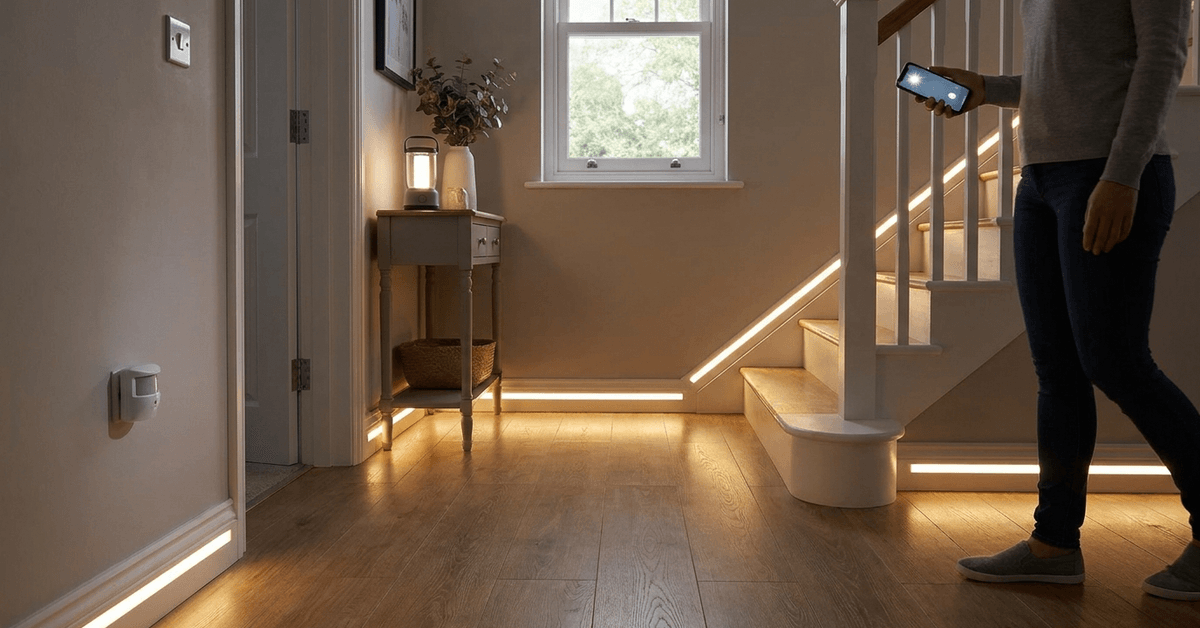
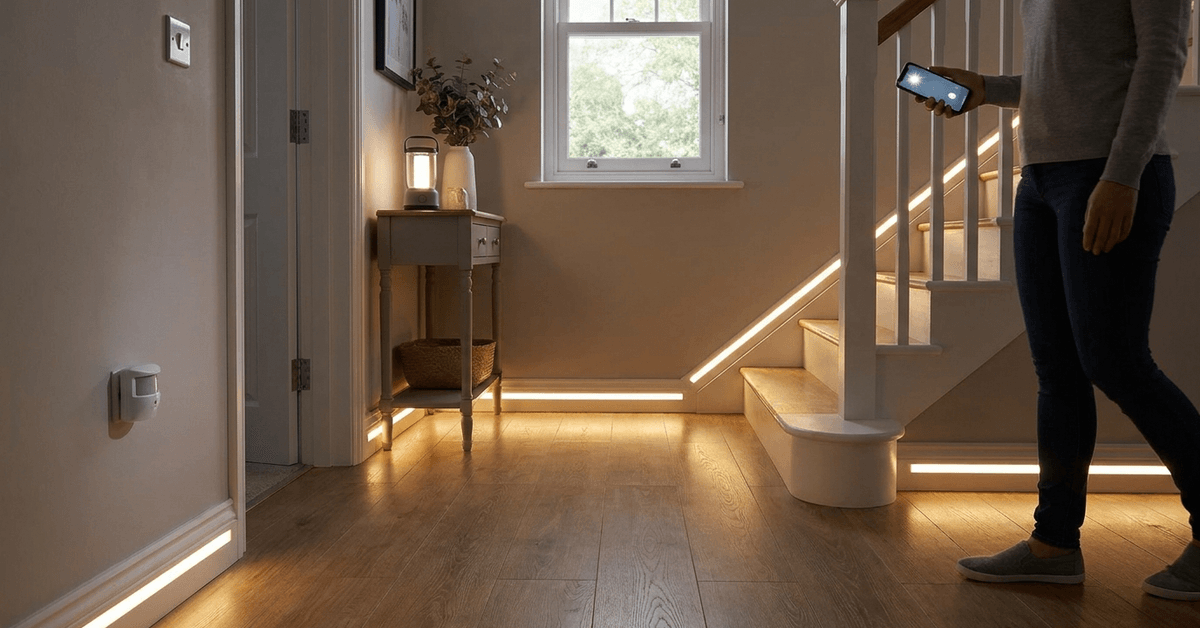
    Emergency lighting paths are deliberate routes illuminated during blackouts. These routes connect essential rooms, exits, and escape points.

    Image 1

    They help prevent trips and allow for safe evacuation or access to vital areas. In smart homes, these paths often combine battery-backed lights with sensor or automation protocols for instant response.

    Key Components of Emergency Lighting Systems

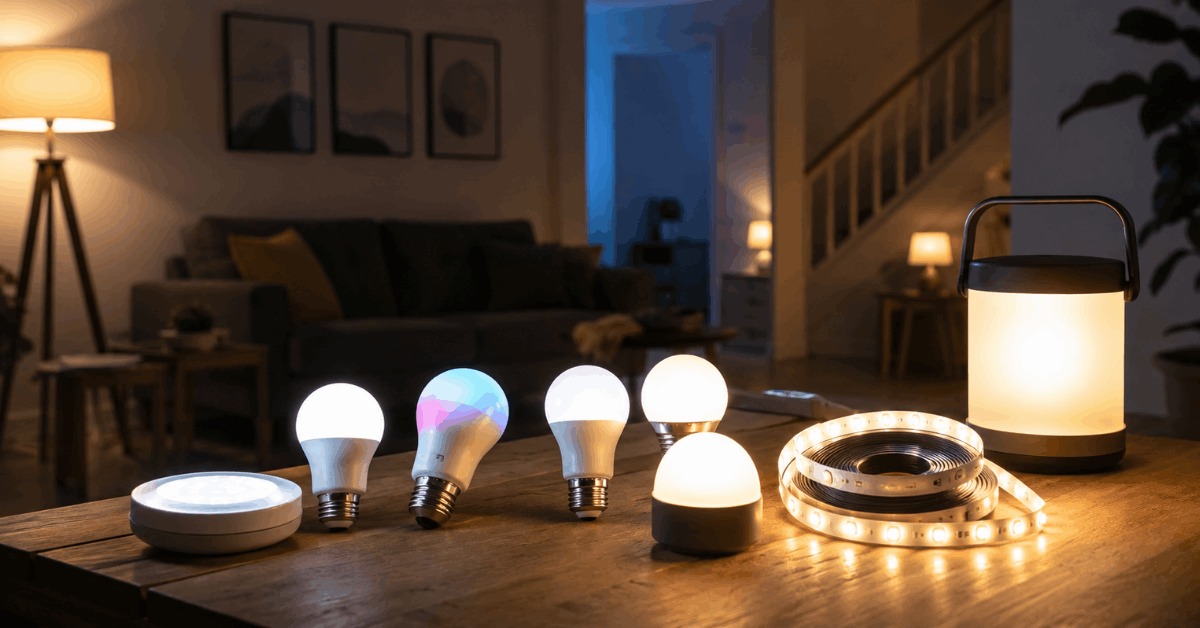
    • LED strip lights: Compact, energy-efficient, and suitable for marking hallways or stairs
    • Battery-backed smart bulbs: Fit into existing fixtures and turn on when mains power fails
    • Portable lanterns: Rechargeable units positioned at key points for manual access
    • Motion sensors: Trigger automatic lighting only when needed
    • Smart hubs: Manage switching logic and app-based controls

    Planning Your Lighting Path Layout

    Effective emergency lighting starts with mapping out your home’s high-traffic and escape routes. Focus on connecting bedrooms, bathrooms, hallways, kitchens, and all main exits.

    Some homeowners use floor sketches to visualize optimal locations. It can help to walk through your home after dark to find tricky spots or potential obstacles.

    Checklist for Path Planning

    • Mark every doorway and stairway leading to exit points
    • Highlight corridors used most at night
    • Identify spaces where clutter may become hazardous
    • Consider sightlines that allow one light source to illuminate multiple areas

    Choosing the Right Emergency Lighting Devices

    Several smart lighting options are specifically designed for power outages. These often incorporate both standard operation and battery backup modes for seamless transition during an outage.

    Recommended Device Types

    • Philips Hue Smart Bulbs with built-in battery modules
    • Wyze Bulb Color with Outage Response
    • Eufy Emergency LED Strip Lights
    • LIFX Candle White, which supports battery operation

    Some residents find hybrid approaches practical. Plug-in nightlights with built-in batteries provide both normal night navigation and backup illumination in emergencies.

    Comparing Features

    Device Name  Power Source  Smart Integration  Backup Duration 
    Philips Hue Emergency Bulb  Mains + Battery  Yes (Hue App)  Up to 5 hours 
    Wyze Outage Bulb  Mains + Battery  Yes (Wyze App)  Up to 4 hours 
    Eufy LED Strip  USB Rechargeable  Yes (Eufy App)  3-6 hours 
    LIFX Candle White  Mains + Battery  Yes (LIFX App)  4 hours 

    Integrating Smart Controls and Automation

    Automation ensures your emergency lighting activates instantly and efficiently. Wireless smart hubs act as central coordinators for these systems.

    Popular Automation Protocols

    • Zigbee for mesh device connectivity and reliability
    • Wi-Fi-based controls for remote monitoring and alerts
    • Home Assistant setups for extensive rule creation
    • IFTTT automation to connect different brands and sensors

    Smartphone apps from brands like Philips Hue or Wyze provide control over brightness, schedules, and emergency triggers. Many platforms even allow users to receive notifications if emergency routes are activated.

    Step-by-Step Path Setup Guide

    1. Identify primary pathways from bedrooms to all exits
    2. Choose low-profile, battery-backed lighting for wall, baseboard, or ceiling placement
    3. Install smart bulbs or LED strips in fixtures along these routes
    4. Set up motion sensors at hallway entrances or bottom/top of stairs
    5. Connect all devices to a smart hub or app
    6. Program automation rules, such as triggering all lights if mains power fails
    7. Test each segment of your path during a simulated outage
    8. Review for shadows or blind spots and reposition lights as needed
    9. Schedule regular checks of battery charge levels and update firmware through apps

    Maintaining and Testing Emergency Lighting

    Ongoing reliability requires routine checks and some basic upkeep. Batteries can degrade over time and firmware updates occasionally fix automation bugs.

    Maintenance Checklist

    • Test all lights and sensors monthly—nighttime walkthroughs work best
    • Replace or recharge batteries at the manufacturer’s suggested intervals
    • Update your device firmware through associated apps
    • Inspect physical mounting for loose fixtures or signs of wear

    Safety Considerations and Smart Features

    Proper installation is critical for safety and function. Position lights to minimize glare yet maximize visibility, considering possible smoke or obstacles during emergencies.

    Smart monitors can be added to alert phones or central panels if any device fails. Some homeowners use text or app notifications to check system health remotely.

    Best Practices for Safety

    • Mount lights near, not underneath, stair treads
    • Keep emergency paths free of tripping hazards like shoes or cords
    • Review fire escape plans with other residents regularly
    • Store backup flashlights where people can easily access them

    Recommended Software and Apps for Central Control

    User-friendly apps can simplify management and troubleshooting. A few programs are frequently mentioned in smart home forums.

    • Philips Hue App: Central control, scenes, scheduling
    • Wyze App: Outage triggers and real-time alerts
    • Eufy Security App: Battery status monitoring
    • Home Assistant: Custom automations and advanced logging
    • IFTTT: Integration across different brands or platforms

    Having a single dashboard to review all devices makes regular testing and upgrades more manageable. Many apps offer event histories to understand how your system responds to outages.

    Conclusion

    Setting up emergency lighting paths can truly transform your home’s resilience to sudden power outages. Combining smart lighting with automated controls offers reliable, hands-free safety when you need it most.

    Prioritizing routine checks and maintenance ensures your system is always ready. For many, these investments help to create a safer, more secure living environment—especially in areas where power disruptions are unpredictable.

  • Tips for Protecting Garage Electronic Keypads From Sun Damage

    Tips for Protecting Garage Electronic Keypads From Sun Damage

    Tips for protecting garage electronic keypads from sun damage

    Garage electronic keypads are a practical upgrade for modern homes. They make access secure and simple for the whole family. But constant sun exposure can rapidly shorten their lifespan.

    This article explains the top methods for shielding garage keypads from UV rays, heat, and related sun damage. Every homeowner prioritizing smart home security—and smooth daily operation—will benefit from these insights.

    Understanding Why Sun Damage Is a Keypad Threat

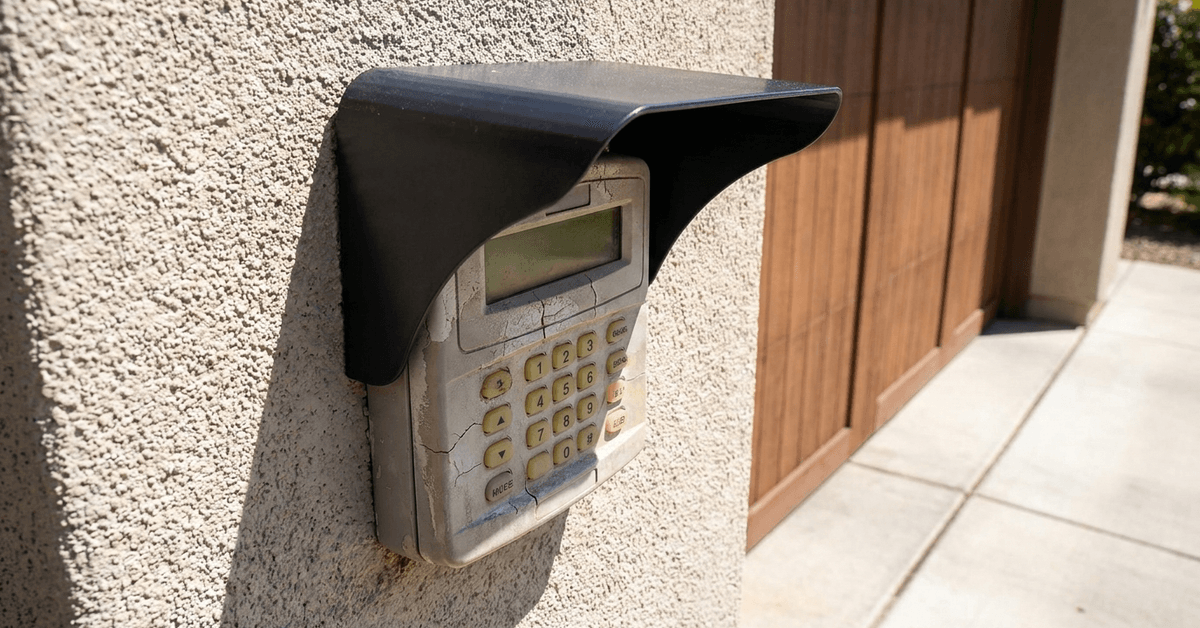
    Most garage keypads use plastic housings, flexible membranes, and sensitive electronics. Prolonged sun contact leads to material wear, screen fading, and eventual function loss.

    Tips for Protecting Garage Electronic Keypads From Sun Damage

    UV exposure can degrade even weather-resistant models. Short circuits or sticky buttons are not uncommon if the damage accumulates. Regular direct sunlight also causes overheating of sensitive microchips.

    Signs of Sun-Related Damage

    • Yellowing or cracking of the outer shell
    • Visible keypad fading
    • Errors in button response
    • Blank or barely visible display screens

    Assessing Your Keypad’s Vulnerability

    The installation position—especially south or west facing—directly determines sun risk. Open, unsheltered garages are the most exposed.

    Tips for Protecting Garage Electronic Keypads From Sun Damage

    Consider material ratings on the product spec sheet. Some models only provide basic UV protection, which tends to be insufficient in strong climates.

    Keypad Placement Factors

    • Wall orientation (south, west, east, north)
    • Presence of overhead eaves or natural shade
    • Proximity to reflective surfaces (such as white vinyl siding)

    Best Physical Barriers for Sun Protection

    Physical barriers remain the most effective line of defense. Homeowners often install after-market shields or use landscaping for shade.

    Aftermarket Keypad Sun Shields

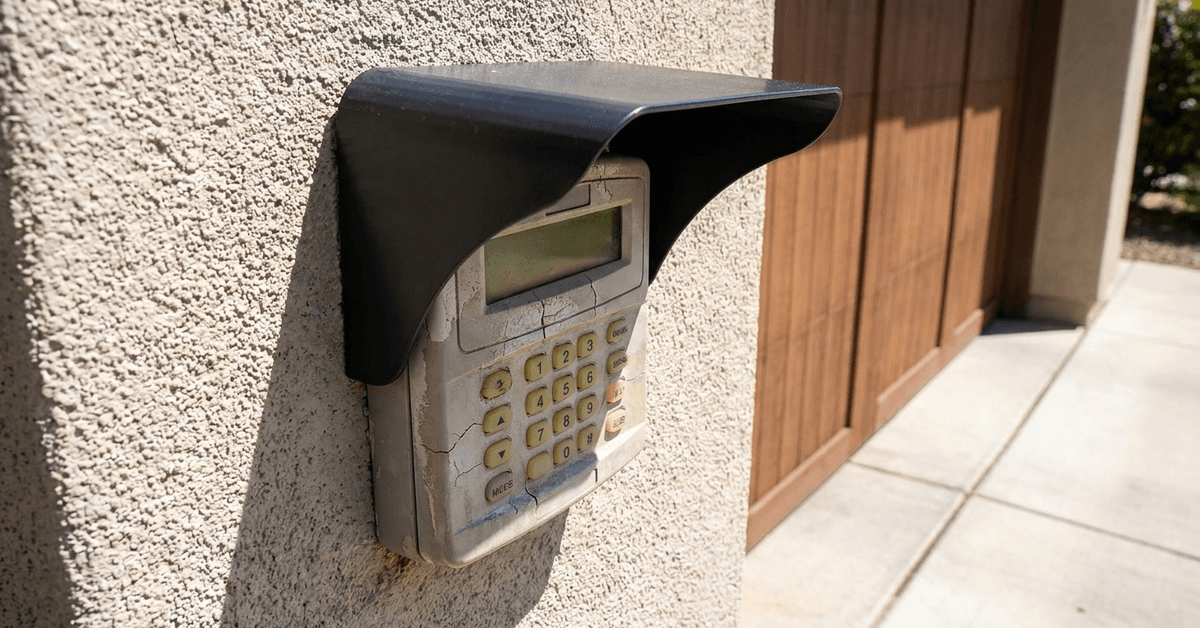
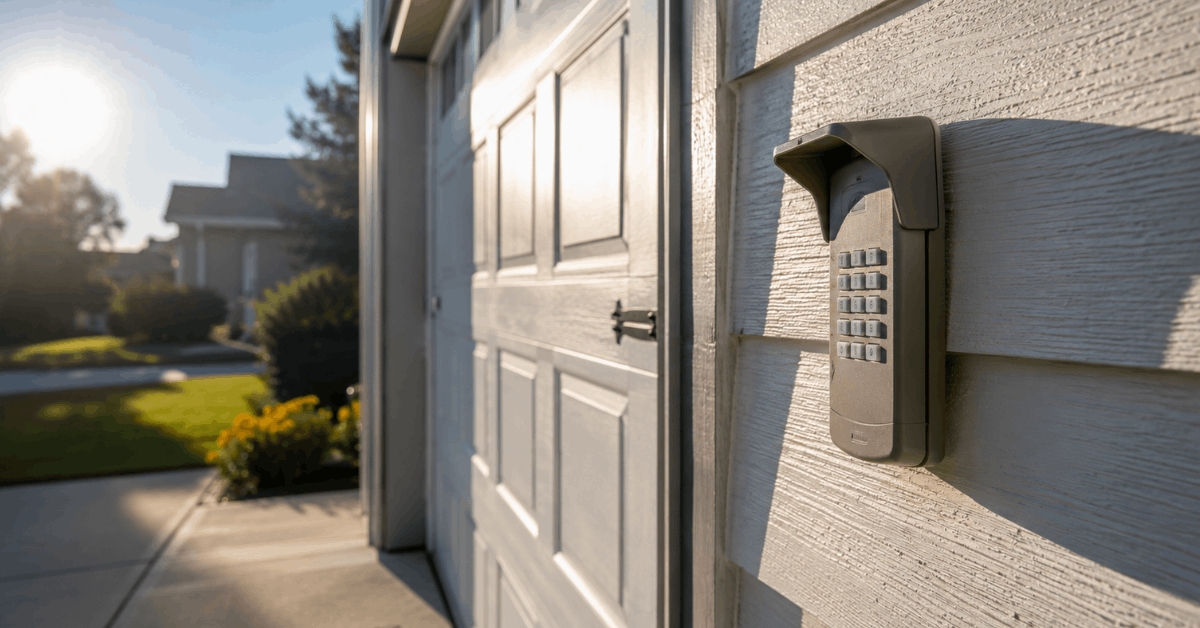
    • Chamberlain Garage Door Keypad Cover offers a hard plastic hood. This protects from both sun and precipitation.
    • Universal flip-up covers are available at hardware stores. Most cost less than $20 and require simple snap-on installation.

    DIY Shade Structures

    • Attaching a small awning above the keypad
    • Mounting a PVC or aluminum visor (cut to size for local conditions)
    • Securing a narrow, painted wood overhang

    Custom setups should avoid trapping heat directly around the keypad. Spacing and ventilation can make a significant difference in device temperature.

    Choosing Keypad Materials and Designs for Harsh Sun

    Look for products with genuine UV-resistant polycarbonate casings. Some, but not all, major brands list this on their datasheets.

    Genuine outdoor keypads feature sealed internals and rubber gaskets. Gasket-tight installation also helps resist dust and humidity.

    Recommended Weather-Resistant Models

    • LiftMaster 878MAX is rated for extended outdoor life.
    • Genie Wireless Keypad Series features a protective sliding cover for extra sun defense.

    Smart Tech Solutions: Remote and App-Based Alternatives

    Smart garage door controllers, like myQ by Chamberlain, can help minimize physical keypad use. This decreases wear from direct sun exposure.

    WiFi-enabled units allow entry with a smartphone app. Some homeowners rarely need to use the external physical pad, especially for frequent family access.

    Popular Smart Garage Apps

    • myQ App supports scheduling and auto open/close features.
    • Meross and Nexx Garage are compatible with Alexa and Google Assistant.

    These systems can even trigger geofences, so the door opens automatically as you approach. Pure app-based entry is less prone to sun-induced failures.

    Routine Maintenance: Inspection and Cleaning Tips

    Dirt, dust, and sun all accelerate keypad failure. Regularly inspecting and lightly cleaning the housing can help prevent breakdowns.

    Safe Cleaning and Inspection Steps

    1. Wipe with a soft, slightly damp microfiber cloth
    2. Avoid strong detergents, alcohol, or solvents
    3. Check for seam gaps, cracks, or sticky keys
    4. If covers are used, inspect for trapped debris

    Installing a Garage Keypad Sun Shield: Step-by-Step

    A sun shield can be added to most keypads in under 15 minutes with basic hardware tools.

    1. Measure the width and height of the keypad panel
    2. Mark the mounting holes—avoid electrical wiring paths
    3. Use corrosion-proof screws or anchors for outdoor use
    4. Allow for at least two inches of clearance above and around device

    Some covers are adhesive-backed, though mechanical fasteners provide the most durable result. It’s helpful to verify any manufacturer warranty implications before drilling.

    What to Avoid When Protecting Your Keypad?

    Certain product types—even if marketed as weather-resistant—may not stand up to direct, all-day sun.

    • Transparent acrylic hoods lack UV blocking in many cases
    • Unvented, tightly-fitted plastic cases can cause overheating
    • Non-approved sealants may trap moisture and degrade circuits

    Sun-reflective paints should never be applied directly to the keypad. Electronic sensors and button accuracy can be negatively affected by residue.

    Common Tech Protocols and Settings to Consider

    Some brands allow keypad brightness adjustment or time-out settings. Lowering screen intensity may reduce sun bleaching on illuminated models.

    Firmware on keypad-enabled smart garage controllers is often updated via companion apps. Updates sometimes improve energy efficiency and UV response.

    Where to Check for Updates?

    • Manufacturer mobile apps (e.g., myQ, Genie Aladdin Connect)
    • Official product support pages for direct firmware downloads
    • Push notifications on the keypad’s digital interface (rare in basic models)

    Conclusion

    Shielding garage electronic keypads from sun damage is a cost-effective step toward long-term home security. Physical barriers like dedicated sun shields or awnings offer robust protection for almost any model. 

    Smart app-based alternatives can further reduce risk by taking daily use away from the keypad. Routine care, thoughtful product selection, and staying alert for firmware updates all contribute to a resilient, high-functioning entry system. 

    Every homeowner aiming for a fail-safe garage setup will find these practical measures worthwhile to keep their tech investment safe in any climate.

  • The Best Way to Clean Smart Thermostat Touchscreens

    The Best Way to Clean Smart Thermostat Touchscreens

    Smart thermostats are central to modern home automation. Their touchscreen interfaces make daily climate control simple. Yet these screens attract fingerprints and dust quickly. Keeping the display clean ensures clarity and device longevity.

    Why Gentle Cleaning Matters for Smart Thermostat Touchscreens?

    Touchscreens use sensitive sensors and delicate coatings. Using improper cleaners or methods risks damaging the device. Screen clarity and touch response can worsen with scratches or residue.

    Manufacturers design most smart thermostats with glass or polycarbonate displays. However, even small abrasives can leave lasting marks. A careful approach makes a big difference in device upkeep.

    The Best Way to Clean Smart Thermostat Touchscreens

    Common Pitfalls: What to Avoid When Cleaning

    Certain products and techniques often seem harmless. In reality, they can harm smart thermostat touchscreens. Awareness avoids costly replacement screens.

    • Alcohol-based cleaners may strip away protective coatings.
    • Paper towels or facial tissues contain fibers that scratch glass or plastic.
    • Household window sprays sometimes leave a hazy residue.
    • Pressing hard risks screen misalignment or cracks.

    Many owners notice streaking after cleaning with hot water or liquid soap. This usually results from minerals in the water or soap residue. Residual moisture can also seep into screen seams.

    The Safest Cleaning Supplies to Use

    Maintaining smart thermostat screens is straightforward with proper supplies. Often, screens just need gentle wiping to remove fingerprints or smudges.

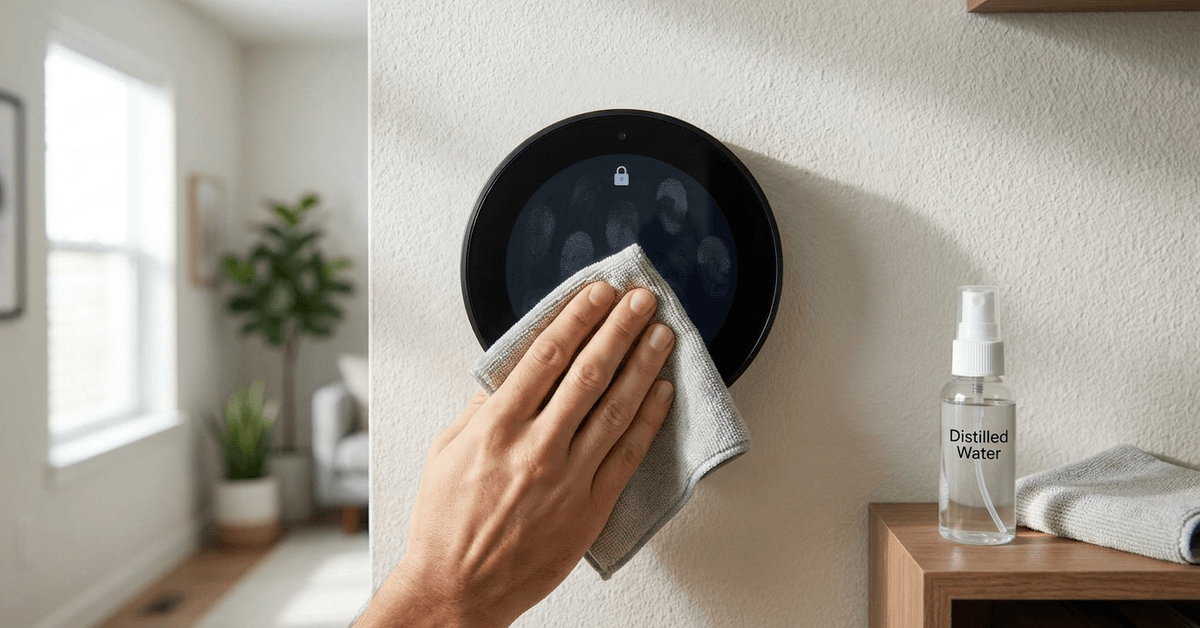
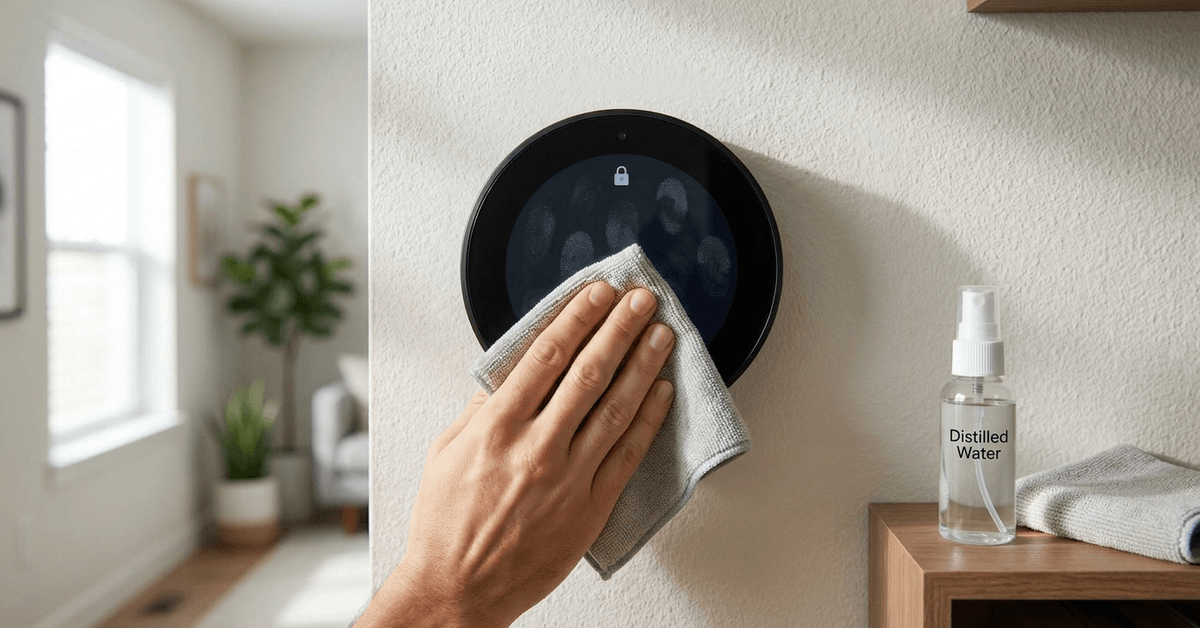
    • Microfiber cloth: This removes oils and debris while protecting the screen finish.
    • Distilled water: Tap water might leave mineral spots. Distilled water avoids this issue.
    • Mild dish soap (optional): For stubborn marks, mix a tiny drop in distilled water.
    • Compressed air: Great for blowing dust from screen edges and sensor crevices.

    For routine maintenance, most homeowners rely on a dry microfiber cloth. Fewer chemicals mean fewer risks.

    Step-by-Step Instructions: Cleaning Your Thermostat Screen Safely

    1. Preparation: Power and Safety First

    A great practice is to turn off the device before cleaning. This prevents accidental settings changes and reduces risk of electric shock.

    Some thermostats offer a ‘Screen Lock’ mode that disables touches. This tool helps avoid accidental commands while cleaning.

    2. Dust Removal and Gentle Wiping

    • Lightly brush the screen with a clean, dry microfiber cloth.
    • For dust in seams, use compressed air at a safe distance.

    Typically, this step is enough for light smudges and everyday dust.

    3. Removing Stubborn Smudges or Oil

    • Mix one drop of mild dish soap with a cup of distilled water.
    • Dampen (do not soak) a corner of your microfiber cloth.
    • Wipe gently, using small circular motions on stuck spots.
    • Wipe again with a dry side of the cloth to remove any moisture or streaks.

    Over-wetting the cloth risks drips. Try to keep the cloth barely damp for best results.

    4. Avoiding Moisture Intrusion

    Directly spraying liquids onto the screen sometimes causes permanent damage. Moisture can seep through screen seams and affect internal circuits.

    Instead, always apply cleaning solution to the cloth first. This prevents liquid from migrating where it shouldn’t.

    Maintaining Cleanliness Between Deep Cleans

    Frequent touch means fingerprints add up over time. Some basic habits minimize buildup and keep displays clearer longer.

    • Wash hands before adjusting settings whenever possible.
    • Use voice control apps (like the official Google Home or Ecobee apps) to reduce physical contact.
    • Install thermostats away from kitchen or high-traffic entryways to limit grease and dirt exposure.

    Families with kids or pets may find weekly wipe-downs essential for screen clarity.

    Recommended Software and Features for Touchscreen Management

    Several smart thermostat brands offer app-based or sensor-based controls. These can limit the need for direct screen interaction.

    • Google Nest App: Allows remote adjustments from a phone or tablet.
    • Ecobee Mobile App: Offers full thermostat control and monitoring via Wi-Fi.
    • Honeywell Home App: Useful for setting schedules or temperature without touching the physical device.

    This reduces screen wear and decreases cleaning frequency.

    Comparing Cleaning Protocols: Glass vs. Plastic Screens

    Some smart thermostats use real glass displays, while others rely on polycarbonate or acrylic. Each material benefits from a slightly tailored cleaning method.

    • Glass screens tolerate more gentle moisture, but scratch easily from gritty cloths.
    • Plastic screens resist shattering but are more sensitive to chemical cleaners and heat.
    • Microfiber remains the best universal choice for both surfaces.

    If unsure, consult the manufacturer’s manual for your exact model. Brand-specific care is sometimes advised for warranty protection.

    Troubleshooting: When Cleaning Doesn’t Solve Display Problems

    Occasionally, a screen resists cleaning or reveals deeper problems. Blotchy colors, lingering streaks, and unresponsive touch controls signal potential hardware issues.

    • Persistent fogginess or streaking might mean internal condensation. Contact support for help.
    • A scratched or deeply pitted display could require professional repair or replacement.
    • Non-responsive screens after cleaning suggest possible moisture ingress, not just dirt.

    Users often wonder if touchscreen-safe films or protectors might help. Some brands sell these as accessories to prevent future scratches. Only use accessories verified by your thermostat manufacturer.

    Conclusion: Protecting Your Smart Thermostat Investment

    Regular, gentle cleaning keeps smart thermostat touchscreens performing at their best. Using safe materials, like a microfiber cloth and distilled water, protects coatings and sensors.

    Homeowners who combine smart app use with careful upkeep see fewer issues with their displays. Screen protectors, when verified for your model, add another layer of security.

    Paying close attention to cleaning habits preserves screen clarity and touch sensitivity for years. In most cases, these practical methods support the efficient, long-term use of your smart home devices.