Category: Everyday Protection & Automation

  • Easy Ways to Childproof Low-Sitting Smart Home Technology

    Easy Ways to Childproof Low-Sitting Smart Home Technology

    Smart home technology brings comfort, but low-sitting devices often catch kids’ curiosity. Parents and caregivers can take focused measures to keep little hands safe, avoid accidents, and maintain optimal device performance.

    Why Smart Devices at Kid-Level Need Special Attention?

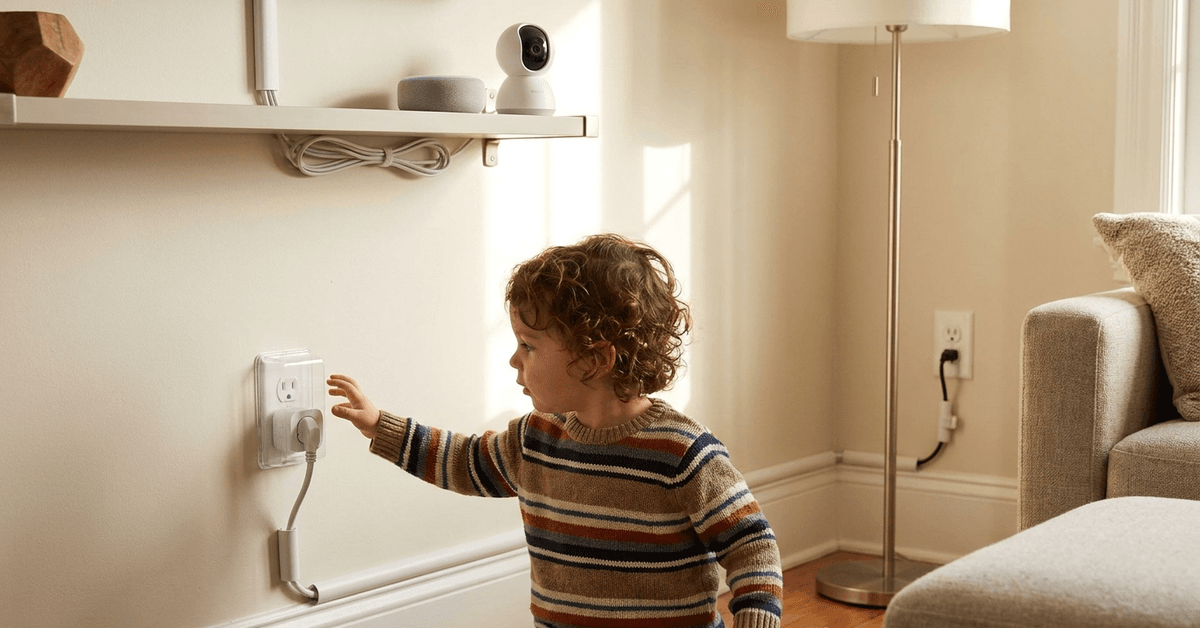
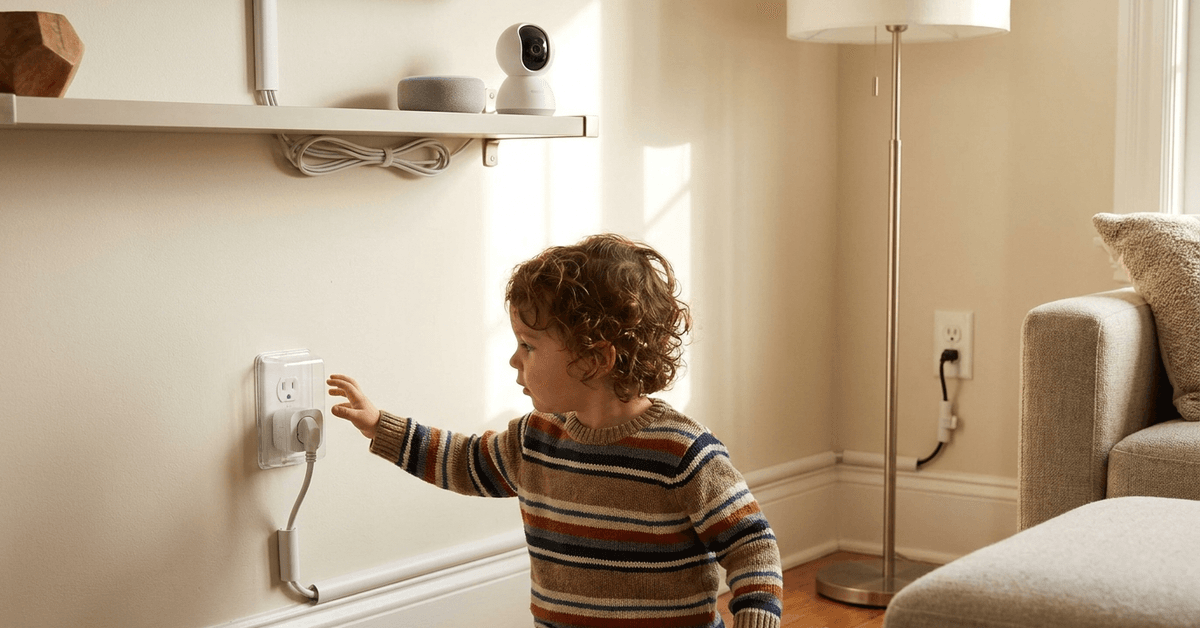
    Low mounts put smart hubs, speakers, and plugs within easy reach for babies and toddlers. Exploring children may unplug, drop, or even chew on these devices. Simple habits can prevent bigger risks.

    Common Low-Sitting Smart Devices and Their Risks

    • Smart Plugs can cause tripping or electric risk if tampered with.
    • Voice assistants, like Google Nest Mini, draw kids with lights and buttons.
    • Security cameras and indoor sensors may be pulled down or blocked.
    • Floor lamps with smart bulbs can topple over if used for balance.

    Physical Barriers: Block, Box, or Cover

    Outlet Covers and Smart Plug Shields

    Silicone outlet covers are a simple way to cover unused sockets. Some brands sell smart plug covers designed for childproofing. These box in both the plug and the device connection.
    Easy Ways to Childproof Low-Sitting Smart Home Technology

    Most covers install without tools and allow plugs to remain connected. They aid in maintaining power and prevent unplugging.

    Cable Management Tunnels

    Cable covers hide cords running along floors or walls. These simple plastic tunnels keep charging cables and power bricks away from a child’s reach.

    Many cable tunnels use double-sided tape, so holes aren’t needed for installation. Shortening the length of exposed cord is also effective.

    Repositioning Devices Out of Reach

    When possible, move smart speakers or hubs higher up. Floating shelves or wall mounts can lift devices above grab height.

    Easy Ways to Childproof Low-Sitting Smart Home Technology
    • Choose wall anchors tested for the device’s weight.
    • Keep cords tidy and secured along the wall.
    • Avoid permanent mounting if you might need to relocate later.

    Adjust Device Settings for Safety

    Locking Smart Plug Controls

    Most major brands provide child lock or “away” modes inside their apps. This disables manual buttons while leaving smart control from your phone active.

    • In the Kasa Smart or TP-Link app, the child lock option is under device settings.
    • Wemo users can use “physical button lockout” in advanced settings.

    Restricting Voice Command Access

    Amazon Echo and Google Nest allow restriction of certain commands. Alexa has a “require voice code” setting that keeps shopping or smart home commands safe from play.

    On Google Assistant, set up Voice Match so device access works only for registered users.

    App-Based Parental Controls

    Dedicated apps or built-in routines help monitor usage and device times. Google Family Link enables app-level controls, location alerts, and time restrictions for smart devices connected to a child’s account.

    • Set downtime so devices can’t be used during naps or at night.
    • Create safe zones by limiting device use to certain rooms.
    • Block new device pairings from unknown accounts.

    Teaching Safe Habits to Children

    Sometimes, education is the best safeguard. Simple reminders about what is “ok to touch” versus “for grownups only” help build awareness. Revisit these lessons often, especially as children get older.

    Visual cues, like color-coded stickers or tape, can mark devices as off-limits. Many parents say kids understand these reminders surprisingly well.

    Recommended Third-Party Tools for Added Security

    • Enviro Safety’s Plug Lock Box: Rugged, tamper-resistant design fits larger plugs.
    • Safety 1st’s Side-by-Side Cord Shortener: Prevents long cords from looping or getting tangled.
    • KIDDE’s Cord Management Kit: Shields and guides cables behind furniture.

    Maintaining Device Performance While Childproofing

    Check Heat Dissipation

    Ensure that enclosures or plug covers are ventilated. Some power adapters get warm. Overheating is rare, but it’s wise to leave openings for airflow.

    Test Signal Strength

    Moving devices or boxing them in may affect Wi-Fi or Zigbee signals. Use your smart hub’s diagnostics to confirm signal quality after relocating or covering devices.

    Maintenance: Regular Safety Checks

    Monthly check-ups help catch frayed cords, loose plugs, or cracked covers. Replace components as needed and keep app firmware updated for the latest safety features.

    Conclusion: Balancing Safety and Technology at Home

    Keeping smart home tech both accessible and child-safe is a constant effort. Each family’s space and needs will be a bit different. Simple physical barriers, well-chosen app settings, and open conversations foster a safer home environment.

    Taking an active role in childproofing ensures that convenience and safety exist side by side. Smart technology shouldn’t mean added worry. With mindful habits, devices can serve the entire household—without compromise.
  • How to Automate Your Lights to Make It Look Like Someone Is Home

    How to Automate Your Lights to Make It Look Like Someone Is Home

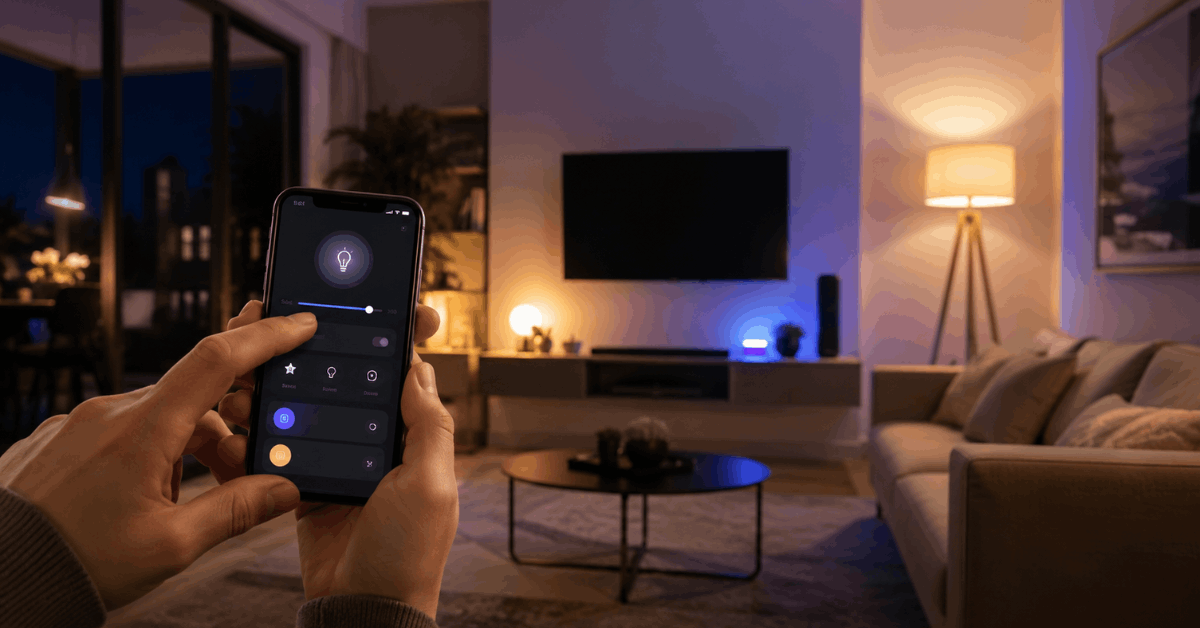
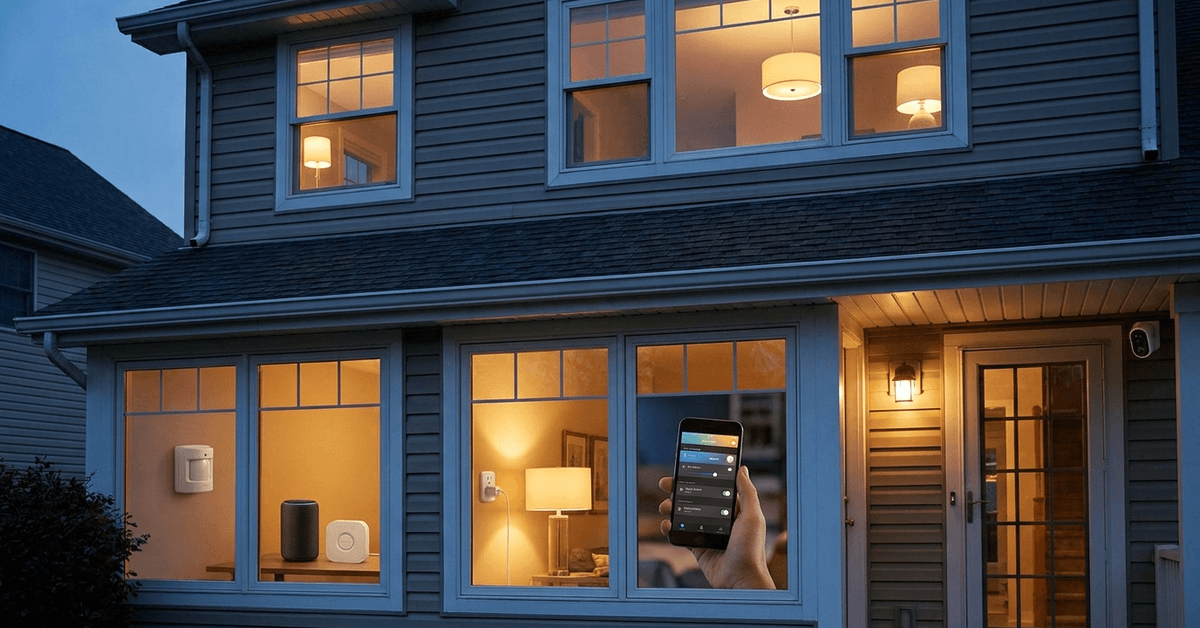
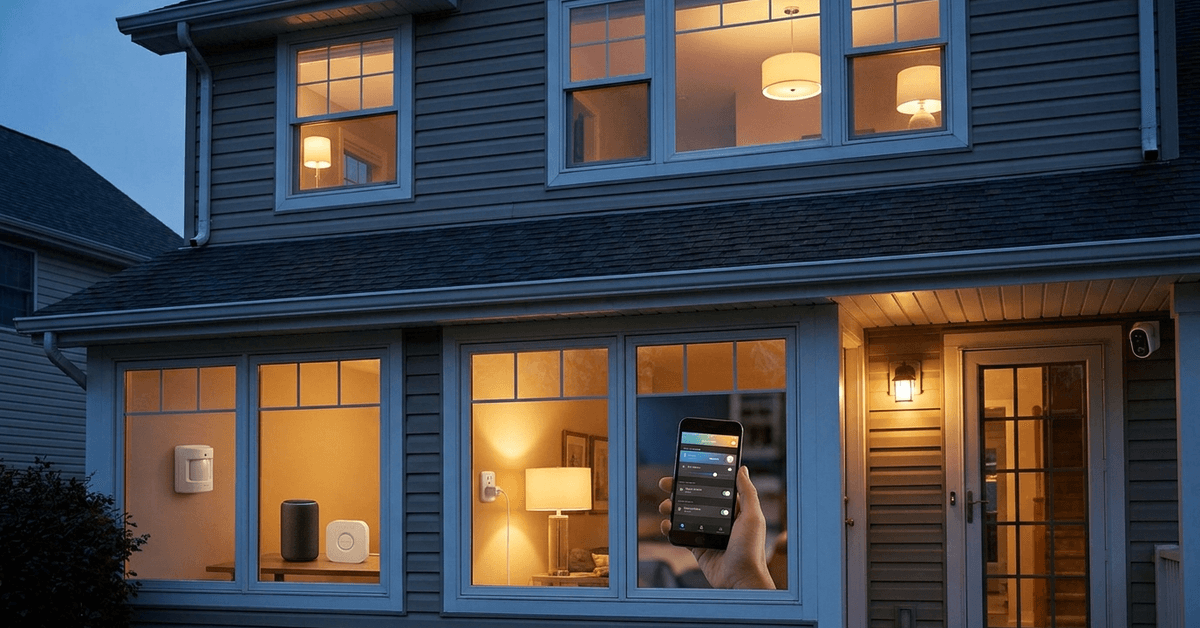
    Securing a home often starts with the simplest details, such as lighting. When a house looks occupied, it often deters unwanted visitors.

    This guide is designed for homeowners and renters interested in practical, tech-driven solutions. The key benefit is peace of mind using smart light automation to mimic the effect of someone always being present.

    Why Smart Lighting Automation Matters for Home Security?

    Automated lights are one of the most effective visual deterrents for burglars. Most intruders seek easy targets.

    How to Automate Your Lights to Make It Look Like Someone Is Home

    Homes that appear occupied are statistically less likely to be targeted. Strategic lighting patterns can create this impression even when nobody is inside.

    Choosing the Right Smart Light Technology

    Modern smart lighting offers several protocols. Each has benefits depending on your needs.

    Wi-Fi-Based Smart Bulbs

    Wi-Fi bulbs are easy to install and don’t require extra hubs. Popular brands include Philips Hue and LIFX.

    These bulbs connect directly to your router and can be controlled from anywhere with an app.

    Zigbee and Z-Wave Systems

    Zigbee and Z-Wave bulbs need a compatible smart hub. These systems are often used for more extensive or integrated smart home setups.

    Reliable brands include Sengled (Zigbee) and Aeotec (Z-Wave).

    Smart Plug Adapters for Regular Lamps

    Smart plugs such as TP-Link Kasa let you automate traditional lamps without replacing bulbs.

    Plugs work with table lamps or floor lamps, adding flexibility to any room, even if bulbs are not smart enabled.

    Apps and Platforms for Reliable Light Scheduling

    Setup requires the right app to handle scheduling with realistic patterns. The most reliable platforms often offer advanced features like variable timing or occupancy simulation.

    How to Automate Your Lights to Make It Look Like Someone Is Home

    Philips Hue App

    The Hue app features customized routines. It includes “Randomize” options for varied timings each evening.

    Compatible only with Hue bulbs and bridges but remains a leader in natural light automation.

    Alexa and Google Home

    Amazon Alexa and Google Home apps allow scene creation and automation. Both platforms integrate many smart light brands.

    Alexa’s “Away Lighting” and Google’s “Home & Away Routines” offer built-in presence mimicking.

    IFTTT (If This Then That)

    IFTTT adds flexibility for those using different brand devices. It allows the creation of cross-device automations.

    Triggers can be based on time, location, or other smart device statuses for more dynamic schedules.

    How to Set Up Automated Lighting Step-by-Step?

    1. Planning Your Lighting Layout

    • Identify which rooms should look occupied (living rooms, entryways, and upstairs windows are typical focal points).
    • Consider varying which rooms are lit on different days or times for natural effect.

    2. Installing Smart Bulbs or Plugs

    • Screw in smart bulbs or connect smart plugs to selected lamps.
    • Connect each device to your Wi-Fi or the designated hub, following the specific manufacturer’s onboarding instructions.

    3. App Configuration and Account Linking

    • Download the brand’s primary app (such as Philips Hue or Kasa Smart).
    • Register the devices and ensure they appear in your app’s dashboard.
    • If using a hub, make sure it is paired and online before proceeding.

    4. Setting Schedules and Routines

    • Create daily routines with different on/off times for each lamp.
    • Use “Randomize” or “Vacation Mode” features where available to add timing unpredictability.
    • For more advanced scenarios, consider linking routines to sunrise and sunset times.

    5. Adding Presence Simulation Features

    • Some systems label this function as “Presence Simulation,” “Away Mode,” or “Randomize Lights.”
    • Enable these features so the system will vary operation patterns automatically.

    Tips for Making Automation Appear Natural

    Vary Timing Patterns

    Lights turning on and off at the same times every day may look suspicious. Most homeowners find that setting slightly different schedules for weekdays and weekends looks more realistic.

    Alternate Between Rooms

    Occupancy simulation works best when several lights are programmed in sequence. For example, the living room could light up around dusk, then switch to a bedroom later.

    Combine Lighting With Other Smart Devices

    Integrating other smart gadgets, like motorized blinds or a TV simulator, enhances authenticity. Sometimes, soft background noise controlled by smart speakers adds another security layer.

    Noteworthy Apps and Tools for Easy Management

    • Philips Hue – For users with Hue bulbs and bridges
    • LIFX App – Offers similar features for LIFX Wi-Fi bulbs
    • TP-Link Kasa – Excellent for smart plug control
    • Amazon Alexa / Google Home – For multi-brand device integration and voice-control routines
    • Apple HomeKit – Home app for Apple ecosystem users
    • IFTTT – Powerful triggers to mix devices across multiple brands

    Legal and Safety Considerations

    Device Security

    Smart devices should always be updated with the latest firmware to avoid vulnerabilities. Enabling two-factor authentication for cloud apps can protect user accounts from unauthorized access.

    Local Electrical Codes

    Some homes may have wiring or sockets that require professional installation for new devices. It’s a good idea to ensure all smart hardware is UL-certified or equivalent, and never overload power outlets.

    User Privacy

    Most apps use cloud services to offer remote access. Checking privacy settings is recommended, especially when sharing access with family members or housemates.

    Powerful Ways to Expand Your Smart Security Setup

    • Add motion sensors to pair with lights for extra realism.
    • Sync lights with door sensors to simulate real-life behavior.
    • Explore home monitoring with smart cameras for layered defense.

    Conclusion

    Making your home look lived in with automated lighting often comes down to smart planning and leveraging the right technology. Reliable routines, coupled with selective device integration, dramatically increase the feeling of security.

    Most people find that investing in a few well-placed bulbs or plugs is a small step with meaningful peace-of-mind returns. With thoughtful setup and regular app checks, homeowners can maintain the ‘always home’ effect with minimal effort.

  • The Right Way to Clean Smart Fingerprint Scanners on Handles

    The Right Way to Clean Smart Fingerprint Scanners on Handles

    Smart fingerprint scanners on door handles are an increasingly common security feature in smart homes. 

    Over time, daily use, oils, and dust can reduce recognition accuracy. For homeowners relying on seamless entry, properly maintaining these devices ensures safety and reliability.

    Why Clean Fingerprint Scanners on Handles?

    Residue buildup is one of the main reasons for scanner malfunction. Sensors smudged by sweat, lotions, or grime may reject valid prints.

    Small scratches can result from improper cleaning or rough materials. Scratching compromises the sensor’s sensitivity.

    The Right Way to Clean Smart Fingerprint Scanners on Handles

    Frequent errors in recognition tend to frustrate users and might result in a false sense of insecurity at home. Regular cleaning keeps performance steady.

    Understanding the Technology Behind Fingerprint Scanners

    Handle-mounted scanners typically use capacitive or optical sensor technology. Capacitive devices detect the pattern of ridges and valleys in the finger by measuring small changes in electrical current. Optical sensors capture a digital image of your fingerprint.

    Each type has unique sensitivities. Capacitive sensors can be particularly affected by moisture or residue while optical sensors are more susceptible to smudged or dirty surfaces.

    Essential Supplies for Safe Cleaning

    Using the correct materials prevents unintentional damage. Many homeowners attempt to use strong chemicals or rough sponges, but these often make issues worse.

    The Right Way to Clean Smart Fingerprint Scanners on Handles
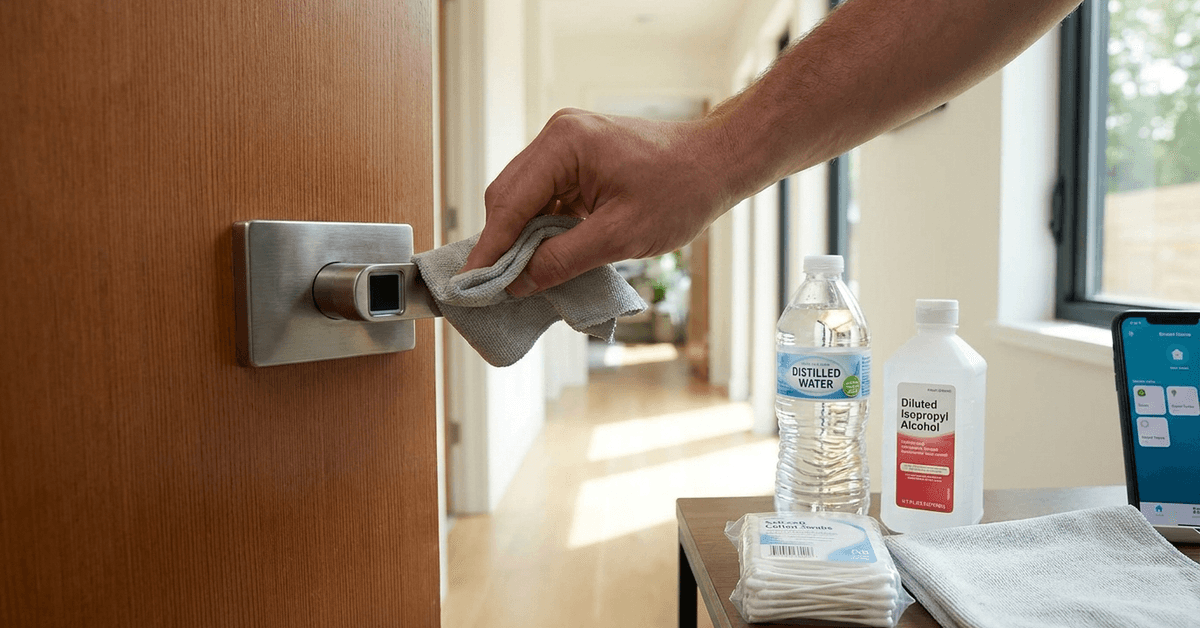
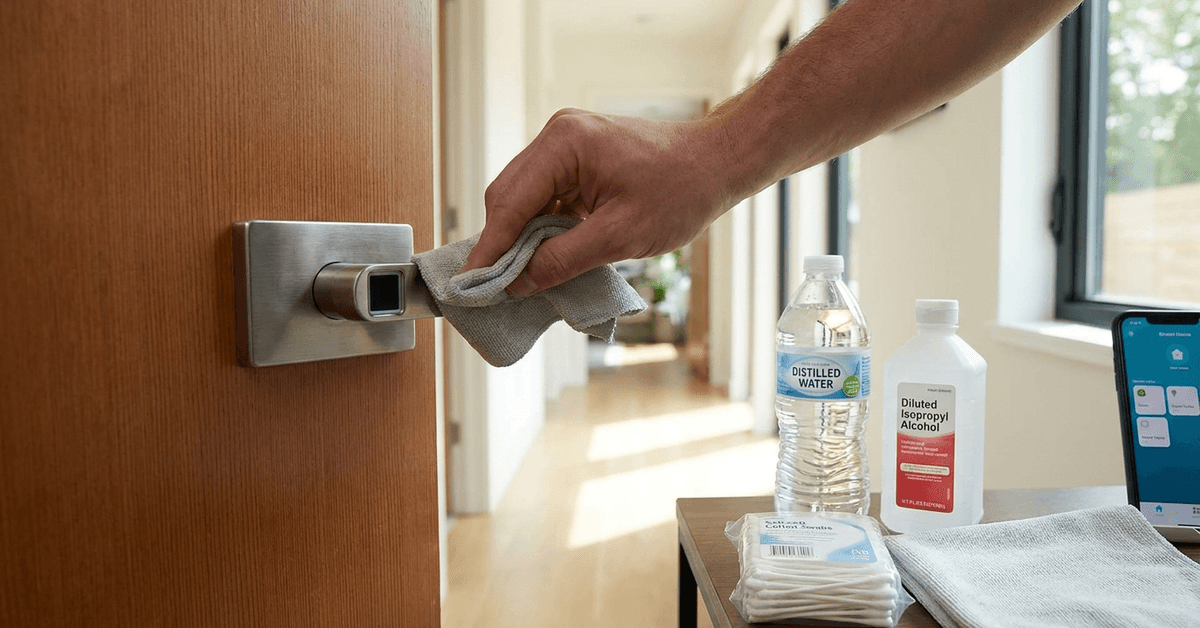
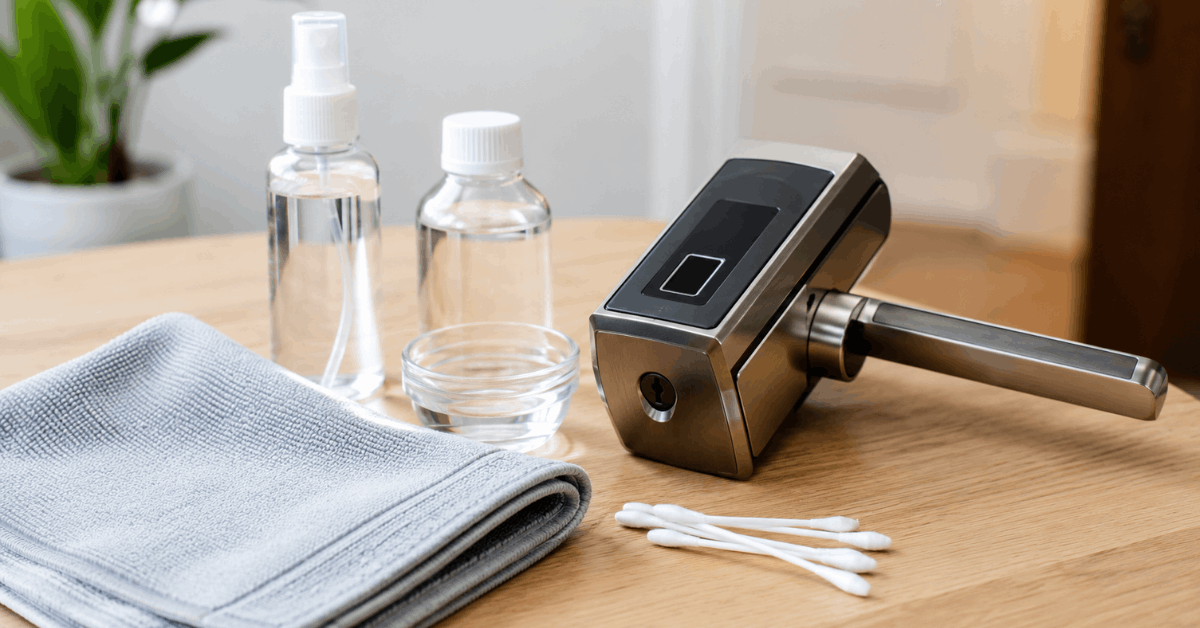
    • Microfiber cloths (lint-free and non-abrasive)
    • Distilled water
    • Isopropyl alcohol (at least 70 percent, but never undiluted on the scanner)
    • Soft cotton swabs

    Commercially available screen cleaning solutions designed for mobile devices are usually safe, but only if the scanner manufacturer approves their use.

    Step-by-Step Guide to Cleaning Fingerprint Scanners on Handles

    Preparation: Disable the Device

    Disabling the smart lock or placing it in maintenance mode (if supported via app) can prevent accidental scans or alarm triggers during cleaning.

    Consulting the manufacturer’s user manual or mobile app settings is often the best approach for safely disabling the scanner before cleaning.

    Dust and Surface Debris Removal

    • Gently wipe the surface using a clean microfiber cloth .
    • Move in circular motions with minimal pressure.
    • Avoid pushing dust particles into the edge of the sensor frame.

    Addressing Stubborn Oils and Smudges

    • Dampen one corner of the microfiber cloth with a small amount of distilled water or a compatible screen cleaning spray.
    • Never apply liquid directly to the scanner.
    • Wipe gently, allowing the cloth to lift oil residue without scrubbing.
    • Use a separate, dry part of the cloth to buff away streaks.

    Disinfecting Without Damage

    • Mix a solution of roughly 30 percent isopropyl alcohol to 70 percent water.
    • Moisten a cotton swab with this mix and squeeze out excess liquid.
    • Carefully dab the sensor surface, making sure not to pool any liquid in the seams around the scanner.
    • Wait at least 2 minutes for any moisture to evaporate before reactivating the scanner.

    Avoiding Cleaning Mistakes

    • Paper towels can scratch sensitive coatings.
    • Household adhesives or tape often leave stubborn residue behind.
    • Never use compressed air cans directly, as propellant can leave residue.
    • Ignore urban myths like toothpaste or abrasive pastes—they erode coatings rapidly.

    Recommended Cleaning Frequency

    For handles in high-traffic areas (like main entrances), cleaning once per week is a dependable rhythm. Less frequently used doors can be wiped down every two weeks.

    External handles exposed to outdoor debris (rain, pollution) require a little more vigilance. After storms or if fingerprints seem consistently unrecognized, a quick cleaning check can prevent access issues.

    Environmental Factors That Impact Scanners

    Extreme temperatures and humidity tend to affect sensor reliability . In some climates, condensation forms and causes misreads.

    Outdoor setups sometimes face pollen, insect residue, or dried water spots. These subtle contaminants are easily missed but can interfere with day-to-day usage.

    Protective Coatings and Long-Term Care

    Using Screen Protectors

    Some brands offer ultra-thin, transparent covers that shield the scanner. Installing these helps protect against minor scratches.

    These covers (such as those from Mobigear, or Spigen) often adhere via static, leaving no adhesive marks. A simple install extends scanner life.

    Regular Software Diagnostics

    Many smart handle systems include diagnostic tools in their apps. Nuki and eufy Smart Lock apps, for instance, run quick self-checks for sensor health.

    Scanning stored fingerprints occasionally helps evaluate accuracy after cleaning. If performance does not improve, deeper technical service may be required.

    Recognizing When Professional Servicing Is Needed

    After multiple cleaning attempts, scanners that continue to struggle may have internal component issues or deeper scratches.

    • Contacting the device manufacturer’s customer support often provides tailored troubleshooting steps.
    • Professional smart lock technicians can clean internal sensor components using tools not available to consumers.

    Ignoring persistent issues tends to make home locking less secure over time.

    Safe Apps and Digital Support for Smart Handle Maintenance

    • The Yale Access App offers maintenance alerts and cleaning reminders.
    • Google Home integrates with compatible smart handles to track health notifications.
    • Manufacturer forums (like the August or Samsung Smart Lock communities) provide tips and real-world user stories about effective cleaning.

    Many brands host instructional videos on their support websites. Using official resources reduces the risk of voiding warranties.

    Tips for Maintaining Accurate Scans After Cleaning

    • Register each user’s fingerprint multiple times in slightly different positions.
    • Encourage all family members or authorized users to keep their fingers clean before using the scanner.
    • If someone is experiencing frequent scan failures, try rescanning their print after cleaning both the finger and the device.
    • Monitor analytics in the handle app (if available) to identify unrecognized attempts, which might indicate surface contaminant issues.

    Internal Linking Opportunities for Enhanced User Engagement

    • /best-fingerprint-smart-locks-for-homes
    • /troubleshooting-smart-lock-not-working
    • /how-to-integrate-fingerprint-locks-with-smart-hubs
    • /essential-smart-home-cleaning-tools

    Visual Suggestions

    • Step-by-step illustration or infographic showing each cleaning stage
    • Side-by-side table comparing cleaning materials (safe versus unsafe)
    • Photo example of a micro-scratched scanner surface versus a pristine one
    • Screenshot walkthrough of cleaning reminder in a manufacturer’s app

    Conclusion

    Smart fingerprint scanners on handles require careful maintenance to support consistent, secure access. Cleaning with soft cloths and safe cleaning solutions helps preserve sensor responsiveness. Environmental awareness, regular gentle care, and use of supportive apps ensure the device’s longevity. When in doubt, referring to the manufacturer’s instructions and seeking professional help protects both your investment and your family’s safety over time.

  • Tips for Positioning Carbon Monoxide Detectors Around the House

    Tips for Positioning Carbon Monoxide Detectors Around the House

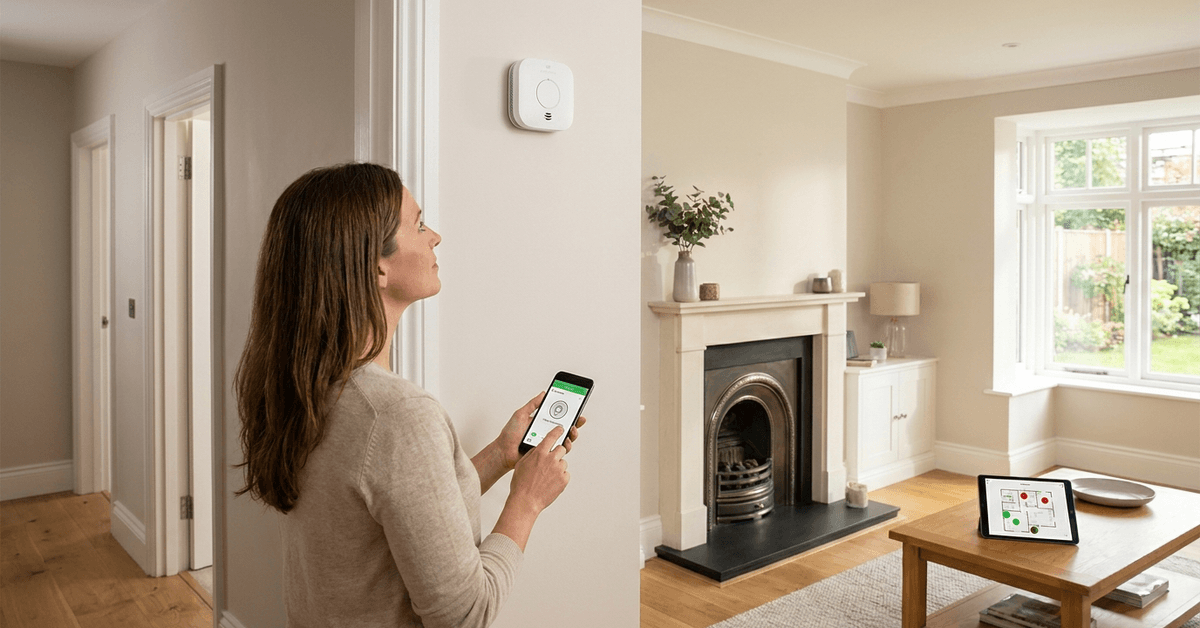
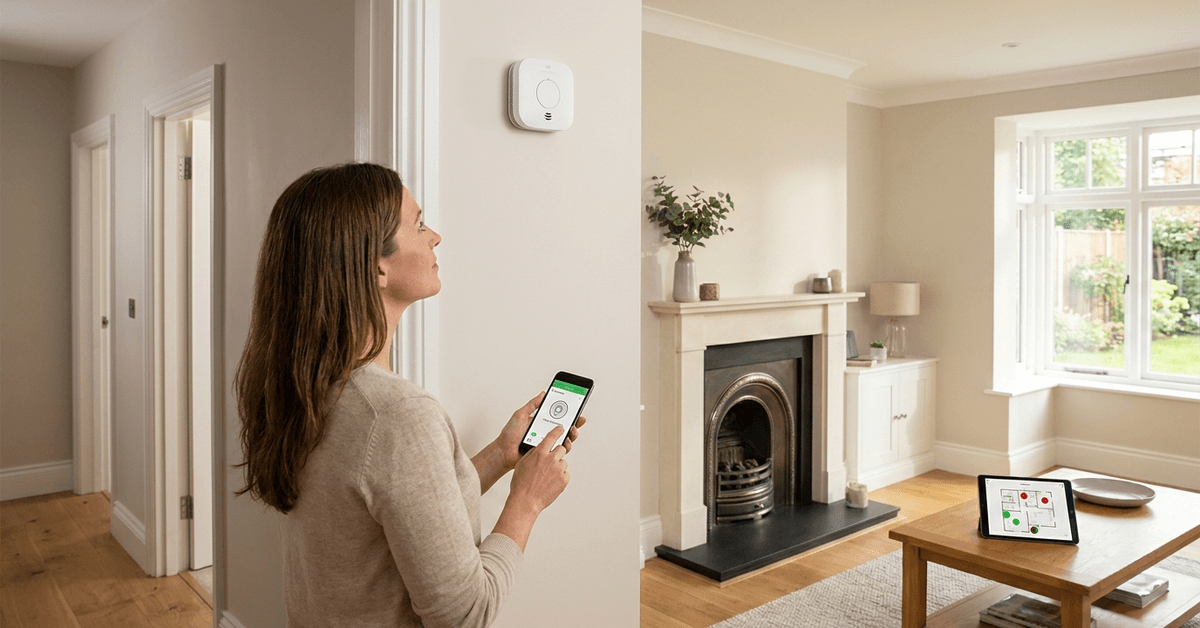
    Carbon monoxide is an invisible threat. For homeowners serious about safety, detector placement plays a crucial role. This guide covers tested tips for getting it right in every room, helping reduce risk in a connected, modern home.

    Why Carbon Monoxide Detector Placement Matters?

    Proper positioning of detectors can mean the difference between timely alerts and dangerous delays. Not all rooms or levels in a house face the same risks. That makes placement planning especially important for multi-story, tech-enabled homes.

    Even if your home features smart automation, relying on sensors alone is risky. The location of each device directly affects how fast you’ll get notified in an emergency.

    Tips for Positioning Carbon Monoxide Detectors Around the House

    Main Risks of Incorrect Installation

    Poorly positioned detectors may fail to alert the household in time. Some spaces produce higher carbon monoxide levels. Others restrict air flow, causing dangerous pockets to become undetected.

    Misreading installation protocols has led to preventable incidents. A surprising number of reported cases result from units placed in the wrong location or orientation.

    Where to Place Carbon Monoxide Detectors: General Principles

    • Each Floor Coverage: Every story should have at least one detector, including the basement and attic if they are finished spaces.
    • Near All Sleeping Areas: Position a detector within 15 to 20 feet of bedrooms. CO poisoning during sleep is especially hazardous since symptoms can go unnoticed.
    • Close to Fuel-Burning Appliances: Install a detector within about 10 feet of boilers, fireplaces, or attached garages for fastest alerting.
    • Avoiding Dead Air Spaces: Corners and tight cavities near ceilings or floors can lead to inaccurate readings.

    Open air flow is preferable, with detectors placed at breathing height when possible. If the device is not combo smoke/CO, wall or ceiling placement should follow the instruction manual closely.

    Room-by-Room Detector Positioning Tips

    Living Rooms and Family Spaces

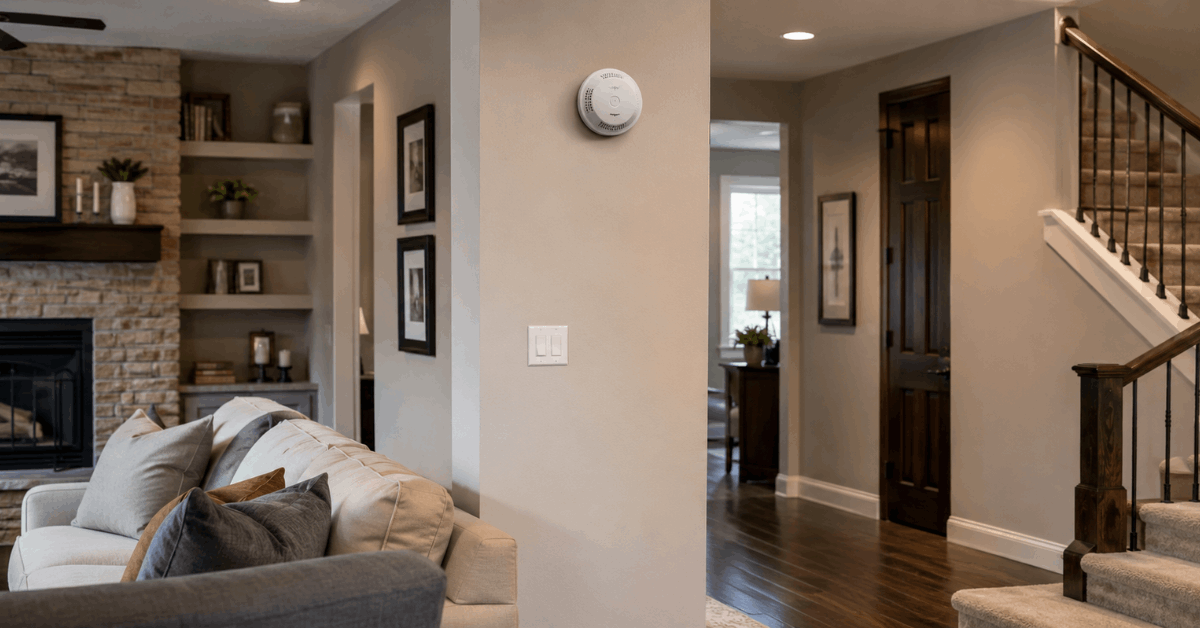
    A great option is to mount detectors at least 5 feet above the floor, not right over a fireplace. Placing units on the wall often catches rising gas. Avoid windows to reduce false readings from drafts.

    Tips for Positioning Carbon Monoxide Detectors Around the House

    Kitchens

    Since natural cooking can release small amounts of gases, detectors close to stoves sometimes trigger nuisance alarms. Position at least 10 feet from ovens or direct cooking zones. Never put a detector inside a pantry or directly behind kitchen doors.

    Bedrooms

    Placing detectors just outside or inside bedroom doors is ideal. Some homeowners prefer inside for peace of mind, although hall placement covers multiple rooms efficiently in smaller homes.

    Basements and Utility Rooms

    If the boiler, furnace, or water heater is in the basement, the most effective position is directly on the ceiling or high on the stairway wall leading up to the rest of the house. This ensures alerts move up with rising CO.

    Garages

    Homes with attached garages see higher CO risk from running vehicles. Detectors outside the garage door leading into the house often catch leaks quickly. Placing a unit directly in the garage is not generally necessary unless the garage is heated or frequently occupied.

    Height: Wall vs. Ceiling Mounting Advice

    The best height for mounting is usually at eye-level, but some manufacturers specify ceiling installation. If ceiling mounting is required, place the unit at least 12 inches from the nearest wall.

    When mounting on walls, a position 4–6 feet above the floor is usually effective. This aligns with normal breathing zones and avoids low buildup, which is rare for CO.

    Smart Home Integration: Pairing with Security Systems

    Modern carbon monoxide detectors, like Google Nest Protect, support wireless alerts and mobile app integration. Connecting detectors to smart hubs allows immediate notifications to every occupant’s phone.

    Some smart systems support linking with platforms like Samsung SmartThings or Apple HomeKit. A connected setup means even small leaks will trigger both sirens and mobile alerts.

    For full coverage, homeowners may want to add sensors to both main living areas and near mechanical rooms. Multi-sensor networks can be managed with apps specific to each brand.

    Tech Protocols and Device Compatibility

    Not every model uses the same network. The most common standards are:

    • Zigbee or Z-Wave Detectors: These mesh networks ensure wide coverage even in large homes. Compatible with many smart hubs.
    • Wi-Fi Enabled Detectors: Units like Nest Protect connect directly to home Wi-Fi, enabling in-app status checks and remote silencing.
    • Bluetooth Devices: Less common for fixed installations, but useful for mobile monitoring in small apartments or during travel.

    Sensor compatibility is worth verifying before setup. Not all brands pair seamlessly with existing smart home equipment, so reviewing device lists and software version support matters.

    Installation Steps: Getting It Right the First Time

    1. Read the manufacturer’s instructions in full and check for room-specific guidance.
    2. Confirm the exact mounting height (ceiling or wall) for each area. If possible, use included mounting kits for stability.
    3. Place the detector outside of HVAC vents, fans, and direct sunlight. High humidity or blowing air can interfere with readings.
    4. Test device operation after mounting by using the test button. Repeat monthly or as instructed.
    5. Link devices with your home’s wireless network or automation hub before finalizing physical location.

    Regular testing increases reliability. Homeowners sometimes forget to test after large software or firmware updates, making this a good habit to maintain.

    Ongoing Maintenance for Smart Detectors

    • Replace batteries every 6 to 12 months, even where ‘long-life’ promises exist.
    • Update device firmware via official apps to fix glitches or improve sensitivity.
    • Vacuum the detector exterior gently every few months to reduce dust accumulation.
    • Check carbon monoxide readouts if your model gives digital displays. Persistent low readings can indicate sensor issues or other air quality irregularities.

    What to Avoid When Installing Carbon Monoxide Detectors?

    • Never put detectors in direct sunlight or high humidity areas like above showers. Moisture and heat can cause false alarms or degrade sensors.
    • Avoid installation behind curtains, doors, or heavily insulated surfaces. Blocked airflow reduces the detector’s ability to sense subtle changes in gas concentration.
    • Avoid placing units in crawl spaces or unconditioned attics unless specified as rated for such environments.

    Legal Guidelines and Local Codes

    Many cities require one carbon monoxide detector per floor. Detectors are mandated by building codes in new construction and renovations in most regions. Check with local authorities or code enforcement offices for up-to-date placement rules.

    Some insurance providers require documented installation at all recommended points. Not meeting placement standards may affect claims after an incident.

    Recommended Apps for Monitoring and Configuration

    • Google Home app: For integrating Nest Protect, setup, mobile alarms, and device health checks.
    • Ring app: Supports compatible CO detectors linked with Ring security systems, offering combined alarm notifications and emergency contacts.
    • SmartThings: For advanced configuration and automation with Zigbee or Z-Wave detectors, including scenes and routines for broader alerts.

    Routine status checks via these apps help maintain both digital records and peace of mind, especially for tech-forward homes.

    Conclusion

    Effective carbon monoxide detector placement protects not just property but the lives within it. Each home—traditional or smart—faces unique risk points, so thoughtful positioning is the single most critical step for safety. 

    Connected detectors and routine maintenance bring confidence, especially as homes become more automated and complex. 

    Staying proactive with tech updates, app integration, and code compliance will ensure you gain the full benefits of modern carbon monoxide protection. Positioning detectors correctly might seem like a small detail, but in a real emergency, it is what can make all the difference.

  • The Ultimate Home Maintenance Checklist for Seasonal Tech Updates

    The Ultimate Home Maintenance Checklist for Seasonal Tech Updates

    Staying ahead of the seasons helps homeowners maintain a comfortable, safe, and efficient home. 

    Each change in weather brings new requirements for smart devices, security protocols, and connected gadgets. This guide covers everything needed for seasonal home tech updates.

    Why Seasonal Tech Updates Matter?

    Many smart home devices thrive on regular care. Overlooking maintenance may shorten device lifespan or cause unexpected malfunctions.

    Small adjustments, timed seasonally, protect against security vulnerabilities. A neglected firmware update, for example, can leave the door open to threats.

    The Ultimate Home Maintenance Checklist for Seasonal Tech Updates

    Spring: Refresh and Reconnect

    Spring cleaning should include technology. Devices often need network refreshes and physical attention after winter.

    Check Network Device Health

    • Restart or power cycle the Wi-Fi router and mesh points.
    • Inspect signal strength in key rooms. Tools like NetSpot or WiFi Analyzer may help map coverage.
    • Remove dust from ventilation points on routers, hubs, and extenders.

    Update Smart Home Hubs & Apps

    • Open home automation apps (Home Assistant, SmartThings, Apple Home).
    • Search for software updates and review changelogs before applying.
    • Reconnect any devices that lost pairing during power cuts.

    Test Battery Devices

    • Replace batteries in smart door locks, window sensors, and thermostats. Brands like Duracell or Energizer offer reliable replacements.
    • Review device dashboards for low battery warnings.

    Outdoor Device Inspection

    • Examine outdoor cameras and motion sensors for winter debris.
    • A soft, damp cloth removes dirt from camera housings without damaging seals.
    • Check for incorrect alignment or loose mounting brackets.

    Summer: Optimize for Heat and Security

    Summer introduces higher temperatures and more outdoor activities. Homeowners might discover unexpected issues affecting performance or safety.

    The Ultimate Home Maintenance Checklist for Seasonal Tech Updates

    Smart HVAC System Calibration

    • Review climate control routines in apps like Nest or ecobee.
    • Update cooling schedules for higher efficiency.
    • Inspect thermostat placement to keep away from direct sunlight.

    Camera and Sensor Heat Checks

    • Verify that outdoor cameras (such as Ring or Arlo) are not overheating by feeling exterior casings during mid-day sun.
    • If needed, add shade or reposition cameras to prevent sun glare.

    Network Security Review

    • Update all network passwords. Mix uppercase, lowercase, numbers, and unique phrases.
    • Enable two-factor authentication on your router control panel if supported by brands like ASUS or TP-Link.
    • Audit connected devices for any that are unfamiliar and disconnect as needed.

    Voice Assistant Privacy Settings

    • Open privacy controls in Alexa, Google Home, or Apple HomePod apps.
    • Review voice recording logs and adjust permissions to only essential features.

    Fall: Prepare for Weather and Increased Usage

    Changing weather and the start of holiday season add strain to smart devices. Preparing now prevents trouble later on.

    Backup System Automations

    • Export automation routines in platforms like Home Assistant or SmartThings.
    • Store backups in secure, offline folders to prevent data loss during outages.
    • Check third-party integration status, particularly for services such as IFTTT or Philips Hue.

    Firmware and Software Review

    • Schedule a full scan for firmware updates on all major devices: security cameras, smart thermostats, alarm panels, and video doorbells.
    • Apply updates individually after reading any update notes.

    Physical Checks for Window and Door Sensors

    • Inspect for water intrusion around mounted sensors.
    • If adhesive is weakening, replace strips with brands like Command or 3M.
    • Test open-close notifications to confirm real-time alerts are working.

    Winter: Secure, Protect, and Conserve Energy

    Colder months limit outdoor access and put more pressure on heating, surveillance, and leak detection systems. Robust preparation here is key.

    Surveillance System Test

    • Review video camera feeds for lag or signal drop.
    • Check storage capacity in connected NVR/DVR units (e.g., Synology or Lorex).
    • Enable motion-triggered alerts for night hours.

    Smart Leak Detector Check

    • Manually trigger sensors from brands such as LeakSmart or Honeywell Home to confirm proper alerting.
    • Inspect under sinks, near hot water heaters, and in basement corners.

    Smart Light and Outlet Routine Adjustment

    • Update schedules for smart lighting (e.g., Philips Hue, LIFX).
    • Reduce run times during low-use hours to preserve energy.
    • Review any always-on outlets and unplug nonessential holiday devices.

    Home Security System Battery Check

    • Replace or recharge batteries for backup security sensors and alarm panels.
    • Test system sirens and panic buttons for audible clarity and speed.

    Annual Deep-Dive Checklist

    Beyond the seasons, an annual review ensures nothing critical is overlooked. Many problems are caught here before ever reaching crisis.

    • Inventory all smart devices by room and device type (use a digital spreadsheet for tracking).
    • Evaluate app permissions for every connected platform, focusing on administrator accounts.
    • Search for newly available device features and integrations. Sometimes, firmware updates include hidden upgrades worth exploring.
    • Wipe old logs and recordings from smart cameras, voice assistants, and security systems, where local data retention is not required.

    Platform Tools and Handy Apps

    Certain tools streamline the whole process, saving time and minimizing error.

    • Fing app scans your network for unknown or suspicious devices.
    • Home Assistant is ideal for custom backup routines and device auditing.
    • Apple Home’s HomeKit Secure Video allows rapid review and deletion of old video segments.

    Conclusion

    Consistent maintenance keeps a smart home ecosystem stable, efficient, and genuinely secure. Each season presents unique demands, but following a routine checklist prevents surprises and extends the life of valuable tech. 

    Homeowners who regularly update, inspect, and refresh their smart devices enjoy greater peace of mind. In practical terms, this approach also cuts long-term costs and makes troubleshooting much simpler. 

    In the fast-moving world of connected homes, discipline and planning are truly the keys to enjoying every benefit that modern smart technology brings.

  • How to Automate a Basement Dehumidifier Based on Weather Data

    How to Automate a Basement Dehumidifier Based on Weather Data

    Maintaining the right humidity level is crucial for any basement. High dampness can damage property and cause unhealthy mold.

    For homeowners wanting a set-and-forget system, automating a basement dehumidifier based on live weather conditions is a practical solution.

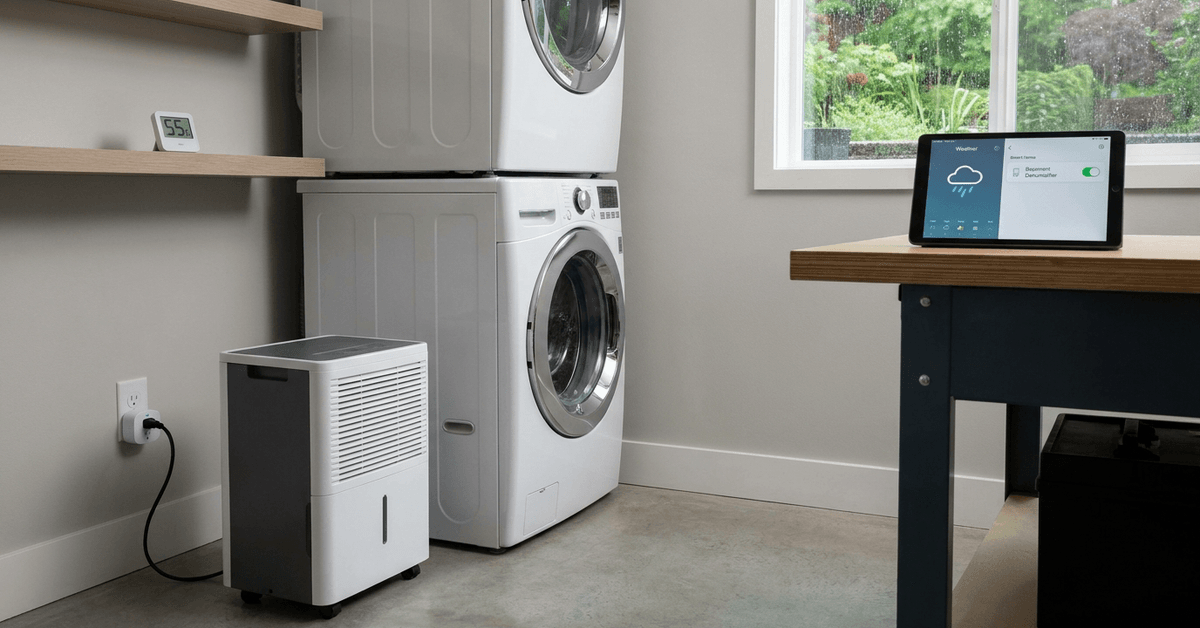
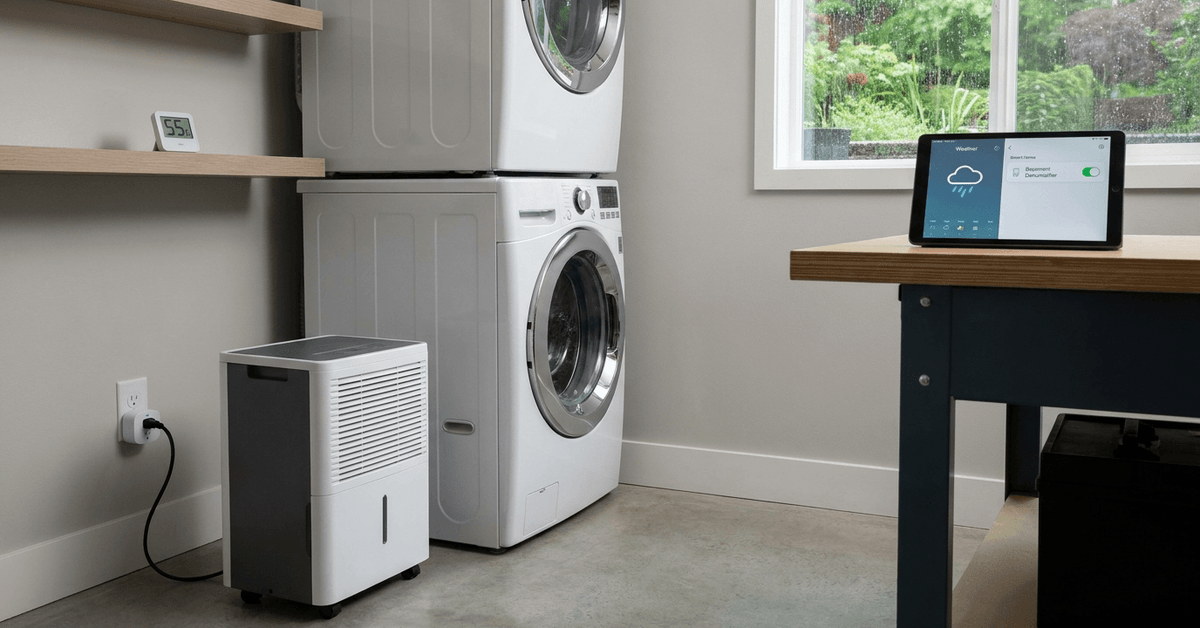
    This article offers a step-by-step breakdown for turning a regular dehumidifier into a smart, weather-responsive device. The process is easier than many expect.

    Image 1

    Why Automate Your Basement Dehumidifier?

    Humidity changes often happen before you even notice. External weather can directly affect your basement’s moisture.

    Automation means less manual checking and fewer surprises when summer storms or heavy rains spike humidity indoors.

    Consistent Air Quality

    Automating keeps conditions steady. You avoid drastic swings, which helps reduce risks of mold and chronic dampness.

    Energy and Cost Savings

    Many units run at full power needlessly. Turning on the dehumidifier only when necessary avoids wasted electricity and wear.

    Hands-Free Peace of Mind

    Once automated, you rarely need to monitor or adjust settings. The system does the thinking for you.

    Essential Components and Tools Needed

    Automating based on weather data requires a few specific items. Here’s what most enthusiasts use:

    • Smart Plug or Wi-Fi Outlet: Acts as a remote switch for your dehumidifier.
    • Indoor humidity sensor: Monitors real-time moisture in your basement.
    • Weather data integration tool (such as IFTTT, Home Assistant, or SmartThings): Links outside weather conditions to your smart plug.
    • Reliable home Wi-Fi network: Ensures consistent device communication.
    • Optional: Zigbee or Z-Wave hub for advanced automation and integration.

    Which Dehumidifiers Are Suitable?

    Almost any plug-in dehumidifier that works with a mechanical on/off switch will function. Digital-only models sometimes need extra configuration.

    When in doubt, checking if your unit resumes operation after a power loss helps determine compatibility.

    Step-by-Step: Automating with IFTTT and a Smart Plug

    One popular method uses IFTTT (If This Then That) paired with a smart plug. This cloud-based system links online weather feeds to physical devices.

    Create Accounts and Prep Devices

    • Sign up for free accounts on IFTTT and the smart plug’s app (such as Kasa, TP-Link, or Meross).
    • Install both apps on your phone.
    • Set up the smart plug on your home network and test manual control with your dehumidifier plugged in.

    Add a Weather Service to IFTTT

    • IFTTT features built-in integrations with popular weather APIs such as Weather Underground or OpenWeatherMap.
    • Connect your IFTTT account to one of these services by following prompts.

    Configure IFTTT Applets for Weather Triggers

    • Create a new applet beginning with a weather trigger (like “Current humidity rises above 70%” or “Rain is forecasted today”).
    • For the action, select “Turn on smart plug.”
    • Repeat for the reverse scenario—when dry weather returns, create another applet to turn the unit off.

    Test for Timing and Accuracy

    Set thresholds slightly below where problems usually start. Many find around 60-65% humidity is a safe upper limit for basements. Adjust as seasons change.

    Advanced Automation with Home Assistant

    For those wanting local control and deeper customization, Home Assistant is a popular open-source platform. It runs on a Raspberry Pi or any always-on PC.

    What Home Assistant Offers

    • Pulls in local and cloud weather data using integrations.
    • Supports Zigbee, Z-Wave, and Wi-Fi device automation through native add-ons.
    • Allows for multi-condition automations, like running the dehumidifier if both inside and outside humidity exceeds set points.

    Example Home Assistant Automation Flow

    1. Install Home Assistant and required add-ons (such as the Meteo-France or OpenWeather integration).
    2. Add the basement’s smart plug and humidity sensor as devices.
    3. Create automations using the visual editor: Set ‘if’ logic with weather and sensor readings, then an ‘action’ to activate the plug.
    4. Schedule checks as often as every few minutes for best responsiveness.

    Integrating With SmartThings or Google Home

    Commercial smart home hubs like SmartThings or Google Home also allow similar weather-based triggers.

    Almost all major plugs and many sensors are compatible with these systems. Custom routines often work through their respective apps.

    How SmartThings Helps

    • Detects both local weather and sensor input.
    • Can combine with other smart home routines (like HVAC or leak detection) for broader automation.

    Voice Assistant Tie-In

    Google Assistant routines let users run sequences based on weather, though advanced custom triggers may require third-party services.

    Important Safety and Maintenance Advice

    Even with automation, occasional manual checks are important for performance and safety. Filters collect dust quickly in basements.

    Backup systems are smart, especially in areas prone to outages. Battery-powered humidity sensors are an option for resilience.

    • Test your dehumidifier’s water reservoir or hose for clogs monthly.
    • Keep the sensor clear from vents or obstructions.
    • Avoid automating high-voltage or commercial-grade dehumidifiers unless specifically rated for smart outlets.

    Weather Data Sourcing Tips

    Online platforms like OpenWeatherMap offer reliable regional forecasts and real-time metrics, ideal for home automation.

    Some services update more frequently or allow tighter location pairing than others. Choosing a provider with up-to-the-minute readings is most effective for basements prone to quick swings.

    Conclusion

    Automating a basement dehumidifier by reacting to weather data is both practical and protective. The process provides peace of mind, helping avoid costly surprises tied to excess humidity.

    After setup, the comfort and preservation gains become clear over time. For anyone looking to add resilience to their home’s foundation, this is a reliable, field-tested upgrade well worth consideration.

  • The Beginner’s Guide to Automated Freeze Protection for Pipes

    The Beginner’s Guide to Automated Freeze Protection for Pipes

    Frozen pipes can create sudden, costly damage. Many smart home enthusiasts now look for automated freeze protection to stop this problem before it starts. Pipe bursts aren’t rare during cold snaps. 

    This guide is for homeowners seeking easy and effective smart tech solutions for pipe freeze prevention. Automated systems reduce manual work and provide peace of mind through real-time alerts and hands-off operation.

    Why automated freeze protection matters?

    Unprotected pipes are highly vulnerable in freezing temperatures. A single cold snap is sometimes all it takes for a pipe to burst. This can flood rooms and destroy property.

    Traditional insulation helps but isn’t perfect. Automated freeze protection adds a proactive layer. It often spots issues before they become critical. Many homeowners discover its value only after a close call or major repair bill.

    Image 1

    How automated freeze protection solutions work

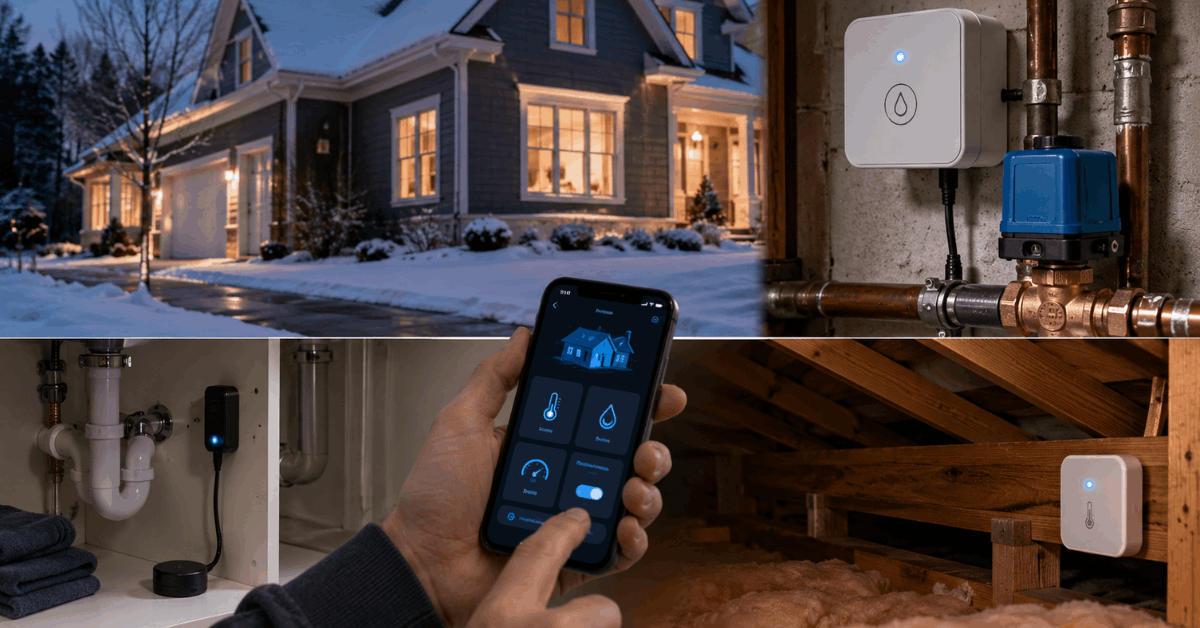
    Smart systems usually combine three core elements: temperature sensing, automated responses, and real-time alerts. Some setups use only one of these but most integrate all three for reliability.

    Remote temperature sensors

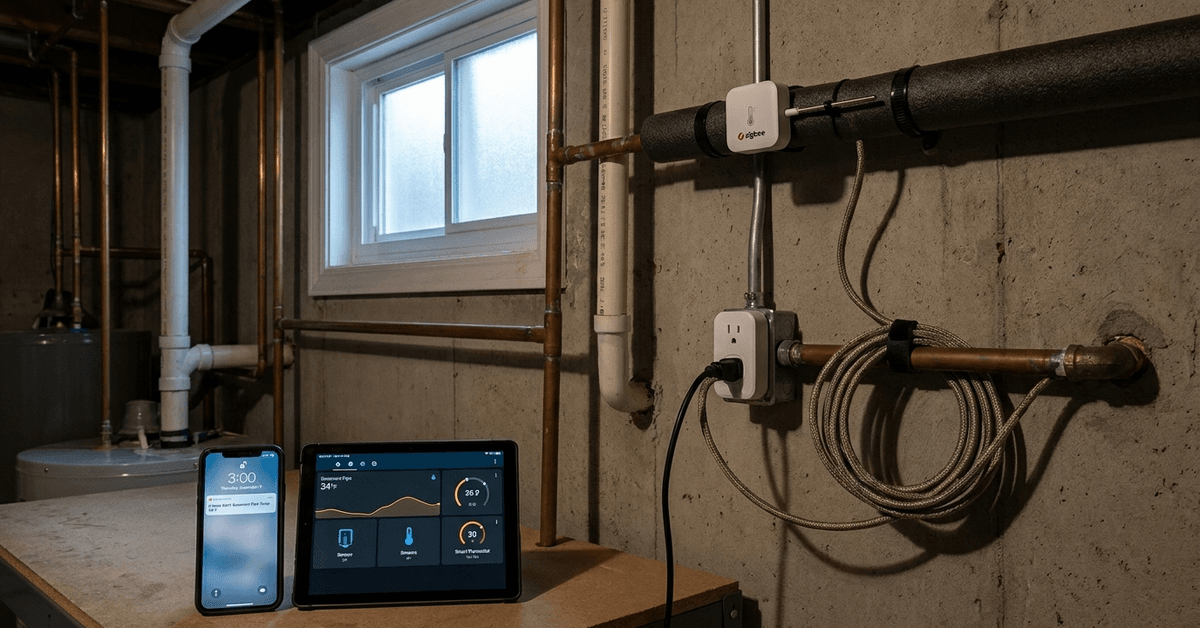
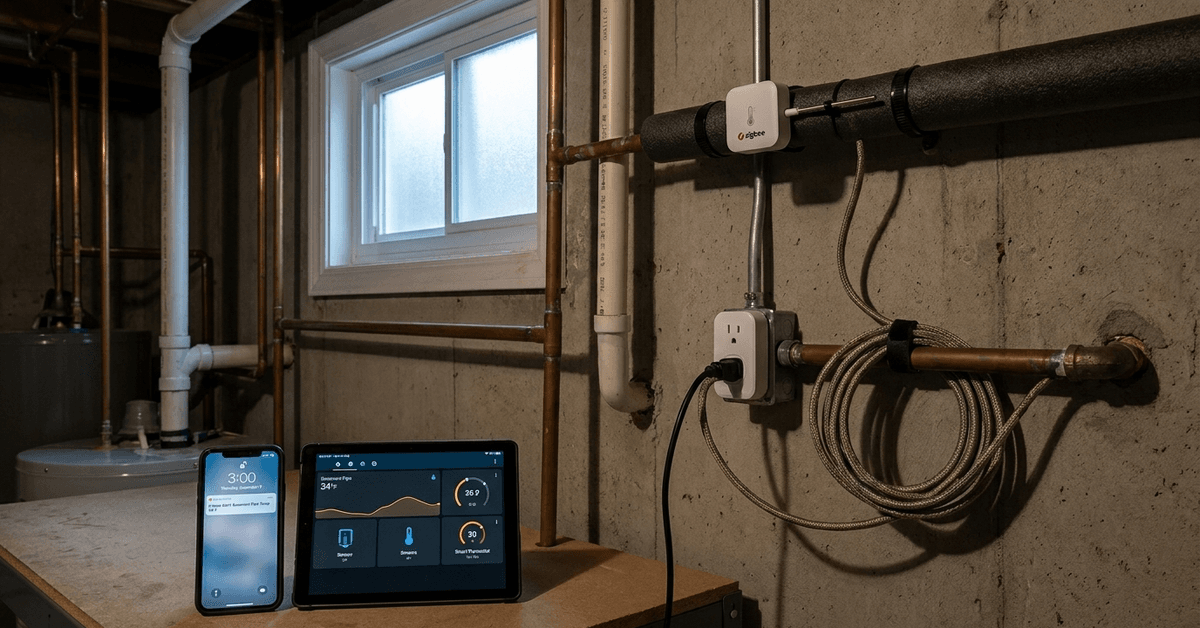
    Wireless sensors monitor pipe or room temperatures. Smart protocols like Zigbee and Z-Wave make it easy to deploy multiple sensors in cold spots. Products like Aqara Temperature and Humidity Sensor and Fibaro Z-Wave Sensor are well-known options.

    By tracking conditions in real-time, these sensors quickly reveal spots with impending freeze risks. Placing these sensors near exposed pipes or unheated basements is usually most effective.

    Automatic heating devices

    When a sensor registers a dangerously low temperature, automated systems can activate heat sources. The most common tool is a smart pipe heating cable or tape. Systems like the Easy Heat Freeze Free Cable can be plugged into a smart plug like TP-Link Kasa.

    Some smart thermostats, such as Ecobee or Nest, also offer custom automations to activate zone heating when specific temperature drops are detected.

    Real-time alerts and automation platforms

    If you’re away, being notified is crucial. Automation platforms, such as Home Assistant, allow users to set notifications via mobile, text, or email. These alerts mean action can be taken fast, sometimes remotely.

    Choosing the right smart freeze protection system

    Not every home or region needs the same type of freeze protection. The correct combination depends on factors like local climate, home layout, and existing smart devices.

    Evaluate climate risk and priorities

    • Colder climates require extensive sensor coverage, especially for exterior walls, crawl spaces, and attics.
    • Mild regions might only need monitoring under sinks or garages.
    • Consider if water shut-off automation adds extra safety.

    Compatible smart home ecosystems

    It’s helpful to match sensors and actuators with your current home automation hub. SmartThings and Home Assistant cover wide device compatibilities. 

    Apple HomeKit and Google Home support basic automations, although device choice is sometimes more limited.

    Zigbee and Z-Wave networks offer excellent reliability and battery life for remote sensors. Wi-Fi sensors are an alternative but may require more frequent battery changes.

    Budget and installation complexity

    • Simple plug-in pipe cables are affordable and straightforward to set up.
    • More complex setups with multiple sensors, smart valves, and remote monitoring cost and require more planning.
    • DIYers usually prefer devices with app-based configuration. Professional installs often include water shut-off kits or plumbing modifications.

    Step-by-step setup: DIY freeze protection automation

    For those starting out, here’s an approachable guide. It assumes a basic smart home hub like Home Assistant, but most methods translate to SmartThings or similar platforms.

    1. Select critical monitoring locations

    • Pipes near exterior walls
    • Unfinished basements or cellars
    • Sinks in rarely heated rooms

    2. Install wireless temperature sensors

    • Pair Zigbee/Z-Wave sensors with your home hub.
    • Test sensor reach and reliability at target locations.
    • Label sensors in the app for clear identification.

    3. Add a smart plug to power pipe heating cable

    • Attach a smart plug like TP-Link Kasa Smart Wi-Fi Plug to a standard heating tape or cable.
    • Set up app routines to turn the cable on or off based on temperature.

    4. Configure automations in smart home hub

    • Use Home Assistant’s “Automations” menu to trigger the smart plug at a set temperature (e.g., below 35°F / 2°C).
    • Optionally, add a push notification or SMS alert when the event triggers.
    • Consider an automatic water shut-off valve (such as the Dome Z-Wave Water Main Shut-Off) as a secondary fail-safe.

    5. Test your setup

    • Cools the sensor location with ice packs or by opening a window briefly.
    • Check if the cable and alert trigger as expected.
    • Modify settings as needed for your room or device specifics.

    Popular automated freeze protection products

    Product  Protocol  Best Feature 
    Aqara Temp & Humidity Sensor  Zigbee  Small size, reliable battery 
    Fibaro Z-Wave Sensor  Z-Wave  Strong automation support 
    Easy Heat Freeze Cable  Standard plug  Plug-and-play with smart plug 
    TP-Link Kasa Wi-Fi Plug  Wi-Fi  Easy integration, app routines 
    Dome Water Shut-Off Valve  Z-Wave  Remote valve control 

    Common installation mistakes and how to avoid them

    Poor sensor placement

    Accurate readings depend on sensor location. Placing a sensor in a warm or insulated area doesn’t show the risk zones’ actual temperature. Cold spots need direct monitoring.

    No redundancy or backup alerts

    If Wi-Fi goes down, notifications might fail. Redundant alerts sent via multiple channels (app, SMS, email) improve reliability. Consider using dual-notification automations in your hub settings.

    Forgetting manual overrides

    Sometimes, automation alone isn’t enough. Including a manual override button within your app or smart plug interface can help deal with unexpected events. It’s an extra layer of control for peace of mind.

    Routine maintenance tips for freeze protection

    • Check sensor batteries monthly in winter—low battery can disable vital protection.
    • Confirm that smart plugs and pipe cables remain securely plugged in and free of corrosion.
    • Review notification settings after updates to smart home apps or hubs.
    • If you plan extended absences, remote monitoring is valuable. Grant a trusted neighbor temporary app access if possible.

    Pros and cons of automated freeze protection

    Pros  Cons 
    Peace of mind and real-time alerts  Initial investment in smart devices 
    Continuous monitoring even when away  Setup may require patience or professional help 
    Customizable automation routines  Batteries or power outages reduce reliability 

    Conclusion

    Automated freeze protection for pipes transforms a vulnerable point in any home into a monitored, manageable part of your smart ecosystem. With a smart blend of temperature sensors, heating cables, and reliable automation, homeowners can avoid the sudden chaos of burst pipes even in severe cold. 

    Picking the right components, planning redundancy, and testing regularly are what make the difference between a near-miss and a disaster. The technology is mature, accessible, and, when set up thoughtfully, mostly hands-off. 

    For anyone new to smart home plumbing safety, a little planning and careful sensor placement go a long way to preserving both property and peace of mind.

  • How to Safely Store Backup Batteries for Home Tech Setups

    How to Safely Store Backup Batteries for Home Tech Setups

    Backup batteries are essential for smart home reliability. Power outages, surges, or simple connectivity issues can disrupt automation if backup energy isn’t ready and safe.

    Smart homeowners, tech enthusiasts, or anyone securing a digital lifestyle at home will benefit from learning effective battery storage methods. Proper storage keeps systems functional, prevents property risks, and even prolongs battery life.

    Why Safe Battery Storage Matters for Home Tech?

    Backup batteries power critical devices during outages. Improper storage can lead to malfunctions, overheating, or even fire hazards.

    How to Safely Store Backup Batteries for Home Tech Setups

    Many advanced home systems rely on battery backups: security cameras, smart locks, alarms, and network routers. Safe storage keeps these systems dependable.

    Risks Associated with Poor Storage

    • Short circuits and potential fires
    • Reduced battery lifespan
    • Voided warranty if manufacturer storage advice is not followed
    • Damage to expensive electronics

    Simple storage errors—like storing all battery types together—can be risky. Even forgetting temperature considerations can have consequences.

    Understanding Types of Backup Batteries

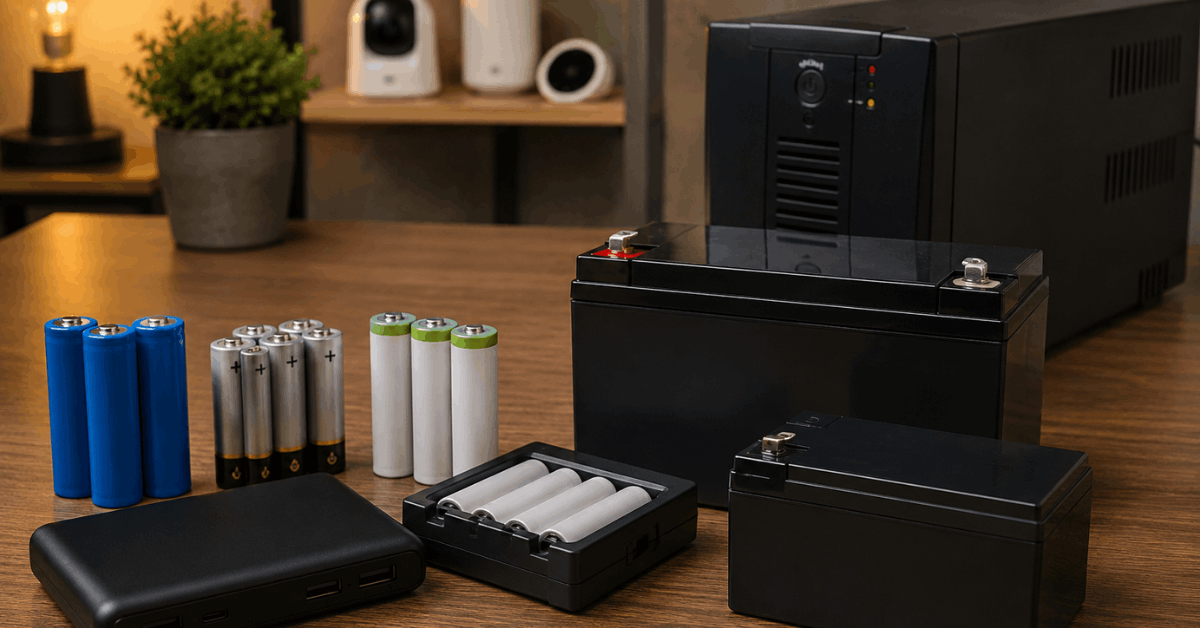
    The most common backup batteries in home setups are lithium-ion, alkaline, nickel-metal hydride, and sealed lead-acid types.

    How to Safely Store Backup Batteries for Home Tech Setups

    Each type has slightly different storage needs and safety protocols. In most smart home applications, lithium-ion batteries are the most common.

    Lithium-Ion Batteries

    Lithium-ion batteries are popular for compact devices. These need precise storage to remain safe and effective.

    • Store in a cool, dry area away from direct sunlight
    • Keep charge levels around 40% to 60% for long-term storage
    • Use battery management apps like Battery Guru for real-time health monitoring

    Alkaline Batteries

    Alkaline batteries are often used for remotes, door sensors, and backup keypads.

    • Store in original packaging or plastic containers
    • Avoid storing in the device for extended periods

    Nickel-Metal Hydride (NiMH) and Sealed Lead-Acid

    NiMH batteries appear in rechargeable gadgets. Sealed lead-acid options can power larger UPS units.

    • Store in a dry place with moderate temperature
    • Lead-acid batteries should be stored fully charged and topped up every few months

    Best Practices for Home Battery Storage

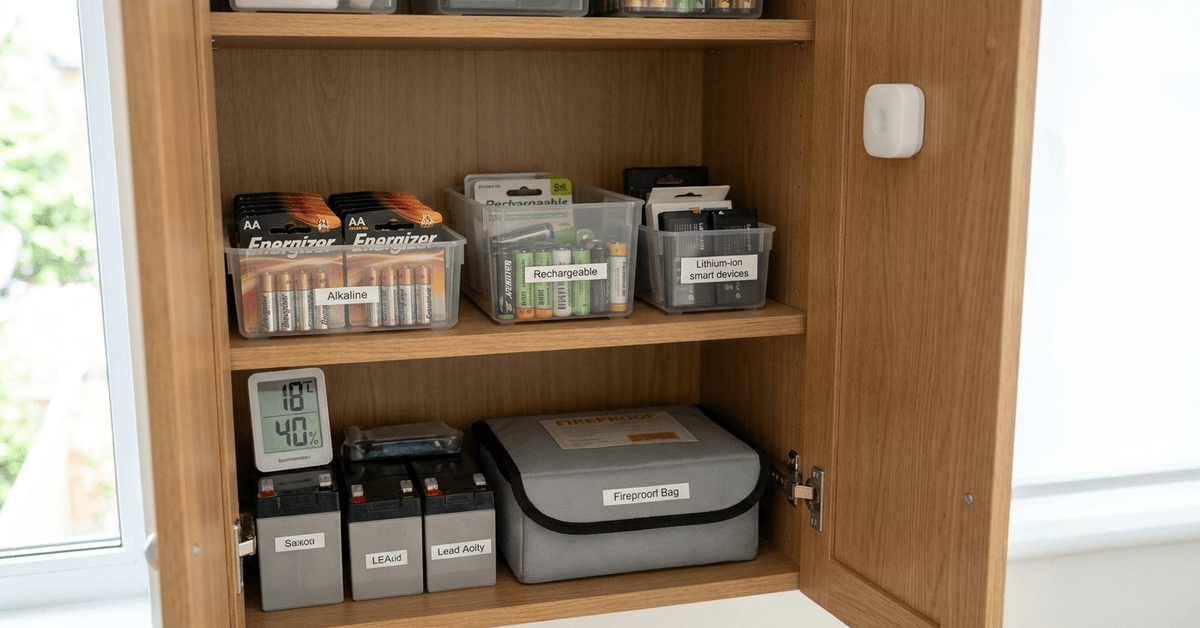
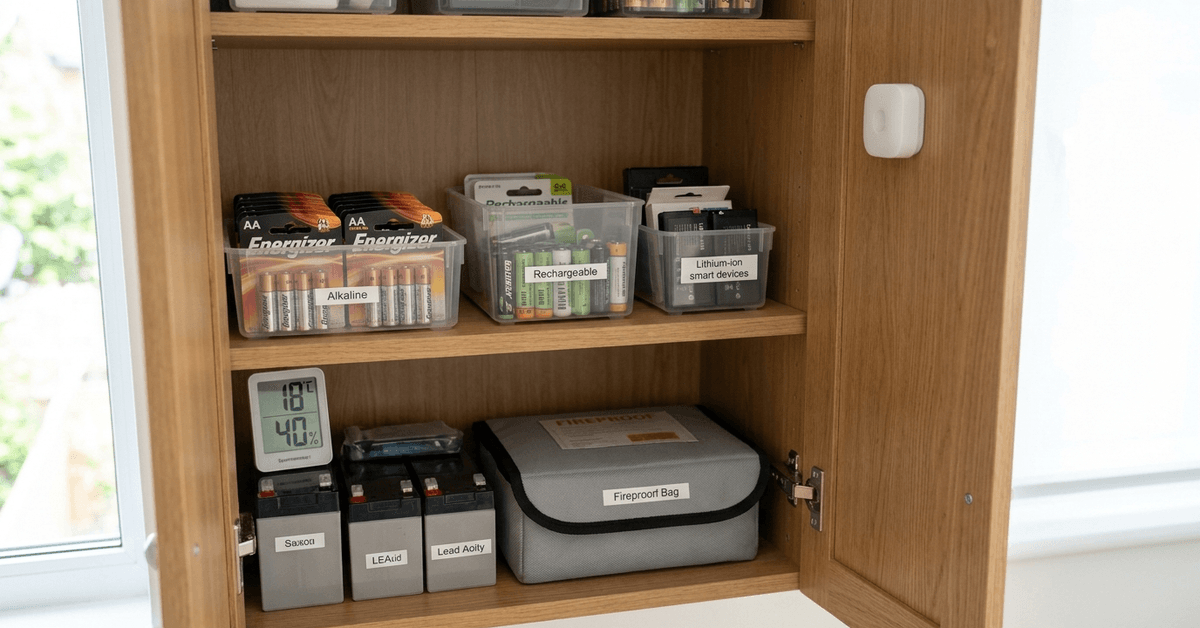
    A reliable storage method is placing backup batteries in a dedicated, well-ventilated, low-humidity cabinet. This reduces interference risks.

    • Store each battery type separately and label container contents
    • Keep out of reach of children and pets
    • Never store batteries in metal jars or drawers with loose coins, screws, or keys
    • Monitor temperature—most batteries perform best between 10°C and 25°C

    Some find value in using digital inventory systems to log battery purchase dates and expected shelf life, available via apps such as Sortly.

    Handling Damaged or Swollen Batteries

    Storing physically damaged or swollen batteries leads to serious hazards. Signs may include bulging, leaking, or excessive warmth.

    • Carefully isolate any suspect batteries using a non-flammable surface, like ceramic
    • Dispose according to local e-waste regulations

    Recommended Storage Products and Locations

    Smart battery cases and fireproof storage bags add another layer of security. Brands like DocSafe or SentrySafe produce certified containers made for battery protection.

    • Select ventilated metal or fire-retardant cabinets for bulk storage needs
    • Avoid storing batteries in attics, garages, or near windows where temperatures fluctuate

    Many users install cabinet locks or tamper alerts for extra safety, easily integrated with smart home sensors.

    Monitoring and Maintenance Tips

    Routine checks keep storage effective. Setting bi-monthly reminders is a habit that helps—smart home apps like Google Keep or Apple Reminders can assist with this.

    • Visually inspect for corrosion or leaks
    • Test capacity with battery testers such as the Klein Tools ET16
    • Rotate stock, using older batteries first to avoid past-expiry use

    Maintaining a record of installed and spare batteries makes tracking easier and prevents waste.

    Disposal and Recycling Guidelines

    Safe disposal is important for both safety and legality. Most local utilities or electronics retailers partner with battery recycling programs.

    • Never dispose of household batteries in regular trash
    • Use locator tools like Call2Recycle’s recycling finder for drop-off sites

    Rechargeable batteries almost always qualify for recycling. Alkaline or zinc-carbon batteries may follow local landfill rules but professional drop-off is still the safest.

    Software and Apps for Battery Management

    Several digital solutions exist to help families keep batteries tracked and maintained.

    • Battery Guru: For monitoring lithium-ion health and charge cycles on Android devices
    • Sortly: Inventory app for cataloging and organizing storage supplies
    • Klein Tools ET16: Hardware tester with optional logging via app

    By logging reminders or tracking charge status, battery health and backup readiness improve significantly.

    Final Thoughts on Safe Home Battery Storage

    Backup battery safety is foundational to secure, smooth-running smart homes. Accidents rarely happen by chance—most result from overlooked best practices or minor slips.

    Storing different battery types separately, keeping them cool and dry, and inspecting them regularly prevents the most common risks. Smart storage cabinets, fireproof containers, and digital tracking apps all add valuable layers of security.

    In the end, an organized approach is the best safeguard for your investment in smart home technology. Safe battery storage means peace of mind and round-the-clock home protection.

  • How to Test Your Home Door Locks for Wear and Tear

    How to Test Your Home Door Locks for Wear and Tear

    Reliable door locks are central to any home’s safety. When overlooked, small faults can lead to bigger risks. Well-maintained locks greatly enhance peace of mind for homeowners and renters alike.

    This article is tailored for smart home enthusiasts and those keen on proactive home maintenance. Recognizing signs of wear helps safeguard both traditional and smart locks. Here is a straightforward guide for testing your locks effectively and safely.

    Why Checking Door Locks Matters

    Damaged or worn locks compromise security. Over time, regular usage leads to internal fatigue. Minor wear is often ignored but can become a serious concern.

    How to Test Your Home Door Locks for Wear and Tear

    Common Causes of Door Lock Wear

    • Frequent key usage.
    • Lack of routine cleaning and lubrication.
    • Exposure to harsh weather.
    • Improper installation.

    Potential Risks of Ignoring Lock Wear

    • Locks become hard to turn or jam.
    • Increased chance of accidental lockouts.
    • Compromised break-in resistance.

    How to Conduct a Visual Lock Inspection?

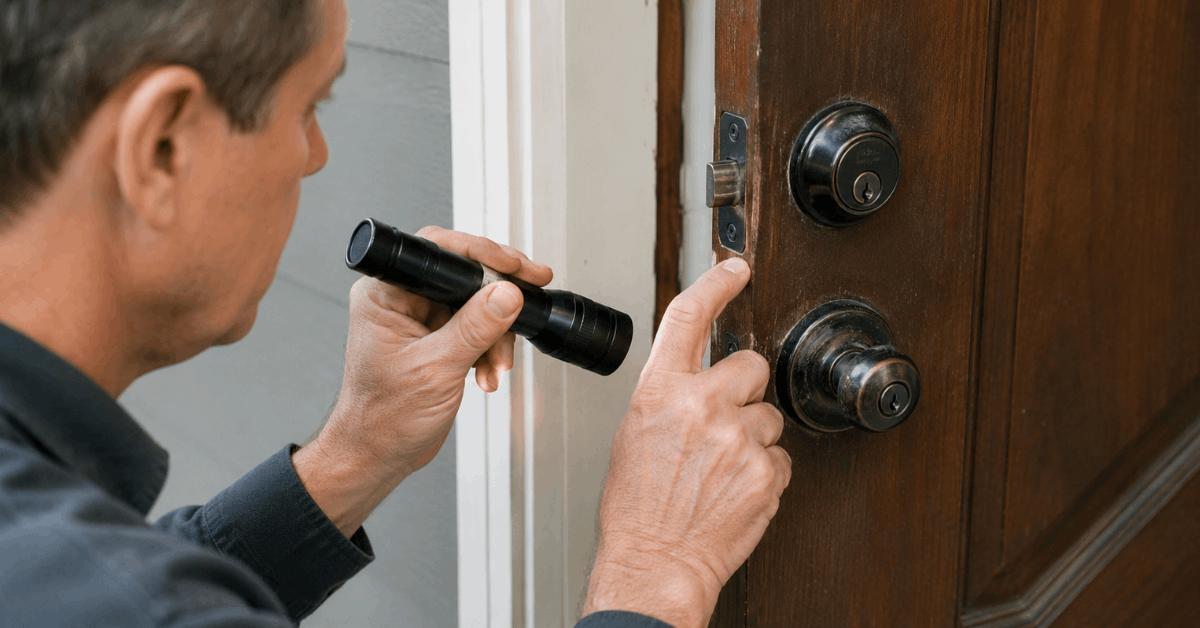
    A regular visual inspection identifies many problems. Observing your hardware closely reveals clues before functionality fails. Most issues are visible to the naked eye.

    How to Test Your Home Door Locks for Wear and Tear

    Exterior Signs of Damage

    • Corrosion near the keyhole or strike plate.
    • Scratches or dents on visible hardware.
    • Loose screws around the lockset.

    Internal Wear Signals

    • Sticky operation when inserting or removing the key.
    • Grinding or rough turning action.

    Homeowners may even hear unusual clicking or friction.

    Testing Functionality of Mechanical Door Locks

    Mechanical locks need hands-on testing. The most essential check is to operate the lock as usual several times, observing for hesitation or resistance.

    Step-by-Step Function Test

    1. Insert the main key fully.
    2. Turn the key while noting any catching or stiffness.
    3. Remove and reinsert the key, checking for snag points.
    4. Lock and unlock the door from both sides if possible.
    5. Examine the latch travel: it should retract and extend smoothly.

    Additional Mechanical Testing Tips

    • Testing at night, when temperatures drop, highlights metal contraction issues.
    • Checking with alternative keys can reveal worn cuts or burrs inside the lock.

    Testing Smart Locks for Wear and Failure Risks

    Smart locks require both physical and digital checks. Regular app-based diagnostics are a strong safeguard against undetected faults.

    Physical Smart Lock Health Check

    • Lightly press and pull the lock body for looseness.
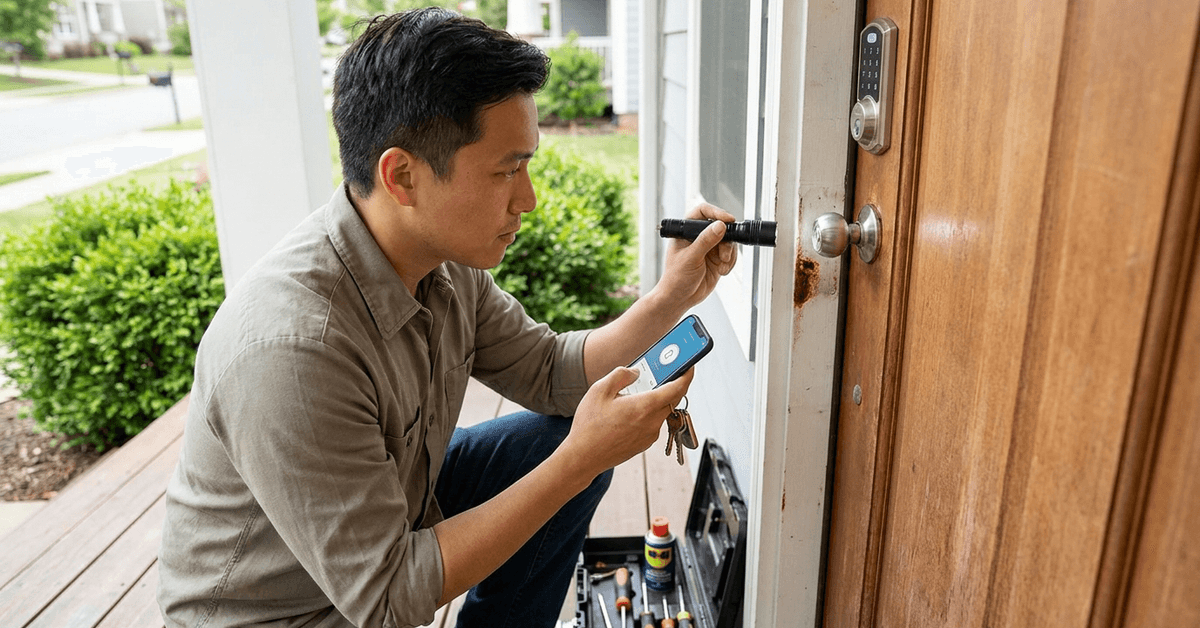
    • Watch for battery indicator warnings on the lock or accompanying app.
    • Test backup key or override access in addition to app unlock.

    Digital/Systematic Health Scan

    • Use the manufacturer’s official app (such as August, Yale Access, or Schlage Home) to check for firmware updates.
    • Run built-in diagnostics where available.
    • Check for intermittent Bluetooth or Wi-Fi connectivity.

    Common Smart Lock Failure Indicators

    • Slow motor movement when locking or unlocking.
    • Frequent disconnections from the home network.
    • Random lock resets or error beeps.

    Using Diagnostic Tools and Apps

    Integrated health features in smart lock ecosystems simplify maintenance. These tools help track usage patterns and battery life efficiently.

    Recommended Diagnostic Features

    • Automated activity logs for tracking successful and failed entry attempts.
    • Push alerts for hardware or firmware updates.
    • Remote lock/unlock status monitoring.

    Manual Diagnostic Best Practices

    • Comparing manual operation to app triggers can expose hardware lag.
    • Reviewing monthly lock usage reports helps reveal declining performance.

    Maintenance Routines to Prolong Lock Life

    Good routines keep door locks functioning smoothly. Scheduled maintenance also reduces unexpected lock failures and extends hardware life.

    Physical Lock Maintenance Actions

    • Applying graphite powder or a silicone-based lubricant once every six months.
    • Tightening mounting screws.
    • Cleaning keyholes with compressed air.

    Smart Lock-Specific Tips

    • Replacing batteries generously before full depletion.
    • Applying firmware updates promptly using the lock’s app.

    When to Replace Instead of Repair?

    Some signs mean repairs are unlikely to help: excessive rust, bent internal parts, or repeated smart unlock failures. Safety is a priority, so proactively replacing hardware is wise.

    Replacement Triggers

    • Keys not turning even after cleaning or lubrication.
    • Cracked housing or severely worn key faces.
    • Smart lock app persistently reports errors after resets.

    DIY vs Professional Evaluation

    Basic tests cover most residential needs. But, persistent problems or advanced smart lock issues often call for expert support, especially when warranty coverage is at stake.

    When Professional Help Adds Value?

    • Identifying hidden mechanical failures invisible to the eye.
    • Updating complex smart locks where advanced tools are needed.
    • Ensuring compliance with insurance or smart home integration requirements.

    Conclusion

    Regular lock testing is foundational for home security. Spotting wear early reduces the risk of lockouts and unauthorized access. Smart home setups benefit from both physical checks and smart diagnostics. 

    Adopting these practical checklists goes a long way in making every entry point safer, more reliable, and future-ready.

  • How to Choose Heavy-Duty Deadbolts to Complement Smart Locks

    How to Choose Heavy-Duty Deadbolts to Complement Smart Locks

    Modern smart locks offer convenience, but many homeowners still value the mechanical strength of traditional deadbolts. 

    Combining both can give balanced, reliable protection. This article guides smart home enthusiasts and DIYers on realistically pairing heavy-duty deadbolts with popular smart lock systems, boosting overall security and peace of mind.

    Understanding the Role of Deadbolts in Smart Home Security

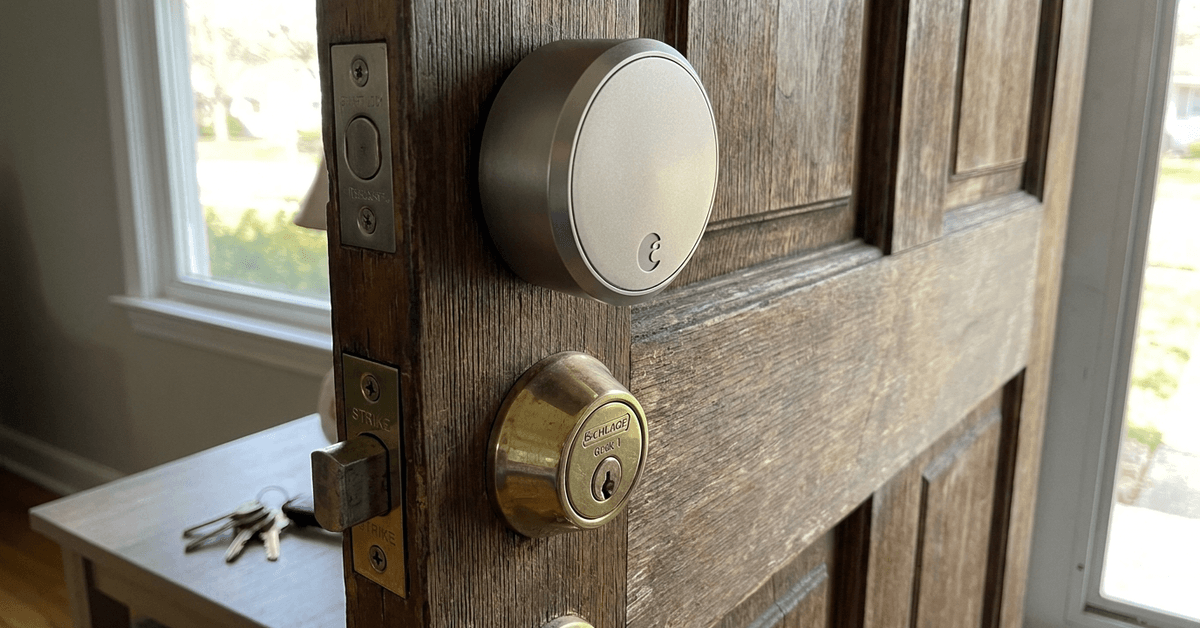
    A smart lock alone controls access digitally, but a deadbolt is still the primary barrier against forced entry. Many experienced homeowners realize a heavy-duty deadbolt can deter physical tampering where electronics alone might not.

    This defense is especially critical for entry doors, garage side doors, and basement entrances. Smart automation cannot replace the raw strength of steel or reinforced bolt throws.

    How to Choose Heavy-Duty Deadbolts to Complement Smart Locks

    Why Pair a Deadbolt with a Smart Lock?

    Pairing these two adds crucial redundancy. In power or network outages, the manual deadbolt remains functional. Smart features offer access tracking, while the deadbolt gives the assurance of mechanical resistance.

    It is becoming common to see both installed together on the same door, providing layers that act independently but in parallel.

    Key Factors When Choosing a Heavy-Duty Deadbolt

    Grade and Certification

    The ANSI/BHMA Grade 1 mark signals the highest level of residential deadbolt strength. Grade 1 deadbolts are tested for at least 250,000 open/close cycles and can withstand tough prying attempts.

    How to Choose Heavy-Duty Deadbolts to Complement Smart Locks

    Any deadbolt selected to pair with a smart lock should be rated at this level whenever possible. Lower grades may not be sufficient for main doors or vulnerable areas.

    Material and Build Quality

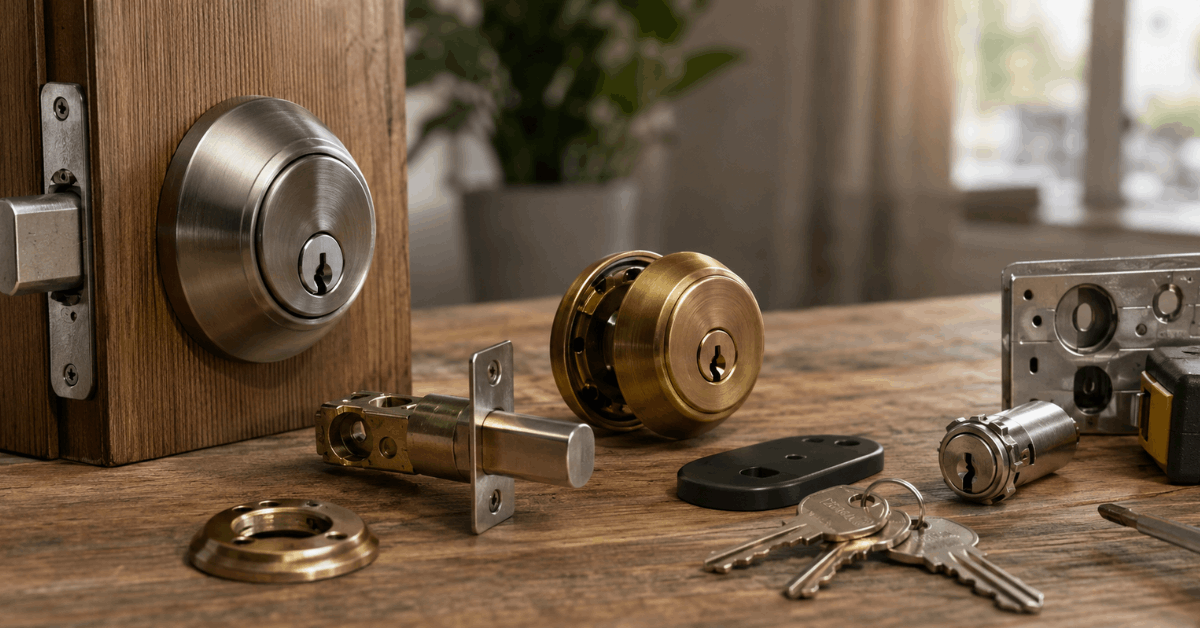
    Bodies made of solid brass or reinforced steel give better resistance to sawing and hammering. Parts with plastic housings may degrade over time, especially if exposed to weather.

    Look for features like anti-drill plates and 1-inch bolts. These prevent simple entry methods, supporting the lock’s long-term utility.

    Compatibility with Existing Hardware

    Deadbolts should physically fit alongside, above, or below the smart lock you have in mind. Measure center-to-center hole distances and thickness of your door before choosing.

    If unsure, many professional installers recommend using deadbolts that align with standard 2-3/8 or 2-3/4 inch backset measurements for US doors.

    Keyway and Key Control

    High-security cylinders with patented keyways are harder to pick or bump. Many locksmiths suggest brands like Schlage (Primus or Everest) or Medeco for improved key control.

    Restricted keyways also help limit unauthorized duplicates, which is sometimes overlooked when focusing only on smart features.

    Choosing Deadbolts That Don’t Interfere with Smart Locks

    Single vs. Double Cylinder Options

    Single cylinder deadbolts operate with a key outside and thumb-turn inside. Double cylinder models require a key on both sides, recommended mainly for doors with nearby glass.

    If pairing with a smart lock, single cylinders often work best since they don’t block quick exits. However, double cylinders do add extra safety for vulnerable glass doors, though fire safety should be considered first.

    Low Profile and Smart Lock Pairing

    Deadbolts with a low-profile thumb turn will allow some retrofit smart locks (like August or Yale Assure) to fit directly over the mechanism. Thicker or oddly-shaped deadbolts can create mounting headaches.

    It is often helpful to search compatibility charts on both the smart lock and deadbolt manufacturer’s websites or to call their tech support before purchasing.

    Matching Smart Features and Mechanical Security

    Not all smart locks include a built-in bolt that meets high-grade standards. When using add-on smart locks, the separate deadbolt provides the security backbone, while the motor or actuator delivers the remote unlock function.

    This setup requires a deadbolt with smooth throw action, as rough or stiff bolts can strain the motor in many smart locks, reducing life span or leading to jams.

    Popular Deadbolt Models That Pair Well With Smart Locks

    • Schlage B60N : Works with many retrofit smart lock products, widely installed by pros.
    • Kwikset 980: Compatible thumb turn, reliable ANSI Grade 1 rating.
    • Medeco Maxum: Patented high-security cylinder, fits many smart lock brackets.
    • Yale Real Living Deadbolt: Works natively with select smart lock systems, UL-certified hardware.

    Installation: Step-by-Step Process

    1. Check your door’s thickness and backset measurement to confirm fit for both the deadbolt and smart lock.
    2. Remove any old hardware. Clean the cavity to avoid sticking.
    3. Install the new deadbolt’s bolt assembly into the door edge, securing with provided screws.
    4. Mount the deadbolt’s exterior and interior components, ensuring the cylinder is aligned.
    5. Test the deadbolt’s manual operation for smooth throw before attaching the smart lock motor or adapter.
    6. Follow the smart lock manufacturer’s mounting guide—sometimes involving a bracket or direct rear attachment.
    7. Configure the smart lock via app, connecting it to Wi-Fi or your smart home controller (e.g., Apple HomeKit , Google Home, or Samsung SmartThings).
    8. Test both the smart unlock and the manual key operation several times to ensure there is no drag or misalignment.

    Smart Lock and Deadbolt Protocols: What to Look For

    Many find that interoperability matters. Smart locks using Z-Wave or Zigbee, like Yale or Schlage Encode, often integrate smoothly with major automation hubs.

    Wi-Fi-enabled smart locks, such as August Wi-Fi Smart Lock, offer direct voice assistant integration but may drain batteries faster. Either approach can pair well with mechanical deadbolts if installation allows.

    Some suggest using a Bluetooth-enabled smart lock for doors with unpredictable Wi-Fi coverage. The most important route is to review the manufacturer’s documentation regarding compatibility and installation quirks before buying any hardware.

    Tips to Maintain Maximum Security Using Both Systems

    • Change the mechanical deadbolt’s keys upon move-in for best key control.
    • Perform regular firmware updates to your smart lock via the official app.
    • Visually check hardware monthly for signs of tampering or misalignment.
    • Opt for deadbolts with anti-snap, anti-drill, and anti-bump features—especially for doors not monitored by cameras.
    • Avoid sharing digital codes via unsecured channels, and never leave backup keys hidden near the entrance.

    Recommended Apps and Management Tools

    The August app provides digital key sharing and access logs, useful for monitoring entry times. Schlage Home App lets users create time-limited access codes and check lock status remotely.

    Yale Access App integrates with several home automation routines and can trigger notifications whenever the bolt is thrown, either manually or via the smart system.

    Conclusion

    Combining a robust, certified deadbolt with a high-quality smart lock creates a defense-in-depth approach that meets both modern convenience and old-fashioned reliability. 

    The chosen deadbolt should always match or exceed the strength rating of the smart lock, work smoothly in tandem, and be installed correctly to avoid conflicts.

    Ultimately, real security comes from regular upkeep, choosing well-reviewed brands, and ensuring both electronic and mechanical components are working as intended. By following practical steps and keeping an eye on compatibility, homeowners can enjoy both safety and ease—without compromise.