Category: Everyday Protection & Automation

  • How to Check for Loose Wiring in Smart Light Switches Safely

    How to Check for Loose Wiring in Smart Light Switches Safely

    Smart light switches play a key role in connected home systems. Reliable wiring is critical for uninterrupted function. 

    Homeowners who handle their own smart switch setups often wonder about loose connections. Safety is the top priority whenever you check for loose wiring.

    Understanding Smart Light Switch Wiring

    Smart switches typically work by replacing traditional wall switches but demand precise wiring. Most smart switches use a live wire, neutral, and a ground. Loose wiring can lead to flickering lights, unreliable responses, or even short circuits.

    The most important concern is preventing electrical shock or fire hazards. If there is any doubt about the wiring, consulting a licensed electrician is always the safest route.
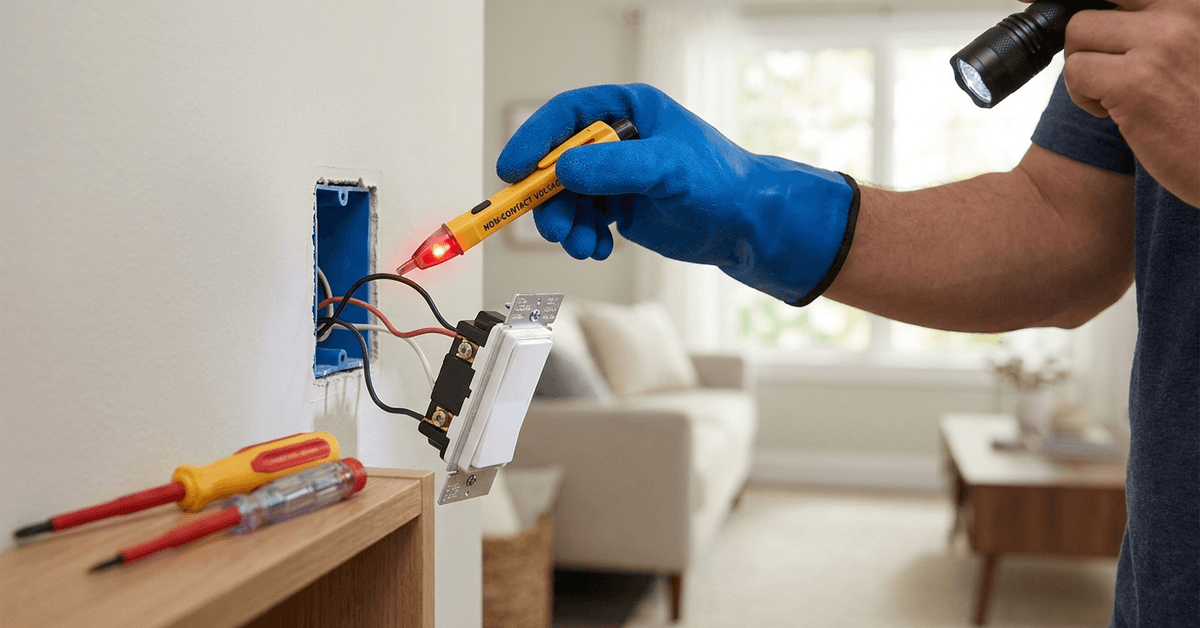
    How to Check for Loose Wiring in Smart Light Switches Safely

    Signs of Loose Wiring in Smart Switches

    Loose wiring often shows up as inconsistent performance. Some common symptoms may seem harmless at first, yet signal a bigger problem.

    • Lights flicker or fail to turn on reliably
    • Switch plate feels warm to the touch
    • Buzzing, crackling, or sparking noises heard from the switch
    • Random resets or loss of smart control features
    • Error messages in the connected app (example: “device offline”)

    Perhaps not all symptoms appear at once. Even if only one or two are noticed, a careful wiring check is wise for safety.

    Essential Tools and Safety Gear

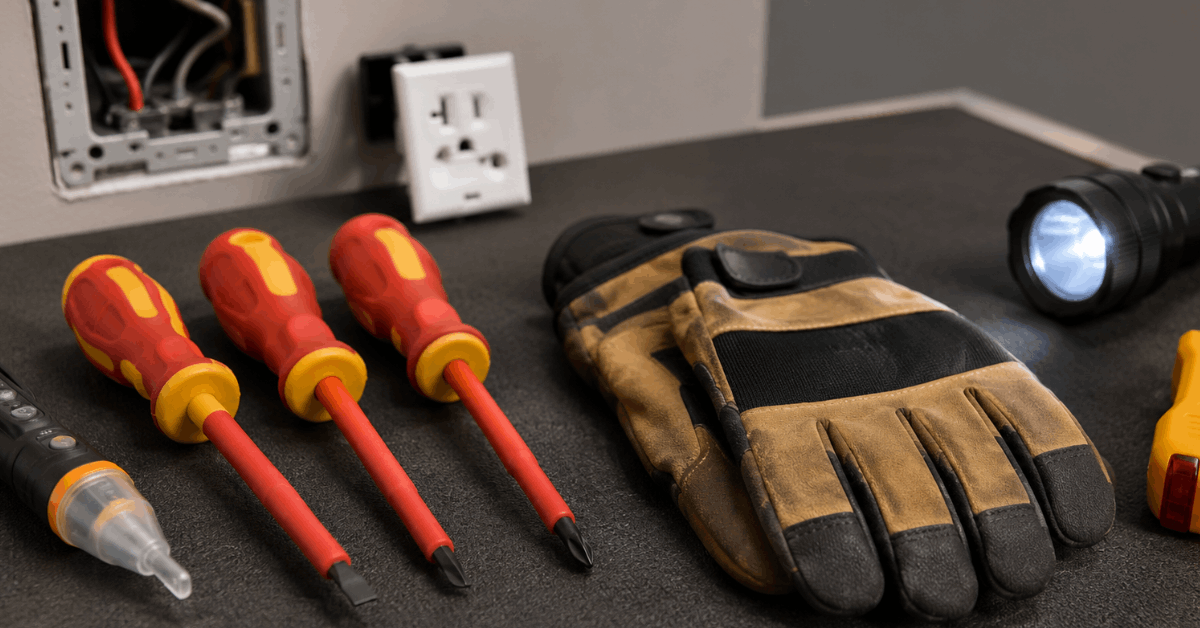
    Using the right tools protects both you and the device. Basic equipment for a safe wiring check generally includes:
    How to Check for Loose Wiring in Smart Light Switches Safely
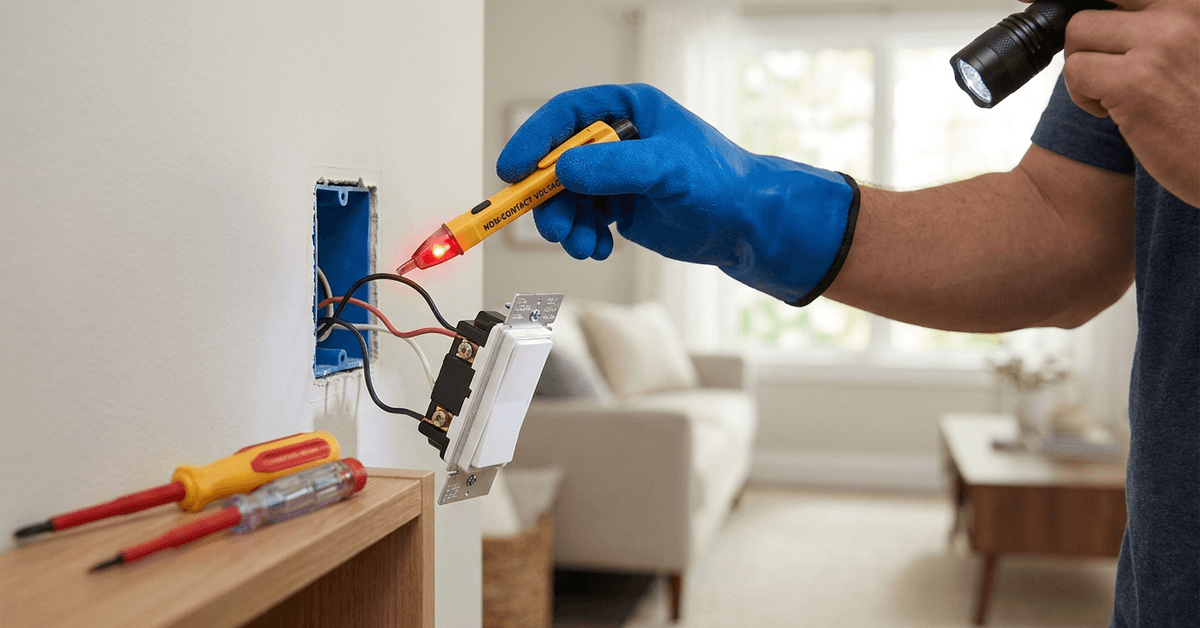
    • Non-contact voltage tester ( Klein Tools NCVT-2 is a leading option)
    • Screwdrivers with insulated handles
    • Protective gloves rated for electrical work
    • Flashlight or headlamp for improved visibility

    Many homeowners also rely on a grounded outlet tester for secondary checks after reassembly.

    Safety Precautions Before Inspection

    Safety steps reduce risk throughout the process. Skipping any part, even briefly, can lead to dangerous outcomes. Recommendations for safe prep:

    1. Switch off power at the circuit breaker. Confirm that the correct breaker is chosen for the smart switch in use.
    2. Test the switch using a non-contact voltage tester. The display should confirm power is truly off before opening the plate.
    3. Label breaker switches if the panel is unclear. This is especially helpful if more than one person handles home maintenance.
    4. Keep hands dry and wear rubber-soled shoes. Small details like this further increase safety margins.

    If there is any concern about electrical knowledge or unexpected wiring, pausing to consult a professional is always safer.

    Step-by-Step: Checking for Loose Wiring in Smart Switches

    The following process guides most users through standard wall switch inspections. Different brands may require adjustments, but the basics will apply in most cases.

    Accessing the Switch Safely

    • After confirming power is off, carefully unscrew the wall plate using an insulated screwdriver.
    • Slowly pull the switch and wiring a few centimeters away from the box for access.

    Some switches may be held by side clips as well as screws. A gentle wiggle can free it without stressing wires.

    Inspecting Wire Terminations

    • Check all terminal screws for snug fit. A loose screw is the most common source of unreliable connections.
    • Inspect all wire nuts for signs of fraying or movement.
    • Look for discolored or scorched insulation. This can mean heat damage from loose contacts.
    • If stranded wires are used, each strand should be tucked in without frayed ends escaping the connector.

    Gently tug each wire. None should slide free or feel overly loose. Only minimal pressure is needed to reveal a weak connection.

    Neutral and Ground Wire Checks

    • Some homes have neutral bundles behind the switch.
    • Ensure that your smart switch’s neutral is connected securely. Looseness here may cause frequent drops from Wi-Fi or Zigbee networks.
    • Ground wires must be connected to either switch grounding screw or house ground bundle.

    Grounding protects against accidents in rare fault scenarios. Loose ground wires are a critical safety fault, so confirming their security matters greatly.

    Testing the Switch After Reassembly

    Once all checks and corrections are made, replace the switch and plate carefully. Ensure no wires are pinched during reinstallation. Some smart switches restart with a test cycle.

    • Switch power back on at the breaker.
    • Activate the switch via the wall and the connected app (if applicable).
    • Observe for any residual flickers, noise, or unusual heat.
    • Use a grounded outlet tester on connected circuits to confirm proper completion if available.

    If any symptoms continue, the circuit might have hidden faults. At that point, further investigation by a licensed technician is warranted.

    Using Smart Home Apps for Diagnostics

    Modern smart switches often offer self-diagnostics through their apps. Examples include Leviton Decora Smart, TP-Link Kasa, and Lutron Caseta.

    • Check for error messages about connectivity or device status.
    • Utilize power monitoring features, if present, to spot brief interruptions indicating loose wiring.
    • Review device logs for repeated offline events or unexplained resets.

    Device providers often maintain troubleshooting sections on their support websites. These resources may offer wiring diagrams or tips unique to the brand.

    When to Call a Professional?

    Smart switches sometimes introduce complexities beyond standard installations. Multi-way switches, homes with outdated wiring, or situations where any wire color seems non-standard may call for expert help.

    • Continued flickering despite checking all connections
    • Breaker fails to stay engaged after installation
    • Switches in older homes where neutral wires are missing
    • Suspicion of damage due to heat or electrical odor

    Long-term safety and homeowner insurance standards both favor expert assessment whenever even modest doubt remains.

    Smart Switch Wiring Maintenance Tips

    • Perform annual checks on all high-use switches to maintain reliability.
    • Keep detailed notes on wiring colors and switch brands for the household reference.
    • Avoid over-tightening terminal screws to prevent breaking older wires.
    • Periodically vacuum or dust switch plates to limit dust buildup near electronics.
    • Update firmware for connected switches via their companion app as recommended.

    Consistent habits like these help prevent future loose wiring issues and extend the life of smart home equipment.

    Conclusion

    Smart light switch wiring checks are not just about maintaining tech convenience but about household safety. Loose wiring is a leading cause of unnecessary malfunctions and, in more serious cases, fire hazards. 

    By approaching checks with the right tools, detailed step-by-step care, and an awareness of personal limits, most routine issues can be resolved calmly. 

    However, experienced technicians remain crucial for any uncertain or persistent concerns. Ultimately, regular wiring inspections underpin the performance and peace of mind in any smart home setup.
  • How to Choose a Mechanical Backup Key Option for Smart Locks

    How to Choose a Mechanical Backup Key Option for Smart Locks

    Smart locks offer remarkable convenience for homes and rentals. Yet technology, no matter how advanced, is not infallible. Power issues or app failures sometimes occur at the worst possible times.

    Many homeowners wonder how to maintain access during such events. A practical solution is to choose a reliable mechanical backup key option. This isn’t just about planning for emergencies—it’s about ensuring peace of mind, too.

    Why Mechanical Backup Keys Matter for Smart Locks?

    Electronic components can occasionally fail. Batteries may run out or wireless connections may drop unexpectedly.

    Image 1

    When this happens, mechanical backup keys step in as a crucial safeguard. They ensure there is always an alternative method of entry.

    Fail-Safe Security in Power Loss

    Power outages can disable Bluetooth or Wi-Fi features. A backup key slot lets you access your property in these scenarios.

    Protection Against App Malfunctions

    Glitchy app updates or phone issues are possible. Mechanical keys remain effective regardless of your device’s state.

    Types of Mechanical Backup Options Available

    There is not a single universal backup mechanism. Options depend on both manufacturer design and the lock’s feature set.

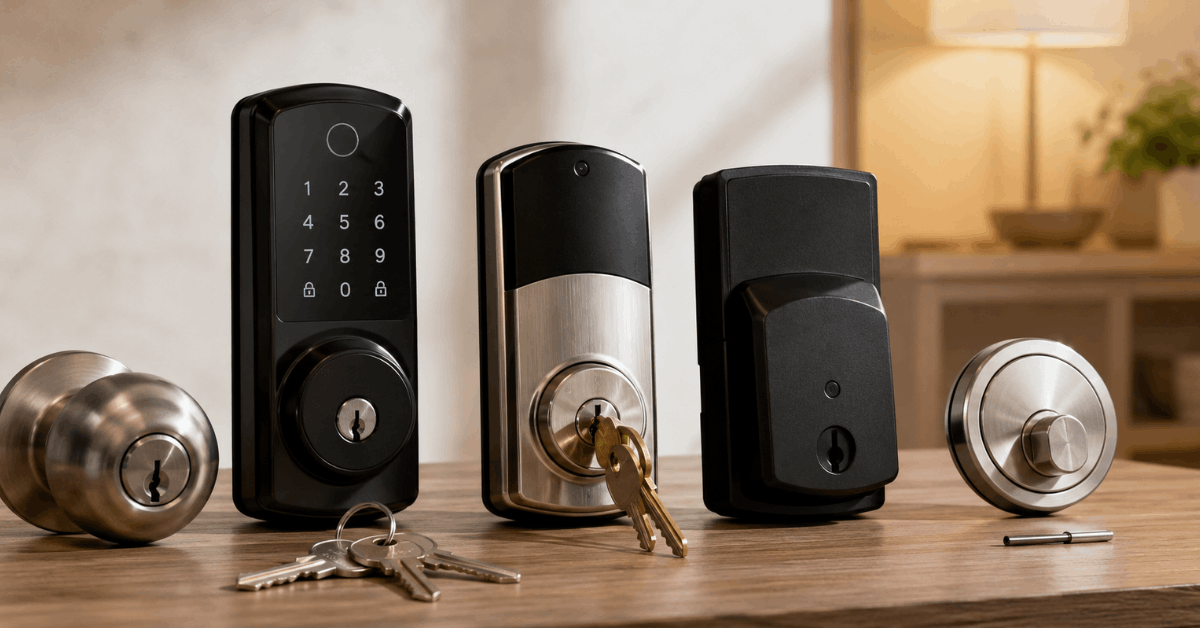
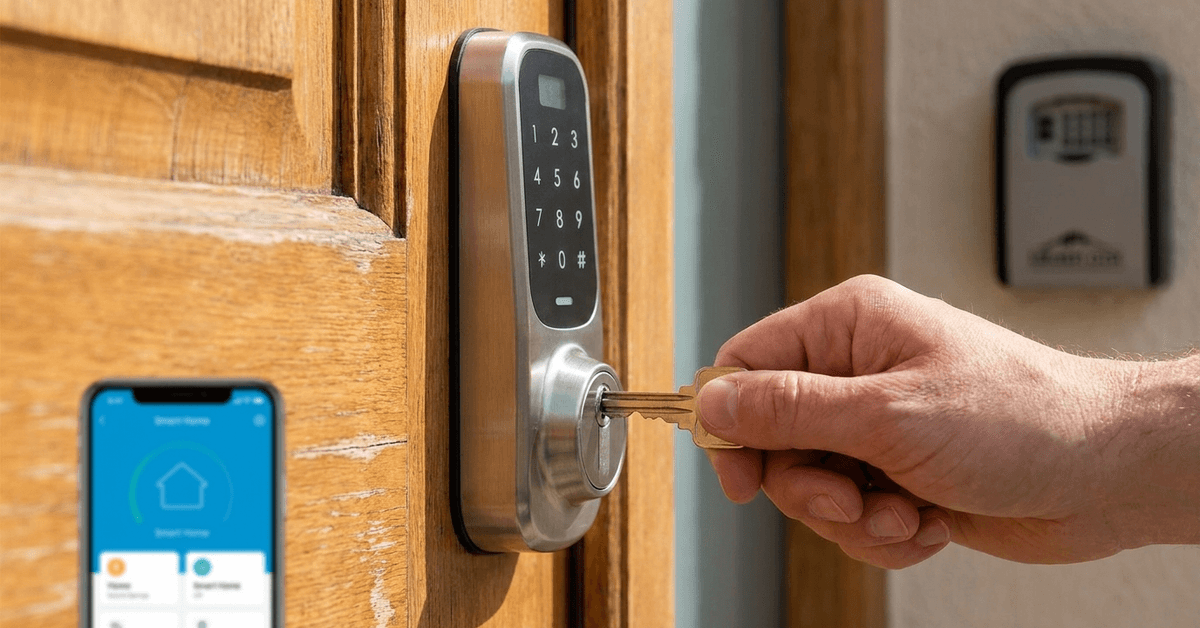
    • Physical Key Cylinder: Traditional metal keys inserted into a lock cylinder.
    • Keypad Hidden Override: Some locks hide the keyway behind a removable cover.
    • Reset Pin Hole: Rare, but some models allow access via a special reset pin tool.

    Physical key cylinders are currently the most widespread for residential locks. They offer familiarity and quick operation in emergencies.

    Key Differentiators When Selecting Backup Options

    Choosing the right backup is not just about what feels familiar. Security standards, access speed, and daily practicality all play a role.

    Quality of the Cylinder

    The ANSI Grade rating tells you the resistance level to picking and forced entry. Look for Grade 1 or Grade 2 where possible.

    Investing in a higher-grade cylinder increases overall door security. Some manufacturers use anti-bump or anti-drill technology in their keys as well.

    Integration With Smart Hardware

    Not all mechanical key slots align perfectly with smart lock electronics. Carefully check that inserting or using the backup key doesn’t reset or damage connected components.

    Concealment and Tamper Protection

    A backup key slot that’s visible can be a target. Hidden designs under faceplates or keypads lower the risk.

    Keep in mind: The more hidden the keyway, the more steps required for access. Balance concealment with emergency usability.

    Technologies and Protocols to Consider

    Modern smart locks may use several connection standards. Each one comes with its own implications for mechanical backup.

    • Z-Wave and Zigbee: Wireless mesh may fail only if power to the hub drops. Keyed access bypasses this risk completely.
    • Wi-Fi-Enabled Locks: If a lockbook or cloud service fails, physical keys are your surest fallback.
    • Bluetooth Low Energy: Proximity-based unlocking is convenient, but a dead battery instantly makes a backup key invaluable.

    Specific Product Examples

    The August Wi-Fi Smart Lock’s compatible deadbolts retain physical key usage. Schlage Encode offers a backup key cylinder hidden behind a security faceplate.

    Yale Assure series provides both a concealed key option and limited-use override keys if needed. Verify with the manufacturer if your model is compatible with common key blanks or requires specialized keys.

    Comparison Table: Popular Smart Locks With Mechanical Backup

    Product Name  Backup Key Style  Concealment Level 
    Schlage Encode  Physical Cylinder  Hidden Behind Faceplate 
    August Wi-Fi Smart Lock  Uses Existing Deadbolt Key  Standard Exposure 
    Yale Assure SL  Optional Override Key  Hidden Under Keypad 

    Step-by-Step: Setting Up Mechanical Backup Access

    1. Determine if your smart lock model has a physical key slot or an accessory module. If not, consider models with both smart and mechanical access.
    2. Store backup keys outside the home but within easy reach. Many homeowners choose discrete key safes or trusted neighbors for this purpose.
    3. Test the key operation regularly. If it feels sticky or resistant, cleaning and a light lubricant may help.
    4. Update all household members on how to access the key and use it in emergencies. Practice the process occasionally to avoid confusion during real outages.

    Security and Maintenance Practices

    Physical keys are not immune to wear or loss. Some tips help maintain their effectiveness over time.

    • Re-key or replace your cylinder after moving in, or after key loss.
    • Keep a record (ideally offsite) of your key code or serial number.
    • Inspect both smart and mechanical parts for signs of tampering or aging once a year.

    Legal and Privacy Considerations

    Local codes may require the ability to use a physical key for fire and safety. Check city or HOA rules to ensure your setup is compliant.

    Be careful about duplicate keys left with outside services or third parties. Every extra key increases risk of unauthorized access.

    Pros and Cons of Mechanical Backup Key Use

    Every security approach comes with advantages and trade-offs. Some homeowners may rarely need their backup key, but for others, it is essential.

    • Reliable physical access at all times, even during outages
    • Potential vulnerability if the key is lost, copied, or not well concealed
    • Needs occasional maintenance to remain effective

    Conclusion

    Choosing a mechanical backup key option for smart locks is both simple and sensible. It bridges the divide between new technology and trusted tradition. Homeowners benefit from tech-enabled convenience while enjoying a fallback that never needs charging or pairing.

    Yet the solution is not one-size-fits-all. Security grades, concealment, compatibility, and maintenance all deserve attention. With careful research and a focus on practical needs, you can confidently select the right backup system for your home.

    In an unpredictable world, this extra layer of reliability is more than a safety net—it is peace of mind, ready whenever you need it.

  • How to Integrate Smart Smoke Alarms With Indoor Lighting Systems

    How to Integrate Smart Smoke Alarms With Indoor Lighting Systems

    Combining smart smoke alarms with indoor lighting systems creates safer, more intuitive homes. This approach gives everyone in the house quicker visual alerts during emergencies.

    Anyone building a modern smart home or improving existing setups will benefit. It is practical for homeowners, renters, and even property managers interested in reliable alarm responses.

    Below is a structured guide covering protocols, tools, and setup steps. Each point considers your safety, system compatibility, and ongoing reliability.

    How to Integrate Smart Smoke Alarms With Indoor Lighting Systems

    Why Integrate Smoke Alarms with Indoor Lighting?

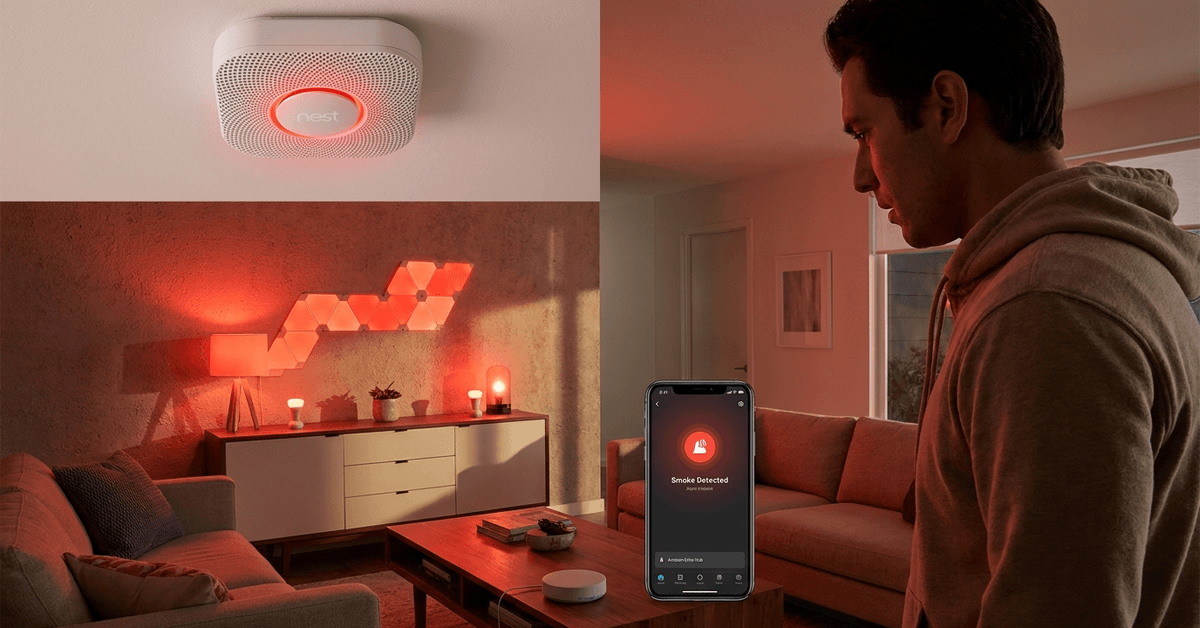
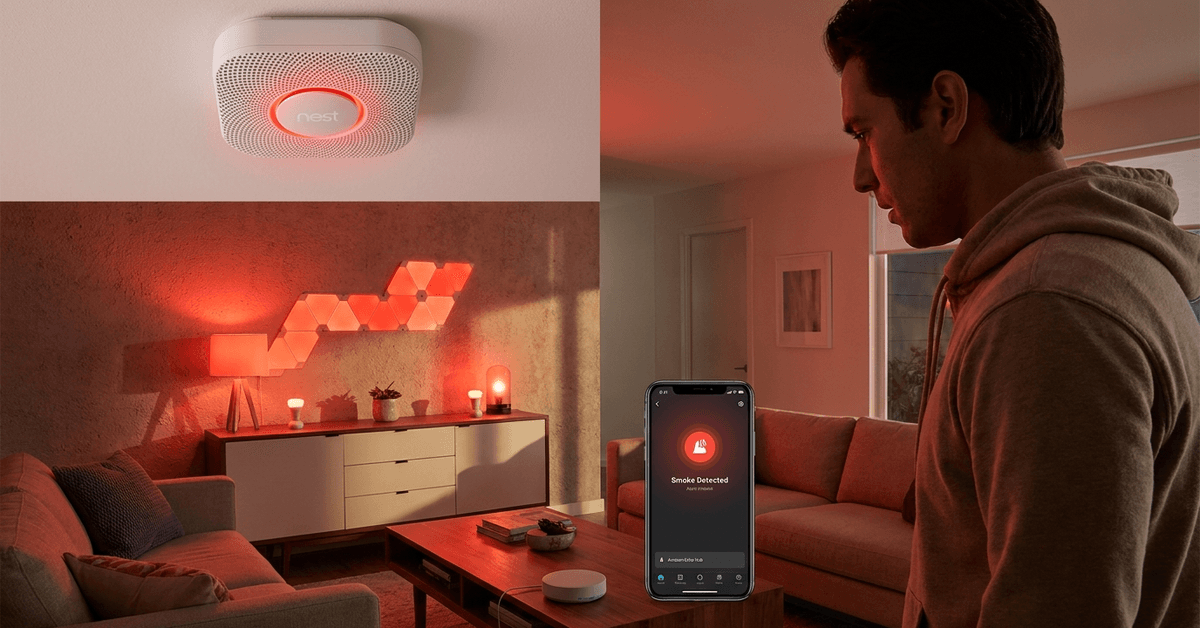
    Smart integration helps smoke alerts reach you faster. Visual cues from lights can wake heavy sleepers and help those with hearing impairments. It is also useful in large or multi-story homes.

    Key Benefits

    • Faster Awareness: Even if alarms are distant, lights alert everyone immediately.
    • Increased Accessibility: Helps those who might not hear alarms well, such as seniors or children.
    • Automation Potential: Lights can guide safe evacuation paths.

    Choosing Compatible Smart Smoke Alarms

    Begin by confirming your smoke alarm is compatible with automation protocols. Common ones include Zigbee, Z-Wave, Wi-Fi, and Thread. Not every alarm supports every platform.

    • Nest Protect: Integrates well with Google products.
    • First Alert Onelink: Supports HomeKit and Alexa routines.
    • Abode Smoke Monitor: Works via Z-Wave networks.

    Protocol Considerations

    Zigbee and Z-Wave usually require a smart hub. Wi-Fi models connect directly to routers and often to cloud accounts. Thread is newer but offers faster, mesh-based responsiveness.

    Selecting Compatible Indoor Lighting

    To sync with alarms, light bulbs or fixtures must be smart-enabled. Brightness control and color-changing features can boost alerting power.

    How to Integrate Smart Smoke Alarms With Indoor Lighting Systems
    • Philips Hue: Robust automation support and broad compatibility.
    • LIFX Bulbs: Work independently on Wi-Fi, easy app-based routines.
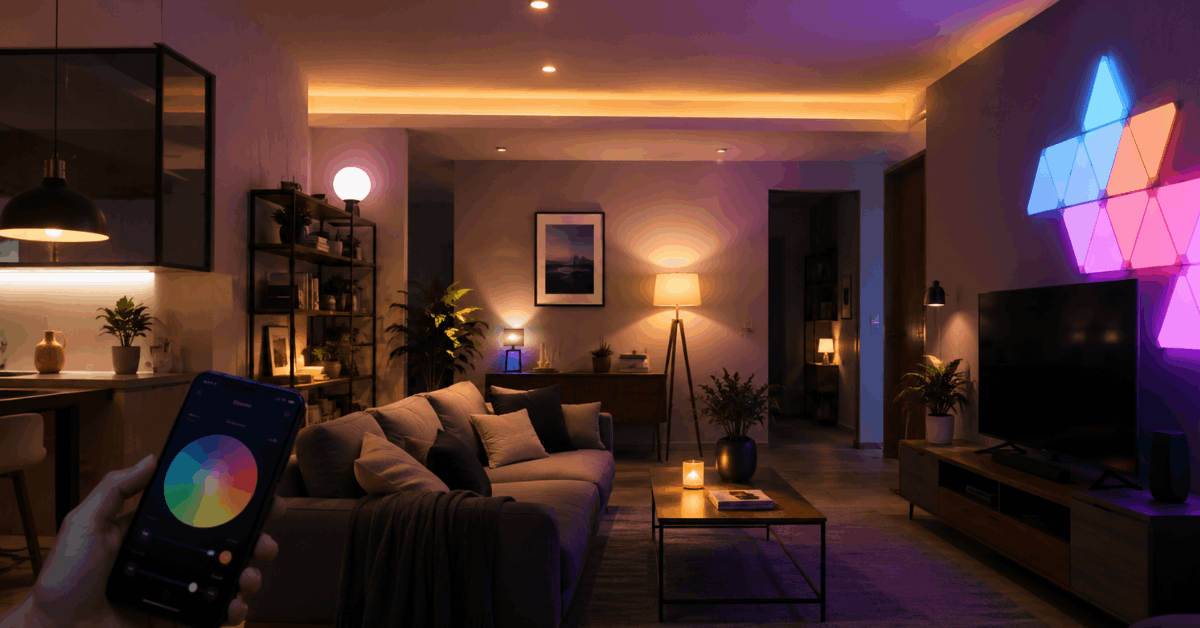
    • Nanoleaf Panels: Creative lighting for visible alerts in large spaces.

    Important Lighting Features

    Color variety allows for red warning flashes. Dimmable functions help prevent glare. Also, a fast response time is desirable for synchronizing with alarm triggers.

    Essential Smart Home Hubs and Platforms

    Central control hubs make integration smoother. Some platforms act as bridges between different brands and protocols. This flexibility is great for combining smoke alarms and lights from separate makers.

    • SmartThings Hub: Supports Zigbee and Z-Wave, easy automations.
    • Apple HomeKit: Useful for full Apple-centric environments.
    • Amazon Alexa + Echo Hub: Works with many third-party lights and sensors.

    Automation Apps & Services

    • IFTTT: Connects services using “if-this-then-that” logic.
    • Home Assistant: Advanced, open source, runs powerful routines locally.
    • Google Home Routines: Simplifies automation for Nest and compatible lights.

    Step-by-Step Guide: Linking Smoke Alarms and Lighting

    Preparation and System Checks

    1. Check that both devices (smoke alarm, lights) appear in your chosen platform or app.
    2. Update firmware for stable connectivity.
    3. Confirm Wi-Fi or mesh network coverage in all rooms.

    Create Device Groupings

    1. Add all smart lights into a single room or “group” in your automation app.
    2. Add the smoke alarm to the same ecosystem.

    Setting Automations

    1. In your hub or automation app, find the option labeled “Automations” or “Scenes.”
    2. Add a new automation with the smoke alarm as the “trigger.”
    3. Choose actions such as “turn on lights,” “set to red,” or “flash repeatedly.”
    4. Test the routine with a manual alert (using test buttons is safest).

    Example: Integration Using SmartThings

    1. Add smoke alarm and lights to your SmartThings account.
    2. Select “Automations.” Click “Add Routine.”
    3. Set up: If “smoke detected” (trigger), then “turn all lights on and flash red.”

    Example: Routines via Google Home

    1. Pair Nest Protect and compatible lights in the Google Home app.
    2. Create a “Routine” with the trigger as “smoke alarm sounds.”
    3. Set the action: Lights on, color red, brightness 100%.

    Common Protocols: What Actually Works?

    Interoperability is vital. Some protocols are more flexible in a mixed-brand environment.

    • Zigbee : Fast, mesh-based, good for whole-home coverage.
    • Wi-Fi: Easy to control, but depends on cloud reliability.
    • Z-Wave: Secure, often used for alarms and security sensors.
    • Thread: Low-latency, expanding rapidly, but fewer products.

    Third-Party Bridges and Services

    IFTTT often links brands that would not natively connect. Home Assistant can also bridge Zigbee, Z-Wave, Wi-Fi, or even legacy brands in a unified dashboard.

    Practical Setup Scenarios

    Apartment-Friendly Solutions

    Wi-Fi bulbs and smoke alarms (like LIFX and Nest Protect) are useful since they require no special wiring or hub installations. This makes them suitable for renters and small apartments.

    Large Home or Office Configurations

    Mesh networks such as Zigbee or Thread help maintain stable automation across different floors. SmartThings and Home Assistant are strong options for bigger layouts.

    Testing and Safety Considerations

    Regular Routine Testing

    Test automations monthly to ensure lights respond to the smoke alarm event. Always use test buttons, not actual smoke, for verification. This keeps things safe and regulated.

    Maintaining System Reliability

    • Keep firmware and apps up to date.
    • Back up automation routines for complex setups.
    • Consider battery backups for Wi-Fi routers, especially in outage-prone regions.

    Troubleshooting Common Integration Issues

    Devices Not Detecting Each Other

    • Check that both are connected to the same platform.
    • Restart the hub or the app controlling your routines.
    • Verify that all permissions (like microphone or notifications) are enabled.

    Automations Delayed or Failing

    • Investigate local versus cloud-based automations. Local routines are faster and more reliable.
    • Look for software conflicts if two apps attempt to control the same device.

    False Alarms or Lights Triggering Unnecessarily

    • Fine-tune sensitivity settings on your smoke detector.
    • Update device placement to reduce nuisance alarms, such as away from kitchens or bathrooms.

    Advanced Features and Future Trends

    Multi-Sensor Integration

    Many homeowners add additional sensors like carbon monoxide detectors or leak sensors into their automations. This creates a layered, proactive safety ecosystem.

    AI-Based Alert Filtering

    Some platforms (notably Home Assistant with advanced plugins) use algorithms to filter out false positives. This can reduce unwanted lighting activations.

    Upcoming Protocols

    The Matter standard aims to unify device compatibility across brands. Once mature, it should simplify these integrations significantly for everyone.

    Conclusion

    Integrating smart smoke alarms with indoor lighting strengthens home security, provides faster, more noticeable alerts, and makes every home more accessible. 

    With careful device selection and structured automations, homeowners can achieve safer environments, whether for families, guests, or even rental properties. 

    Ongoing testing and embracing modern platforms ensure your safety routines perform when they matter most. The right combination can bring genuine peace of mind in day-to-day living.

  • How to Use Smart Geofencing to Turn Off Appliances When You Leave

    How to Use Smart Geofencing to Turn Off Appliances When You Leave

    Many homeowners look for easier ways to save energy and boost home security. Smart geofencing can help by turning off appliances automatically when nobody’s home.

    This setup is practical for busy families, frequent travelers, and anyone wanting a safer, smarter house. With the right tools, geofencing becomes seamless.

    Understanding Smart Geofencing in Home Automation

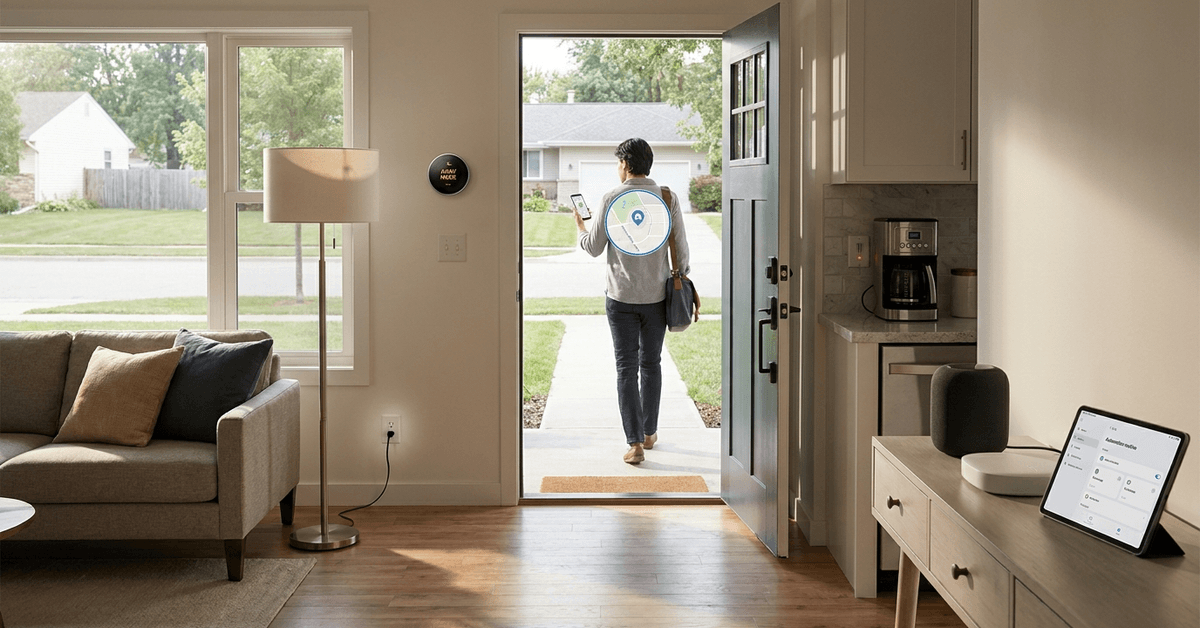
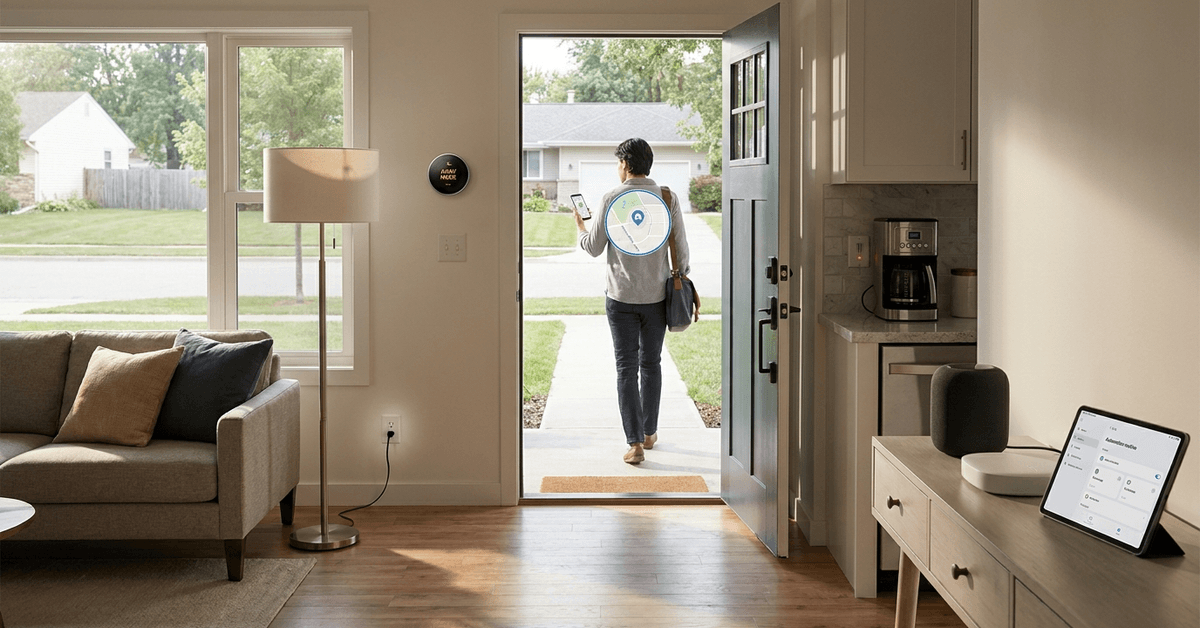
    Geofencing uses your phone’s location to trigger automation events as you enter or leave a defined area. This tech runs on GPS, Wi-Fi, and mobile data systems.

    How to Use Smart Geofencing to Turn Off Appliances When You Leave

    Most modern smart home platforms, like SmartThings and Home Assistant, offer built-in geofencing. They connect with your phone to detect real-world presence at home.

    How Geofencing Works with Home Devices?

    Smart apps set a virtual boundary around your house. When the last person leaves, a preset routine can power off devices or systems.

    Lights, plugs, and climate control can all respond, provided they are compatible with the platform and automation rules.

    Why Turn Off Appliances Automatically?

    Leaving appliances running needlessly can waste energy or even pose risks. Turning them off remotely is one way to tackle this problem.

    How to Use Smart Geofencing to Turn Off Appliances When You Leave

    Some of the main benefits include lower power bills, reduced fire hazards, and improved peace of mind.

    Key Appliances That Can Be Managed

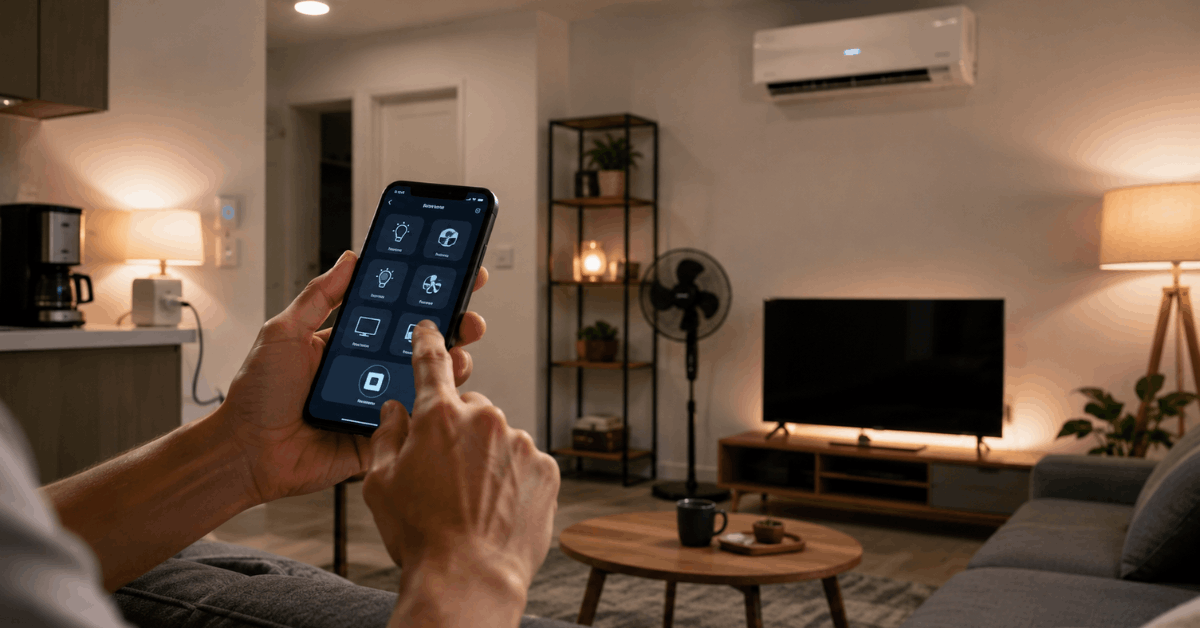
    • Smart plugs for lamps and fans
    • Wi-Fi-enabled air conditioners
    • Connected coffee makers
    • Entertainment systems
    • Electric heaters

    Each device needs smart connectivity to be controlled by automation.

    Requirements and Compatible Hardware for Geofencing

    Reliable geofencing needs a few essentials: a compatible smart hub, a smartphone with location services, and smart plugs or switches.

    SmartThings Hub is a popular choice, but Home Assistant and Apple HomeKit work just as well for connected homes.

    Common Supported Devices

    • TP-Link Kasa smart plugs
    • Philips Hue smart lights
    • Ecobee or Nest smart thermostats
    • Any device with IFTTT or Alexa/Google Home integration

    Not every plug or outlet is compatible. Always check device specs before purchasing new hardware.

    Recommended Software Platforms With Geofencing Automation

    Smart home platforms serve as the backbone for location-based control. Their mobile apps use your location to automate routines and scenes.

    Some leading apps include Samsung SmartThings , Apple Home, and Home Assistant. Third-party apps like IFTTT and Life360 add even more flexibility.

    Platform Highlights

    • SmartThings: High reliability, wide device support
    • Home Assistant: Powerful, privacy-friendly, open-source
    • Apple Home: Tight ecosystem for iPhone/iPad users
    • Google Home: Good device compatibility and routine options

    Setting Up Smart Geofencing Step-by-Step

    A basic setup uses your phone, a compatible outlet or switch, and the app’s automation tools. Below is a simple guide using SmartThings as an example.

    Initial Steps

    1. Install the SmartThings mobile app on your phone.
    2. Sign in and ensure location permissions are enabled.

    Connecting Devices

    1. Plug appliances into a smart plug (like Kasa or TP-Link models).
    2. Add each plug to your SmartThings account.

    Configuring Geofence Automations

    • Navigate to the Automations section in the app.
    • Select “Add Automation.”
    • Pick the “When everyone leaves” trigger.
    • Set your home location by adjusting the on-screen map.
    • Choose which devices to power off when the last person leaves.
    • Save and test the routine by leaving and returning with your phone.

    Troubleshooting Common Issues

    • Location not updating: Keep GPS and Wi-Fi active for accuracy.
    • Devices not responding: Confirm plugs or bulbs are online and linked.
    • Routine not triggering: Review automation timing settings and phone permissions.

    Tips to Optimize Reliability and Security

    To avoid false triggers or lapses, consider these proven adjustments. Practical fine-tuning can save time and stress later.

    Improving Accuracy

    • Expand the geofence radius to avoid missed exits if GPS drifts.
    • Use Wi-Fi assist features in your home app for extra precision.
    • Add multiple family phones so everyone is included in routines.

    Enhancing Safety

    • Combine geofencing with motion detectors for layered security.
    • Set a short delay on automations to prevent turning off devices if someone returns quickly.

    Smart Home Privacy Concerns

    Privacy matters when using phone location for automation. Reputable platforms, like Home Assistant, often process data locally for better control.

    Review app permissions regularly and stay updated with security fixes. Most platforms let you turn off features that feel too intrusive.

    Legal and Safety Considerations

    Disabling vital appliances automatically is not always safe. Avoid connecting critical systems like medical devices to automated shutoffs.

    Review warranty terms for all smart devices used. Well-known brands like Philips, TP-Link, or Ecobee offer clear usage guidelines.

    Conclusion: Achieve Seamless Home Automation With Geofencing

    Smart geofencing brings true convenience to energy savings and safety. By blending the right apps, devices, and practical knowledge, homeowners gain control and comfort when stepping out the door.

    Routine use helps maximize both security and peace of mind. With careful planning, the risks are low and the long-term gains are rewarding for almost any connected household.

  • How to Use Smart Water Leak Sensors to Prevent Kitchen Damage

    How to Use Smart Water Leak Sensors to Prevent Kitchen Damage

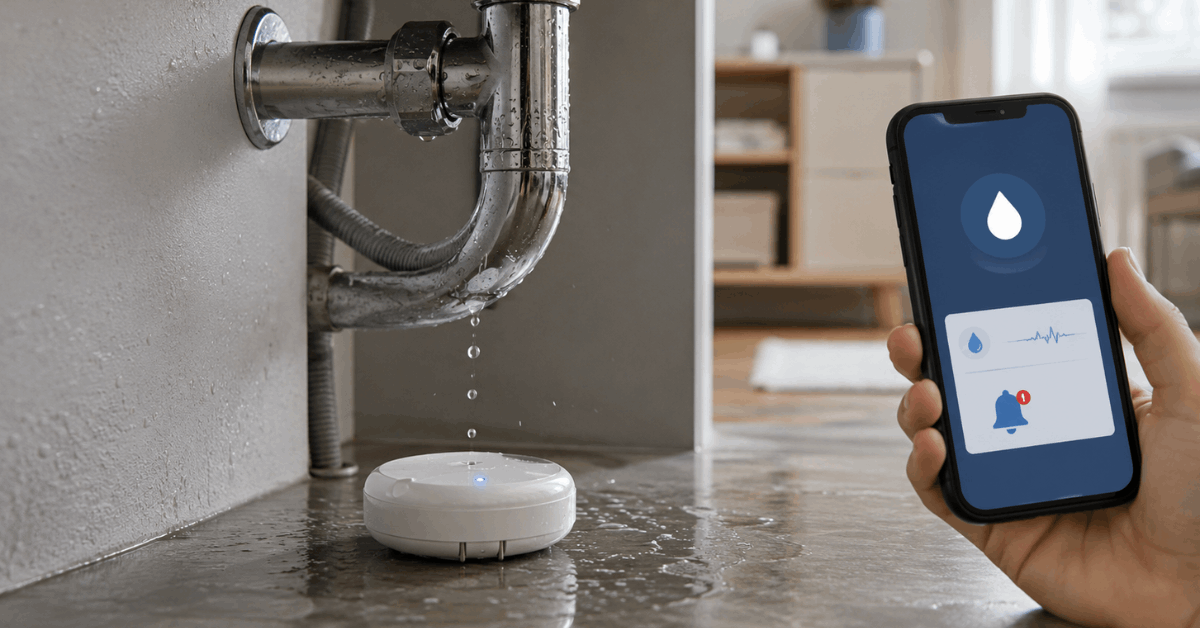
    Water leaks in the kitchen can cause costly damage if they go unnoticed. Smart water leak sensors can provide real-time alerts and remote monitoring to help detect problems early. 

    Many models are affordable, easy to install, and compatible with common smart home systems. This guide explains practical setup tips, useful apps, and ways to improve leak-detection automation.

    Why Water Leak Sensors Matter for Kitchen Safety?

    Kitchen water leaks often go unnoticed under cabinets, sinks, or dishwashers. The result is costly repairs and, perhaps worse, loss of cherished kitchen appliances or finishes.

    Hidden Leak Risks

    Rubber seals and water lines can weaken as appliances age. Kitchens experience frequent plumbing use, and small leaks can go undetected for weeks.

    Potential Costs

    Insurance statistics show that water damage often costs hundreds to thousands of dollars. Expenses include not just the plumbing fix, but cabinet repairs and mold remediation.

    Real-World Examples

    Many residents report coming home to warped wood or buckled tile. Slow leaks behind dishwashers are especially common, and sometimes only discovered through a musty smell or puddle.

    How Smart Water Leak Sensors Operate?

    Modern smart leak sensors detect moisture in real time. Most use a pair of metal contacts that, when touched by water, complete an electrical circuit and trigger an immediate alert.

    How to Use Smart Water Leak Sensors to Prevent Kitchen Damage

    Key Features

    • Real-time moisture detection 
    • Battery operation and long battery life
    • Wireless communication with a central hub or Wi-Fi
    • Mobile app notifications for rapid response

    Tech Protocols Involved

    • Zigbee and Z-Wave: These popular smart home protocols minimize interference with Wi-Fi and offer reliable, low-power performance.
    • Wi-Fi: Direct connection to your home network and cloud services for app-based alerts without a hub.

    Choosing the Right Leak Sensor for Your Needs

    Several widely-used brands are trusted in the smart home space. Each serves slightly different needs, depending on compatibility and app support.

    • Eve Water Guard: Works well with Apple HomeKit and sends loud audible alerts plus push notifications.
    • Shelly Flood Sensor: Integrates with Shelly Cloud and MQTT for advanced automations.
    • Aqara Water Leak Sensor: Ideal for Zigbee-based setups; pairs with Aqara’s hub and the Mi Home app.
    • Samsung SmartThings Water Leak Sensor: Compatible with the SmartThings ecosystem, which supports routines across many brands.
    • D-Link DCH-S162: Wi-Fi-based option with built-in siren and direct mobile alerts.

    Things to Consider

    • Protocol compatibility with your hub (if you already use a platform like SmartThings or HomeKit)
    • App usability and alert features
    • Physical sensor size based on placement
    • Battery life and replacement ease

    Where and How to Place Sensors in the Kitchen?

    Correct placement is key for timely alerts. Common leak zones vary by kitchen design but some areas remain universal.

    Recommended Sensor Locations

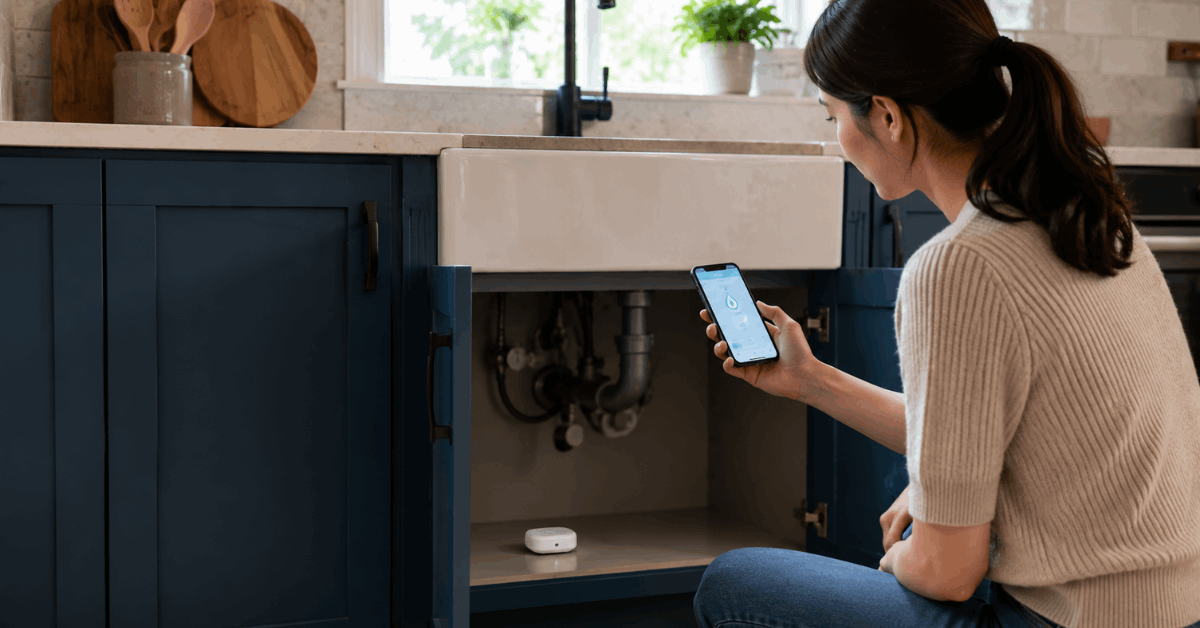
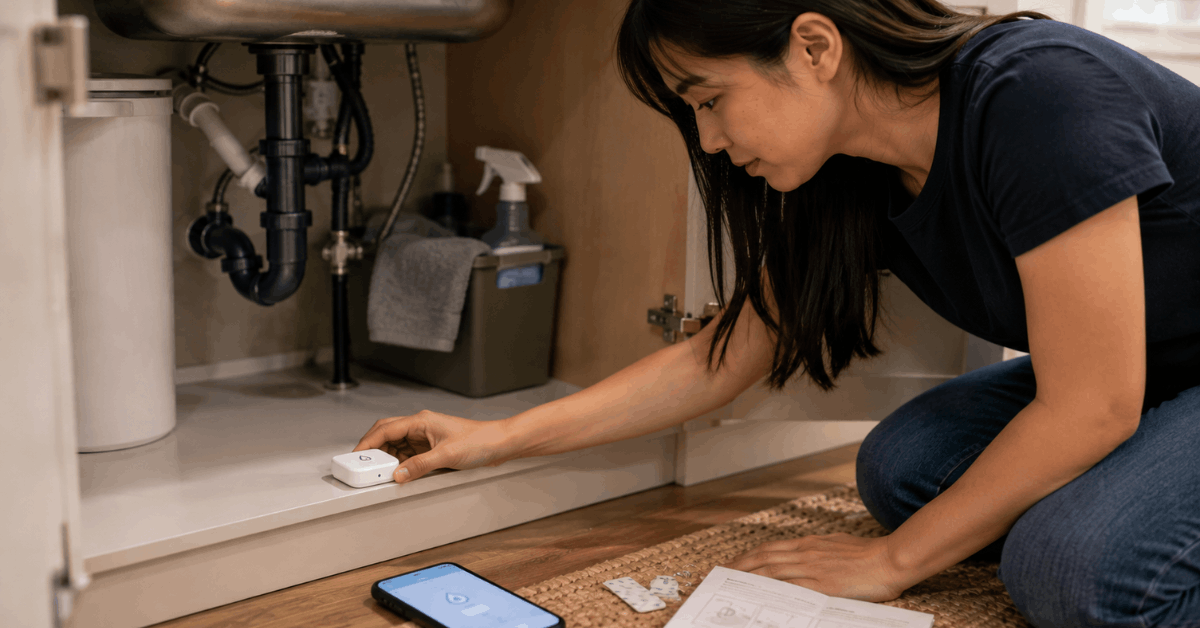
    • Under sink cabinets (especially beneath the P-trap and faucet connections)
    • Behind or alongside the dishwasher
    • Near refrigerator ice maker or water dispenser connections
    • Under washing machines if located in kitchen areas

    Placement Tips

    • Position sensors so water flows toward the contacts, not away from them.
    • Maintain easy access for battery changes.
    • Consider adding a sensor to each appliance connection, not just obvious wet areas.

    Step-by-Step: Installing Your Smart Water Leak Sensor

    Installation typically takes only a few minutes per sensor. Most models arrive with adhesive pads, screws, or stand-alone bases for flexible mounting.

    How to Use Smart Water Leak Sensors to Prevent Kitchen Damage
    1. Unbox your chosen sensor and check batteries are inserted or charged.
    2. Download the official app (e.g., Aqara Home, Shelly Cloud, SmartThings, Eve app).
    3. Pair the sensor with your smartphone or smart home hub, following the onscreen prompts in your app.
    4. Test the sensor by placing a damp paper towel on the metal contacts to ensure you receive an alert.
    5. Mount or place the sensor in your chosen spot. Double-check it won’t be knocked out of position by cleaning or dropped items.

    Optional Automation Upgrades

    • Connect leak sensors to a smart shutoff valve for automatic water isolation.
    • Send alerts to multiple family members’ phones or smart speakers for faster intervention.
    • Integrate with other automations, for example triggering lights or a siren when a leak is detected.

    Top Mobile Apps and Smart Home Platforms

    Most leak sensors come with a dedicated app or support leading third-party platforms. The following ecosystems are the most popular:

    • Apple HomeKit: Integrates deeply with iPhone or iPad and allows automation with other Apple home devices.
    • Samsung SmartThings: Broad compatibility with sensors, cameras, and other smart tech.
    • Google Home: Adds leak sensors to routines for voice alerts or notifications.
    • Shelly Cloud: Useful for more customizable automations and MQTT support.

    Notification Customization

    • Homeowners can set up push notifications, text messages, or even email alerts based on personal preference.
    • Some platforms allow silence overrides for urgent alerts, ensuring no leak goes unnoticed, even in Do Not Disturb mode.

    Maintenance and Testing for Ongoing Reliability

    Regular maintenance helps ensure leak sensors work properly when needed. Test each sensor at least every few months using a damp cloth to activate the contacts. 

    Check battery levels in the app and replace low batteries promptly. Also confirm that each sensor remains correctly positioned after cleaning or moving appliances.

    Integrating Leak Sensors with Kitchen Automation

    Smart leak sensors can work with other connected devices to improve kitchen safety. Automations can provide faster alerts and help reduce water damage when a leak occurs.

    Smart Shutoff Valves

    Smart shutoff valves can automatically stop water flow when a serious leak is detected. Systems such as Flo by Moen can add another layer of protection to the kitchen. This can be especially useful when no one is home to respond immediately.

    Alerts and Smart Home Routines

    Leak sensors can connect with voice assistants or smart displays to provide quick warnings. Users can also create routines that change smart-light colors or display alerts when water is detected. These automations make potential leaks easier to notice and address quickly.

    Preventing False Alarms and Common Troubleshooting

    False alarms can happen because of splashes, condensation, cleaning, or nearby pets. Proper placement and basic maintenance can help sensors respond more accurately.

    Choose the Right Sensor Placement

    Avoid placing sensors where routine splashes or moisture are common. Position them close to likely leak sources without exposing them to normal kitchen activity. Adjust the location if false alarms continue.

    Keep Sensors and Apps Updated

    Check the sensor app and firmware regularly for available updates. Updates can improve reliability and correct software-related problems. If issues remain, inspect the sensor, connection, and placement before resetting the device.

    Conclusion: Smart Leak Sensors as Essential Kitchen Safeguard

    Smart water leak sensors can help detect hidden kitchen leaks before they cause serious damage. Proper placement, regular testing, and customized alerts can improve their reliability. 

    While they cannot prevent every water-related problem, they provide a practical layer of protection for homeowners. Consistent maintenance can help reduce repair risks and improve peace of mind.

  • The Beginner’s Guide to Smart Ambient Temperature Monitors

    The Beginner’s Guide to Smart Ambient Temperature Monitors

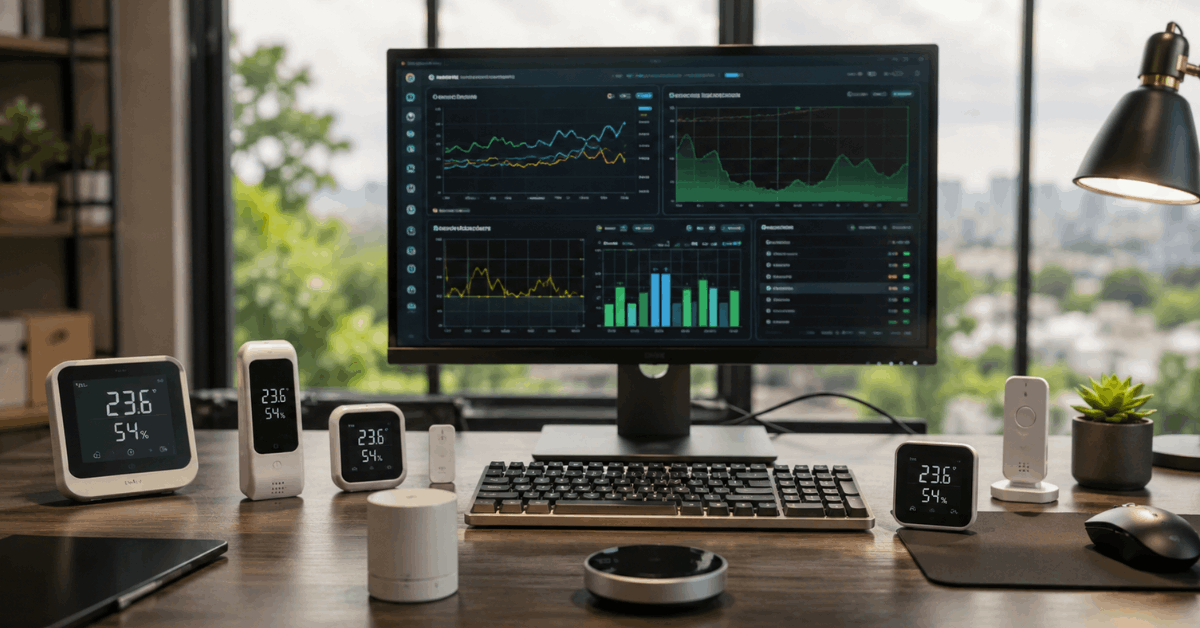
    Smart ambient temperature monitors are practical additions to any modern home. These small devices help track and manage indoor climate. 

    For homeowners interested in smart automation, understanding how these devices function can lead to more comfortable, energy-efficient living.

    This guide is aimed at beginners who want a clear, step-by-step understanding of smart ambient temperature monitoring. Knowing what to look for, how to choose, and how to connect these monitors can make a real difference in home comfort.

    What Are Smart Ambient Temperature Monitors?

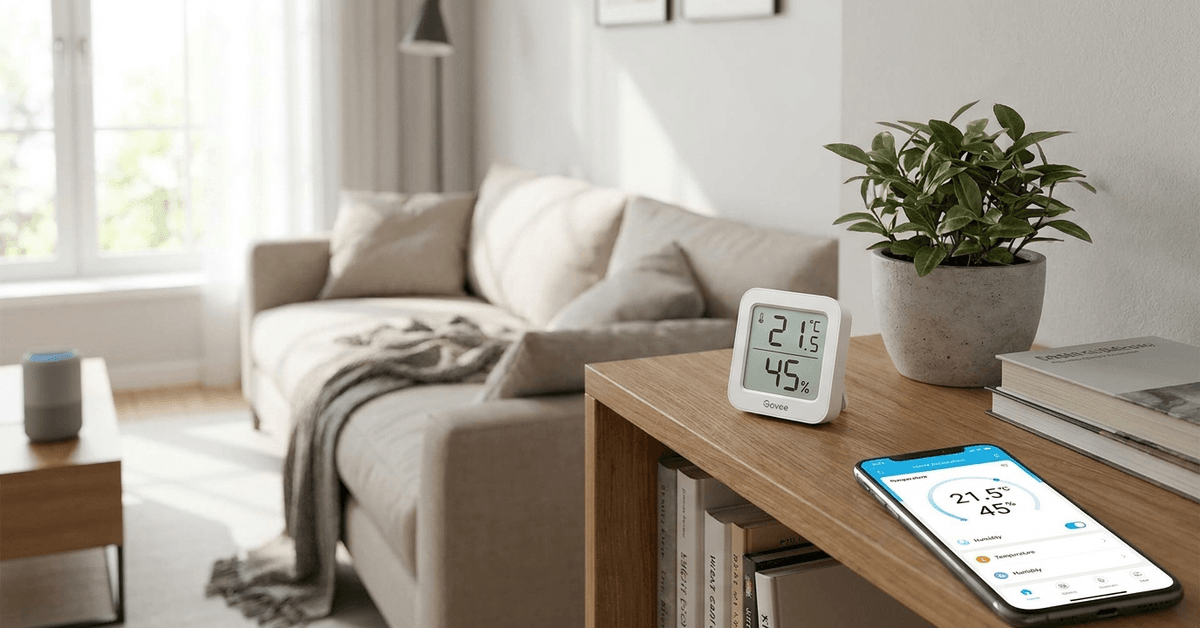
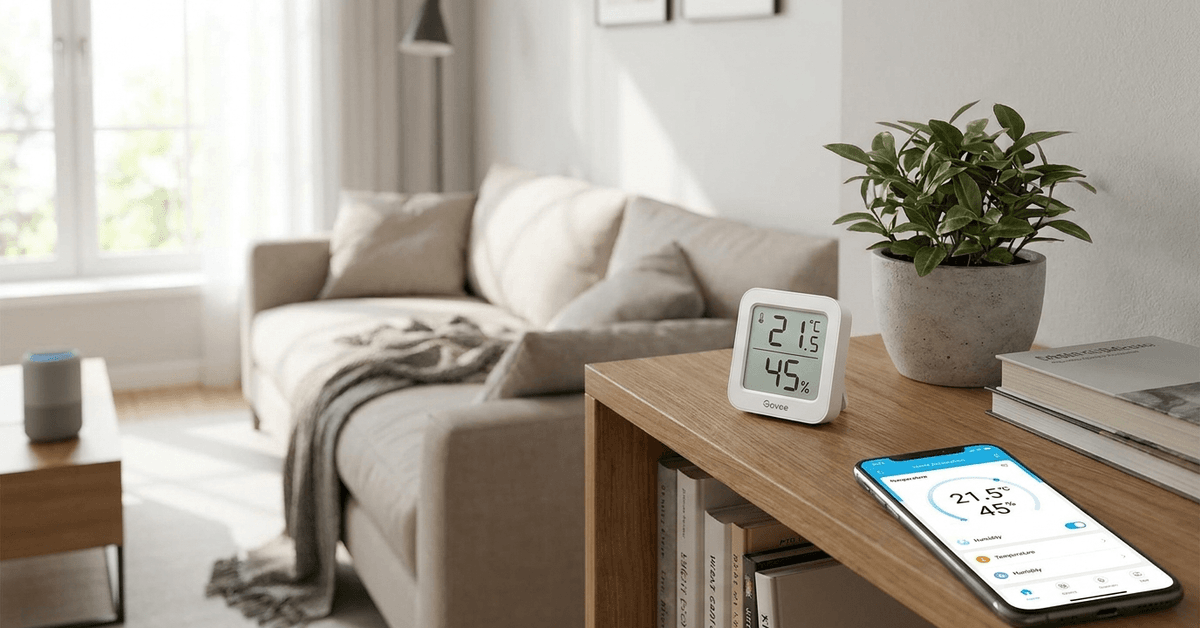
    Smart ambient temperature monitors are devices that detect, log, and often automate temperature responses in real time. 

    They frequently include humidity sensors as well. Usual forms are compact units that sit discreetly on walls, shelves, or furniture.

    The Beginner’s Guide to Smart Ambient Temperature Monitors

    Many monitors connect wirelessly to smart home hubs or IoT platforms. Once integrated, these devices can trigger heating, cooling, or fan systems, depending on readings and your chosen preferences.

    Why Does Ambient Temperature Monitoring Matter?

    Accurate ambient temperature data has real benefits. It increases personal comfort and can extend the life of sensitive household items, like musical instruments or electronics.

    Room temperature impacts sleep, energy bills, and even indoor air quality. For homes with infants, elderly residents, or pets, maintaining consistent ambient conditions is especially important.

    Key Features to Consider When Choosing a Monitor

    Sensor Precision and Range

    Accuracy is a top priority. The most reliable monitors keep readings within ±0.5°C. Models with a broad range (typically -20°C to 50°C) are well-suited to most conditions.

    The Beginner’s Guide to Smart Ambient Temperature Monitors

    Connectivity Options

    Most monitors use Wi-Fi, Bluetooth, or Zigbee. Wi-Fi models sync directly with routers. Zigbee is favored for smart home integration because of low power draw and stable networks.

    App and Platform Compatibility

    Ease of use depends on app support. Popular brands include integration with SmartThings, Apple Home, Google Home, or dedicated apps such as Govee Home.

    Data Logging and Export

    Continuous monitoring is useful for analysis. Some monitors store years of history, while others offer real-time data export, typically in CSV format for spreadsheets.

    Battery Life and Power Source

    Most smart temperature sensors run on batteries. Long battery life — up to two years — is convenient. Some wall-powered options exist for permanent setups.

    Popular Smart Ambient Temperature Monitors

    • Aqara Temperature and Humidity Sensor: Reliable Zigbee device, widely used with SmartThings and Apple HomeKit
    • Govee WiFi Thermo-Hygrometer: Good app support, live alerts, multiple device management
    • Ecobee SmartSensor: Pairs with Ecobee thermostats, provides room-level temperature data
    • Xiaomi Mi Temperature and Humidity Monitor 2: Bluetooth device, affordable, minimalist design
    • SwitchBot Meter Plus: Versatile, compatible with Alexa and Google Home

    How to Install a Smart Temperature Monitor?

    • Unpack the monitor and insert any required batteries.
    • Decide where to place the unit; away from vents, direct sunlight, stoves, or windows is preferable.
    • Download the recommended app (such as Govee Home or SwitchBot).
    • Open the app and follow prompts to add a new device.
    • Connect the monitor to Wi-Fi, Bluetooth, or Zigbee, based on specifications.
    • Name the device and assign its location for easier management.

    Some users find setup confusing. It’s not uncommon to need a couple of tries connecting Zigbee devices to some hubs. Placement also requires thought — a spot too close to a window can cause inaccurate readings.

    Integrating With Your Smart Home System

    Pairing With a Hub

    Integration unlocks automations. Zigbee monitors typically pair with a central hub like SmartThings, Home Assistant, or Hubitat. Each hub has slightly different steps but usually involves searching for new devices in the hub dashboard.

    Automating Routines

    Once added, users commonly build routines, for example:

    • If bedroom temperature falls below 19°C, turn on heater.
    • If living room exceeds 27°C, open smart window or turn on the fan.

    These automations depend on precise sensor data and supported device controls.

    Mobile App Notifications

    Apps can push custom alerts if thresholds are met or exceeded. Many find this useful when away from home to prevent frozen pipes or overheated rooms.

    Review of Protocols and Compatibility

    The protocol chosen affects speed, range, and which smart hubs work natively. The main protocols are:

    • Bluetooth: Short range, easy to set up, best for single-room monitoring
    • Wi-Fi: Broad compatibility, can cause small network congestion with many devices
    • Zigbee: Mesh network, ideal for large homes, popular among smart home enthusiasts

    Z-Wave is sometimes found in North America but is less common for simple temperature sensors.

    Troubleshooting Common Issues

    Connectivity drops sometimes happen, especially with Wi-Fi units far from routers. Zigbee can fail if there are too few other Zigbee nodes nearby to strengthen the mesh.

    If temperature readings seem off, moving the monitor to a different location often helps. App bugs are occasionally to blame — updates generally resolve these.

    Tips for Using Smart Ambient Temperature Monitors in Real Homes

    • Placement is critical. Avoid locations near radiators, kitchens, or drafts.
    • Regularly check battery status via the app, particularly before travel.
    • Update device firmware periodically for accuracy improvements and bug fixes.
    • Review your temperature data monthly to spot patterns in energy usage or comfort.
    • If security is a concern, choose monitors from reputable brands with transparent privacy policies.

    External Integrations and Third-Party Automation

    Advanced users sometimes connect sensors to platforms like IFTTT or Home Assistant for more complex automations — such as sending a Slack message if a server closet overheats. 

    Integration requires enabling the relevant service within the monitor’s app, then linking to the automation platform through an API or webhook.

    Energy Savings and Smart Home Security Benefits

    Optimizing home temperature leads to lower heating and cooling costs. Security systems benefit by triggering alerts if abnormal temperature fluctuations suggest fire or intrusion (for example, a window left open in winter).

    Remote monitoring also provides peace of mind for second homes or sensitive spaces, making these devices valuable components in a smart security setup.

    Conclusion

    Smart ambient temperature monitors bring both comfort and efficiency to the modern home. The right monitor, well positioned and properly connected, adds more than just convenience. It can lower bills, enhance automation, and even protect valuable possessions. 

    Beginners may find initial setup takes patience, but the practical benefits quickly become clear. Over time, data from these devices can inform everything from day-to-day comfort choices to major upgrades in smart home management. 

    For anyone interested in a safer, more responsive home environment, this technology is a worthwhile investment.

  • How to Clean and Maintain Smart Smoke Detectors Properly

    How to Clean and Maintain Smart Smoke Detectors Properly

    Smart smoke detectors protect homes by offering early alerts and app integration. Dust and everyday air particles, however, can interfere with their sensors over time.

    Homeowners and renters interested in smart home safety can benefit greatly from maintaining these devices. Cleaner units detect fires more accurately and prevent frustrating nuisance alarms.

    Why Smart Smoke Detector Maintenance Matters?

    Smart smoke detectors, like Nest Protect or First Alert Onelink, rely on advanced sensors and wireless connectivity. Even minimal debris or battery neglect impacts effectiveness.

    How to Clean and Maintain Smart Smoke Detectors Properly

    Detecting issues early reduces the risk of sensor failure. Plus, regular care extends the detector’s lifespan and keeps app notifications reliable.

    Understanding Your Smart Smoke Detector’s Technology

    Some models use a combination of photoelectric and ionization sensors. Others add carbon monoxide detection. Each reacts to different particle or gas signatures.

    It helps to read the product manual, as manufacturers may suggest unique cleaning intervals or steps for their models. For reference, Google Home usually syncs with Nest devices for easy alerts when maintenance is overdue.

    How Often Should You Clean Smart Smoke Detectors?

    Most experts suggest an exterior cleaning at least once every two to three months. A full internal inspection is advisable yearly or if you notice false alarms.

    Homes with pets, smokers, or recent renovations may need more frequent attention due to particle buildup that can quickly accumulate.

    Step-by-Step Guide: Cleaning Your Smart Smoke Detector

    Preparation checklist

    How to Clean and Maintain Smart Smoke Detectors Properly
    • Turn off power via the device’s app or at the circuit if hard-wired (if unsure, check the specific manual).
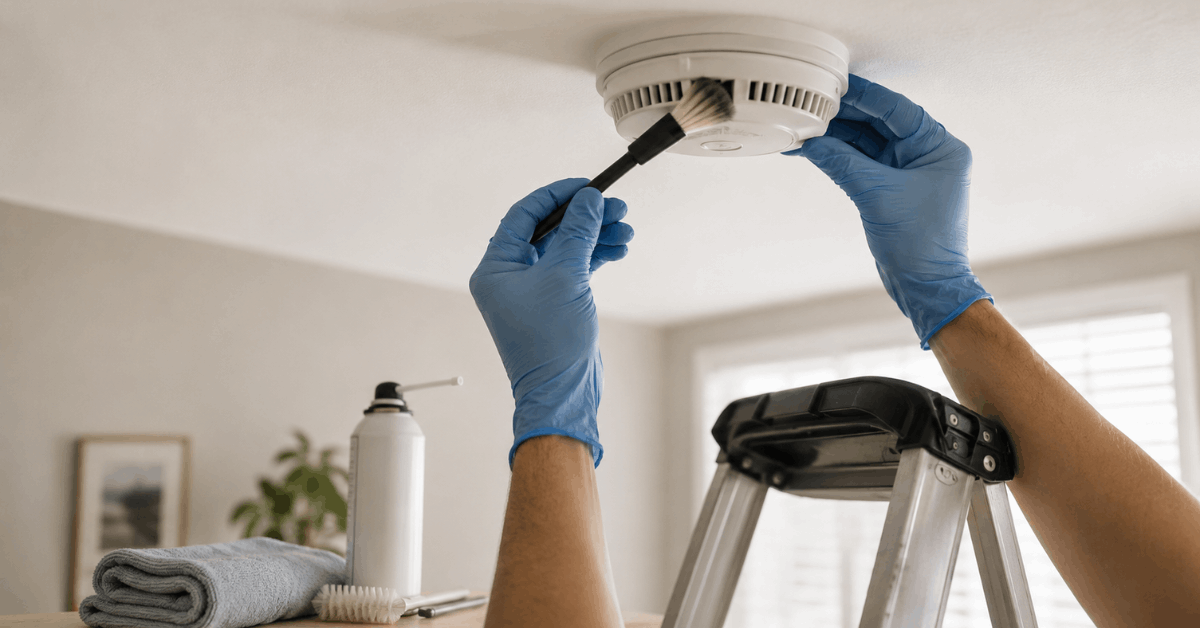
    • Gather a soft brush, compressed air and a slightly damp cloth.
    • Have a sturdy, safe step stool or ladder on hand.

    Exterior cleaning

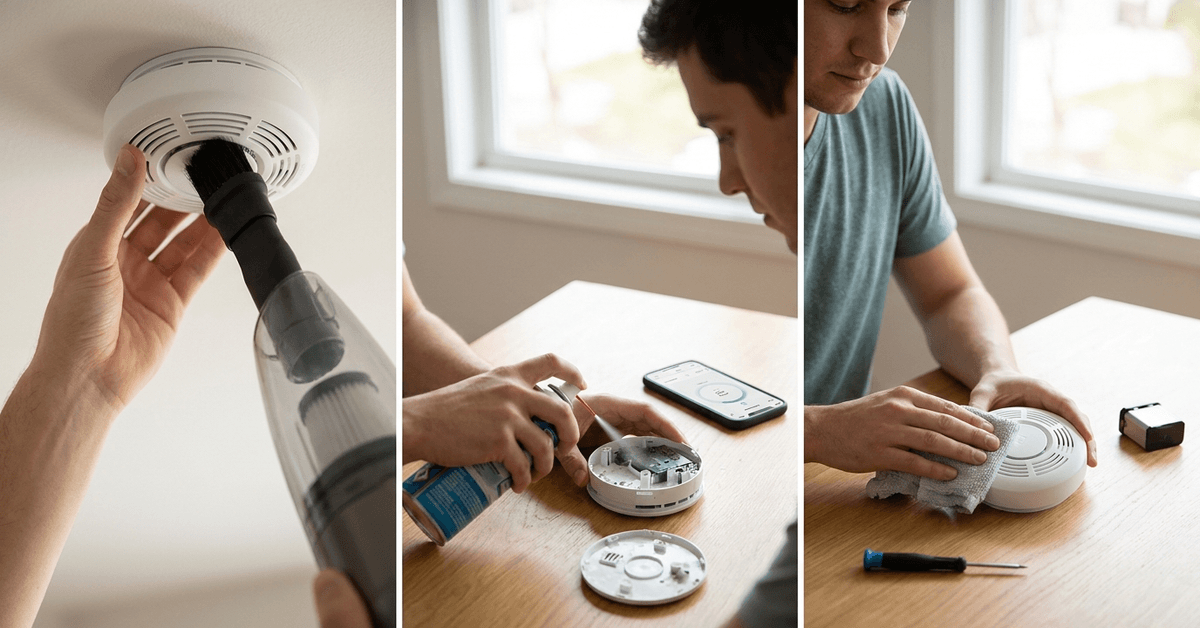
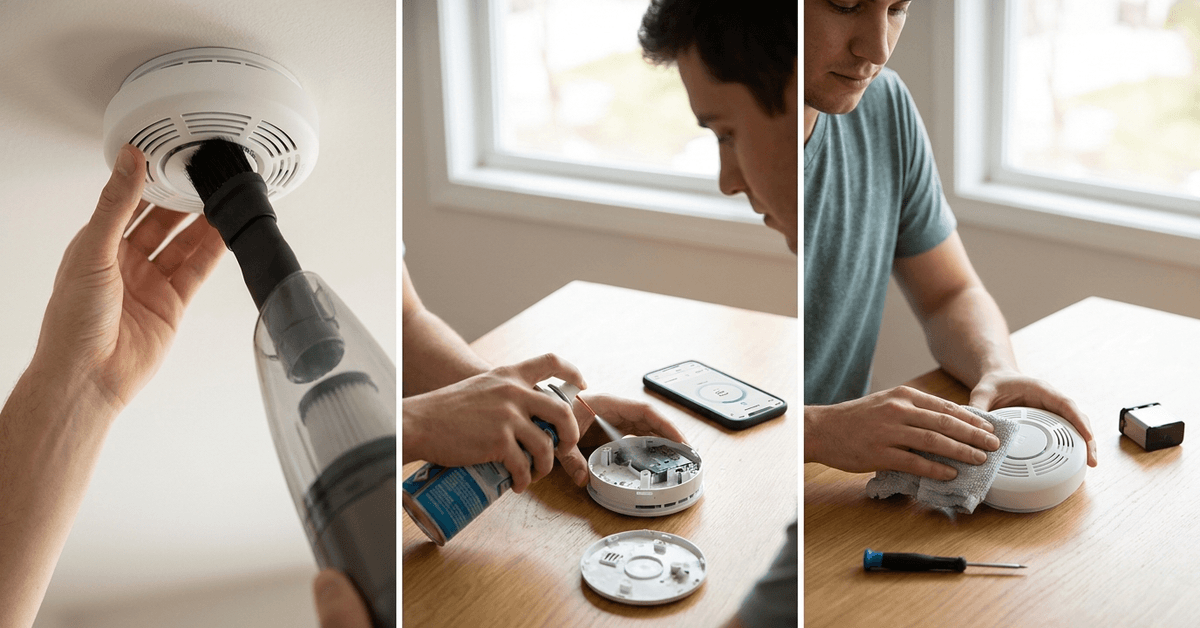
    • Gently brush around the vents and sensor inlets to dislodge loose dust.
    • Use short bursts from a can of compressed air for hard-to-reach openings.
    • Wipe the casing lightly with a damp cloth and buff dry. Avoid direct water on any sensors.

    Interior inspection and cleaning

    • If the manual allows, twist to remove the unit’s cover or front plate.
    • Visually inspect for visible debris, insect remains, or corrosion on contacts.
    • Clean gently with the soft brush and air, not touching the sensor’s surface directly.
    • Reassemble carefully, aligning all clips and seals to maintain airtightness.

    It might be tempting to use cleaning sprays, but plain air and light brushing are safest to avoid residue inside the detector.

    Maintaining Software and Device Connectivity

    Smart smoke detectors use Wi-Fi, Zigbee, or Z-Wave to connect to home hubs. Regular software upkeep supports accurate alerts and faster emergency notifications.

    • Enable firmware auto-updates via the device’s official app, such as Nest App or Onelink Home.
    • Check that push notifications are active in your mobile settings for both smoke and CO alerts.
    • Run monthly device tests through the app to verify sensor and speaker health.

    A network outage or outdated app can sometimes prevent notifications, so it’s worth double-checking router reliability too.

    Replacing Batteries and Backup Power

    Some smart smoke units use sealed lithium batteries. Others are hardwired but require battery backups. Ignoring low power warnings leads to missed alarms or device failures.

    • Replace replaceable batteries annually, or per the low-battery alert.
    • For sealed units, note the manufacturer’s stated lifespan—often 7 or 10 years.
    • Mark the install or battery change date inside the detector’s cover with a marker for easy tracking.

    Outages during storms or renovations often drain backup power, which many people overlook until an alert appears.

    Signs Your Smart Smoke Detector Needs Extra Attention

    • Frequent nuisance alarms or sudden silence from the device indicate a possible sensor or software issue.
    • Yellow or red status lights, especially on Nest Protect, suggest a need for cleaning or replacement.
    • Repeated missed notifications in the app can point to connectivity problems or outdated firmware.

    Addressing these signs quickly helps avoid dangerous delays in real-world emergencies.

    Quick Troubleshooting for Common Issues

    • If you notice chirping or beeping, check if it’s a low-battery warning or maintenance reminder in the app.
    • A device going offline might benefit from moving your router or using a Wi-Fi extender for broader coverage.
    • False alarms after cleaning may result from lingering dust—run a fan in the room for a few minutes, then repeat a gentle cleaning cycle.

    Legal, Safety, and Regulatory Reminders

    Local regulations may mandate smoke detector placement in every sleeping area and main hallway. Proper maintenance is often a legal obligation for property owners.

    • Check the guidance tied to your city or landlord to verify required maintenance frequency.
    • Only approved devices, such as UL-listed smart smoke detectors, should be used in rental or managed properties.
    • If unsure about wiring or mounting, licensed electricians or fire safety specialists can provide help for complex setups.

    Conclusion

    Smart smoke detector care supports both your home’s safety and your investment in smart technology. With a solid cleaning and maintenance routine, nuisance alarms decrease and detection reliability increases. 

    Having experienced several real-world test drills myself, I can say well-kept sensors make a big difference when seconds count. 

    For those managing busy schedules, calendar reminders in smart home apps or using connected routines in Google Home can help keep everything on track. Consistent attention to sensor cleaning, app updates, and power checks leads to safer, smarter living.

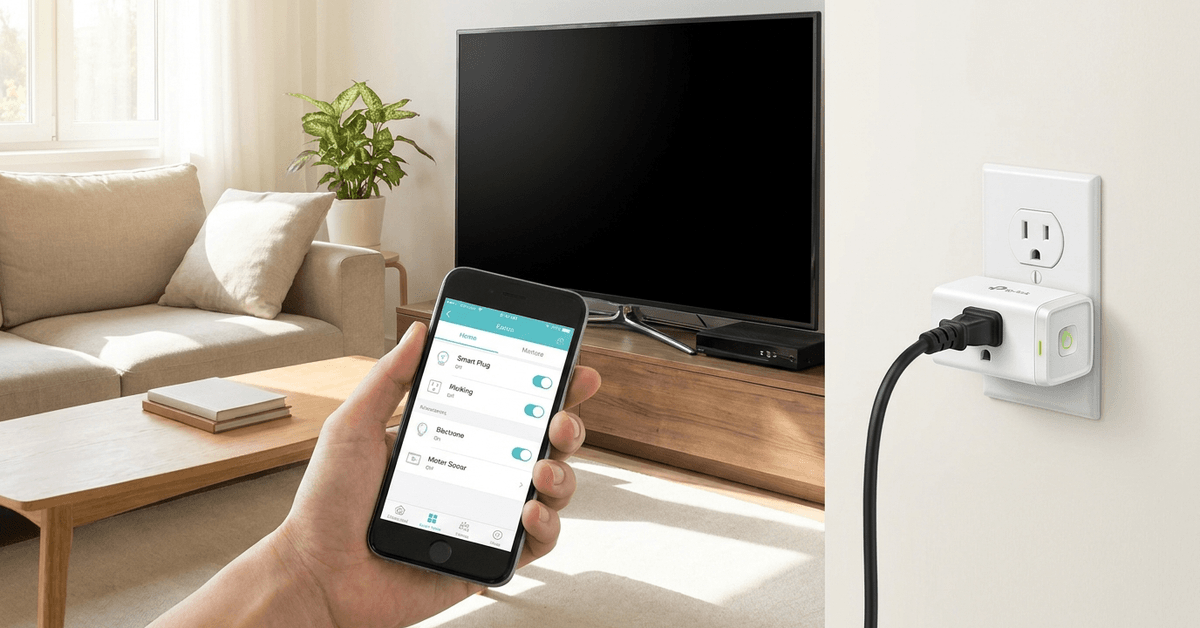
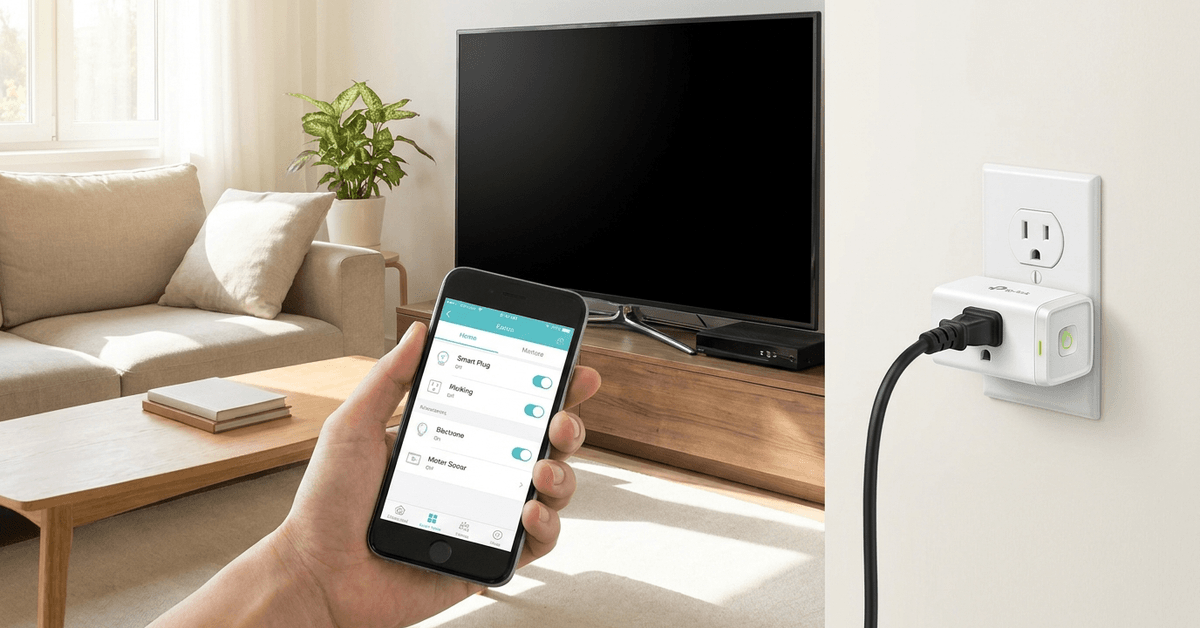
  • How to Use Smart Plugs to Cut Phantom Energy Consumption

    How to Use Smart Plugs to Cut Phantom Energy Consumption

    Phantom energy loss can quietly add to electricity bills in ways people rarely notice. Devices left plugged in often draw power even when turned off.

    This energy waste, sometimes called standby or vampire power, affects most modern homes.

    How to Use Smart Plugs to Cut Phantom Energy Consumption

    Smart plugs offer a practical tool for controlling these phantom drains.

    Understanding Phantom Energy Consumption in Your Home

    Many appliances keep consuming power if left plugged into a wall outlet. The biggest sources usually include TVs, chargers, cable boxes, and gaming consoles.

    Each device on standby may use only a few watts, but over time, this adds up. According to the Department of Energy, standby power can account for up to 10% of household electricity use.

    How Smart Plugs Work to Stop Energy Waste?

    Smart plugs are small devices plugged into a typical outlet. Once plugged in, these outlets are connected to home Wi-Fi or Zigbee networks.

    How to Use Smart Plugs to Cut Phantom Energy Consumption

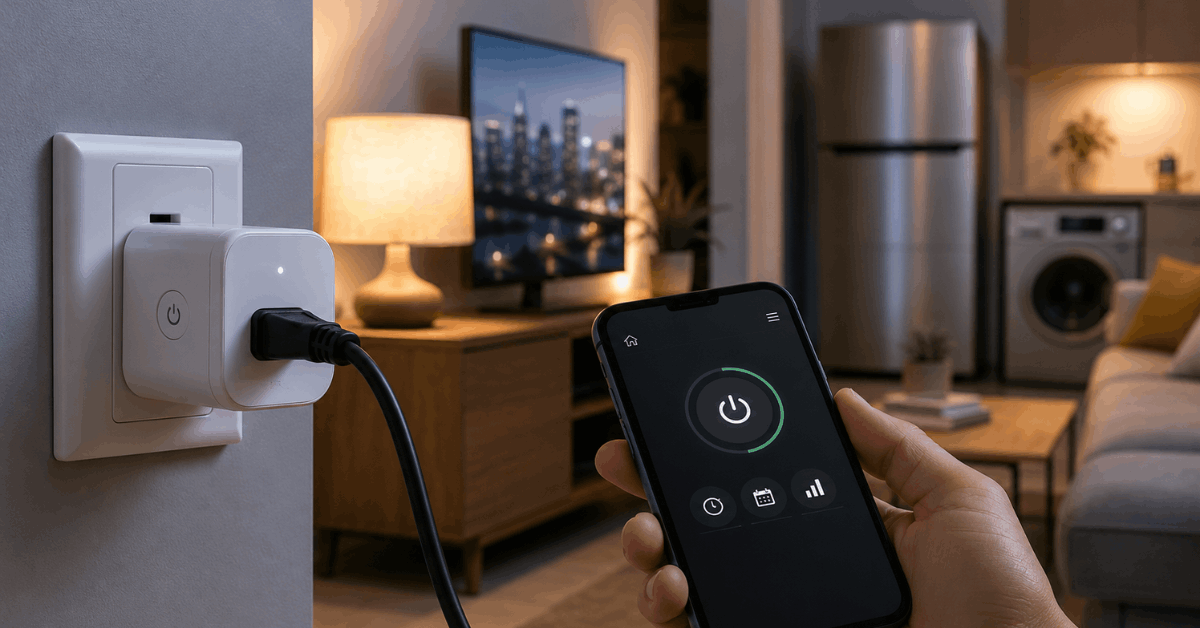
    A connected device, like a lamp or TV, can be remotely turned on or off. The most notable feature is remote or scheduled control through smartphone apps or voice assistants.

    Key protocols and compatibility

    The most popular smart plugs use Wi-Fi, Zigbee, or Z-Wave. Wi-Fi smart plugs (such as TP-Link’s Kasa or Wemo Mini) are easy for most users.

    Zigbee-based smart plugs, including the Amazon Smart Plug, connect directly with many smart hubs. A homeowner may prefer a protocol that matches their chosen smart home system for best results.

    Choosing the Right Smart Plug for Your Setup

    Device compatibility is the first consideration. Many smart plugs handle up to 15 amps, suitable for most devices except high-power items. The plug should support your Wi-Fi bandwidth (2.4GHz is most common).

    If smart speakers or home assistants are part of your network, check for Alexa or Google Assistant integration.

    The TP-Link Kasa Smart Plug HS103 is one of the most widely supported options. Other reliable brands include Wemo, Meross, and Eve Energy.

    Step-by-Step Guide: Installing and Configuring a Smart Plug

    Unpacking and pairing the smart plug

    • Plug the device into a wall outlet.
    • Check for a blinking LED, which usually signals pairing mode.
    • Install the manufacturer’s app, such as Kasa Smart, Wemo, or Meross (available on iOS and Android).
    • Follow the on-screen directions to connect the plug to your home Wi-Fi network.
    • Some platforms may require scanning a QR code on the plug itself.

    Adding devices to your smart plug

    • Connect a target device (like a game console, printer, or toaster) to the smart plug.
    • Name the plug in your app for easy tracking, e.g., “Living Room TV.”
    • Assign the smart plug to a room if your smart home app organizes devices by location.

    Setting schedules and automations

    • From your app, select automation or schedule settings.
    • Configure the device to turn off after certain hours (for example, automatically power down gaming consoles after midnight).
    • Use the app’s timer feature for typical standby culprits, such as coffee makers or fans.
    • The energy monitoring feature (found in advanced models like the Kasa HS110) allows real-time tracking of consumption.

    Practical Ways to Reduce Phantom Energy With Smart Plugs

    Targeting the worst offenders

    • Entertainment systems (TVs, audio receivers, streaming boxes)
    • Office electronics (desktop monitors, printers, routers)
    • Kitchen gadgets (microwaves, coffee machines, toasters)
    • Mobile device chargers and gaming consoles

    These devices rarely need to stay powered all night or while away.

    Grouping several gadgets on a power strip paired with a smart plug can streamline whole-system shutdowns.

    Automation for routines

    • Consider setting schedules that align with usual routines (such as off during work hours and on before dinner).
    • Use geofencing features, where the plug turns off devices when a user leaves home.
    • Some plugs, like Kasa, offer built-in vacation or away modes for added security and convenience.

    App Features to Help You Save More Energy

    Most manufacturer apps provide energy usage reports. The Kasa Smart and Eve apps display daily, weekly, and monthly consumption data.

    This information makes it easier to spot patterns or identify unexpected energy draws. Notifications can inform you if a device has been left on for too long.

    Integrating Smart Plugs Into a Wider Smart Home Security System

    Many homeowners combine plugs with home security systems. Devices connected to plugs can mimic regular activity when away, discouraging unwelcome visitors.

    Integration with platforms such as Google Home or Apple HomeKit unlocks routines triggered by sensors or alarms.

    Scripting in software like IFTTT gives even more granular control, for example, shutting everything down when arming a security system.

    Best Practices and Real-World Tips for Reliable Savings

    • Test each smart plug for Wi-Fi reliability in different outlets throughout the home.
    • Regularly review energy data to assess which devices should be unplugged altogether.
    • Some cheaper plugs lack surge protection: avoid attaching sensitive electronics to these models.
    • Assign clear, unique names in your smart home app to prevent confusion over which plug controls which appliance.
    • Check firmware updates regularly via the app to ensure stable security and the latest features.
    • Be cautious with electric heaters or high-power appliances; most smart plugs are not rated for these loads.

    Conclusion

    Smart plugs offer a simple yet effective defense against phantom energy consumption. Choosing the right device, following a careful installation, and setting thoughtful routines can help homeowners reduce waste and save money.

    Integrating energy monitoring, aligning with home security systems, and using reliable brands ensures maximum benefit and peace of mind.

    Long term, smart home automation continues to offer significant promise for both energy efficiency and household convenience.

  • How to Choose a Fireproof Safe for Important Family Documents

    How to Choose a Fireproof Safe for Important Family Documents

    Safeguarding family documents from fire is a crucial step for any homeowner. Fireproof safes have evolved with smarter features to protect irreplaceable records, wills, or legal paperwork.

    This guide is ideal for those who value secure home technology and seek reliable storage solutions for critical paperwork.

    How to Choose a Fireproof Safe for Important Family Documents

    The right safe preserves your family’s future, even in the toughest situations. There’s satisfaction in knowing original documents stay protected, not just digitized.

    Why Fireproof Safes Are Essential for Your Home?

    Fire damage can be devastating, especially for documents that can’t be duplicated easily. Few people expect disaster, but it strikes without warning and puts vital records at risk.

    What needs protection?

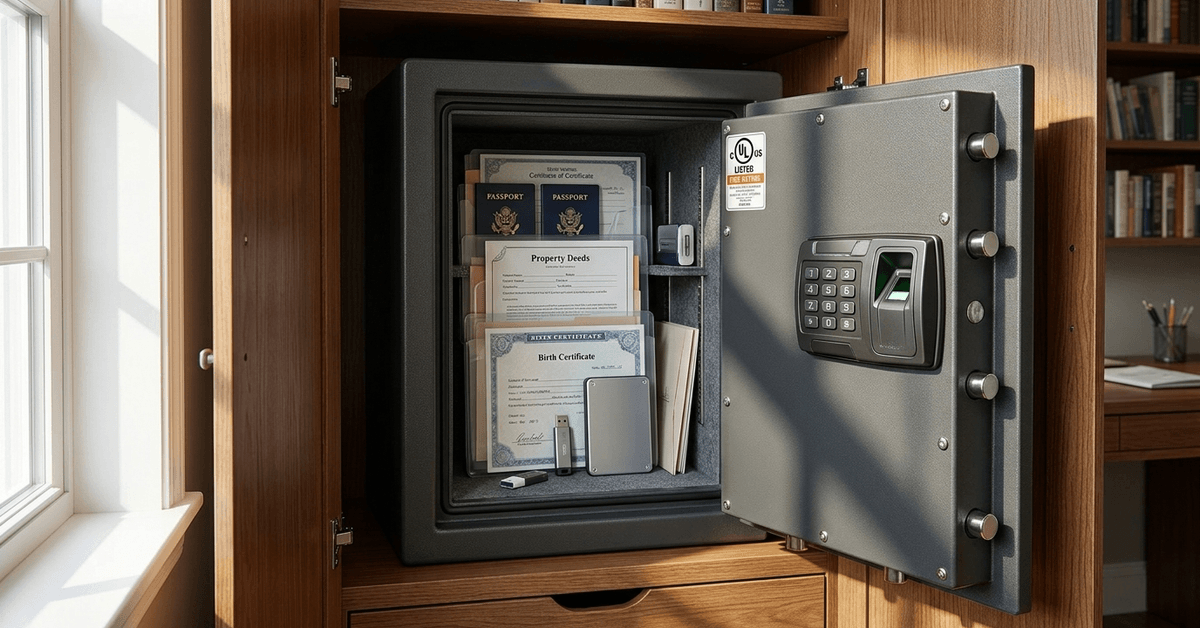
    • Birth certificates 
    • Property deeds and titles
    • Passports and ID cards
    • Insurance policies
    • Wills and legal files
    • Financial records

    Copies in the cloud help, but original documents often remain legally necessary.

    How fireproof safes work?

    These safes use insulation made from composite concrete or fire-rated steel panels. They create a barrier that keeps inside temperatures low enough to prevent document ignition during a fire emergency.

    Most basic safes shield paper at up to 170°C (350°F)—the temperature at which documents begin to char.

    Key Features to Consider in a Fireproof Safe

    Understanding specific features can make a real difference in day-to-day security and reliability.

    Fire rating

    The UL fire rating is perhaps the most significant metric to check on a safe’s label. This rating explains the length of time, in minutes or hours, that the interior stays below 170°C in a fire.

    Common ratings include 30 minutes, 60 minutes, and 120 minutes. Some high-end models go further, but these are rare in residential categories.

    Internal capacity

    Document boxes, binders, folders, or even portable drives—think practically about what you’ll be storing.

    Larger safes offer extra space for backup data drives or small valuables. Yet, bulky units may be inconvenient if you have limited closet space.

    Lock type and smart features

    • Electronic keypad: Quick access, programmable codes, and often a backup key override.
    • Traditional key: Reliable but can be lost or duplicated.
    • Biometric scanner: Fast but battery-dependent and may require maintenance.

    For simple setups, a robust electronic lock is usually reliable long-term. Smart home users often connect safes to Zigbee or Z-Wave systems, if supported by brands like Yale or SentrySafe.

    Water resistance

    Many house fires trigger sprinklers or fire hoses, which can flood the area. A water-resistant lining protects documents from both fire and secondary water damage. It’s an extra line of defense when disaster strikes.

    Build quality and certifications

    Steel gauge and dual-wall construction make a difference in durability. Reputable brands display independent certifications like UL (Underwriters Laboratories) or ETL (Intertek), signifying third-party tested performance. If you see a safe with “no certification,” it’s worth being cautious.

    Installation and Setup: Best Practices

    Safe installation matters almost as much as buying the right model.

    Find the optimal location

    • Basements are safe from high heat but may be prone to flooding.
    • Bedroom closets keep safes accessible yet hidden from visitors.
    • Consider wall or floor mounting for built-in security.

    Choosing a central spot away from direct windows or damp walls limits the risk of heat exposure and water seepage.

    Anchoring for theft prevention

    Many safes include pre-drilled holes to secure them to floors or walls. Anchoring prevents quick theft and keeps the unit stable during earthquakes or accidental bumps.

    • Use high-quality expanding anchors in concrete floors.
    • When mounting to wood framing, choose lag bolts that are at least 2.5 inches long.

    Some users mistakenly skip anchoring to finish setup quickly but regret this after a break-in or rough incident.

    Smart notification setup

    Select safes integrate with smart home hubs for tamper detection or access notifications.

    Common compatible hubs include Samsung SmartThings and Hubitat Elevation. Configure through the manufacturer’s app or the smart hub dashboard:

    1. Add the device from your hub’s app (usually “Add device” or “Z-Wave/Zigbee device”).
    2. Enter the pairing mode on the safe, following the manual.
    3. Assign alert settings for door tampering or failed code attempts.

    Test notifications after setup by triggering the safe’s tamper function for peace of mind.

    Popular Brands and Recommendations

    Choosing a proven brand increases the likelihood of performance matching the catalog listing.

    Top 3 brands for home fireproof safes

    • SentrySafe: Consumer-friendly, models with multiple certifications, widespread support.
    • Honeywell: Reliable water and fire protection, solid build for document storage.
    • Yale: Advanced electronic and smart safe options, including some that integrate with home automation protocols.

    Sticking with well-known brands simplifies customer service and warranty coverage.

    Additional shopping tips

    • Check the UL and ETL certifications directly on the product label—not just the packaging or marketing materials.
    • Reading third-party reviews can uncover any long-term reliability issues, which aren’t always visible in first-year use.

    Professional locksmiths often recommend combination locks for low-maintenance setups, but smart locks are gaining ground in tech-forward homes.

    Smart Storage for Digital Backups

    Document safety extends beyond paper—USB drives and portable SSDs matter. Water and heat-resistant safes can protect both physical and backup media from disaster.

    Recommended apps and tools

    • Bitwarden: Secure password management for all digital storage passwords.
    • Google Drive or Microsoft OneDrive: Cloud backup of scanned documents as a safety net.
    • iStorage diskAshur: Hardware-encrypted drive for sensitive digital copies.

    Homeowners often rely on this mix—physical safes for originals, and secure digital systems for backup and recovery.

    Maintenance and Routine Checks

    Neglecting upkeep can undermine the safety investment.

    Test locks and batteries

    Monthly tests for electronic or biometric systems catch failing batteries before they lock out access. If using a manual lock, lubricate it with graphite powder twice a year to prevent jamming.

    Inspect seals and hinges

    Visual checks of door seals and hinges ensure continued fire and water resistance. Lightly vacuum dust buildup from external vents or seams, especially in older homes or utility spaces.

    Conclusion

    Finding the right fireproof safe for important family documents does more than protect paper. It secures your legacy, provides rapid recovery resources in emergencies, and integrates seamlessly into a tech-forward smart home setup. 
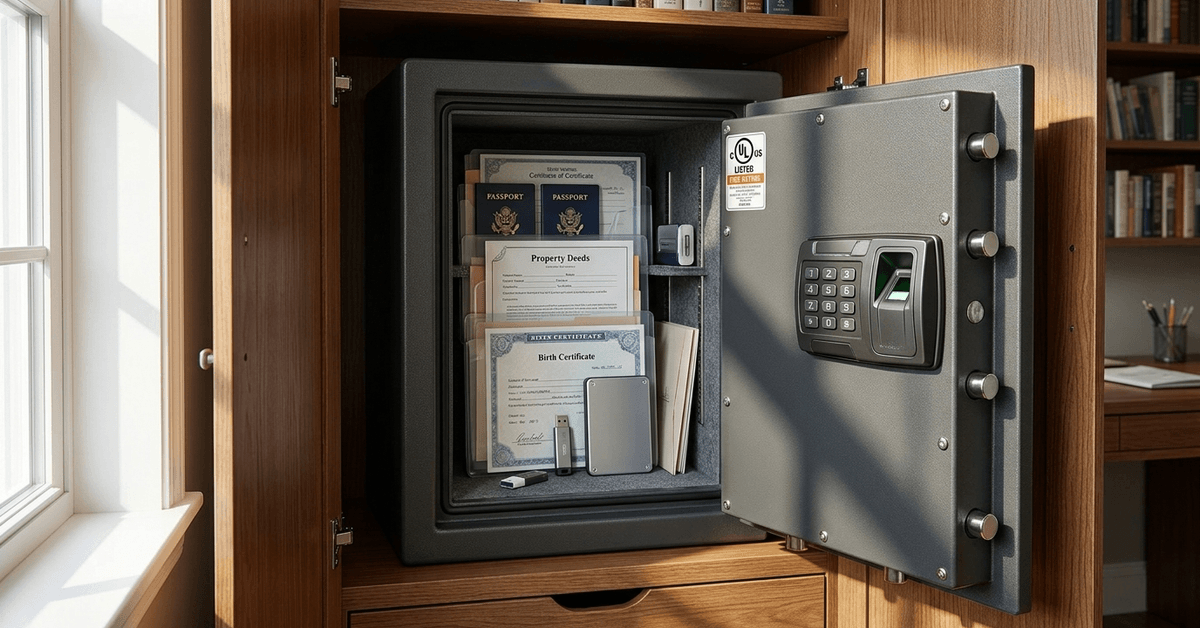
    Modern options balance robust fire ratings, advanced locking mechanisms, and convenient digital integration for peace of mind. Regular checks ensure your investment keeps delivering security year after year. 

    With careful selection and routine maintenance, you create a truly safe space for your most cherished and vital records—no matter what life brings.

  • The Best Way to Automate Humidity Control in Crawl Spaces

    The Best Way to Automate Humidity Control in Crawl Spaces

    Managing crawl space humidity is crucial for keeping homes healthy and free from mold, rot, or unwanted pests. For many, ignoring these zones leads to costly repairs and decreased indoor air quality.

    This practical guide is for homeowners and DIY enthusiasts looking for reliable, automated solutions. With the right setup, manual checks and guesswork can become a thing of the past.

    Why Automating Crawl Space Humidity Matters

    Excess moisture in crawl spaces is a silent threat. It impacts home structure, energy efficiency, and comfort.

    The Best Way to Automate Humidity Control in Crawl Spaces

    Signs of poor humidity control often include musty smells, warped flooring, or visible mold. Even minor leaks or seasonal weather can shift moisture levels rapidly.

    Automated systems can keep conditions stable, which reduces maintenance and worry. When operated correctly, these solutions truly pay off over time.

    Key Hardware for Crawl Space Humidity Automation

    Every automation project begins with solid hardware. Some tools stand out for dependability and smart integration.

    Humidity Sensors

    The backbone of automation is a good smart humidity sensor. Look for models with accurate, digital readings.

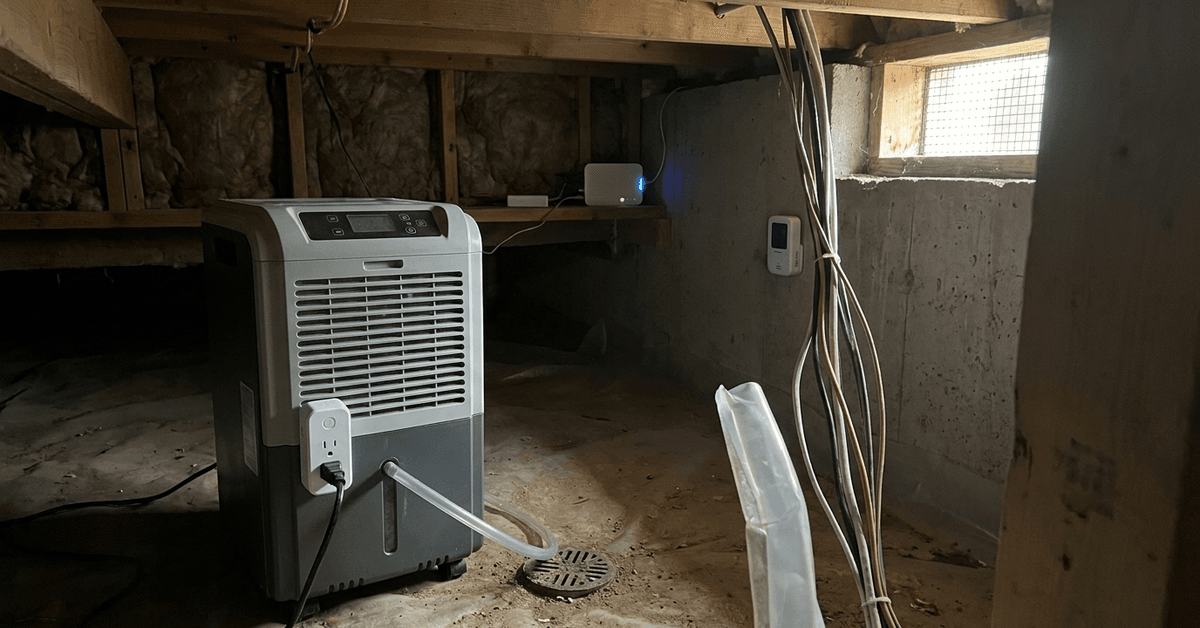
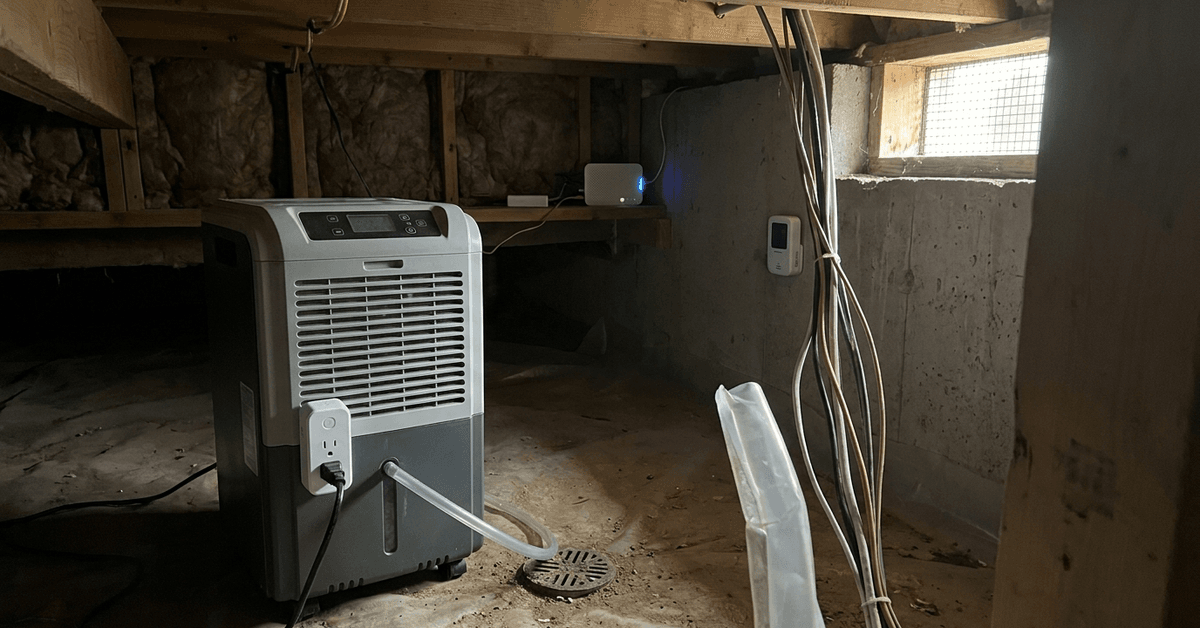
    Reliable choices include the Shelly H&T sensor and the Aqara Temperature and Humidity Sensor. Both work with major systems and support real-time data.

    Smart Plugs and Relays

    Controlling dehumidifiers remotely often requires smart plugs or relay modules. Brands like TP-Link Kasa or Sonoff S31 are popular among homeowners for this purpose.

    A relay, like the Zooz ZEN16 MultiRelay, is useful for more advanced setups. These handle on/off tasks based on readings from sensors.

    Dehumidifiers

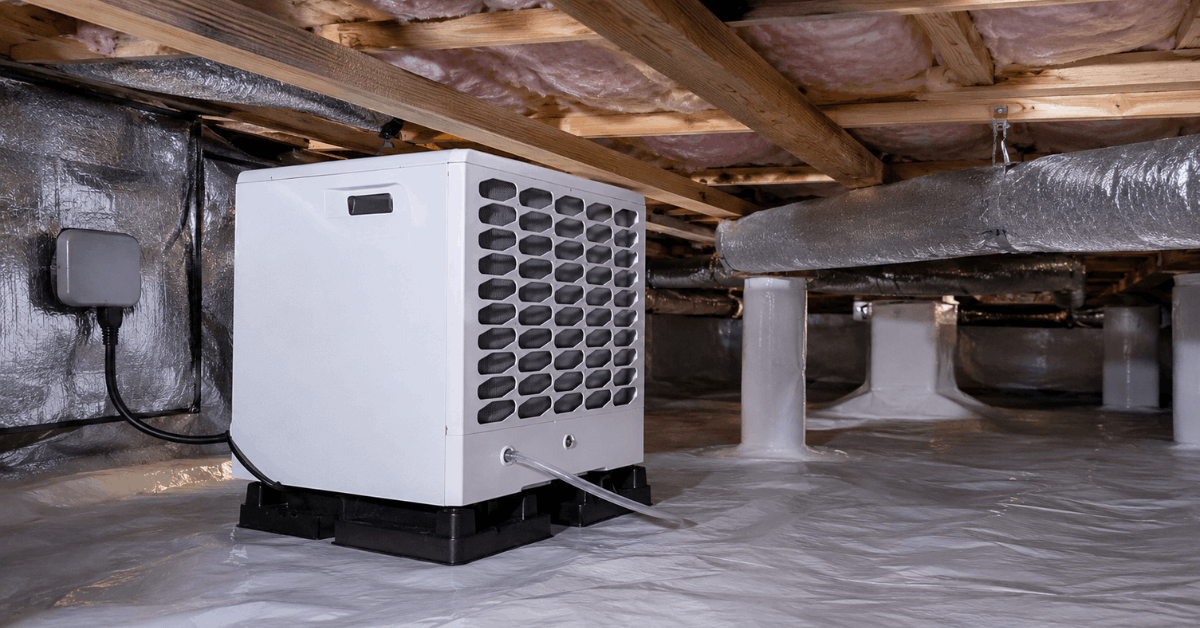
    A robust crawl-space dehumidifier is essential. Many prefer models from Aprilaire or AlorAir, both known for high capacity and energy efficiency.

    The Best Way to Automate Humidity Control in Crawl Spaces

    Units with automatic drainage and built-in pump features simplify ongoing use, cutting down on frequent visits under the house.

    Controller Hubs

    Integrating different hardware components relies on a reliable automation hub . Home Assistant and Samsung SmartThings are consistently recommended in the smart home community.

    With these, users can create customized automation routines that actually work in demanding crawl space environments.

    Recommended Communication Protocols

    Protocol choice affects reliability and expandability. Wi-Fi works for some, but dedicated smart home protocols are safer for isolated spaces.

    Zigbee

    The Zigbee protocol is a favorite for sensors. It’s energy efficient and suits wireless transmission through crawl space obstacles.

    Z-Wave

    Many automation pros prefer Z-Wave for its strong mesh networking. It shines in larger homes or if multiple connected devices are spread around.

    Wi-Fi vs. Bluetooth

    While Wi-Fi sensors exist, range and reliability sometimes fall short in basements or crawl spaces. Bluetooth has limited use unless distances are very short.

    Step-by-Step: Automating Humidity Control

    Bringing all pieces together requires thoughtful planning and a logical sequence of steps. The process below is a blend of what most pros follow in real homes.

    1. Assess crawl space conditions: Check size, power outlets, standing water, and access points.
    2. Select compatible smart humidity sensors: Research if your hub supports Zigbee or Z-Wave devices.
    3. Install the sensor securely: Place sensors away from vents and direct water sources for the most accurate readings.
    4. Choose a smart dehumidifier or connect a standard unit via a smart plug or relay.
    5. Set up the controller hub: Create automation rules, for instance, ‘turn on dehumidifier when humidity exceeds 60%’.
    6. Test your automation: Run simulations and make quick adjustments if any device fails or misreads.
    7. Log and monitor readings: Use hub dashboards or apps to review performance over several weeks.

    Popular Apps and Platforms for Control

    App control simplifies real-time adjustments, alert delivery, and long-term monitoring. Reliable integration is essential for peace of mind.

    • Home Assistant: Wide device compatibility. Allows custom automations, detailed graphs, and remote alerts.
    • SmartThings: User-friendly mobile interface. Supports both Zigbee and Z-Wave sensors.
    • Aqara Home app: Focused integration for their sensors. Geo-fencing and threshold notifications.
    • Shelly Cloud: Direct access to Shelly sensors and relays. Features scheduling and instant push notifications.

    Essential Configuration Tips

    Crawl spaces pose unique challenges. Environmental changes and power issues are common.

    Power Safety

    Install surge-protected outlets for the dehumidifier and hub. This helps prevent unexpected shutdowns during storms or outages.

    Network Stability

    For wireless sensors, consider a mesh repeater nearby. Zigbee or Z-Wave repeaters can help signals travel through insulation or cinder blocks.

    Automation Logic

    Using a double-trigger method can reduce short cycling. Many set a ‘turn on above 60%’ and ‘turn off below 55%’.

    Firmware Updates

    Keeping sensors and plugs updated is sometimes overlooked. Up-to-date firmware improves accuracy and may unlock new features.

    Conclusion

    Automating humidity control in crawl spaces provides more than just convenience. It guards your home against mold, structural damage, and poor air quality. 

    The ideal setup involves accurate smart sensors, robust automation hubs, and reliable device controls using protocols like Zigbee or Z-Wave. 

    With careful planning and dependable gear, homeowners can enjoy a healthier, more resilient living space. Adapting these proven strategies helps secure peace of mind—often, that’s the smartest upgrade of all.