Blog

  • Simple Ways to Hide Indoor Security Cameras in Plain Sight

    Simple Ways to Hide Indoor Security Cameras in Plain Sight

    Indoor security cameras have become a mainstay in modern homes. The convenience, control, and peace of mind they provide are hard to ignore.

    For families, renters, or smart home enthusiasts who want reliable monitoring without making guests uneasy, hiding these cameras cleverly is critical. Here, practical strategies meet technical know-how.

    Why Hide Indoor Security Cameras?

    Many homeowners prefer not to draw attention to their surveillance setups. Often, the goal is reliable coverage while blending devices into the living space.

    Simple Ways to Hide Indoor Security Cameras in Plain Sight

    Common reasons for seeking low-visibility options include:

    • Reducing risk of tampering or theft attempts
    • Maintaining home aesthetics and décor harmony
    • Making monitoring feel natural, especially for children or visitors
    • Complying with local privacy expectations

    Best Practices Before Concealing Cameras

    Check Laws and Ethics

    Legal compliance matters. Always keep in mind: recording in private areas like bathrooms or bedrooms is usually prohibited.
    Simple Ways to Hide Indoor Security Cameras in Plain Sight

    Visible notice, such as a sticker or policy sign, is sometimes recommended even inside the home. It maintains transparency.

    Consider Camera Type and Field of View

    The choice of camera directly impacts how easy it will be to hide. Models with wide-angle lenses require careful positioning.

    Compact cameras that connect to Wi-Fi, such as the Wyze Cam v3, offer more options than bulky traditional units.

    Assess Wi-Fi Signal and Power Access

    Obstacles like dense walls or furniture can affect camera connectivity. Test signal strength before final placement.

    For plug-in cameras, discreet cable management will keep setups both tidy and inconspicuous.

    Main Methods for Hiding Indoor Cameras in Plain Sight

    Integrating Cameras into Everyday Objects

    Clever concealment often involves blending cameras with home décor or daily items. Some commonly used strategies are:

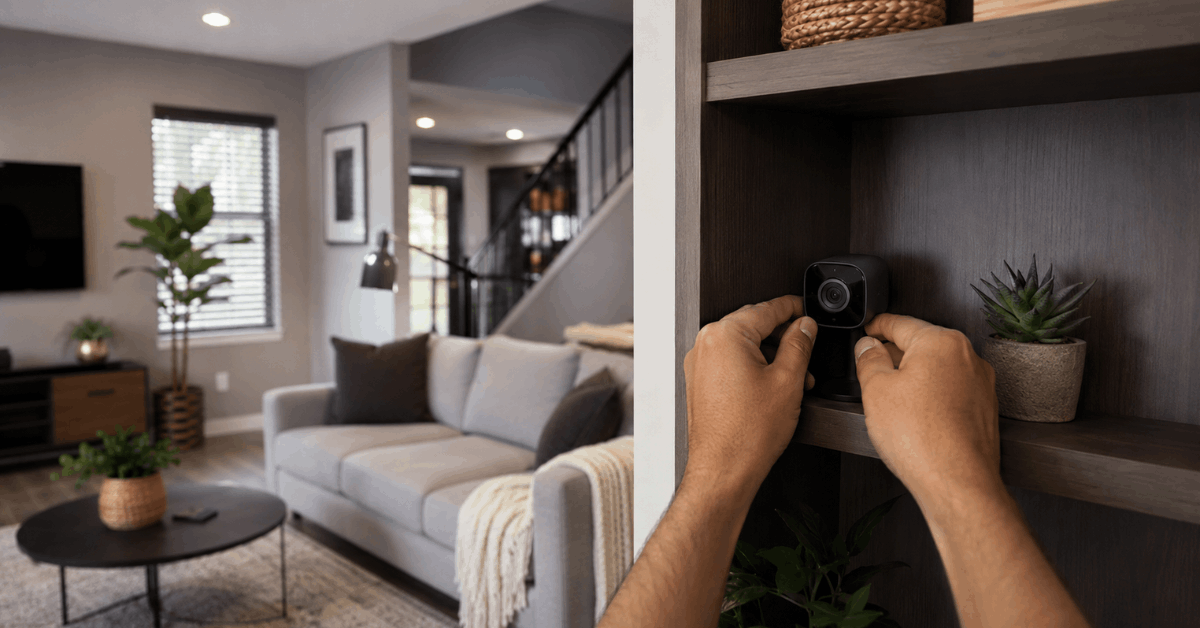
    • Bookcases and Shelves: Small cameras tucked among books or decorative boxes appear natural.
    • On top of framed pictures or behind plants with gaps for lenses.
    • Inside hollowed-out faux books or storage boxes found at home stores.

    Choose surroundings that do not block the lens view or restrict motion sensors.

    Using Smart Home Devices as Covers

    Disguising cameras within or behind other electronics adds another layer of subtlety.

    • Smart speakers (like Amazon Echo or Google Nest): Many homeowners position small cameras behind or near the base of these speakers. The presence of wires is less suspicious.
    • Old routers, modems, or even cable boxes make natural hiding spots where electronics are clustered.

    Camouflage with Decorative Objects

    Home offices, living rooms, and kitchens often hold a variety of inconspicuous items.

    • Fake plants, vases, or clock faces with a cut-out behind for a lens.
    • Photo frames: Placing a pinhole camera through the frame side blends in with everyday surroundings.

    Disguising Cameras in Light Fixtures

    Lighting fixtures are usually present in all indoor spaces and draw little attention when subtly modified.

    • Recessed lighting in ceilings can sometimes house mini cameras, especially with wireless models.
    • Table lamps with broad lampshades can enclose small surveillance cubes underneath the shade, with lens visibility through fabric gaps.

    Careful adjustment is necessary so the camera does not overheat or become blocked by the light source.

    Artificial Vents and HVAC Covers

    Creative homeowners sometimes place cameras behind unused vent covers or similar wall installations. These covers offer a stable, secured spot near room ceilings.

    • Ensure adequate airflow for camera temperature control.
    • Removable vent covers: Allow for camera maintenance without drawing attention.

    Installation Steps for Hidden Camera Setups

    Selecting the Ideal Location

    • Identify the areas needing coverage. Usually entryways, hallways, and common rooms are the top priorities.
    • Avoid direct sunlight or heat sources that may damage device lenses or electronics.

    Setting Up Power and Connectivity

    • Hidden installations often need extra attention to cable routing. Homeowners find adhesive cord channels or cable concealers very useful.
    • For battery-powered options, regular battery checks become a necessary routine.
    • Wi-Fi range testing: Use apps like WiFiman or NetSpot to make sure the camera stays connected even behind objects.

    Configuring Alerts and Recording Settings

    • Open the camera’s app (such as the Wyze or Blink Home Monitor app).
    • Set up motion-triggered alerts during periods you are away from home.
    • Save clips to the cloud or a secure microSD card for backup.

    Tips to Maximize Security and Performance

    Routine Device Checks

    Hidden cameras are easier to overlook when it comes to maintenance. Regular cleaning of lenses is crucial to maintain clear recordings.

    • Check camera logs weekly for signs of tampering or signal loss.
    • Firmware updates: Keep devices updated through the original manufacturer’s app to patch any vulnerabilities.

    Using Privacy Zones and Motion Filters

    Adjust privacy settings so cameras exclude private areas or common seating zones. Most modern apps offer zone masking for this purpose.

    • In the Nest Home app, draw privacy zones around beds or work desks.
    • Enable notifications only for specific events, limiting alert fatigue.

    Securing Footage Storage and Remote Access

    • Opt for end-to-end encrypted platforms like Arlo Secure or HomeKit Secure Video for sensitive footage.
    • Regularly update access permissions for family members to prevent unauthorized viewing.
    • Two-factor authentication: Activate this feature, available in almost every reputable security app, for boosted protection.

    Potential Pitfalls and How to Avoid Them

    Blocked Field of View

    Household rearrangements or dust buildup may obscure a hidden camera’s line of sight. It’s easy to forget, especially with clever concealment.

    • Review camera feeds after room redesigns to ensure continued coverage.
    • Set reminders: Calendar alerts for routine camera checks minimize lapses in monitoring.

    Camera Overheating

    Hidden cameras inside tight spaces may risk overheating, especially if placed near active electronics or lamps.

    • Check manufacturer guidance on operating temperatures for your device.
    • Allow airflow by avoiding sealed enclosures.

    Popular Hidden Camera Models and Tools

    • Wyze Cam v3: Small, weather-rated, and app-controlled, ideal for shelves and corners.
    • Blink Mini: Compact with cloud backup and motion detection, often chosen for indoor concealment.
    • TP-Link Tapo C200: Pan and tilt functions let cameras see around obstacles, reducing the need for perfect placement.

    Recommended Software and Apps for Seamless Setup

    • Wyze App: For configuring zones, alerts, and firmware upgrades.
    • Blink Home Monitor: Allows for multi-device feeds, privacy settings, and live viewing.
    • NetSpot and WiFiman: To test signal strength in intended camera locations.
    • HomeKit Secure Video: Apple ecosystem users can store and analyze footage privately.

    Conclusion

    Effective home monitoring does not mean sacrificing comfort or style. Simple concealment of security cameras creates safer spaces while keeping technology unobtrusive.

    Each technique outlined can be tailored to individual needs for privacy, aesthetics, and function. Reliable brands, robust apps, and attention to detail keep your system efficient and discreet.

    Remember: regular inspection and responsible use maximize the benefits of hidden surveillance. Thoughtful setup now can save hassle, confusion, or security headaches down the line.
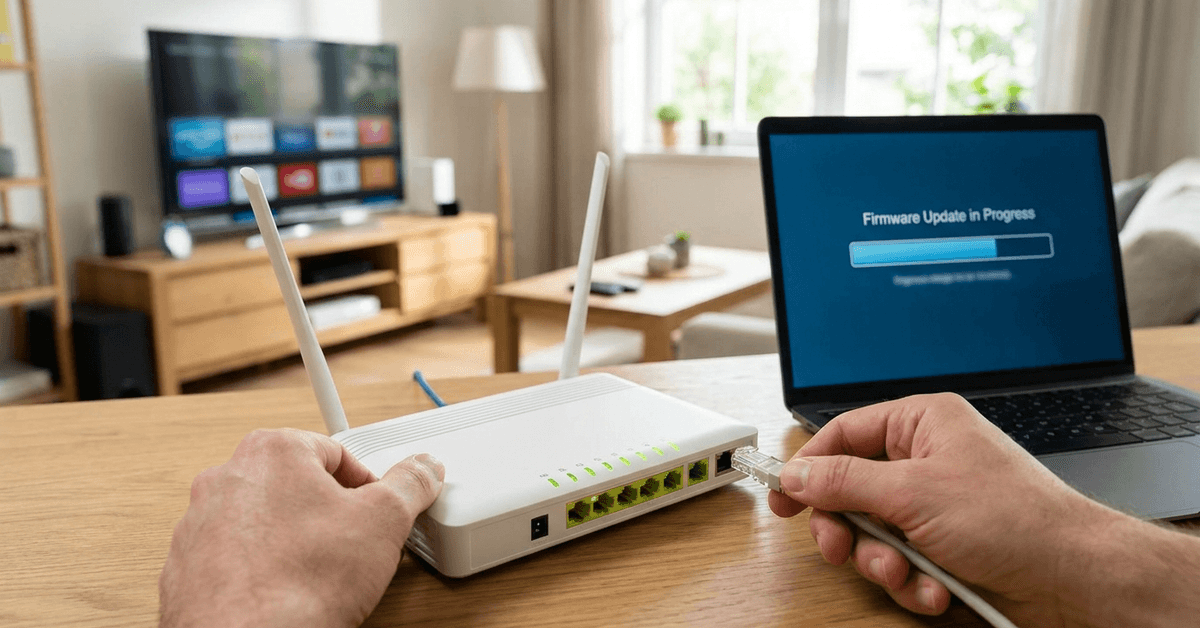
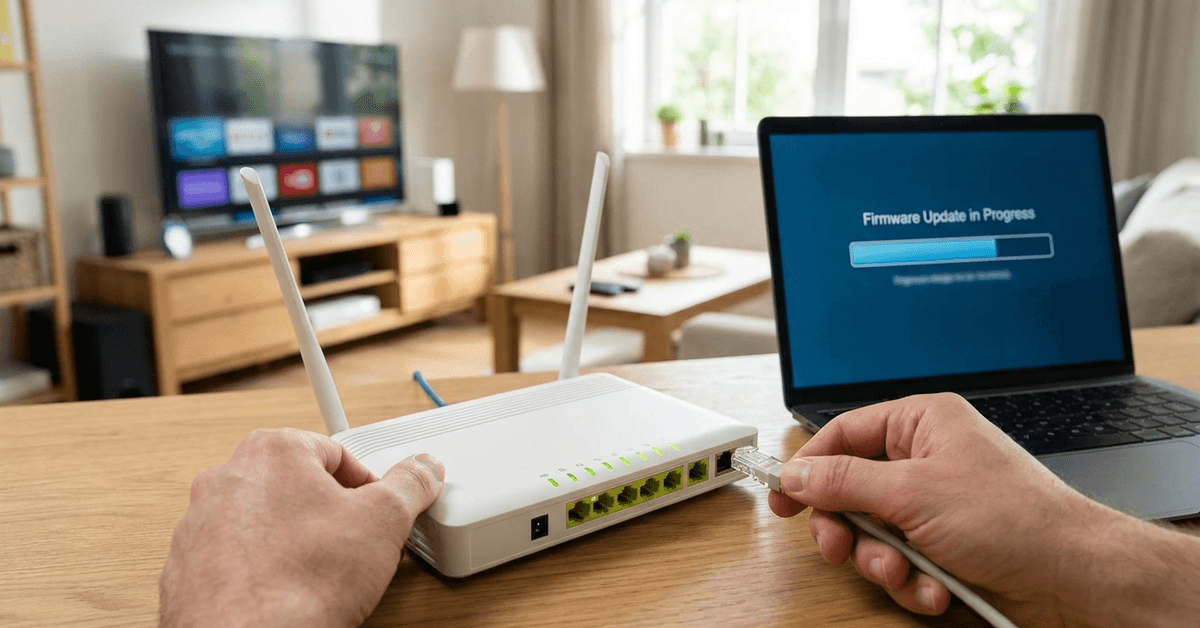
  • How to Safely Update Your Home Router’s Firmware

    How to Safely Update Your Home Router’s Firmware

    Keeping your home router’s firmware up to date is essential for anyone with smart home devices, security cameras, or even just Wi-Fi users.

    Owners of connected homes rely on their router as the main line of defense against online threats and vulnerabilities.

    The simple act of updating firmware can block hackers, close security holes, and lead to a noticeably better network experience.

    How to Safely Update Your Home Router’s Firmware

    Understanding Router Firmware and Its Purpose

    Firmware is the specialized software embedded in your router hardware that directs how it operates.

    Unlike regular apps or programs, firmware manages device-level features: wireless connectivity, network protection, and device prioritization.

    Manufacturers such as TP-Link, Netgear, Asus, and Linksys regularly release firmware updates for bug fixes, performance boosts, and vulnerability patches.

    Neglecting firmware leaves older routers exposed to well-known exploits. Updated routers, in contrast, handle the latest security protocols and offer new features.

    Why Updating Router Firmware Matters?

    One primary benefit is improved security. Cybercriminals often target unpatched home routers with malware or remote access tricks.

    How to Safely Update Your Home Router’s Firmware

    Older firmware versions are easier for attackers to compromise, possibly exposing personal devices or smart home gadgets.

    Frequent updates often resolve Wi-Fi dropouts, increase speed consistency, or unlock advanced parental controls.

    For anyone using smart speakers, security cameras, or smart thermostats, patched routers help devices stay connected and reliable.

    Important Precautions Before Updating Firmware

    While updating firmware is usually safe, preparation helps avoid hiccups.

    Sudden power loss or disconnections during an update can temporarily ‘brick’ your router—making it unusable until fixed.

    Precaution Checklist

    • Check the router model and hardware version, often listed on a label underneath your device.
    • Backup current configuration settings in the router dashboard (look for ‘Backup Settings’ or ‘Export’).
    • Preferably use a wired connection (Ethernet) between your computer and router to prevent interruption.
    • Confirm that you have stable power—avoid running updates during storms or power fluctuations.

    How to Identify and Download the Latest Firmware?

    Manufacturers typically distribute firmware through their support sites, with files listed by product and hardware version.

    Locating the correct version is crucial. Applying the wrong firmware can cause glitches or even void a warranty.

    Finding the Right Firmware

    • Identify your make, model, and version (for example, Netgear Nighthawk R7000, v2).
    • Visit the official support site for your brand: such as tplink.com/support or asus.com/support.
    • Enter your router’s information and download only the latest firmware listed for your product code.

    Preparing for the Update: Step-by-Step

    With the right file in hand, double-check a few essentials to ensure a seamless process.

    • Extract the downloaded update file if it comes zipped, and save it in an easily accessible folder.
    • Connect your computer to the router via Ethernet. Wi-Fi updates risk disconnection.
    • Open your web browser and enter your router’s local IP address (often 192.168.1.1 or 192.168.0.1).
    • Login using your current admin credentials.

    Updating Firmware Through Your Router’s Web Interface

    Most home routers update directly via their built-in admin panel. The method usually looks like this:

    1. Navigate to Firmware Upgrade or System Tools, often under an ‘Advanced’ or ‘Administration’ tab.
    2. Click ‘Browse’ or ‘Choose File’ to select your saved firmware file.
    3. Select ‘Upgrade’ or ‘Upload’ and confirm your choice.
    4. Wait as the install process runs (this typically takes three to five minutes).

    During this period, network connectivity will drop—avoid unplugging or restarting the router.

    Automatic vs. Manual Firmware Updates

    Some modern routers offer automatic firmware updates.

    For example, Google Nest Wifi and certain Asus routers can check and install updates in the background if ‘Auto Update’ is enabled.

    Enabling this feature is convenient, but some users feel safer verifying updates themselves.

    Manual firmware upgrades offer more control, especially for those running custom settings, open-source firmware, or nonstandard configurations.

    What to Do After the Firmware Update

    Once flashing is complete, the router may reboot itself.

    Let it restart fully before reconnecting any devices or attempting to log in again.

    • Restore your saved backup configuration if settings are reset to factory defaults.
    • Test Wi-Fi and wired connections for stability and performance improvements.
    • Verify that smart home devices can reconnect, and check if parental controls or device QoS have changed.
    • Log in to the admin panel and double-check that the new firmware version appears as installed.

    Common Problems and Solutions

    Real-world router upgrades sometimes meet roadblocks. In most cases, issues are easy to fix.

    Failed Update or Bricked Router

    If your router fails to start, try a ‘hard reset’ by holding the reset button for 10 seconds—or as directed in the manual.

    Download and flash the correct firmware again via the router’s recovery mode (often accessible at 192.168.1.1/recovery).

    Lost Internet or Wi-Fi Connection Afterwards

    • Restart both your router and internet modem. Wait for LEDs to settle.
    • Ensure cables are connected securely—sometimes ports reseat slightly during the reboot.
    • Reconfigure wireless settings (SSID, Wi-Fi passwords) if they reverted to default.

    Router Update Won’t Start

    Verify that the firmware file is correct and matches your router model exactly. Sometimes ISPs lock firmware (particularly with ISP-provided devices). In those cases, only approved versions are accepted; reaching out to ISP support can clarify options.

    Extra Tips for Maximum Router and Network Security

    • Enable two-factor authentication on your router, if offered, to prevent unauthorized changes.
    • Change your admin password to something unique and strong after every update.
    • Disable remote management unless you absolutely need it—this blocks outside attackers.
    • Schedule a reminder every few months to check the manufacturer’s support site for new firmware releases.
    • Watch for signs of compromise: odd device behavior, unexpected restarts, or unexplained bandwidth use.

    For smart home enthusiasts, regular router updates give peace of mind and keep a houseful of gadgets efficient and secure.

    Conclusion: Keeping Your Router—and Home—Protected

    Maintaining up-to-date firmware on your home router is a foundational practice for smart home security and seamless network performance.

    A careful, stepwise approach to firmware upgrades helps avoid frustrating mishaps, reduces downtime, and shields your entire home from cyber risks.

    Most modern routers make updates straightforward for any user, and those who stay proactive with their devices greatly improve household security.

    Pausing to update router firmware now and then is a small investment that pays off in reliability and peace of mind for years to come.

  • How to Check How Many Devices Are Connected to Your Home Wi-Fi

    How to Check How Many Devices Are Connected to Your Home Wi-Fi

    Knowing what devices are connected to your home Wi-Fi is key to securing your network and optimizing performance. Many homeowners are surprised by the number of devices quietly using bandwidth.

    This guide breaks down simple and advanced ways to track devices on your smart home Wi-Fi. Whether managing a big family network or a solo setup, better visibility brings peace of mind.

    Why It Matters to Track Connected Devices?

    Device management helps uncover bandwidth hogs using your Wi-Fi. It also identifies unknown devices, suggesting if neighbors or strangers may have gained access.

    How to Check How Many Devices Are Connected to Your Home Wi-Fi

    Adopting device tracking tools makes parental controls more effective and ensures internet speeds remain consistent. It is a fundamental part of any smart home security strategy.

    Built-In Router Management Console

    Accessing Your Router Dashboard

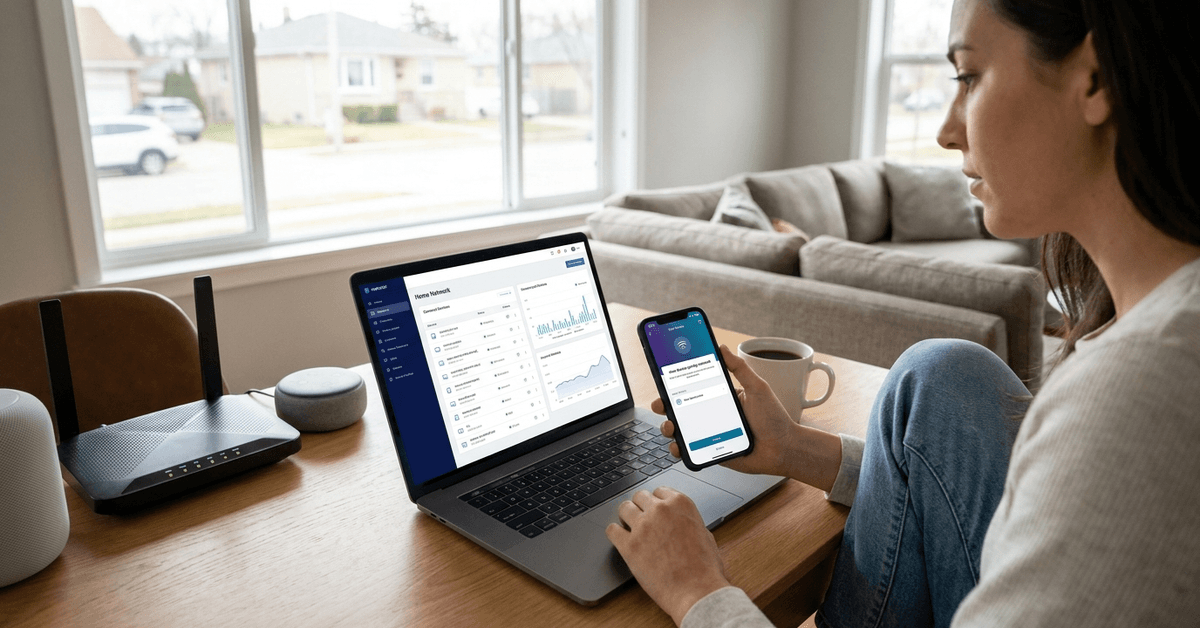
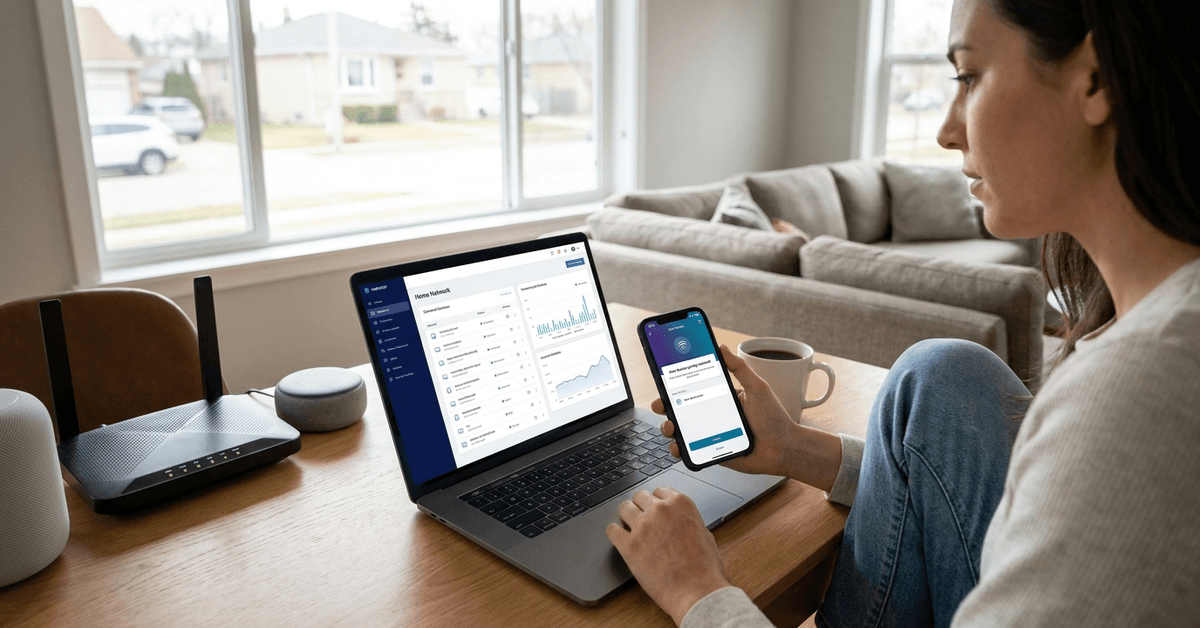
    The router dashboard is usually the most accurate way to see all connected devices in real time. Nearly every router offers this in its web interface.

    • Connect to your home Wi-Fi with a phone or computer.
    • Open a browser and enter the router’s IP address (often 192.168.1.1 or 192.168.0.1).
    • Authenticate with your username and password. A sticker on the router often lists these defaults.
    • Look for sections labeled “Device List,” “Connected Devices,” or similar.

    Device names may appear generic, like “Wireless Device” or “Unknown.” In these cases, matching MAC addresses to known devices helps.

    Most Popular Router Brands’ Menus

    • TP-Link: Go to “Network” then “DHCP Clients List.”
    • Netgear: Head to “Attached Devices.”
    • Asus: Click “Network Map” and check “Clients.”
    • Linksys: Find “Device List” under the “Status” tab.

    Some routers display connection type and duration, helping you spot guests or longer-term connections.

    Using Official Mobile Apps for Routers

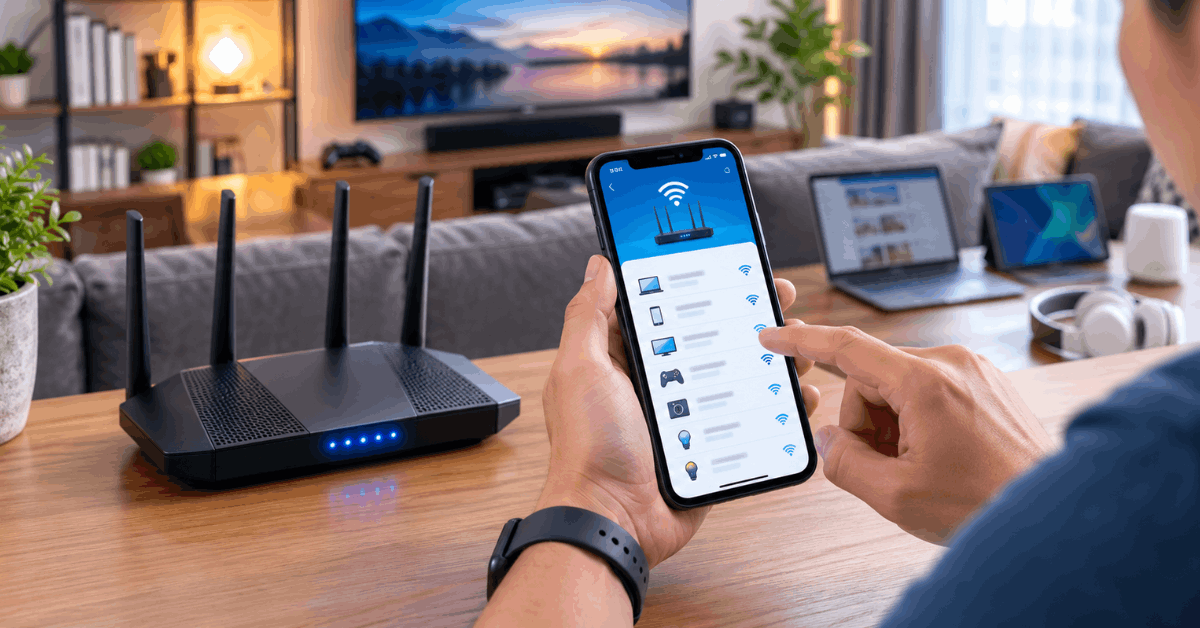
    Brand-specific apps, like TP-Link Tether or Netgear Nighthawk, show device status and let you control access. These apps streamline routine checks right from a phone or tablet.

    How to Check How Many Devices Are Connected to Your Home Wi-Fi

    Downloading and Setting Up Apps

    • Search for your router brand’s app in Google Play or the Apple App Store.
    • Log in using an account or the router’s admin credentials.
    • Device lists are on the main dashboard—tap for details.

    Notifications alert you when new gadgets connect, placing control in your pocket anytime.

    Third-Party Network Scanning Tools

    Best Free and Paid Scanners

    Independent tools, such as Fing, add network-wide tracking for tech-savvy users. These applications scan entire home networks for connected devices.

    • Fing (Android/iOS): User-friendly and free for basic scans.
    • Advanced IP Scanner (Windows): Lists all network endpoints.
    • Angry IP Scanner (Windows/Mac): Fast scanning for larger set-ups.

    These tools offer extra details, like device manufacturer and open ports, which can help spot unknown hardware.

    Running Your First Scan

    • Install the chosen app or software on a device already on your Wi-Fi.
    • Launch the tool and run its network scan feature.
    • Review named devices and note unfamiliar ones.

    Frequent scanning, perhaps monthly, allows you to spot unwanted guests and maintain complete visibility.

    Smart Home Hubs and Integrated Security Apps

    All-in-One Smart Home Routers

    Modern routers, such as Google Nest Wi-Fi or Eero, offer built-in mesh networking. Their respective apps include device monitoring and guest network options for smart devices.

    • Google Home: Open the app and tap on your Nest router. See connected device details under “Wi-Fi,” then “Devices.”
    • Eero: Open the Eero app and select the connected devices tab for a live count and activity log.

    These platforms often highlight “recently active” or high-usage devices for deeper insights.

    Smart Security Suites

    Services like Bitdefender Box or Norton Core also integrate network scanning. Their mobile or desktop apps aim to block threats and keep a real-time log of every device using your Wi-Fi.

    Identifying and Managing Unknown Devices

    Differentiate Trusted and Suspicious Connections

    Matching MAC addresses helps recognize familiar devices. Manufacturers often print a MAC ID on their products or packaging. A glance at your device’s network settings typically shows its assigned network name.

    Suspicious or recurring unknowns might signal weak Wi-Fi passwords or overlooked smart bulbs. Disabling Wi-Fi for given MAC addresses via the router blocks unwanted access.

    When to Change Your Wi-Fi Password

    If mystery devices are present, homeowners often find it responsible to update their Wi-Fi password. This instantly disconnects all connected devices, forcing only authorized users to reconnect.

    • Change your Wi-Fi password from the router dashboard or app.
    • Update all home devices with the new credentials.
    • Monitor for any reappearance of unknown connections post-update.

    Key Tech Terms and Protocols Homeowners Should Know

    • MAC Address Filtering : Manages which devices can join your network.
    • SSID: Your Wi-Fi network’s visible name.
    • WPA2 or WPA3: Encryption standards for safe wireless access.
    • Guest Network: Separate access for visitors, keeping main devices secure.

    Learning these basics sharpens your ability to spot uninvited guests and maintain strong defenses.

    Tips for Ongoing Wi-Fi Health and Security

    • Update firmware on routers and smart devices regularly.
    • Enable automatic alerts for new device connections (supported in many apps).
    • Run routine scans to catch overlooked devices.
    • Create a guest network for visitors. This keeps your main system private.
    • Label each device in your management console for easier tracking.

    Conclusion

    Knowing how to check which devices are connected to your home Wi-Fi brings far more than simple curiosity. It strengthens security, reveals hidden performance drains, and supports a safer smart home ecosystem.

    Using routers’ built-in features, trusted mobile apps, or third-party scanners, homeowners can keep tabs on every device in real time. Matching device names, updating passwords, and running regular checks all help build control and confidence in everyday network use.

    Whether you manage a few laptops or dozens of smart gadgets, regular monitoring ensures your home Wi-Fi stays fast, private, and protected from unwanted guests. Staying vigilant with these simple tactics is a routine every smart homeowner can feel good about.

  • The Right Way to Mount Magnetic Security Sensors on Window Frames

    The Right Way to Mount Magnetic Security Sensors on Window Frames

    Magnetic sensors play a crucial part in any modern home security setup. For many users, proper installation directly influences sensor accuracy and peace of mind. 

    This guide is for homeowners, renters, and smart tech enthusiasts who want lasting, trouble-free results.

    You’ll learn the complete, expert-backed workflow for correctly mounting magnetic window sensors. Expect clear, step-by-step instructions featuring real-world protocols and top-rated app guidance.

    How Magnetic Security Sensors Work on Windows?

    Magnetic contact sensors use a simple system. Two parts, a magnet and a switch, create a closed circuit when the window is shut.

    The Right Way to Mount Magnetic Security Sensors on Window Frames

    When the window opens, the magnetic field breaks. This action triggers the security alert in your hub or smartphone app.

    Core Components in a Typical Sensor Kit

    • Contact sensor unit 
    • Magnet bar
    • Mounting tape or screws
    • Optional: alignment spacers
    • Setup instructions or QR link for configuration

    Choosing the Right Sensor and Placement

    Not every window or sensor brand is the same. Profiles can be low or thick, finishes may be smooth or textured, and frame widths will influence sensor range.

    The Right Way to Mount Magnetic Security Sensors on Window Frames

    Popular sensor brands for smart home systems include Aqara, Ecolink, Honeywell, and Samsung SmartThings. Most give reliable app integrations via Zigbee or Z-Wave protocols.

    Evaluating Compatibility

    Check that the sensor frequency matches your hub. Many smart home users rely on platforms such as SmartThings or Home Assistant for seamless integration.

    Wood, PVC, and metal window frames each pose different challenges. Metal, for example, may interfere mildly with some contact sensors due to magnetic field distortion.

    Where to Place the Sensor and Magnet

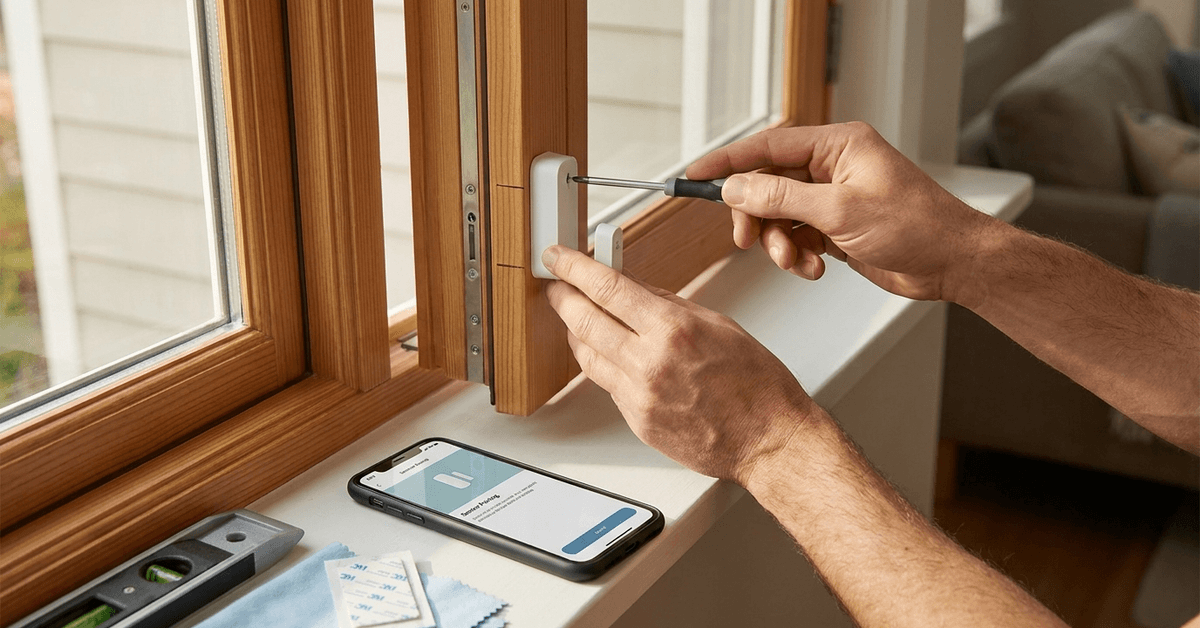
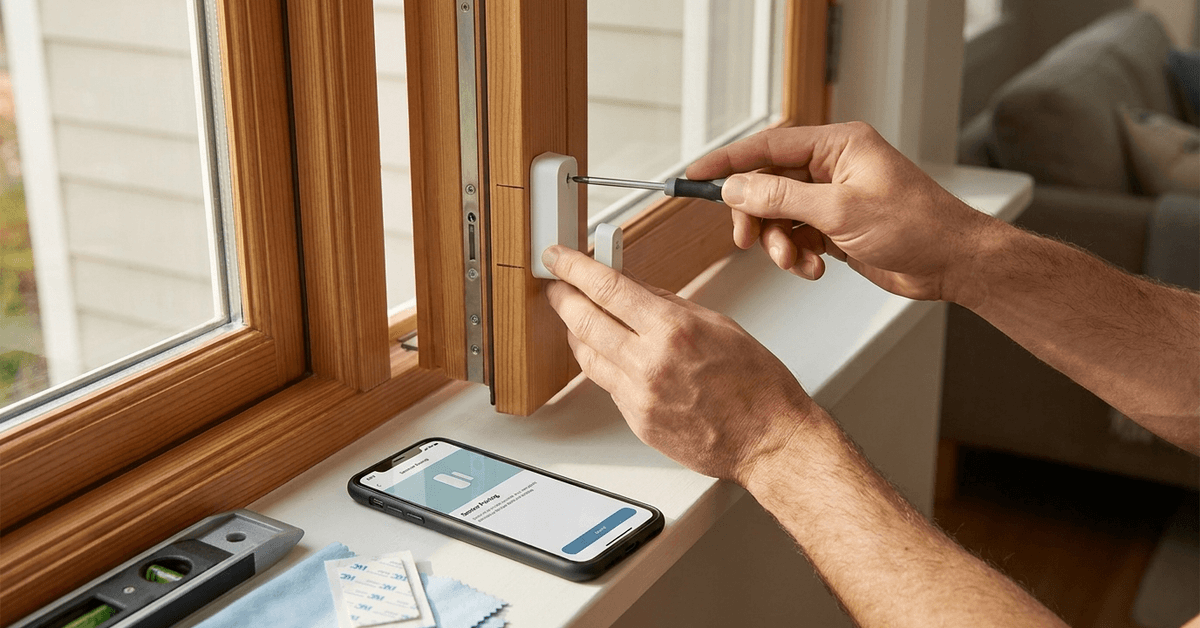
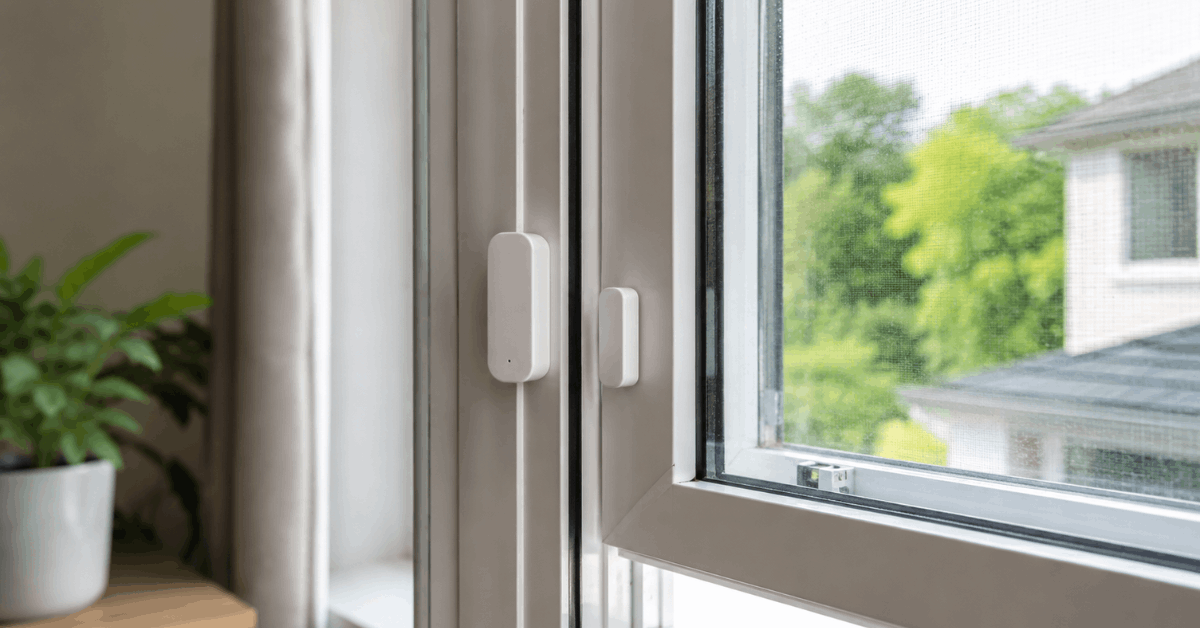
    • Mount the sensor unit on the fixed window frame.
    • Secure the magnet on the moving sash (the part that opens and closes).
    • A good rule is to keep both parts below 0.6 cm apart when the window is closed.
    • Keep all stickers or barcodes facing up, which helps future maintenance or troubleshooting.

    Essential Preparation Before Installation

    Clean surfaces yield better long-term adhesion. Alcohol wipes or a mild soap solution can remove oils and dust.

    Allow the frame to dry completely. If renovating or painting recently, let paint cure for several days first.

    Gathering the Right Tools

    • Level tool or bubble level for precise alignment
    • Pencil or painter’s tape to temporary mark positions
    • Non-abrasive cloths
    • Optional: micro screwdriver set if the sensor uses screws instead of tape

    Step-by-Step: Installing a Magnetic Window Sensor

    This section describes the most effective, real-world mounting procedure.

    1. Prepare and Test Fit

    • Visually identify the ideal mounting spot based on manufacturer guidelines.
    • Most experts suggest a corner away from window handles.
    • Do a dry fit, holding both pieces in place, to confirm alignment and surface quality.

    2. Mark the Sensor and Magnet Positions

    • Use a pencil or removable tape to outline each part.
    • Verify the parts are in perfect alignment, horizontally and vertically, with the level tool.
    • The magnet’s dotted or indicated side must face the sensor unit.

    3. Secure the Parts

    • Remove adhesive covers or prepare mounting screws.
    • Press each sensor half firmly onto clean surface for 20–30 seconds.
    • If using screws, lightly tighten them to hold parts flush but avoid over-tightening, which can crack plastic housings.

    4. Test Functionality Before Finalizing

    • Close the window and pair the sensor to your hub or app.
    • Open and close the sash several times while monitoring the sensor activity in your smart home app. A great example is the Aqara Home App , which provides real-time status updates.
    • If misalignment errors appear, carefully reposition the magnet slightly closer or farther as needed.

    5. Tidy Up and Re-Test

    • Peel away any marking tape or pencil traces.
    • Confirm device status updates as expected within your chosen app interface.

    App Pairing and Calibration for Smart Systems

    Most window sensors come with a QR code to launch the onboarding in supported apps. Homeowners commonly use SmartThings, Home Assistant, or Apple Home for rapid integration.

    Typical App Workflow

    1. Scan the QR code on the sensor or package to open the device pairing screen in your smart home app.
    2. Follow the step-by-step prompts to join the sensor to your hub or controller.
    3. After initial connection, test triggering alerts by opening and closing the window while monitoring the app.
    4. Rename the sensor with a descriptive label, such as “Bedroom Left Window,” and assign it to the right room profile.
    5. Some apps allow notification threshold adjustment, which can reduce false alarms caused by vibrations or wind.

    Common Mounting Issues and Real-World Fixes

    Even with careful setup, a few challenges still surprise homeowners. Sensor gaps or drop-outs are not rare in homes with unusual window geometry.

    Issue: Sensor Won’t Register When Closed

    • Magnet and sensor may be too far apart. Experts recommend a maximum gap near 0.6 cm.
    • Adhesive pads may have shifted during mounting. Reapply using fresh, high-grip tape if necessary.

    Issue: False Alarms or Intermittent Disconnects

    • Metal frames can subtly distort magnetic fields. Adding a plastic shim under the magnet can improve reliability.
    • Wireless interference is possible if many Zigbee or Z-Wave devices are nearby. Relocate the hub or add a signal repeater for better coverage.

    Issue: App Pairing Fails or Drops

    • Check hub compatibility and firmware updates, especially with Home Assistant .
    • Restart sensor, and redo the app pairing steps. Weak batteries or fresh device out of the box can also limit discovery.

    Maintenance and Long-Term Reliability Tips

    Sensor systems benefit from a simple, scheduled checkup. Most brands recommend inspection every few months.

    Battery replacement is straightforward. Typical window sensor batteries last 8–18 months, depending on usage and app polling frequency.

    Best Practices

    • Wipe sensors and magnets with a dry microfiber cloth for dust control.
    • Test window sensor response in your app at least once per month. This habit helps catch early warning signs of misalignment or dead batteries.
    • Store a log of install dates and battery swaps in your smart home dashboard, such as Home Assistant or SmartThings notes.

    Conclusion: Secure, Reliable Windows Begin with Smart Sensor Mounting

    Getting the most from your smart magnetic security sensors means careful planning and methodical installation. The process isn’t hard, but attention to detail at each step maximizes your investment and peace of mind.

    Regular maintenance, suitable app integration, and a clear understanding of real-world mounting pitfalls all contribute to a safer, smarter home. The right protocol ensures your window’s first line of defense stands strong, day or night.

  • Tips for Insulating Outdoor Smart Cameras Against Extreme Cold

    Tips for Insulating Outdoor Smart Cameras Against Extreme Cold

    Outdoor smart cameras face serious operational challenges in cold environments. Those living in frigid climates know that extreme temperatures may impact device performance, image clarity, and even network reliability.

    This article is for homeowners, renters, or property managers aiming to protect their smart surveillance gear from winter extremes. Reducing downtime, avoiding camera failures, and preserving battery life are the main goals here.

    Why Cold Affects Outdoor Smart Cameras?

    Most cameras contain sensitive electronics and batteries. Cold weather often affects both.

    Tips for Insulating Outdoor Smart Cameras Against Extreme Cold

    Below-freezing temperatures can slow battery chemical reactions, minimize charge retention, and cause premature shutoff.

    Condensation risks rise as well. When devices move from warm to cold, internal moisture may form and damage circuits.

    Additionally, some models become sluggish or lose Wi-Fi connection due to firmware limitations under stress.

    Key Features for Cold Climate Cameras

    Some camera models are designed with colder climates in mind.

    Tips for Insulating Outdoor Smart Cameras Against Extreme Cold

    Weatherproof Ratings

    The most important rating to check is the IP65/66 or above enclosure standard. This means strong protection against snow, sleet, and ice.

    Cameras rated IP66 or higher are less likely to allow moisture ingress even if snow piles around them.

    Low Temperature Operating Range

    It helps to review the manufacturer’s listed operating range. Many smart cameras officially perform best above -20°C (-4°F).

    Industrial or enterprise-grade options may function reliably to -30°C (-22°F) or colder.

    External Power Options

    Batteries drain faster in the cold. An external power supply such as a weatherproofed AC adapter or solar panel can maintain operation.

    Battery-only cameras may struggle to last through longer cold spells.

    Insulation Strategies for Outdoor Cameras

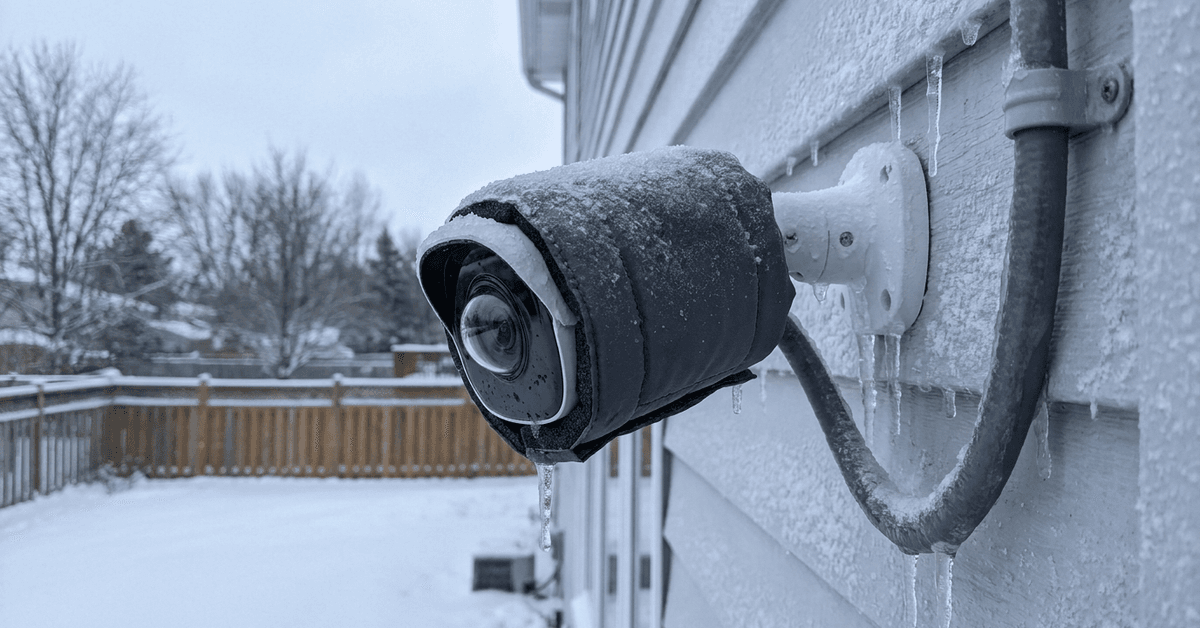
    Insulating your device provides a protective thermal buffer and may significantly improve performance.

    Basic Thermal Covers

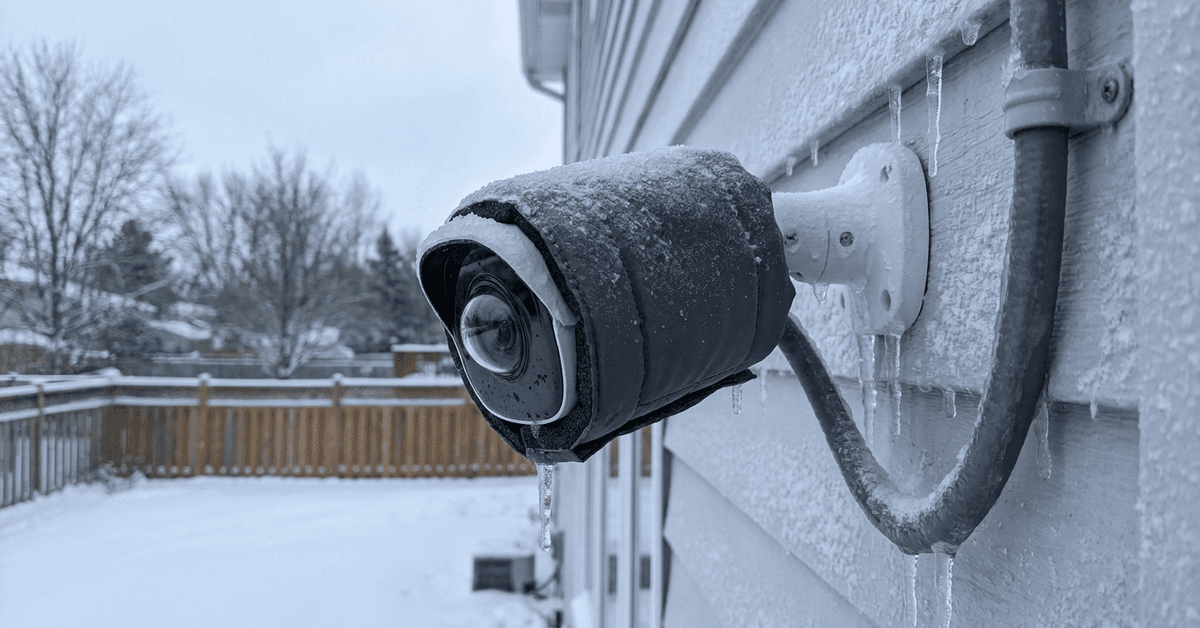
    Off-the-shelf winter camera jackets are often available for popular models. These covers use foam or neoprene materials.

    A higher-density thermal jacket offers more reliable insulation while maintaining airflow to avoid overheating on sunny days.

    DIY Insulation Approaches

    Many homeowners find value in custom solutions. Simple materials such as rigid foam panels or pipe insulation sleeves may provide good results.

    • Cut a rigid foam shield to size and mount it around the camera housing.
    • PVC pipe insulation or weatherproof tape can cover wires and connectors for added protection.
    • Strategically placed plastic dome enclosures may block direct wind and snow.

    Enclosed Mounting Options

    Wall-mounting the camera inside a properly vented birdhouse-style box offers extra protection while maintaining lens clarity.

    A strategically positioned plastic dome or transparent acrylic shield may further reduce cold air exposure.

    Heated Camera Mounts

    The most robust method uses a low wattage camera heater designed for security hardware. These integrate with the camera mount or housing.

    Thermostatic switch kits automate heating only when needed, saving power and prolonging hardware life.

    Optimizing Camera Settings for Winter

    Simple configuration adjustments often maintain performance even when insulation is limited.

    Adjust Motion Sensitivity

    False alarms rise in winter due to blowing snow and fluctuating light. Reducing sensitivity in the camera app, such as Arlo Secure or Ring App, is often useful.

    Many platforms let you define activity zones to further minimize unnecessary notifications.

    Night Vision Adjustments

    Infrared sensors consume more power and may create glare on snow. Switching from full IR mode to a balanced or auto setting often preserves battery.

    Firmware Updates

    Certain winter bugs cause firmware instability. Checking regularly for updates via the camera’s companion app is crucial for devices like Google Nest or Wyze Cam.

    Protecting Power and Connectivity in Cold

    Power and connection dropouts are common winter complaints. Site-specific solutions usually help more than generic fixes.

    Battery Maintenance

    Pre-charging and swapping batteries in a warm indoor space ensures longer runtime. High-capacity lithium batteries perform better in cold than standard types.

    Store spare batteries indoors and rotate them at least once per week.

    Wired Power Considerations

    A properly insulated or heated cable conduit minimizes voltage drop and prevents ice buildup. Outdoor-rated AC adapters, such as those from Wyze Outdoor Power Adapter, are recommended.

    Wi-Fi Reliability

    Cold temperatures affect both the camera and Wi-Fi router placement. Placing the router closer to the outdoor wall sometimes helps.

    Mesh Wi-Fi systems, such as Google Nest Wifi , may prevent disconnections during storms or deep freezes.

    Routine Checks and Preventive Maintenance

    Preventing damage is easier with routine checks, even if your cameras seem to be holding up.

    • Brush off snow buildup every few days with a soft broom.
    • Check housing seals for cracks and replace if needed.
    • Review live footage quality weekly from inside using the camera app.
    • Inspect cords and connectors for ice or corrosion.

    Legal and Safety Considerations

    Exterior modifications should comply with building codes and HOA rules. Drilling or mounting heated housings may have restrictions on visible electrical work.

    Homeowners should only use safety-rated materials and UL-listed accessories. Avoid enclosing any device in a non-vented or flammable material.

    Always refer to the camera manufacturer’s official winterization guidelines to preserve warranty terms and liability coverage.

    Conclusion

    Insulating smart cameras against extreme cold extends hardware lifespan and ensures that critical footage is always available during winter’s worst. Homeowners usually see fewer outages, clearer images, and improved security reliability by applying smart, well-tested approaches.

    Combining quality equipment, DIY insulation, and tech-savvy app management can offset most cold weather risks. With a bit of routine attention and the right setup, it’s possible to maintain effective outdoor surveillance all season without constant troubleshooting or battery swaps.

  • How to Set Up Automated Voice Alerts for Door Openings

    How to Set Up Automated Voice Alerts for Door Openings

    Automated voice alerts for door openings are a cornerstone of modern smart home security. They provide instant, audible feedback whenever an entry point is accessed.

    This setup is valuable for families, property managers, and anyone looking to strengthen home awareness.

    By integrating sensors, automation hubs, and voice assistants, homeowners unlock powerful situational awareness with minimal effort.

    How to Set Up Automated Voice Alerts for Door Openings

    Why Voice Alerts for Doors Matter in Smart Homes?

    Instant voice alerts help provide a real-time line of defense. They act before a notification reaches your phone.

    This makes voice automation ideal for busy households, elderly residents, or families with young children.

    Enhanced Awareness

    An audible alert can inform you if someone enters or leaves, even when away from your phone.

    This feature is especially valued in homes with multiple exterior doors or sliding entrances.

    Deterrence and Safety

    Voice messages can deter unwanted entry by increasing perceived human presence.

    For caretakers or those with mobility issues, audible announcements create peace of mind.

    Essential Components Needed

    Automated voice alerts rely on several smart devices communicating together.

    • Contact Sensors: Installed on doors to detect open/close status. Common brands include Aqara, Philips Hue, and Samsung SmartThings.
    • Smart Hub: Acts as the system brain. Platforms like SmartThings, Home Assistant, or Hubitat Elevation are widely used.
    • Voice Assistant Speaker: Delivers spoken alerts. Google Nest speakers and Amazon Echo devices are popular options.
    • Automation Platform/App: Handles event logic. This could be built-in (like Alexa routines) or more advanced (such as Home Assistant).

    Most systems work with either Zigbee, Z-Wave, or WiFi-based devices. Compatibility matters when selecting parts.

    Choosing Compatible Devices and Protocols

    Interoperability between devices and platforms is at the heart of a seamless setup.

    Zigbee Versus Z-Wave Versus WiFi Sensors

    • Zigbee: Known for fast response and reliable mesh networking. Aqara and Sonoff sensors are common choices.
    • Z-Wave: Strong security features and good range. Brands like Aeotec or Fibaro stand out.
    • WiFi: Direct cloud connectivity. Shelly Door/Window sensors offer simple setup without a hub.

    Zigbee and Z-Wave require a compatible hub. WiFi devices may integrate directly with voice platforms but increase network load.

    Automation Platforms

    Home Assistant is often selected for ultimate flexibility and privacy.

    SmartThings and Hubitat Elevation provide user-friendly interfaces and broad compatibility.

    For plug-and-play voice alert setups, Alexa and Google Home routines offer a streamlined approach.

    Step-by-Step Voice Alert Setup Example

    Here is a general outline using Home Assistant with Zigbee sensors and a Google Nest speaker.

    How to Set Up Automated Voice Alerts for Door Openings

    1. Prepare Your Devices

    • Add the Zigbee coordinator to Home Assistant (using Zigbee2MQTT or ZHA integration).
    • Pair your contact sensor by following the manufacturer’s instructions.
    • Register your Google Nest speaker as a media player in Home Assistant.

    2. Configure an Automation in Home Assistant

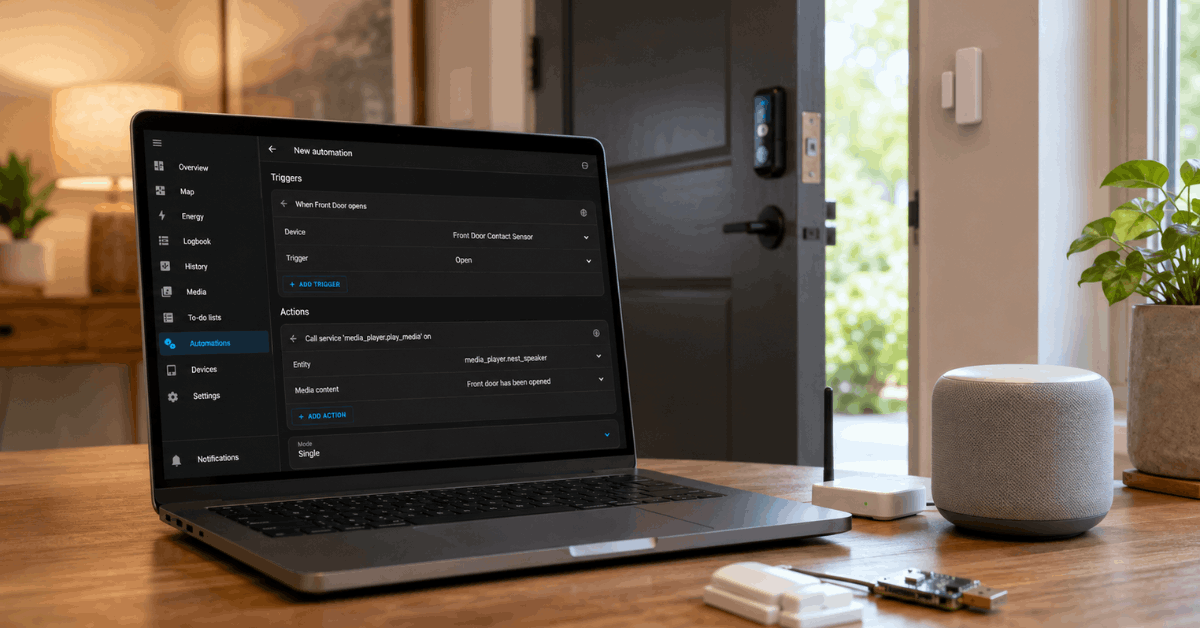
    • Navigate to Automations and create a new entry.
    • Set the trigger as the door sensor reporting an “open” state.
    • For the action, select “Call Service” and pick the “media_player.play_media” option.
    • Input your alert phrase (e.g., “Front door has been opened”) as the TTS message.
    • Point the service to your Google Nest speaker’s entity ID.

    The automation will now announce the alert through your speaker whenever the sensor detects opening.

    3. Testing and Fine-Tuning

    • Test by opening the door to ensure the alert triggers immediately.
    • Adjust the message, volume, or timing within the automation edit menu.

    Alternative Simplified Approach: Alexa Routines

    For those using Amazon Echo devices and compatible sensors, Alexa Routines make setup quick.

    • Install a compatible contact sensor (like the Ring Alarm Contact Sensor ).
    • Add the sensor to the Alexa app. Ensure it appears under Devices.
    • Create a Routine and set the trigger as the sensor’s “open” event.
    • Add an action for Alexa to “Say” a custom message.

    The Echo speaker will then play your chosen voice alert.

    Practical Tips for Reliable Performance

    Practicality matters as much as technical setup in daily life. Sensitivity and avoidance of false positives are priorities.

    Avoiding Repeated Triggers

    • Position the sensor to only detect intended openings. Mis-aligned magnets can yield erratic alerts.
    • Configure automation to trigger only on “open,” with an added cooldown timer to avoid repeat voice prompts in rapid succession.

    Voice Volume and Device Placement

    • Place speakers at central points for best sound coverage (such as hallways or kitchen entrances).
    • Volume automation or night mode prevents disturbance during certain hours.

    Security and Privacy Considerations

    • Keep automations local if privacy is paramount. Platforms like Home Assistant work without cloud services.
    • Avoid storing sensitive information in voice alerts.

    Popular Software and Apps for Voice Alerts

    • Home Assistant: Flexible open-source automation with robust integrations.
    • SmartThings: Intuitive app setup, compatible with various brands.
    • Alexa App: Best for Echo users, supports custom routines.
    • Google Home: Straightforward configuration for Google Nest speakers.
    • IFTTT: For custom cross-platform bridges, especially with WiFi sensors.

    Troubleshooting Common Voice Alert Issues

    Delayed or Missed Alerts

    • Check WiFi or Zigbee network stability. Sensors may drop offline when signal is weak.
    • Review automation logic for correct trigger-action flow.

    Inconsistent Voice Playback

    • Ensure the speaker firmware is updated and responsive in the hub dashboard.
    • Test volume and language settings within the assistant app.

    Advanced Customization Ideas

    Personalized Messages

    • Dynamically include time, resident names, or warning phrases (e.g., “Garage door was opened at 9:41 PM”).
    • Home Assistant’s Template actions allow this type of flexibility.

    Multi-Speaker Coverage

    • Broadcast alerts to multiple rooms for wider coverage or targeted delivery (such as only in the master bedroom at night).

    Conditional Announcements

    • Guide automations to run only if nobody is home, or not during certain hours.

    Conclusion

    Automated voice alerts for door openings bring an important layer of proactive security and awareness to modern homes. With the right mix of contact sensors, automation hubs, and voice assistant speakers, homeowners can achieve reliable, real-time notifications tailored to their routines.

    Whether aiming for full customization or simple plug-and-play, the solutions outlined provide a path to a smarter, safer living environment. 

    Adjusting for compatibility, convenience, and personal preferences will make the difference in daily usability and satisfaction. As technology continues to evolve, these systems only grow more reliable and helpful for everyday peace of mind.

  • How to Install a Smart Peephole Camera in an Apartment Door

    How to Install a Smart Peephole Camera in an Apartment Door

    Security is a growing concern for apartment dwellers. Many tenants want an extra layer of safety without altering the structure of the rented property.

    A smart peephole camera can easily enhance entrance visibility. It is ideal for those who prefer simple, tech-driven security solutions over traditional door viewers.

    This guide is crafted for anyone seeking to boost apartment entryway monitoring. Upgrading your door lets you see who’s outside, even when you are not home.

    Why Choose a Smart Peephole Camera for Your Apartment?

    Traditional peepholes offer basic security, but smart versions add video, alerts, and remote access.

    How to Install a Smart Peephole Camera in an Apartment Door

    Some models include motion detection and cloud recording, making them far more versatile for busy residents.

    Apartment doors typically cannot be modified permanently. Many smart peephole cameras offer a non-invasive alternative.

    Factors to Consider Before Installing a Smart Peephole Camera

    Choosing the right device depends on features, compatibility, and building policies.

    Compatibility with apartment doors

    Not every peephole camera fits every door. Measuring the peephole diameter is essential before purchase.

    Common diameters are 12mm, 14mm, and 16mm, so check the spec sheet for exact fit recommendations.

    Power supply options

    Some cameras use rechargeable batteries, while others require a plug or USB for constant power.

    For most renters, models with easily removable batteries are the best choice, avoiding the need for drilling or permanent rewiring.

    Notifications and app support

    Look for smart peepholes that provide instant notifications to your smartphone.

    Strong app compatibility ensures ongoing access and device updates. Apps like Ring, Eufy Security, and Yale Home are popular options.

    Respecting property rules and privacy

    Most landlords permit peephole replacements if the modification is reversible.

    Before purchasing, it’s worth consulting building policies and talking to your property manager about acceptable security upgrades.

    Required Tools and Typical Supplies

    • Phillips screwdriver 
    • Measuring tape
    • Drill (only if needed for new mounting plates, which is rare in rental units)
    • Your chosen smart peephole camera kit
    • Smartphone or tablet for app setup

    Most smart peephole cameras are designed for DIY installation. Complex electrical work is usually unnecessary.

    Installation: Step-by-Step Process

    Preparing the door and existing peephole

    • Start by checking that your chosen device matches your peephole size.
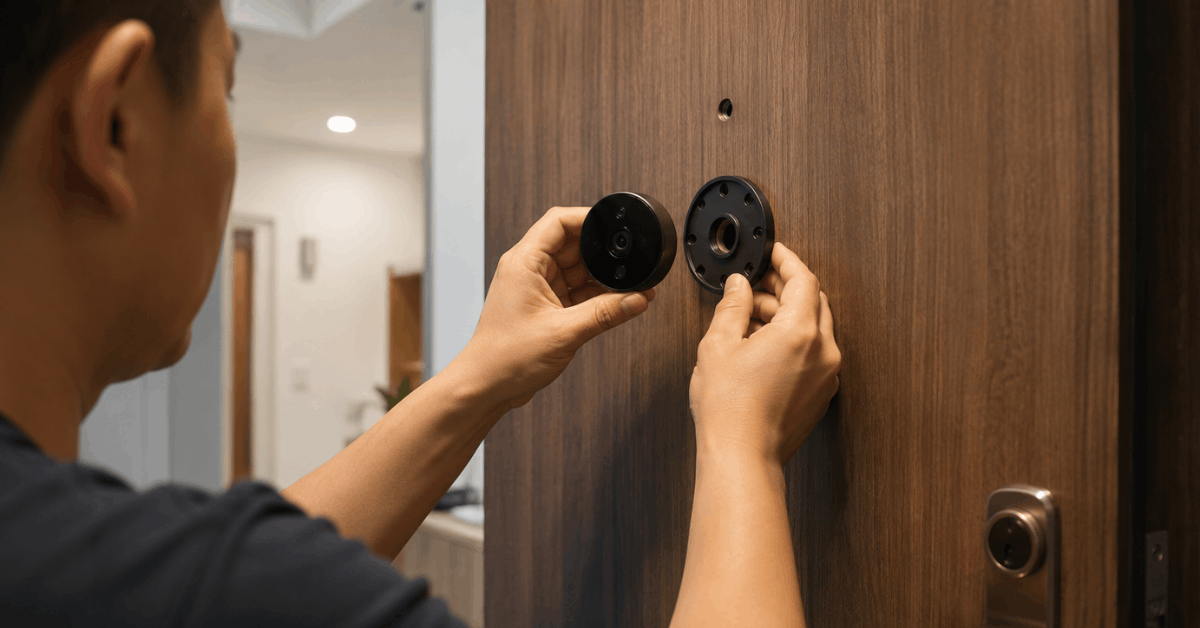
    • Remove the old peephole with a screwdriver, unscrewing it gently from the inside.

    If the original viewer feels stuck, applying mild twisting pressure from both sides may help to loosen the threads.

    Installing the smart peephole camera

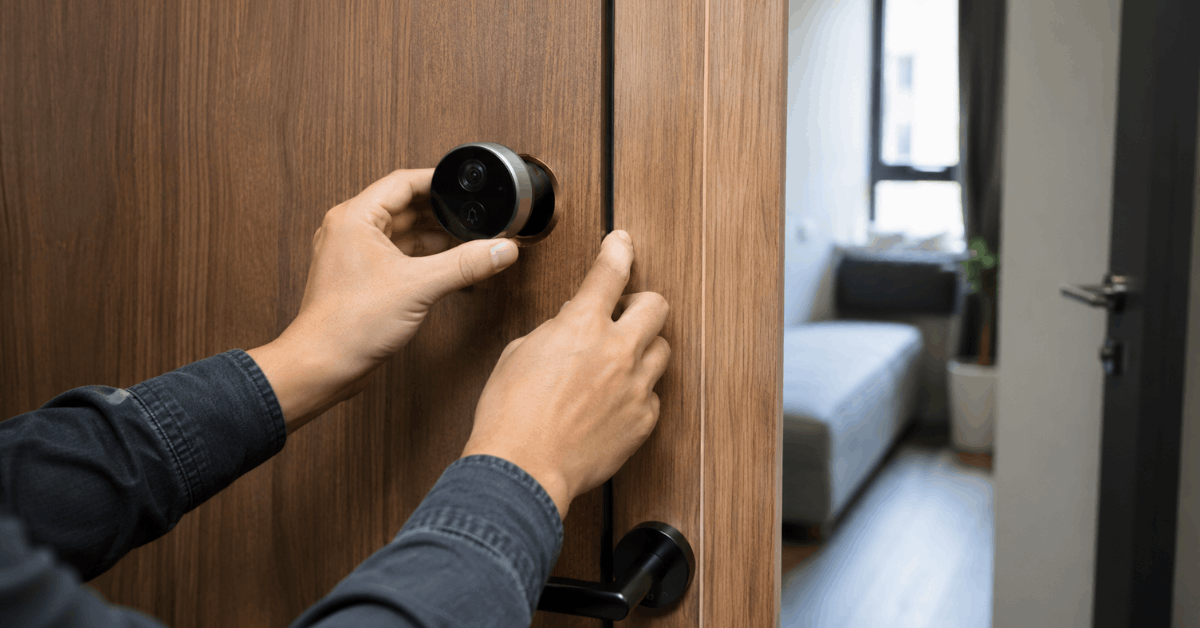
    • Place the camera’s lens unit on the exterior side of the door, through the peephole opening.
    • Attach the inside monitor or display panel using the screws provided in the camera kit.
    • For models powered by batteries, insert batteries before final assembly and make sure the battery contacts sit flush.

    Some devices have a rubber gasket or adhesive ring that helps secure the camera and prevents drafts. It’s vital to align these neatly.

    Connecting the device to Wi-Fi and app

    • Download the appropriate manufacturer’s app, such as Ring or Eufy Security, from the Google Play Store or Apple App Store.
    • Power on the peephole device. Many models enter pairing mode automatically.
    • Using the app, follow prompts to connect to your apartment’s Wi-Fi network. Stick to 2.4 GHz Wi-Fi networks, as these are commonly supported.

    Try to set up your account with a strong, unique password for maximum security. Enable two-factor authentication if available within the app.

    Configuring Notifications, Video Storage, and Privacy Features

    Setting up motion detection alerts

    • Access the device settings within the companion app.
    • Adjust motion sensitivity to balance detection accuracy and battery life.
    • Some platforms let you define motion activity zones to avoid false alerts from neighbors in the hallway.

    Video storage methods

    • Choose between cloud storage or SD card recording, depending on your camera model.
    • Cloud subscriptions, such as Ring Protect or Eufy Cloud, offer continuous recording and incident archiving.
    • SD card use can save subscription fees but might limit video backup if the card fills up or is removed.

    Enhancing privacy and guest notifications

    • Consider camera models with privacy shutters or the ability to mask zones you do not want to record.
    • Set up chime notifications or special alerts for familiar faces (sometimes called ‘friend detection’), available on higher-end models.

    Tips for Maintaining Your Smart Peephole Camera

    • Regularly check for firmware updates in your device’s app.
    • Clean the camera lens gently with a microfiber cloth every month to ensure clear video.
    • If using batteries, consider swapping them every three to four months to avoid sudden outages.

    Security, Legal, and Privacy Considerations

    Complying with residential rules

    Avoid causing permanent alterations to the property to stay compliant with apartment guidelines.

    Respecting neighbors’ privacy

    Point the camera solely at your own doorway or common areas, not at neighboring units or private spaces beyond your leasehold.

    Data security best practices

    • Update passwords regularly for your app accounts.
    • Enable app authentication features designed to protect video feeds.
    • Deactivate or remove the device before moving out to return the door to its original condition.

    Conclusion

    Installing a smart peephole camera in an apartment door provides enhanced safety and peace of mind. Most renters can install these devices without professional help or major changes. 

    Following the above steps, anyone can confidently improve their home’s entryway security using adaptable technology. 

    Consistently monitoring device settings and respecting privacy rules maximizes the benefits. Smart peephole cameras combine convenience with top-notch security for modern apartment living.

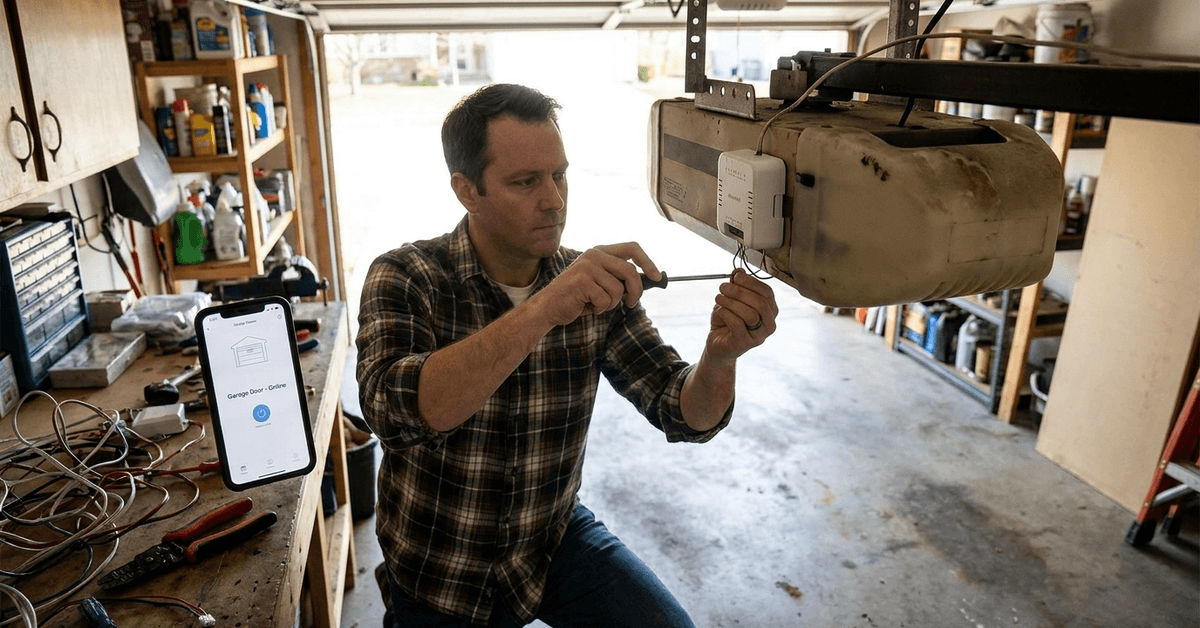
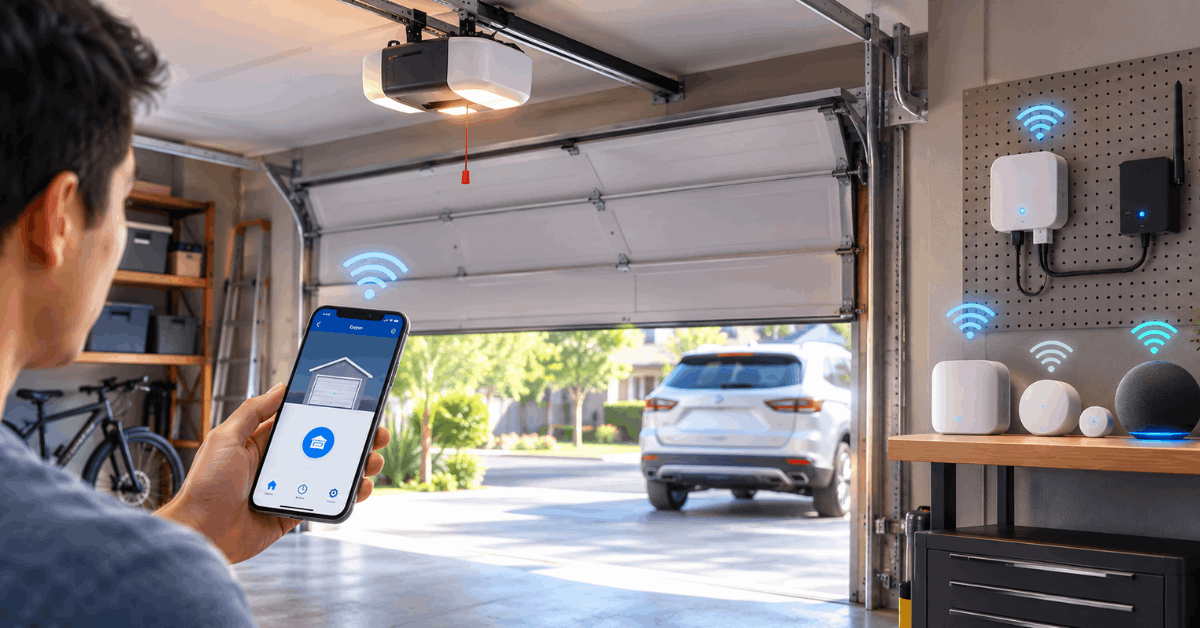
  • How to Connect Older Garage Door Openers to a Smart Home System

    How to Connect Older Garage Door Openers to a Smart Home System

    Many homeowners want to integrate their aging garage door openers with a smart home system. It provides peace of mind, upgrades daily convenience, and can add value to the property.

    This guide is designed for anyone with older garage door hardware who would like it to work with their smart home gadgets, platforms, or apps. The following explanations will highlight supported tech, installation steps, and best practices for secure setup.

    Understanding Older Garage Door Opener Compatibility

    The first step for many is clarifying what “older” means in this context. Usually, pre-2010 models lack built-in smart support. These units use simple wall switches and basic remotes.

    How to Connect Older Garage Door Openers to a Smart Home System

    Smart conversion depends entirely on the ability to control the opener using a dry contact (momentary push-button) or a wired wall control. This physical interface is key when deciding on upgrade solutions.

    Smart Home Protocols and Technologies

    Several tech protocols are used in modern smart home automation. Not all will work with old hardware, but knowing the options helps tailor the approach.

    Wi-Fi-Based Controllers

    Chamberlain myQ and similar Wi-Fi modules are popular. These usually require openers built no earlier than the mid-1990s, as some older brands block add-ons.

    How to Connect Older Garage Door Openers to a Smart Home System

    If myQ is incompatible, universal Wi-Fi relay switches (like the Meross Smart Wi-Fi Garage Door Opener) offer an adaptable route for most legacy systems.

    Zigbee and Z-Wave Modules

    For those running a smart home hub such as SmartThings or Hubitat, Zigbee or Z-Wave relays make an alternative to Wi-Fi devices.

    The GoControl/Linear Garage Door Controller is a respected choice backed by years of real-world use and strong hub compatibility.

    Retrofit Security and Safety

    Older units may lack key safety mechanisms. Retrofitting a smart module does not upgrade these protections. Always check for compatibility with safety sensors to avoid unexpected closing hazards.

    Step-by-Step Smart Conversion Process

    Most wire-in retrofit devices follow a similar workflow, even if the specific model varies.

    Required Tools and Supplies

    • Smart relay controller (such as Meross, GoControl, or compatible brand)
    • Phillips screwdriver
    • Wire stripper or cutter (occasionally needed)
    • Wire connectors (included with most smart kits)
    • Safety glasses and work gloves

    Physical Wiring Instructions

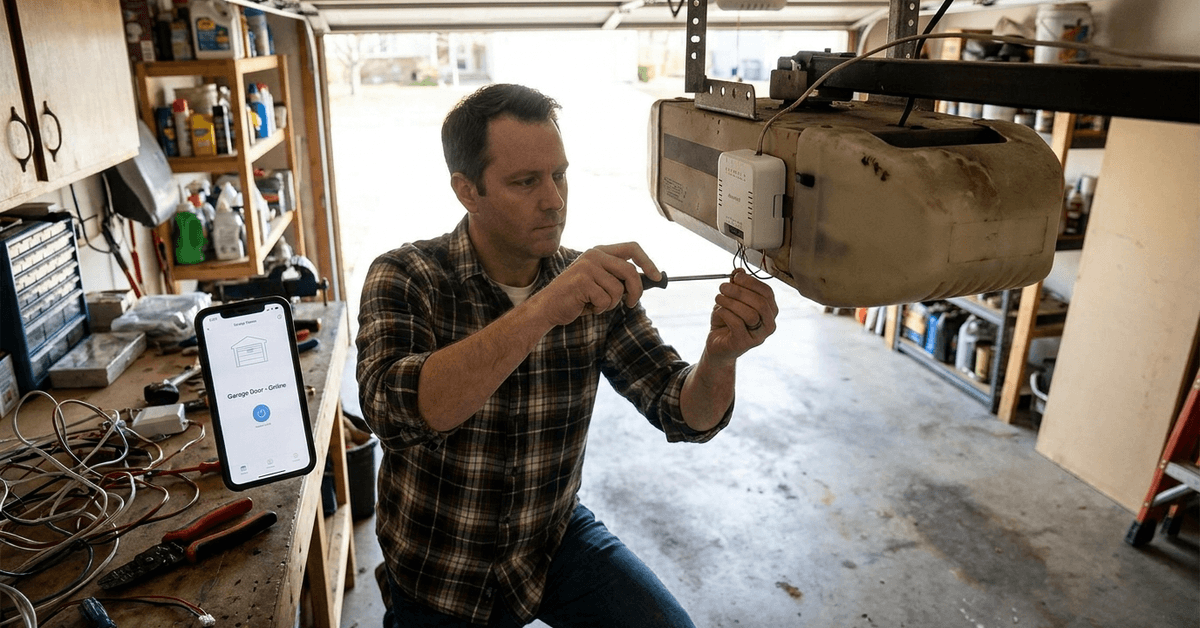
    1. Unplug the garage opener for safety before beginning any work.
    2. Open the wall switch panel that operates the door. Find its terminal screws (usually two).
    3. Connect the controller’s output wires to these terminals. Most use small solid copper wires.
    4. Secure the relay’s power supply adapter to a wall outlet (usually included in smart kits).
    5. Route or secure wires neatly to avoid tangles or snag risks.

    Pairing With Smart Home Systems

    1. Plug the opener back in and restore power.
    2. Open the associated smartphone app (such as the manufacturer’s, or a platform like Apple HomeKit or Alexa).
    3. Follow the in-app instructions to add a new device, usually by scanning a code or selecting from a nearby device list.
    4. Test door operation from the app. If the door does not respond, verify your wiring and Wi-Fi connection.

    Best Garage Door Smart Modules for Older Models

    The market has matured, but a few models are particularly well-tested with older openers.

    Meross MSG100 Wi-Fi Garage Door Opener

    This controller supports wired wall button interfaces and is budget-friendly. It works well with Alexa, Google Home, and SmartThings.

    Its small size and remote sensor (to detect open or closed status) make it flexible for most spaces.

    GoControl Z-Wave Garage Door Opener Remote

    This Z-Wave device is popular among advanced systems, integrating easily with Vera, SmartThings, and similar hubs.

    Its sensor magnets provide position feedback, so users can always check the true door status within their home app environment.

    Home8 Garage Door Controller

    Some prefer niche options like Home8 for extra video support. This unit works with many openers and can alert your phone if the door is triggered.

    Integrating With Popular Smart Home Platforms

    Connecting a retrofitted opener with your broader smart home depends on the platform of choice. A few general strategies work across brands.

    Amazon Alexa Integration

    Alexa routines allow voice or app-triggered garage opening. Enable the device’s skill in the Alexa app, then follow secure linking prompts.

    Google Home/App Integration

    Many Wi-Fi modules appear as new devices in the Google Home app. Adding routines or automations can tie actions (like coming home) to trigger door control.

    Apple HomeKit Compatibility

    For Apple users, HomeKit requires certified hardware or use of Homebridge (open-source software) to bridge non-certified smart relays. Setup can be a little involved, yet users often praise the integration once connected.

    Security, Privacy, and Safety Considerations

    Connecting an older opener to your home’s Wi-Fi or network does increase remote access. Smart home security best practices are crucial for peace of mind.

    Using Strong Passwords

    Always set unique, complex passwords for your apps and smart devices. Avoid default codes, which can be exploited.

    Enabling Two-Factor Authentication

    Many smart platforms like myQ and Alexa offer extra login security. Two-factor sign-in is worth enabling wherever possible.

    Safe Door Automation

    Some older openers do not automatically stop if the door meets an obstacle. Pairing a smart relay does not add this function. Frequent checks and mechanical upgrades are advised for maximum safety.

    Network Segmentation

    Segmenting smart gadgets onto a separate Wi-Fi network protects other devices in case of a compromise. Many modern routers make this setup simple without technical headaches.

    Troubleshooting Common Issues

    Smart upgrades occasionally trigger technical hiccups. Most are minor, but a few are worth knowing.

    • No response from smart relay: Check wiring, ensure the smart module is powered, and confirm strong Wi-Fi signal coverage in the garage.
    • “Device not supported” errors: Some legacy openers block add-on modules. Model-specific guides or online forums can help with unusual units.
    • Garage door opens or closes unexpectedly: Review apps for conflicting routines or check for wiring touch points between the wall button and the smart relay. Faulty sensors rarely cause ongoing door movement.

    Conclusion

    Connecting older garage door openers to smart home platforms is realistic for most households. Using a compatible relay, trusted apps, and simple wiring, modern convenience can be achieved—often with just a basic toolkit.

    The process is usually straightforward and does not require advanced skills. Choosing the right technology ensures both compatibility and long-term reliability. Regular maintenance and security habits protect both access and privacy for the future.

    Prioritizing compatibility and careful installation leads to success. Homeowners frequently report that smart upgrades improve daily routines, accessibility, and overall peace of mind, especially when leaving or arriving home.

  • How to Test Your Smart Doorbell Microphone for Clear Audio

    How to Test Your Smart Doorbell Microphone for Clear Audio

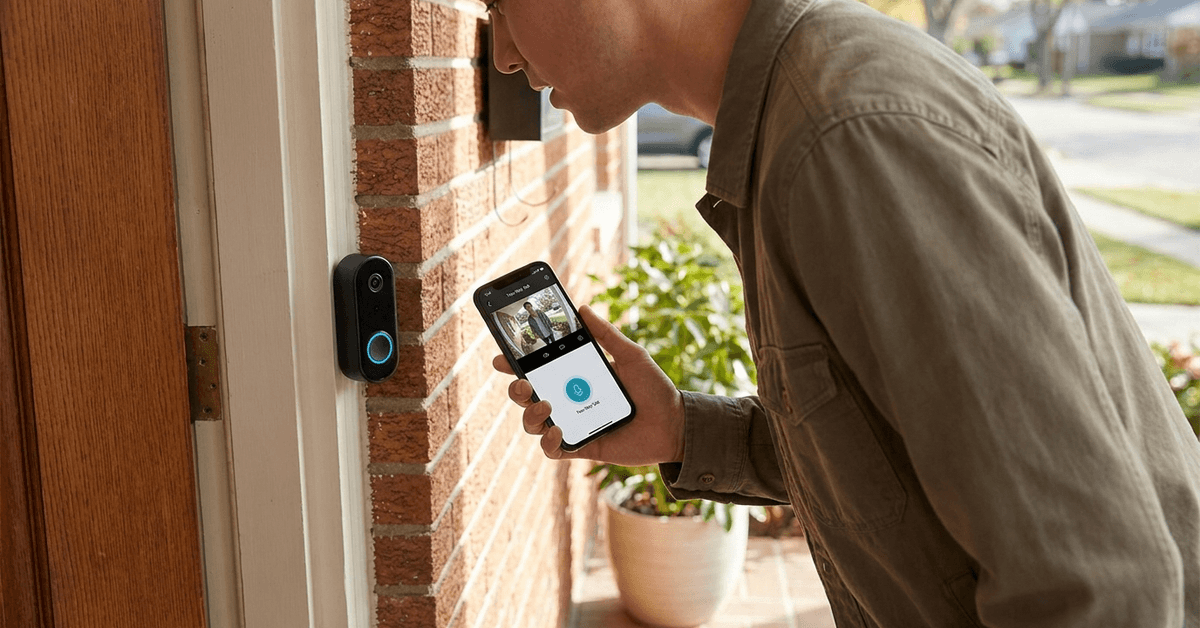
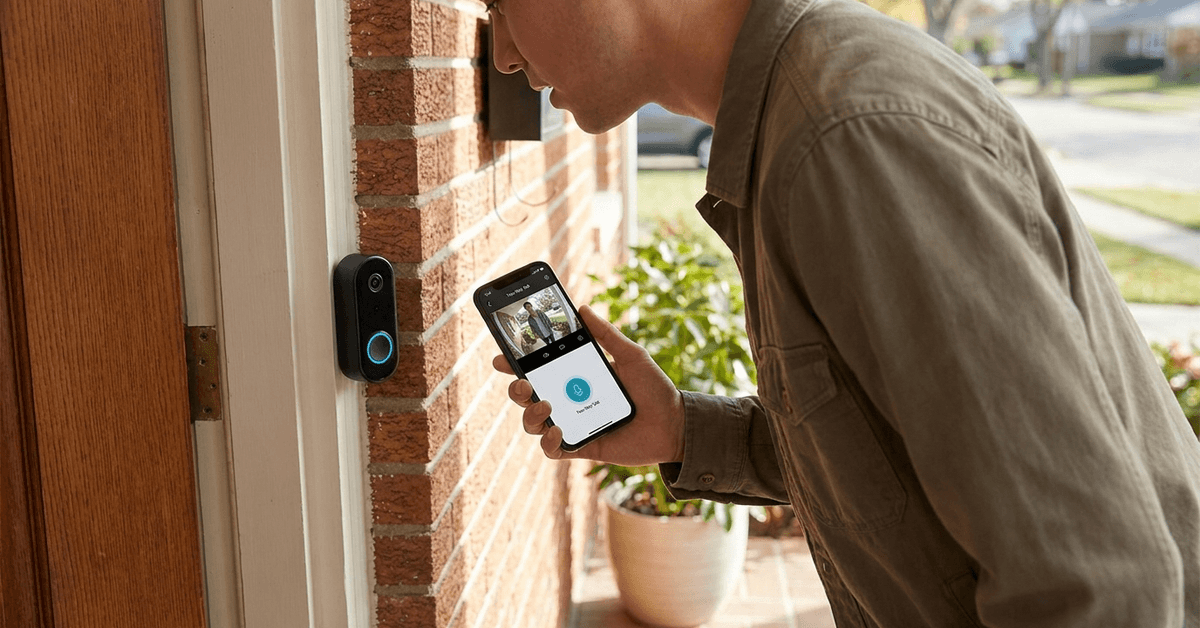
    Ensuring your smart doorbell microphone delivers clear audio is critical for reliable security and everyday convenience.

    This practical guide addresses every aspect of audio testing that a smart home owner may encounter.

    Why Clear Audio Matters in Smart Doorbells?

    Smart doorbells are not just about video feeds.

    Image 1

    Many real-life incidents depend on the quality of spoken communication at your front door. Good audio makes two-way talk possible and ensures visitor identification is accurate.

    Common issues caused by poor microphone performance

    • Unable to hear visitors due to muffled sound
    • Difficulty understanding instructions during deliveries
    • Missed security alerts caused by unintelligible audio

    Traditional troubleshooting rarely addresses these issues with enough detail.

    Initial Steps Before Testing

    Before running any test, always check your doorbell’s documentation. Microphone location and recommended settings can often vary depending on the manufacturer.

    Recommended pre-test checklist

    • Locate the actual microphone hole on the device
    • Confirm that no tape, dust, or debris blocks the microphone
    • Restart your doorbell if you experience persistent audio issues
    • Update the device firmware using the brand’s official app

    These small things are often overlooked and can make a major difference.

    Basic Audio Test Methods

    There are multiple ways to check audio clarity with minimal setup. Live call mode on your doorbell’s app is the easiest method for initial assessment.

    Testing via two-way talk

    1. Open the doorbell’s official app on your phone or tablet
    2. Activate the live view or two-way talk function
    3. Stand next to your smart doorbell and speak at a normal volume
    4. Listen carefully to your own voice through the mobile device speaker

    This approach quickly reveals basic clarity, echo, or background noise issues.

    Recording and playback for detailed analysis

    1. Enable audio recording in the smart doorbell’s settings menu
    2. Record a short message at the doorbell
    3. Play the recording back via the app’s event history feature

    Some brands offer downloadable files in MP3 or WAV format for closer examination on a computer.

    Advanced testing: Third-party Tools and Protocols

    Going beyond built-in features uncovers subtle problems or hardware limits. Many users find Audacity a powerful free software for waveform analysis and background noise evaluation.

    Using Audacity for clarity inspection

    1. Download the recorded audio file from your doorbell system
    2. Import the file into Audacity on your PC or Mac
    3. Visually inspect the waveform for dropouts or broken audio
    4. Use the playback tool to identify static, echo, or low-quality segments

    Even those with limited technical experience can interpret simple waveform spikes or gaps.

    Third-party mobile apps for real-time analysis

    Apps like Sound Meter (available for Android) or Decibel X (iOS/Android) help measure environmental noise levels around your doorbell.

    • Compare decibel readings indoors and outdoors during tests
    • If the baseline noise near your door is above 70 dB, microphone clarity will likely suffer
    • Adjust testing times or microphone direction accordingly

    External Factors That Affect Microphone Quality

    Environmental noise, weather and mounting surface all impact microphone performance. These outside variables sometimes mask or distort what your smart doorbell hears.

    Placement and mounting considerations

    • Metal or glass mounting surfaces often produce unwanted echoes or reverb
    • Wall edges, overhangs, or shrubbery may block or muffle the microphone
    • Avoid areas close to HVAC units or busy streets, if possible

    Testing from multiple locations helps isolate these variables.

    Weatherproofing and wind interference

    • Some brands include a dedicated windscreen over the microphone
    • Heavy rain, snow, or wind can degrade audio for any model
    • Temporary protective covers may help in severe seasons, as long as microphone holes remain unobstructed

    Listen for any sudden changes in audio when the weather shifts.

    Specific Smart Doorbell Brands and Their Test Features

    Many popular doorbells have unique testing tools.

    It’s worth reviewing specific options for brands like Ring, Nest Doorbell, Eufy, Arlo, and Wyze.

    Ring

    • Built-in volume and sensitivity sliders via the app
    • Event playback includes timestamped audio segments
    • Access Ring Diagnostic Tools for in-depth troubleshooting guidance

    Nest Doorbell

    • Remote test notifications for quick sound checks
    • Ability to download event clips from Nest Aware for local analysis

    Eufy and Arlo

    • Allow direct export of high-quality audio files
    • Offer motion-triggered recording for more natural test cases

    If your model is not listed, refer to the support channel of the manufacturer for help with audio testing steps.

    Ensuring Consistent Test Conditions for Reliable Results

    Realistic evaluation should closely match your usual day-to-day environment.

    • Test at different times: quiet midday, busy evening, and late at night
    • Change the position of your voice: closer, farther, side angles
    • Capture background sounds like dogs, traffic, or wind to see if they interfere

    Small differences add up and may change results from one day to the next.

    Common Troubleshooting Tips if Audio Is Unclear

    Persistent microphone issues may not always require professional servicing.

    • Double-check privacy glass and door frame acoustic properties
    • If you use Wi-Fi, confirm that your signal strength is strong at the doorbell’s mounting point
    • Factory reset the device as a last resort after backing up all important recordings

    Sometimes, older models lack advanced audio hardware compared to newer generations.

    Comparison of Software Tools for Microphone Testing

    Tool  Platform  Key Feature 
    Audacity  Windows/Mac  Detailed waveform and audio clarity analysis 
    Sound Meter  Android  Measures environmental noise level in real time 
    Decibel X  iOS/Android  Easy UI for quick neighbor noise checks 

    Consistent use of these can highlight gradual shifts in microphone quality.

    Powerful Conclusion: Maintain Clear Audio for Reliable Security

    Smart doorbell microphones are often the first—and sometimes only—means of interaction with people at your entrance. Regular testing with a mix of built-in features and third-party tools helps ensure you catch sound issues early.

    Clean, accurate audio means better security, fewer missed visitors, and a smoother smart home experience. As hardware, weather, and daily noise vary, periodic checks offer the peace of mind every homeowner wants. Wherever you live, maintaining clear audio is a crucial detail in your overall smart security setup.

  • The Beginner’s Guide to Smart Padlocks for Outdoor Gates

    The Beginner’s Guide to Smart Padlocks for Outdoor Gates

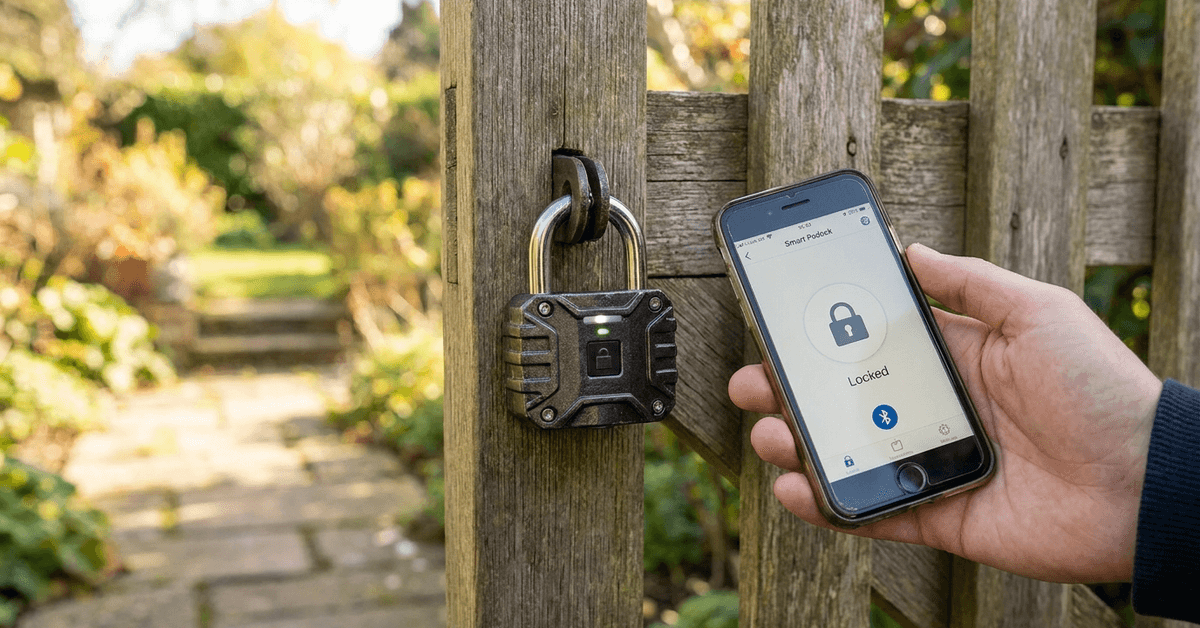
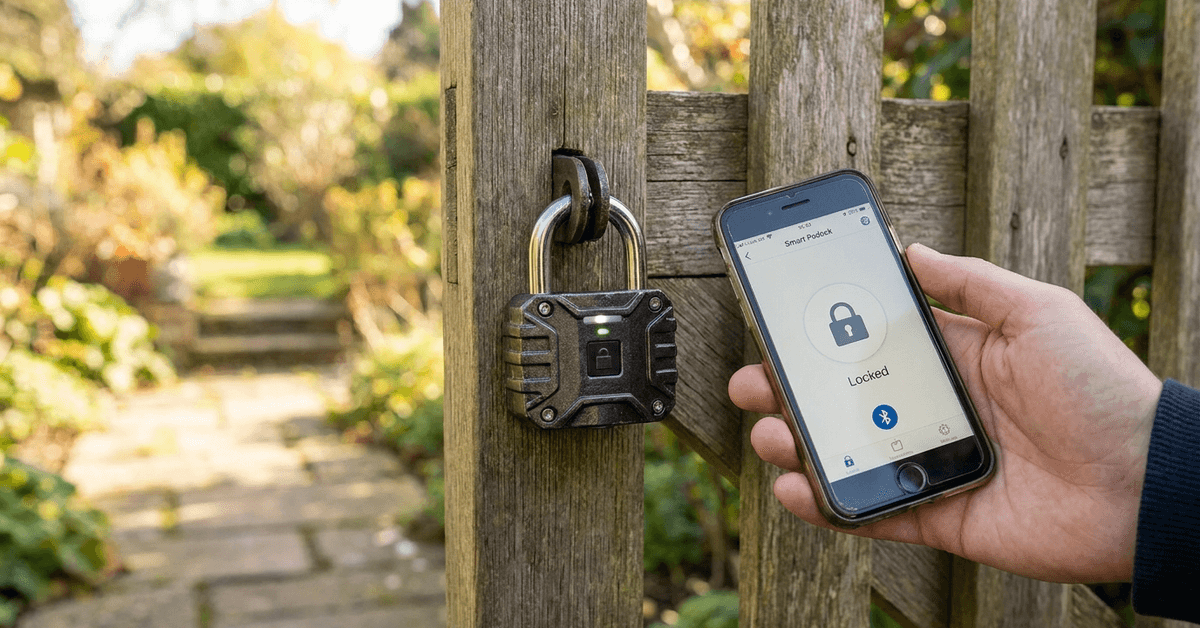
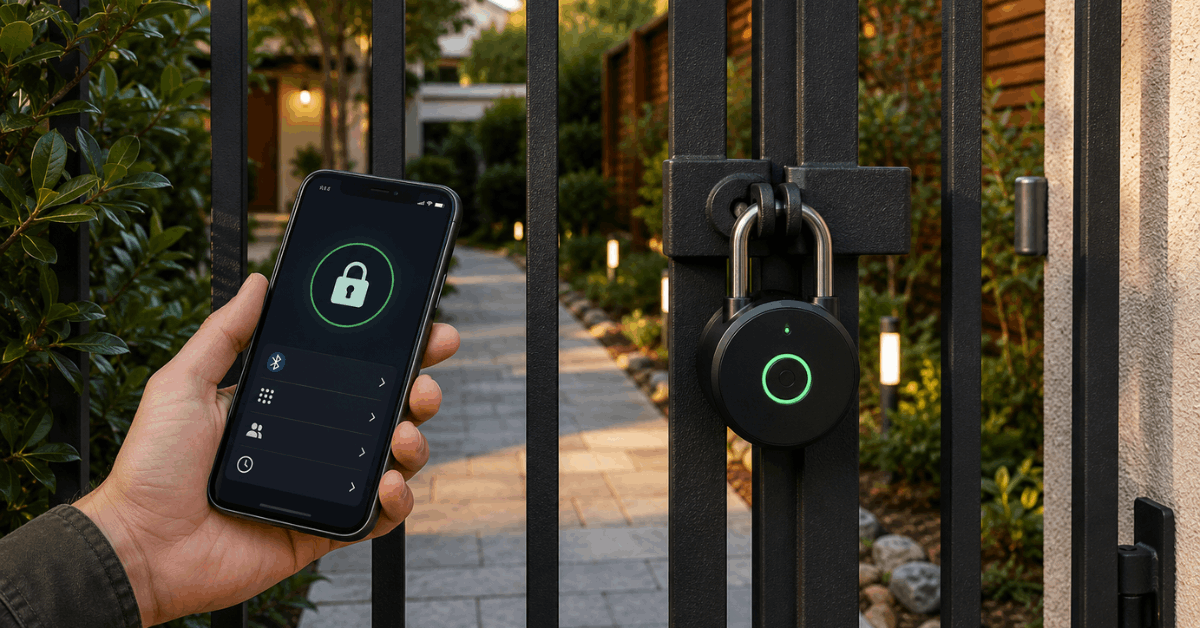
    Outdoor gates can be a vulnerable point in home security. Smart padlocks have emerged as a popular way to safeguard exterior entrances with convenience and modern technology.

    This guide is designed for homeowners new to smart home security. If you’re interested in upgrading your outdoor gate protection, you’ll find step-by-step advice and clear explanations below.

    What Is a Smart Padlock for Outdoor Gates?

    A smart padlock is an access control device that uses electronic components instead of a traditional key. These devices are designed to resist weather and physical attacks.

    The Beginner’s Guide to Smart Padlocks for Outdoor Gates

    Bluetooth connectivity is the most common communication method for these padlocks. Others may use Wi-Fi or NFC, depending on the model.

    Most outdoor smart padlocks are made with toughened steel shackles. Many include weatherproofing, IP65 or higher, to withstand rain and temperature changes.

    Key Features to Look For

    Weather Resistance

    Outdoor models must handle moisture, dust, and UV light. IP ratings matter. An IP67 padlock, for example, is fully waterproof and dust-tight.

    Mobile App Integration

    Nearly all smart padlocks work with a dedicated smartphone app. App controls allow users to lock or unlock the device with their phone, check activity logs, or share access remotely.

    Battery Life and Power Options

    Common battery types include rechargeable lithium or replaceable CR2 cells. These often last several months per charge, depending on use.

    Access Sharing and Management

    Some brands allow digital key sharing. This makes it possible to grant others limited access—helpful for property managers or deliveries.

    Physical Security

    Look for anti-shim & anti-cut features. Hardened shackle materials such as boron alloy provide more protection against tools.

    Popular Smart Padlock Brands and Their Apps

    Homeowners researching smart locks will find several brands offering robust outdoor solutions. Here are a few options commonly used for gates:

    • Master Lock Bluetooth Padlock (App: Master Lock Vault eLocks)
    • Igloohome Smart Padlock (App: igloohome)
    • eGeeTouch 3rd Gen (App: eGeeTouch Manager)
    • Yale Smart Padlock (App: Yale Access)

    Each brand’s app offers its own features. Some provide log history, while others focus on ease of user management.

    How Smart Padlocks Work on Outdoor Gates?

    Smart padlocks use electronic authentication instead of a physical key. Most use a Bluetooth connection to communicate with a mobile device within range.

    The Beginner’s Guide to Smart Padlocks for Outdoor Gates

    The padlock only opens after it confirms the user’s identity via app. Some support remote unlocks with Wi-Fi hubs or key fobs for added flexibility.

    Typical Access Methods

    • App unlock using Bluetooth/NFC
    • Pincode entry (on models with keypads)
    • Temporary digital keys for guest access

    Audit Trails

    App-based padlocks can track usage. This helps with security oversight, since it is clear when and by whom the lock was accessed.

    Step-by-Step Installation Guide

    1. Assess Gate Compatibility

    Measure the latch and spacing to ensure your chosen smart padlock will fit. Some models have wide shackles for thick chains.

    2. Set Up the Padlock

    • Charge the battery fully.
    • Download the brand’s mobile app and follow pairing instructions.

    3. Attach the Padlock

    • Install the shackle through the gate latch or chain.
    • Tighten or close it securely, listening for any click indicating a full lock.

    4. Configure Access and Security

    • Set up your master profile in the app.
    • Add trusted users or temporary digital keys if needed.
    • Enable audit logging if supported for usage tracking.

    If Wi-Fi unlocking is supported, some models require purchasing a compatible gateway hub. This allows remote control outside Bluetooth range.

    Common Setup Issues and Practical Tips

    Signal Interference

    Strong metal gates or fences may interfere with Bluetooth signals. Placing a phone close to the padlock typically solves connection problems.

    Battery Drain

    Cold temperatures reduce battery life. Choosing a model with a physical key backup or clear battery indicator adds convenience.

    Firmware Updates

    Occasional app or firmware updates are normal. Most apps notify the user directly when updates become available.

    Security Protocols and Data Privacy

    Modern smart padlocks use AES-128 or AES-256 encryption to secure wireless communication. App accounts often use two-factor authentication.

    It’s best to avoid connecting padlocks to open Wi-Fi networks. Private access points or direct Bluetooth links are safer in most residential cases.

    Maintaining Your Smart Padlock

    Battery Checks

    Periodic battery checks are helpful, especially before holidays or travel. Some padlocks alert the user with app push notifications when power is low.

    Cleaning and Inspection

    For best performance, wipe any debris off the shackle and keypad. Check for corrosion if the area is exposed to heavy rain.

    Firmware and App Health

    Updates can close security gaps or improve stability. Checking for app updates every few months provides some security reassurance.

    Legal and Privacy Considerations

    Using a smart padlock on an outdoor gate is legal for personal property. When sharing digital keys with others, privacy should be respected.

    Padlock brands outline their privacy policies within their apps. Reviewing these policies will clarify how log data or shared keys are used and stored.

    Conclusion

    Smart padlocks offer a practical upgrade for outdoor gate security. Choosing the right model involves comparing weather resistance, app features, and physical build. Reliable brands use modern encryption for peace of mind.

    Installation is simple and maintenance is minimal when routines are followed. App notifications make daily use straightforward. As technology evolves, homeowners can continue to expect stronger protection and easier access management for their outdoor spaces.