Blog

  • How to Check the Battery Health of Wireless Security Gadgets

    How to Check the Battery Health of Wireless Security Gadgets

    Checking the battery health of wireless security gadgets is vital for reliable home protection. Smart sensors, cameras, and locks all depend on steady power to perform. Unexpected outages can create security risks or system failures.

    This guide is ideal for homeowners, renters, and anyone operating wireless security equipment at home or in small businesses. 

    Understanding the core methods and best practices for battery health can prevent surprise battery drain, reduce costs, and keep your property secure at all times.

    Why Battery Health Matters in Wireless Security Devices?

    Wireless security gadgets rely on batteries for constant operation. Weak batteries can trigger false alarms, disable notifications, or cause devices to disconnect from the network.
    How to Check the Battery Health of Wireless Security Gadgets

    Reliable battery health means consistent monitoring and less chance of a lapse in protection. In the real world, equipment left unchecked often fails at the most inconvenient time—usually when it’s needed most.

    Core Types of Wireless Security Gadgets

    Smart Security Cameras

    Battery-powered cameras (like the Arlo Pro 4 or Blink Outdoor) need steady voltage. Their batteries must support features like night vision, streaming, and motion detection.

    Door/Window Sensors

    Small form sensors from brands such as Ring or Aqara are essential for entry-point monitoring. They use button-cell or AAA batteries, which may drain faster than expected in busy homes.

    Smart Door Locks and Keypads

    Locks like August Smart Lock or Schlage Encode depend on battery integrity for secure operation. A drained battery can mean a locked-out situation or a failure to log access events.

    Ways to Check Battery Health: Practical Methods

    Built-in Device Apps

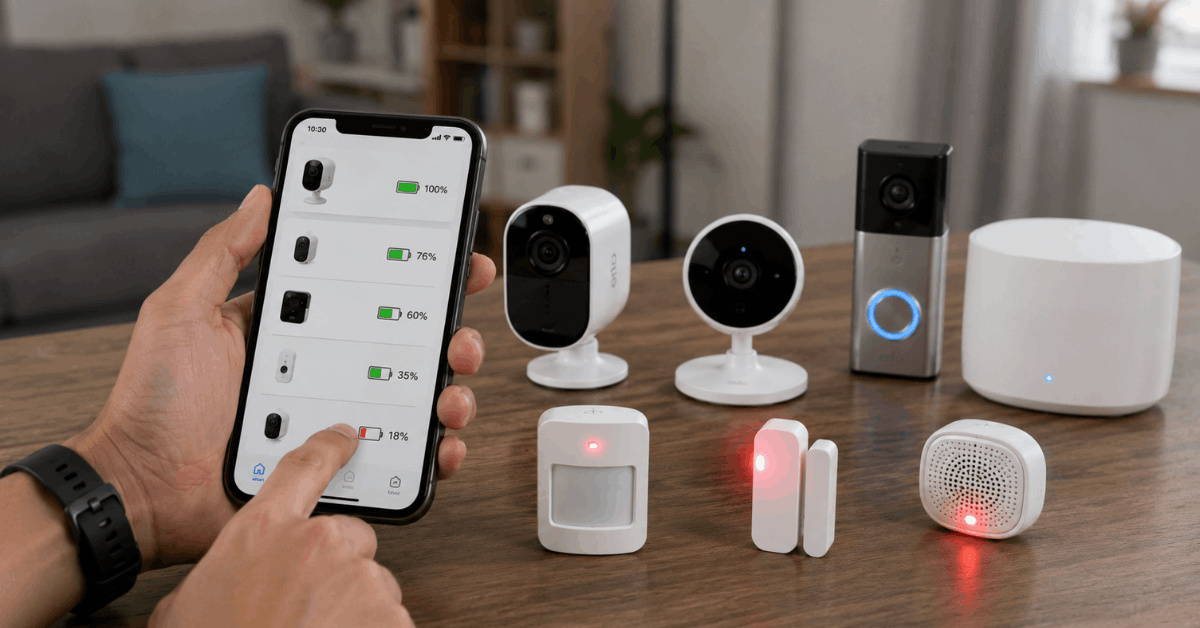
    Most major brands offer monitoring through their official apps. Device battery level indicators provide a quick status of individual peripherals.
    How to Check the Battery Health of Wireless Security Gadgets
    • For Arlo: Arlo Secure app, Battery Level tab
    • For Ring: Ring app, Devices > Device Health
    • For Eufy: Eufy Security app, open device, view Battery section

    Regular checks inside these apps reveal early signs of battery drain, letting users take proactive steps before a critical failure occurs.

    Physical Device Indicators

    Some devices show a battery status using LED lights or audible chirps when levels fall below safe thresholds. For example, many sensors blink red or emit a soft beep.

    These signals are clear and can be trapped in daily observation, especially in high-traffic areas or during scheduled walkthroughs of your system.

    Smart Home Hubs and Automation Platforms

    Centralized platforms like Samsung SmartThings and Home Assistant aggregate battery stats for connected equipment in one place. This allows at-a-glance status checks across all gadgets.

    • SmartThings: Go to Devices, tap device, Battery (%) shown
    • Home Assistant: Dashboard battery entity shows real-time values

    Email and Push Notifications

    Many brands offer optional alerts for low battery events. Enabling push or email notifications in device settings provides automatic warnings, ensuring batteries are never forgotten.

    For most users, this is a simple safety net against missed manual checks or overlooked devices.

    Advanced Techniques for Deep Battery Diagnostics

    Diagnostic Software and Tools

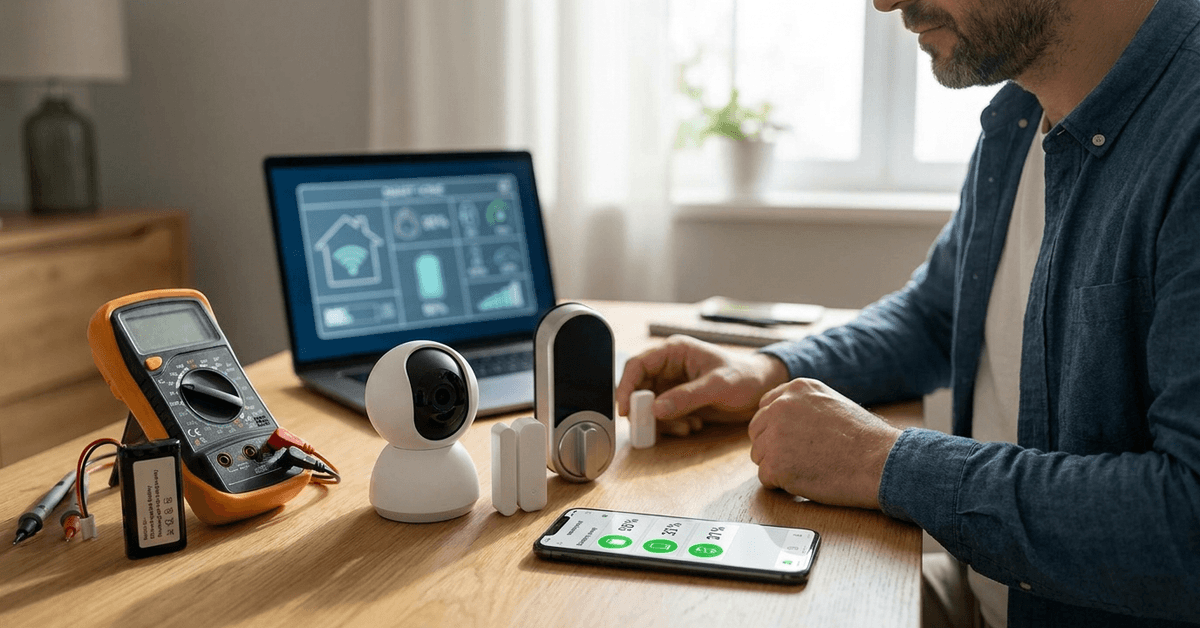
    Advanced users sometimes prefer to analyze batteries using portable multimeters or smart battery testers. These physical tools offer voltage readings, load tests, and capacity checks.

    • Remove the battery from the device
    • Use a multimeter: Set to DC volts, touch probes to battery terminals
    • Compare reading with labeled rating (e.g., 3.0V for CR123A cells)

    A drop below 90% of nominal voltage often signals the need for replacement, even if the device has not alerted the user yet.

    Integrating Battery Stats into Smart Home Routines

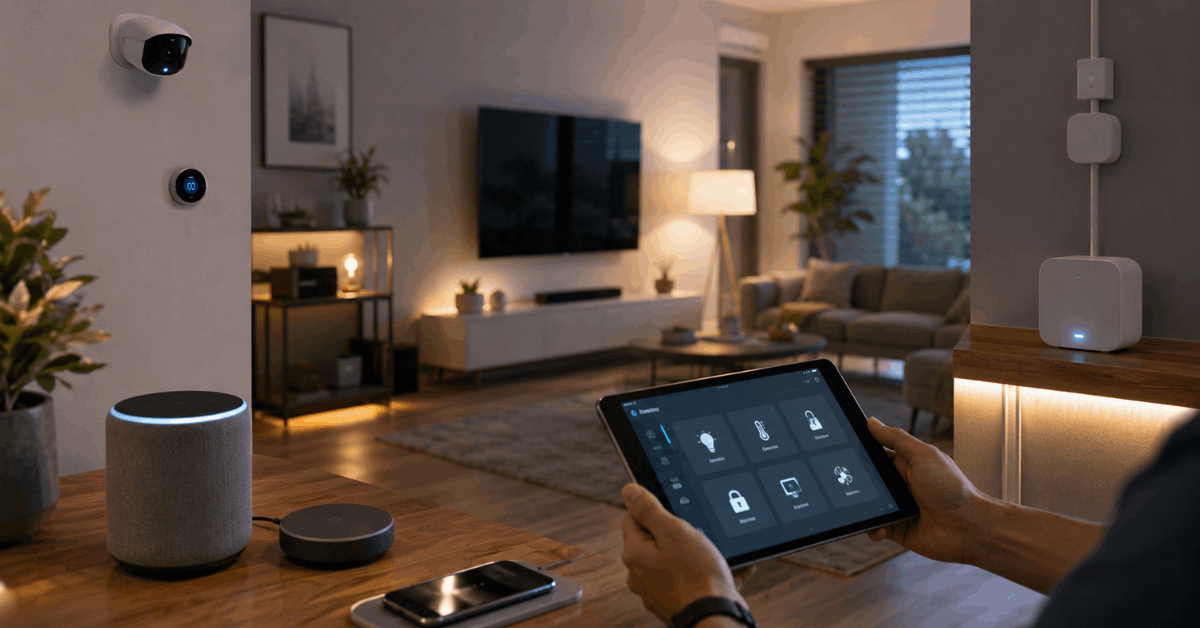
    Many advanced homeowners configure homes to display battery status on wall tablets or TVs using dashboards—typically via Home Assistant or Apple HomeKit automations.

    This offers real-time information to everyone in the household, not just the person with the app.

    Step-by-Step: Setting Up App Alerts for Battery Health

    1. Choose your main security app 

    • Open the Arlo, Ring, or Eufy Security app
    • Navigate to settings or notification panel
    • Enable low battery alerts for each registered device

    2. Configure notification preferences 

    • Select push, SMS, or email as the alert method
    • Test notifications by setting a low threshold if possible
    • Review alert reliability every few months

    3. Set a regular calendar reminder 

    • Add a recurring event to check battery status monthly
    • Sync reminders across family or trusted roommates to avoid missed checks

    Common Battery Types and Expected Lifespans

    • AA/AAA Alkaline: 6-12 months in most sensors
    • CR123A Lithium: 1-3 years in many cameras and door/window sensors
    • Rechargeable Packs: 3-6 months before charging, 2-5 years lifespan total

    Actual lifespan varies based on climate, event frequency, and device firmware. Unusual battery drain sometimes points to extreme temperatures, excess motion triggers, or outdated firmware.

    Best Practices for Maximizing Battery Life

    • Disable non-essential features such as constant video recording
    • Update firmware regularly for efficiency improvements
    • Position cameras and sensors to avoid excessive trigger events
    • Use high-quality batteries that match the manufacturer’s specs

    Avoid mixing old and new batteries in the same device. Also, a reset or recalibration of low reporting sensors is sometimes helpful before replacing their power source.

    What to Avoid When Monitoring Wireless Gadget Batteries?

    • Ignoring early warning signals from devices or apps
    • Using cheap generic batteries, which may leak or underperform
    • Letting unused batteries sit inside devices through long absences
    • Neglecting firmware updates that can optimize power usage

    Some gadgets display inaccurate battery levels after battery replacement. A full power reset, as recommended in the official support, usually corrects this error.

    Recommended Tools and Apps for Battery Monitoring

    • Battery Monitor by Home Assistant (Home Assistant add-on for automation integration)
    • Device-specific apps: Arlo Secure, Ring, Eufy Security, Aqara Home
    • Multimeter (physical diagnostic tool for advanced checks)
    • Google Home app (for devices compatible with Google ecosystem)

    Experimenting with dashboards like Home Assistant or Samsung SmartThings offers the highest control and broadest view, especially for interconnected homes.

    Conclusion

    Staying on top of battery health is one of the simplest yet most critical strategies for maintaining a safe and fully functional smart home environment. Powerful monitoring options exist for every skill level, from built-in apps to advanced multimeter testing.

    Consistent checks and timely response to alerts eliminate surprises and ensure every wireless security device performs when you need it most. 

    By applying a few best practices, such as proactive alert setup and high-quality battery choices, homeowners can safeguard both their equipment and peace of mind on Fortressmate.com and beyond.
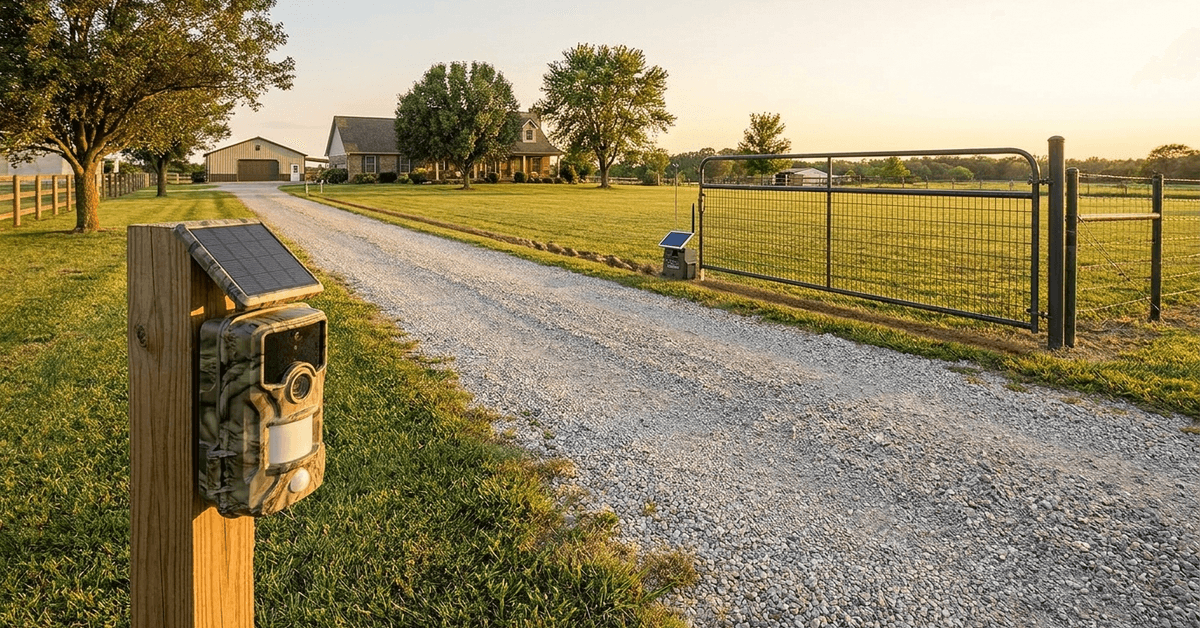
  • How to Set Up a Standalone Drive Alarm for Large Yards

    How to Set Up a Standalone Drive Alarm for Large Yards

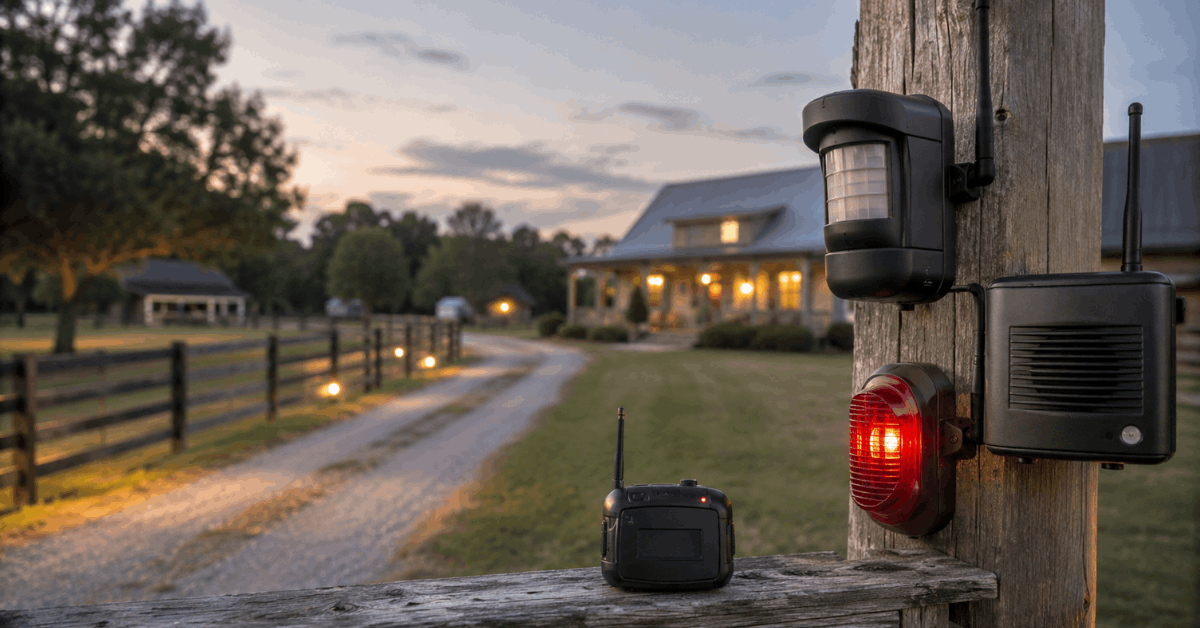
    Large yards often pose a challenge for monitoring vehicle movement. Standalone drive alarms offer a practical solution for homeowners needing prompt driveway alerts without complicated installations or high costs.

    This guide unpacks the basics, equipment choices, and step-by-step configuration to help safeguard your property with minimal fuss.

    Why Standalone Drive Alarms Matter for Large Yards?

    Wide properties usually have limited visibility near driveways. Standard indoor sensors rarely reach the required range. A dedicated alarm improves response times and property awareness.

    How to Set Up a Standalone Drive Alarm for Large Yards

    More expansive lots are difficult to monitor with traditional home security cameras alone. Many residents seek extra peace of mind for detached garages, barns, or outbuildings also spread across the property.

    A standalone solution requires no integration with broader smart home ecosystems. It offers alerts independent of WiFi or home automation hubs.

    Key Features of Reliable Standalone Drive Alarms

    Before choosing a system, several features ensure consistent functionality for larger sites.

    How to Set Up a Standalone Drive Alarm for Large Yards
    • Long-range detection up to 800 feet or more between sensor and receiver is essential for most acreages.
    • Weather resistance rated IP65 or better to handle rain, dust, and sun exposure year-round.
    • Customizable notification options: chime, flashing light, or portable pager, depending on property needs.
    • Expandable sensor networks: many systems allow additional sensors for multiple entry points or zones.

    Some models offer simple noise or light-based deterrents to startle intruders upon detection.

    Popular Standalone Drive Alarm Models and Tech Protocols

    Wireless Infrared (PIR) Driveway Sensors

    Wireless motion-sensing alarms like the Guardline Wireless Driveway Alarm are popular for their robust range and easy configuration.

    PIR (Passive Infrared) sensors spot heat and movement from vehicles or people moving past the detection field. False alarms can happen due to small wildlife or heavy wind, so strategic placement limits extraneous triggers.

    Magnetic Probe Sensors

    For higher accuracy, magnetic probe systems such as the Dakota Alert Vehicle Sensor use a buried probe to sense metal moving overhead.

    This style greatly reduces false triggers from animals or blowing foliage but does require shallow trenching across the driveway.

    Alerts arrive at a wireless receiver indoors, which can usually be placed up to 1,000 feet from the probe itself.

    Solar-Powered Outdoor Sensors

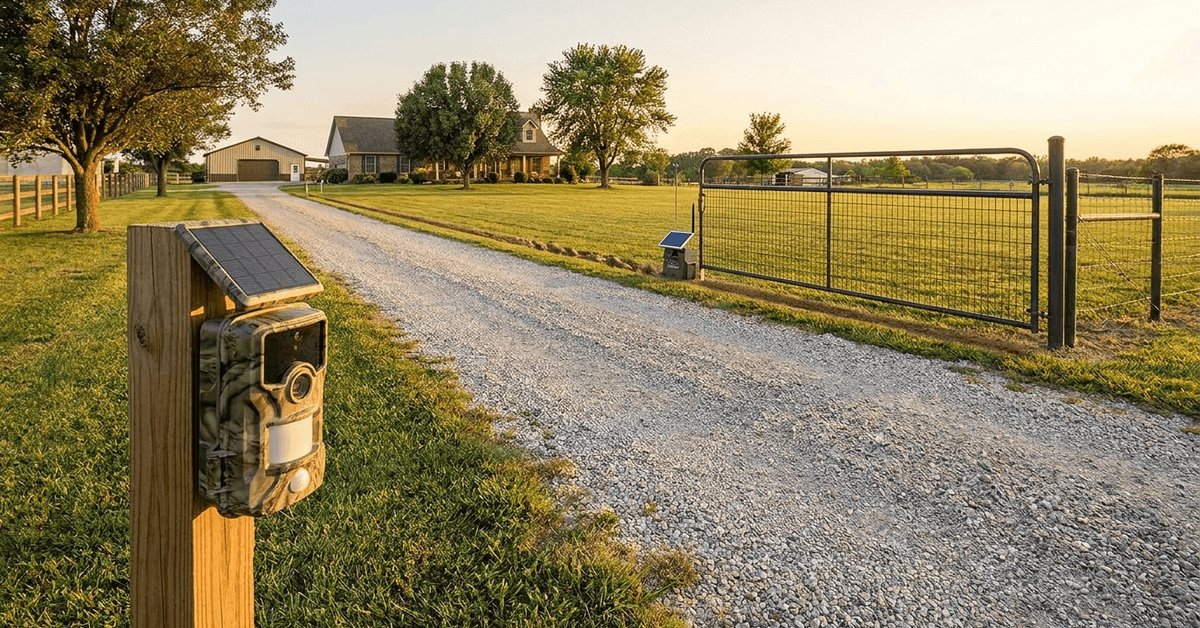
    Some solutions, like the Hosmart Solar Driveway Alarm, offer solar-charging sensors, reducing battery maintenance and making them ideal for outbuildings far from electrical supply.

    Solar circuits help maintain standby readiness, and many sensors operate for multiple days after a full charge, even during cloudy weather.

    Planning and Placement Best Practices

    Larger yards require careful sensor placement. Blind spots near trees or curves may delay alerts.

    Homeowners frequently place sensors 50-100 feet from road access or property gates, aiming for a direct, unobstructed detection path.

    • Sensors should be 2-3 feet off the ground for optimal detection of car front ends or license plates.
    • Test multiple locations before burial or permanent attachment to fences or posts.
    • Keep transmitters away from dense metal or brick, which may block the wireless signal.

    It is sometimes useful to mark test spots with small flags before committing to final positions.

    Step-by-Step Setup for a Standalone Drive Alarm

    1. Unboxing and Checking Components

    Confirm the package contains all required parts: sensors, receiver(s), mounting brackets, power cables, and (for some models) magnetic probes.

    2. Installing Power Sources

    Follow the manual to insert batteries, connect solar panels if required, or plug in AC adapters.

    Many systems have removable covers that clip or screw into place to shield power bays from weather.

    3. Pairing Sensors to Receiver

    Most wireless alarms come pre-paired, but some require matching frequency or channel codes. Consult your product’s quick-start guide for pairing instructions.

    4. Field Testing Detection Range

    Begin at the farthest target location along your driveway. Walk or drive past the sensor to check real-world trigger range.

    Verify the receiver audibly alerts you at the intended distance from inside the main house or building.

    5. Permanent Mounting

    Once satisfied with performance, use included screws, posts, or zip ties to affix the sensor.

    • For magnetic probes, dig a shallow trench across the drive (usually 6-12 inches deep) and lay the probe horizontally before filling it in with soil.
    • For PIR or solar sensors, mount on a wooden stake or fence post at the selected height, ensuring a clear view of approaching vehicles.

    6. Adjusting Sensitivity and Alerts

    Many receivers allow volume, chime tone, or notification type adjustments. Some even support separate alerts for each sensor zone.

    Experiment with settings to minimize false positives while ensuring prompt notification of actual vehicles.

    Maintaining and Troubleshooting Standalone Drive Alarms

    Battery life depends on sensor type and activity levels. Regularly test alarms and replace batteries or clean solar panels every 3–6 months.

    Signal obstruction often results from new landscaping or metallic clutter. Periodically verify signal paths and relocate items as needed if performance has degraded.

    If frequent false alarms persist, try lowering sensor sensitivity or slightly redirecting detection angles away from high-traffic animal paths.

    Integrating Notification with Smart Devices

    Although standalone, some modern alarms permit receiver connectivity to smart speakers or home automation hubs through external relays or audio triggers.

    Users sometimes leverage systems with a relay output, integrating them via a device such as a Shelly relay or Sonoff for further notification through platforms like Alexa, SmartThings, or Google Home.

    This approach extends driveway alerts to phone notifications or whole-home audio, blending standalone reliability with the convenience of smart home features.

    Top App and Software Tools for Extended Monitoring

    Standalone systems often function independently, but advanced users leverage add-ons:

    • IFTTT: Triggers from compatible relay devices can fire routines or push notifications to multiple devices.
    • Home Assistant: DIY integrations allow custom drive alarm automations or logging through ESPHome-enabled relays.
    • Audio Alert Apps: Some receivers with headphone output can be wired into tablets or intercoms for distributed in-home notification.

    These options suit homeowners looking for extra insight without overhauling their entire security infrastructure.

    Conclusion

    Large yards benefit significantly from standalone drive alarms, combining simplicity with effective early warning. Selection hinges on property layout and personal needs, from wireless PIR sensors to buried magnetic probes.

    After choosing the best fit, basic setup involves power configuration, range testing, and careful positioning. Ongoing maintenance ensures continued reliability, making these systems a practical addition to any expansive property.

    With these steps, most homeowners achieve prompt alerts for approaching vehicles without complex wiring or expensive monitoring. For those seeking integration, several modern models allow limited but effective crossover into existing smart home ecosystems.

  • The Best Way to Power Indoor Smart Gadgets Without Visible Wires

    The Best Way to Power Indoor Smart Gadgets Without Visible Wires

    Every modern smart home thrives on convenience and visual harmony. For many, visible wires disrupt the streamlined look of living spaces. This guide addresses practical ways to keep your indoor smart gadgets powered invisibly.

    Why Homeowners Prefer No-Wire Power Solutions?

    Open-plan homes, minimalistic designs, or simply tight corners—wires have a way of standing out when you most want them hidden. Most people feel that visible cords undermine both style and safety.

    Besides appearances, tripping hazards and dust collection add risk. Childproofing and pet safety are further boosted when wires are absent.

    The Best Way to Power Indoor Smart Gadgets Without Visible Wires

    Popular Wireless Power Technologies for Smart Gadgets

    The most reliable way to avoid visible wires is to use wireless power transmission. Several methods and products have gained traction in the last few years.

    Qi Wireless Charging

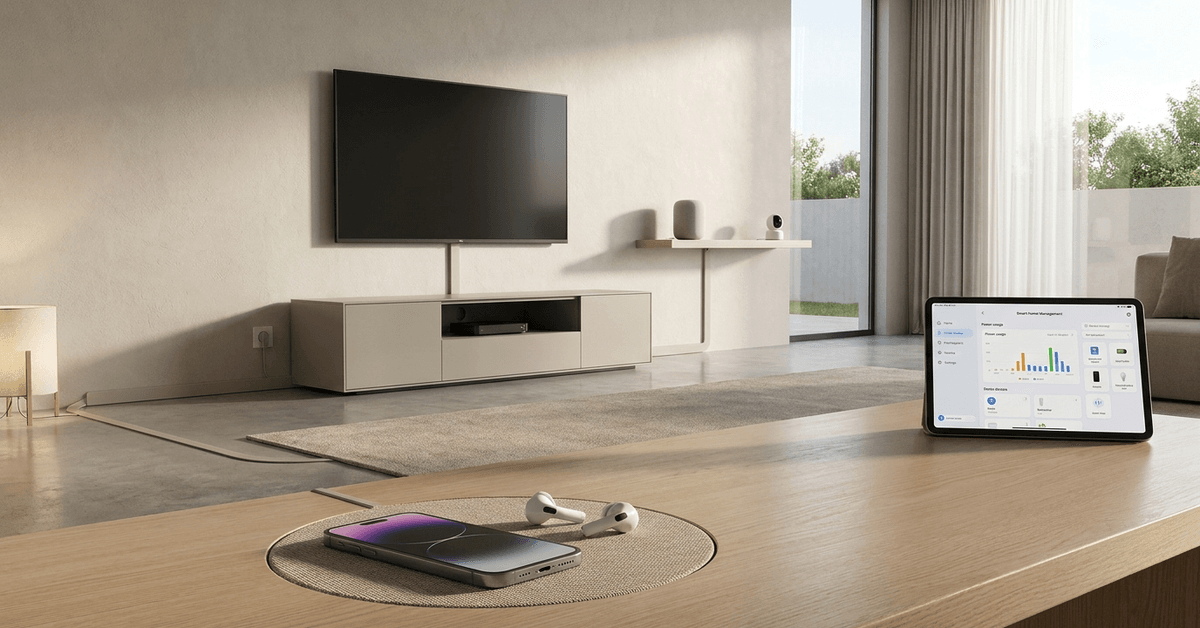
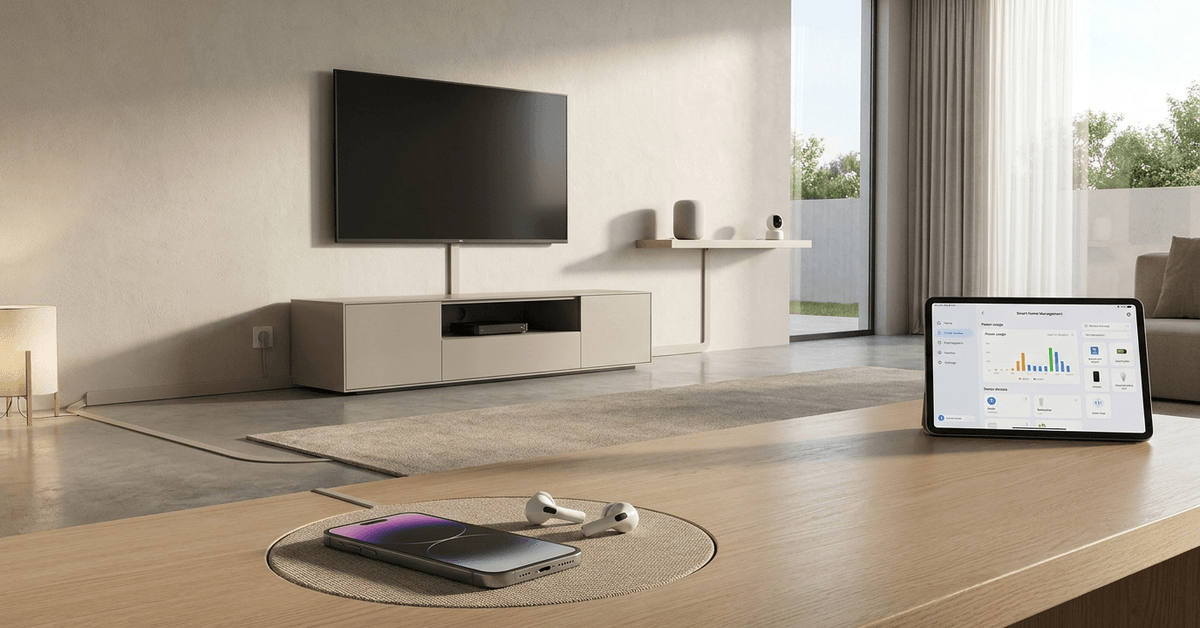
    Qi , the widely adopted wireless charging standard, works with many smart speakers, lights, and camera hubs. Homeowners often build Qi pads into furniture for seamless charging.

    Placement flexibility is an advantage, but power output is best suited for smartphones and devices under 15W.

    Magnetic Resonance Charging

    Unlike standard induction, magnetic resonance offers slightly more distance between chargers and devices. It allows some gadgets to charge even if not perfectly aligned with the pad.

    This solution often appeals to users looking to power gadgets set within shelving or semi-hidden nooks.

    Power Over Ethernet (PoE)

    Power over Ethernet is a go-to professional option for cameras, access points, and sometimes smart displays. Single Ethernet cables deliver both data and power, reducing cord clutter.

    While not fully wireless, PoE installations can be carefully routed through walls for near-invisible results.

    Long-Range Wireless Power (Emerging)

    Solutions like Ossia’s Cota or Wi-Charge transmit low-level power over air for small devices. These platforms are emerging and mostly found in commercial pilots so far.

    Practical home use is not mainstream yet, but tech fans may want to keep an eye on developments in this area.

    Step-by-Step: Concealing Wires Without Major Renovation

    When wireless power isn’t an option, subtle wire management helps blend power delivery into the background. Many renters rely on these solutions for flexibility.

    Surface-Mount Cable Raceways

    Cable raceways are wall-mounted channels that snap closed over wires. Painted to match walls or baseboards, they help wires blend in almost completely.

    Most raceways attach with adhesive strips, avoiding damage and making them renter-friendly.

    Under-Carpet Power Routing

    Flat extension cords or ribbon cables can slide under rugs where needed. Most are rated for smart device wattages but should never be pinched tight by heavy furniture.

    Cautious users check local building codes and UL listings for safety.

    Furniture-Integrated Power Hubs

    Many desks, nightstands, or wall cabinets now come with built-in power. Some even feature hidden USB or wireless charging pads for a clutter-free look.

    Custom furniture makers increasingly offer this as a primary selling point for smart homes.

    Wall and Ceiling Wire Concealment

    Wiremold and similar in-wall kits allow most users to pull wires behind drywall. No specialized skill is required, but checking for existing wiring before cutting is key for safety.

    Helpful for powering smart cameras, panels, or soundbars where outlets aren’t nearby.

    Choosing the Best Fit for Your Smart Home Setup

    No single approach works for everyone. The ideal solution balances convenience, budget, and power needs.

    The Best Way to Power Indoor Smart Gadgets Without Visible Wires
    • For small gadgets (sensors, speakers): Consider Qi charging pads built into shelves or lamp bases.
    • For permanent devices (security cams, thermostats): Professional PoE installation keeps things nearly invisible.
    • In rental spaces: Adhesive raceways and furniture-based hubs offer no-commitment options.
    • For early adopters: Explore emerging long-range wireless platforms as they reach the market.

    Choosing products from reputable brands like Belkin, Ubiquiti, or IKEA adds peace of mind around longevity and safety.

    Smart Power Management Apps and Automation

    A well-powered setup does more with the right app controls. For users keen on efficiency, power monitoring and schedules help reduce vampire loads and keep operating costs transparent.

    Kasa Smart App

    The Kasa app works with many TP-Link outlets/power strips. Homeowners frequently use it to automate on/off schedules for chargers or lamps.

    Weekly usage reports in-app bring visibility to each device’s impact.

    Home Assistant (Open Source)

    Home Assistant provides powerful automations if you run a mixed-brand smart home. Integrations with smart plugs, sensors, and PoE switches can help users coordinate device power-up and sleep routines for all rooms.

    The dashboard lets users glance at real-time power use and tweak routines as life changes.

    Google Home and Alexa App Controls

    Both major smart platforms allow for energy monitoring with select compatible gadgets. Scenarios, like “Away Mode,” help smart homes power down all non-essential gadgets with a single tap.

    This hands-off management is appreciated by those who want brains and power savings in one package.

    Installation Best Practices and Safety Considerations

    Neat power solutions add value, but safety can’t be overlooked. Each method has its own precautions:

    • Wireless chargers should be kept away from water and heat sources.
    • PoE requires checking voltage and device compatibility.
    • Concealed flat cords must never be used where furniture or doors might crush wires.
    • All cable management gear used should meet UL or CE safety certifications.

    Many homeowners choose to consult an electrician when uncertain. It respects insurance requirements and gives confidence in ongoing safety.

    How Clean Power Setups Improve Security & Maintenance?

    Power methods that eliminate exposed wires don’t only look better. They make routine cleaning easier, reduce dust traps, and deter tampering or unplugging.

    Security-focused homes particularly benefit, since fewer visible targets mean more reliable device uptime. This supports robust automation and data gathering for all smart gadgets.

    Conclusion

    Invisible power solutions have become central to smart home convenience and style. Whether you lean on the latest wireless tech or meticulous cable management, a blend of tools ensures every device stays powered, safe, and out of sight.

    A practical approach means evaluating available infrastructure, considering your device mix, and taking future upgrades into account. Subtle, secure power delivers both peace of mind and a living space that always feels ready for what’s next.

  • How to Choose the Correct Power Cables for Continuous Camera Recording

    How to Choose the Correct Power Cables for Continuous Camera Recording

    Continuous camera recording depends entirely on cable reliability, yet cable selection is often underestimated. An incorrect cable can cause footage drops or permanent equipment damage. 

    This guide helps smart home enthusiasts and DIYers secure uninterrupted power for their cameras, ensuring essential moments are always captured.

    Why Cable Choice Matters for Continuous Recording?

    Cameras require a stable and sufficient power supply for all-day recording. Cable quality plays a central role in preventing disruptions and voltage drops.

    Risks of Incorrect Cable Selection

    • Interrupted recordings due to short circuits or power loss
    • Degraded video quality if voltage drops below camera minimum
    • Shortened camera lifespan from overheating or inconsistent current

    Continuous streaming cameras, especially those with full HD or night vision, draw more power than basic models. Many users realize too late that cheap or undersized cables lead to gradual failures.

    How to Choose the Correct Power Cables for Continuous Camera Recording

    Understanding Camera Power Requirements

    Before choosing a cable, it’s helpful to check your camera’s rated input voltage and current draw. These figures are available in the camera’s manual or on the manufacturer’s site.

    Common Power Specs for Security Cameras

    • PoE (Power over Ethernet): 48V DC, up to 15.4W (IEEE 802.3af) or 25.5W (802.3at)
    • USB-powered cameras: 5V at 1A to 2.5A
    • 12V DC standard: often 1A to 2A per camera
    • 24V DC: used for longer runs, sometimes with multi-camera setups

    Some surveillance setups combine wired and wireless cameras. Each type comes with unique cable sizing and compatibility needs.

    Which Cable Type is Best for Your Camera?

    Different cable types suit different camera models, run lengths, and installation environments. Here’s how homeowners decide between the most practical options.

    How to Choose the Correct Power Cables for Continuous Camera Recording

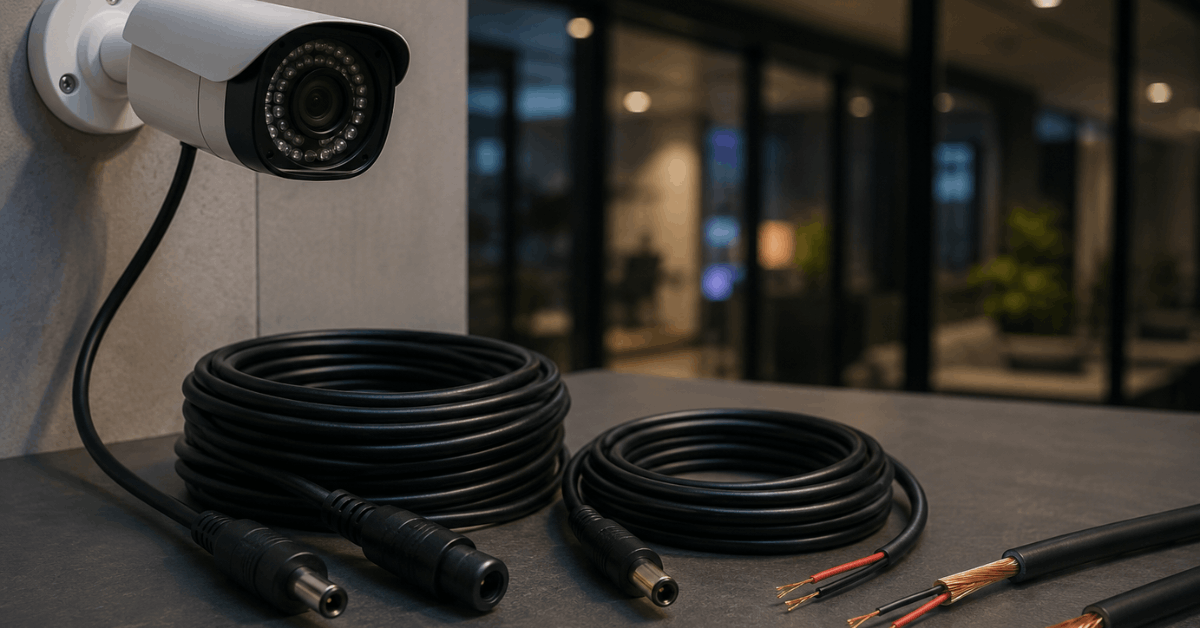
    Standard DC Power Cables

    • Ideal for most 12V cameras under 50 feet away from the power source
    • Pre-made sets include molded connectors for quick use
    • Look for copper conductors, not just copper-clad aluminum (CCA)

    Power over Ethernet (PoE) Cables

    • Used for IP cameras supporting PoE via Cat5e or Cat6 cables
    • Single cable powers and connects network data, reducing clutter
    • For best results, Cat6 is often preferred for runs over 100 feet due to less voltage drop

    USB Power Cables

    • Mostly for compact, consumer-grade cameras
    • Longer USB runs (over 10 feet) may drop voltage—active USB extension cables or powered hubs help mitigate this

    How Cable Gauge Influences Power and Reliability?

    Cable thickness, measured by AWG (American Wire Gauge), directly affects how much power reaches the camera without dropping below required voltage.

    Common Gauge Recommendations

    • Short runs (under 25 feet): 24AWG or 22AWG typically suffice
    • Medium runs (25–50 feet): choose 20AWG for minimal voltage loss
    • Long runs (over 50 feet): 18AWG or thicker often needed

    Thick cables cost a bit more but dramatically lessen risk of outages. For outdoor use, always select cables rated for UV and weather exposure.

    Calculating the Correct Cable for Your Setup

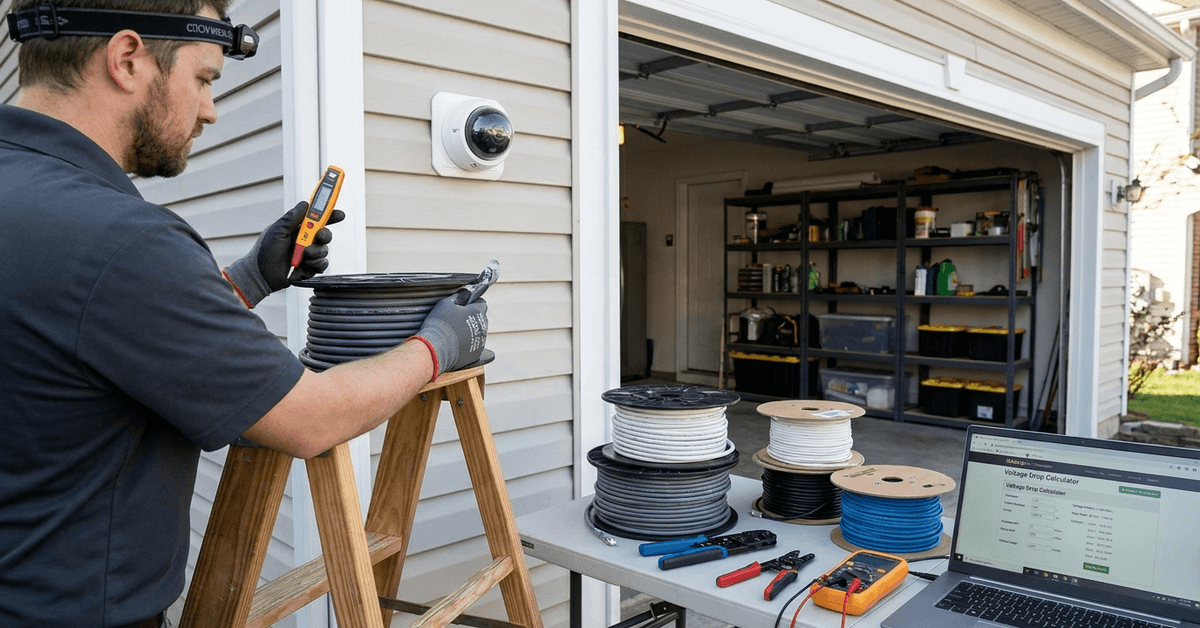
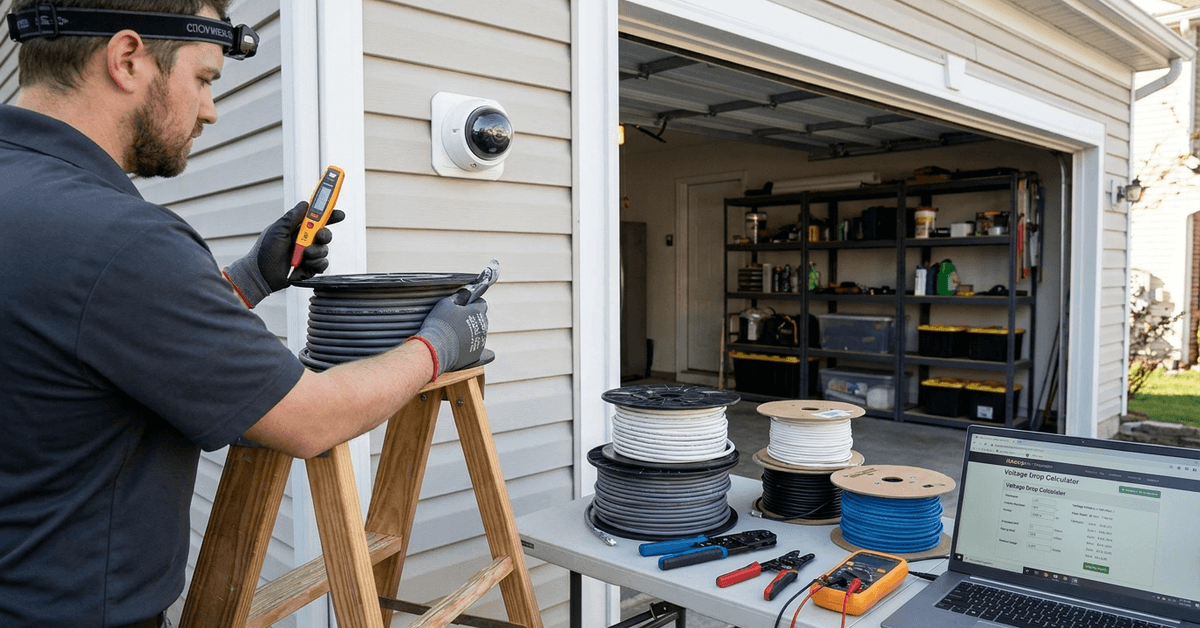
    Accurate calculation helps prevent guesswork. A combination of gauge, length, and required current will define your best option.

    Simple Calculation Steps

    1. Find your camera’s voltage (V) and amperage (A)
    2. Measure the route length from power source to camera
    3. Use a cable voltage drop calculator (web tools such as RapidTables help here)
    4. Compare the resulting voltage at the camera end against its rated minimum

    If voltage at the destination is too low, a thicker gauge or a shorter run is often the most reliable answer. It isn’t uncommon for first attempts to reveal underpowered setups, especially in large homes.

    Install Best Practices for Continuous Camera Power

    Physical installation matters as much as cable type. A few real-world practices increase reliability:

    • Secure cables along walls or ceilings to avoid physical wear
    • Avoid running power alongside high-interference lines (like mains AC)
    • Label both ends for future troubleshooting
    • Use surge protectors or inline fuses for sensitive equipment
    • Leave a service loop—extra wire at ends—for maintenance

    Smart Power Solutions for Advanced Setups

    Many smart home users add fail-safes to their camera systems, especially in areas prone to outages or tampering. Building redundancy into your cabling is highly effective.

    Uninterruptible Power Supply (UPS) Options

    • A compact UPS keeps surveillance running during brief outages
    • Specific UPS models offer DC output for direct wiring—search for “networking UPS” or “surveillance UPS”
    • For PoE, some UPS units can back up both switch and cameras together

    Smart Power Management

    • Integrated Wi-Fi plugs (TP-Link Kasa, Wyze Plug) allow scheduled restarts or monitoring for overheating
    • Homeowners often connect smart plugs to battery power banks for added backup—though this suits only low-amperage cameras

    Common Installation Mistakes to Avoid

    • Using copper-clad aluminum cables in humid or hot areas—they corrode quickly and lose power
    • Daisy-chaining multiple extension cables, leading to significant voltage drop
    • Ignoring voltage at the camera end—meters like Klein Tools Voltage Tester help confirm delivery
    • Relying on generic adapters with unknown output regulation

    Consistent, always-on recording depends on little choices, often overlooked until issues arise.

    Safe and Legal Considerations

    Wiring inside homes must suit local electrical standards. Outdoor runs require weather-rated cables and sealed connectors to avoid fire hazards and permit violations.

    For PoE systems in larger properties, professional consultation is sometimes the most prudent approach, especially for wiring inside walls or ceilings.

    Conclusion

    Choosing the correct power cables means more than just plugging in a camera and hoping for the best. It involves real calculations, smart material choices, and a willingness to double-check voltage at every stage. 

    Prioritizing cable quality—especially copper conductors and the right gauge—secures non-stop protection for both your property and your data.

    Thoughtful homeowners combine these technical steps with routine checks and, occasionally, smart add-ons like UPS backups. The result is a camera network that works around the clock, ready for whatever the day or night brings.

    With the right cables, your Fortressmate.com setup stands stronger and more reliably guarded for the long haul.

  • The Beginner’s Guide to Setting up Automated Porch Lighting

    The Beginner’s Guide to Setting up Automated Porch Lighting

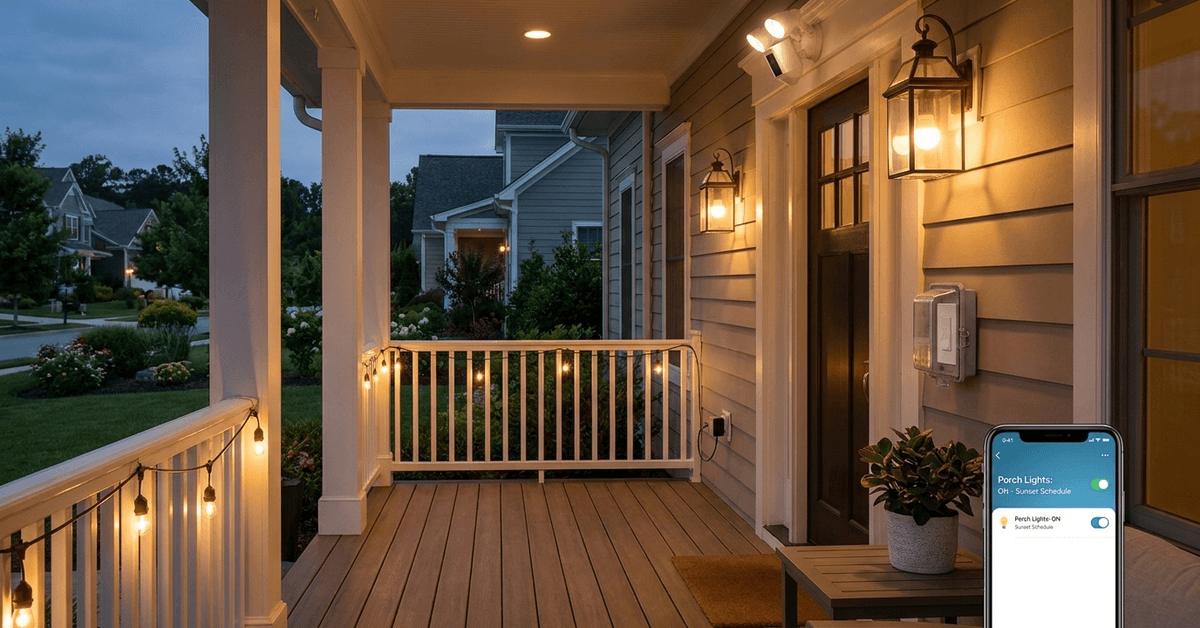
    Automated porch lighting creates a welcoming atmosphere all night. For many, its main benefit comes from the added security it brings to a home’s entrance.

    Motion-activated light discourages unwanted visitors. At the same time, it makes daily tasks like unlocking doors at night much easier.

    Types of Automated Porch Lighting Solutions

    Smart Bulbs

    A straightforward introduction is to begin with Philips Hue bulbs. They connect with most major platforms like Alexa or Google Home.

    The Beginner’s Guide to Setting up Automated Porch Lighting

    Users can schedule on and off times via an app. Customization options are plentiful, though the upfront cost may seem a little high for some.

    Smart Light Switches

    Another practical alternative is using Lutron Caseta smart switches. These allow for smart control of existing porch lights without changing the bulbs.

    Reliability is a key advantage. Integration with other smart systems feels seamless once connected.

    Outdoor Smart Plugs

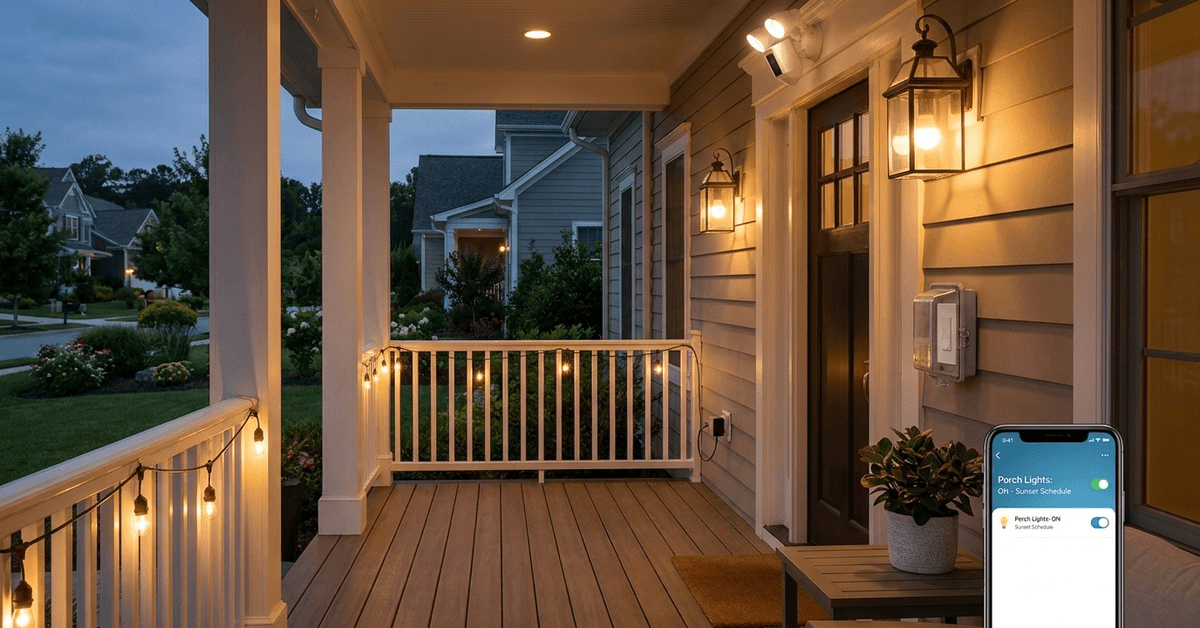
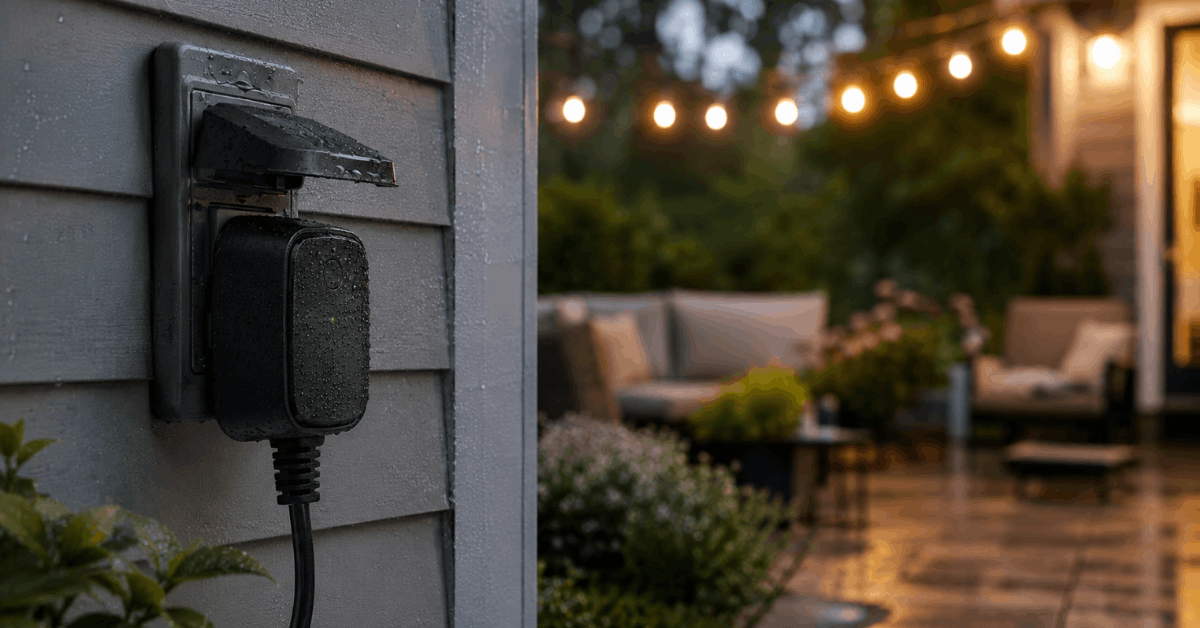
    Kasa Outdoor Smart Plug is a commonly chosen device for porch lighting. It works well with string lights or lamp fixtures plugged into outdoor outlets.

    The Beginner’s Guide to Setting up Automated Porch Lighting

    Direct app control and timer settings are included. It’s perhaps the most flexible choice for renters or temporary setups.

    Dedicated Motion Sensor Lights

    Specialized fixtures, such as the Ring Floodlight Cam , combine powerful illumination and video monitoring. Motion triggers recorded footage and bright light automatically.

    The electrical installation might be a bit more advanced. Pre-existing wiring makes the job easier for most DIY homeowners.

    Key Communication Protocols Explained

    Wi-Fi Control

    Devices like smart bulbs and plugs often use Wi-Fi for connectivity. Wi-Fi is familiar, but it can add network congestion if several devices are active together.

    Setup typically requires a mobile app and a steady signal near the porch. Range extenders sometimes make a difference in reliability.

    Zigbee and Z-Wave

    Many smart switches, including Z-Wave or Zigbee models, operate with lower frequency radio protocols. These enable devices to talk to each other directly.

    Z-Wave and Zigbee form mesh networks, extending signal strength with every compatible device. Homeowners looking for large setups might prefer this approach.

    Bluetooh-Based Control

    Some budget-friendly porch lighting options use Bluetooth pairing with a smartphone. Range is more limited here, but it reduces Wi-Fi dependency.

    This method is simple to use. In practice, it often works best for small entryways.

    Step-by-Step: Installing a Smart Porch Light

    Gathering Essential Tools

    • Screwdriver
    • Wireless-enabled bulb, switch, or plug
    • Mounting hardware (for fixtures)
    • Your chosen smart home app
    • Stable home Wi-Fi or hub if required

    Connecting Your Device

    1. Turn off the power to your porch light from the main circuit breaker.
    2. Install the new smart device according to the manufacturer’s manual.
    3. Restore power and ensure the fixture switches on as expected.
    4. Download the companion app or use your existing smart home platform.
    5. Following in-app prompts, pair the device to your Wi-Fi, Zigbee, or other chosen protocol.

    Customizing Schedules and Scenes

    • Within the app, set schedules for dawn and dusk operation if desired.
    • Use motion detection settings for more advanced setups.
    • Consider grouping porch lights into “scenes” with other devices for larger routines.

    Best Apps and Platforms for Porch Lighting Automation

    Apple HomeKit

    HomeKit brings secure control to iPhone users. It integrates porch lighting scenes with automations like geofencing.

    Homeowners anchored in the Apple ecosystem often feel it offers crisp simplicity and stability.

    Google Home

    Google Home allows seamless integration of timers, triggers, and voice commands. Routines can include prompts such as “Turn porch lights off when everyone leaves.”

    Those already using Nest cameras or Google Assistant smart speakers will find this process especially intuitive.

    Amazon Alexa

    With Alexa , creating routines is very flexible. Porch lights, doorbell cameras, and announcement features work together for total awareness.

    Some prefer Alexa for its customizable voice command system and wide device compatibility.

    Samsung SmartThings

    SmartThings excels at mixing Zigbee, Z-Wave, and Wi-Fi gadgets on one dashboard. Automations like “if motion detected, turn on light” are quick to build.

    Owners of multiple brands often lean toward SmartThings for cross-compatibility.

    Basic Security and Privacy Guidelines

    Strong passwords and device updates are essential steps. Each branded app provides security updates, so turning on auto-update is recommended.

    For many, enabling two-factor authentication adds obvious peace of mind. Always pick trustworthy brands to avoid privacy breaches.

    Common Troubleshooting Points

    • If a device fails to connect, double-check Wi-Fi or hub proximity. Metal siding can interfere with the signal at entrances.
    • When lights turn on or off at unintended times, review automation rules for overlaps or errors.
    • If scheduling fails in the app, syncing device firmware often fixes glitches.

    Legal and Safety Reminders

    Electrical projects should always comply with local building codes and regulations. When in doubt, consider a licensed electrician for installation.

    Secure all outdoor wiring in weatherproof housing to prevent hazards. Reliable brands publish installation guides with regional safety tips included.

    Conclusion

    Automated porch lighting does more than boost security—it lifts daily convenience and comfort, too. There are multiple starting points, from bulbs to smart switches, suited for all homeowner tech levels.

    Key protocols—such as Wi-Fi, Zigbee, and Z-Wave—extend flexible setup options. For peace of mind, secure smart lights with strong passwords and regular updates.

    Once the system is in place, smart porch lighting is mostly hands-off. The combination of enhanced safety, energy savings, and sheer ease justifies the upgrade for many modern households.

  • How to Sync Smart Indoor Lights With Your Daily Alarm Routine

    How to Sync Smart Indoor Lights With Your Daily Alarm Routine

    Waking up can feel less abrupt and more natural with indoor lighting that synchronizes to your alarm. Homeowners looking to build a reliable, secure smart home often explore light syncing as a practical upgrade.

    This guide on Fortressmate.com explores actionable steps and specific tech options so anyone can enjoy a smarter morning routine. Let’s break down the benefits, the tech requirements, and how to achieve seamless integration using trusted devices and popular smart home apps.

    Why Sync Indoor Lights to Your Daily Alarm?

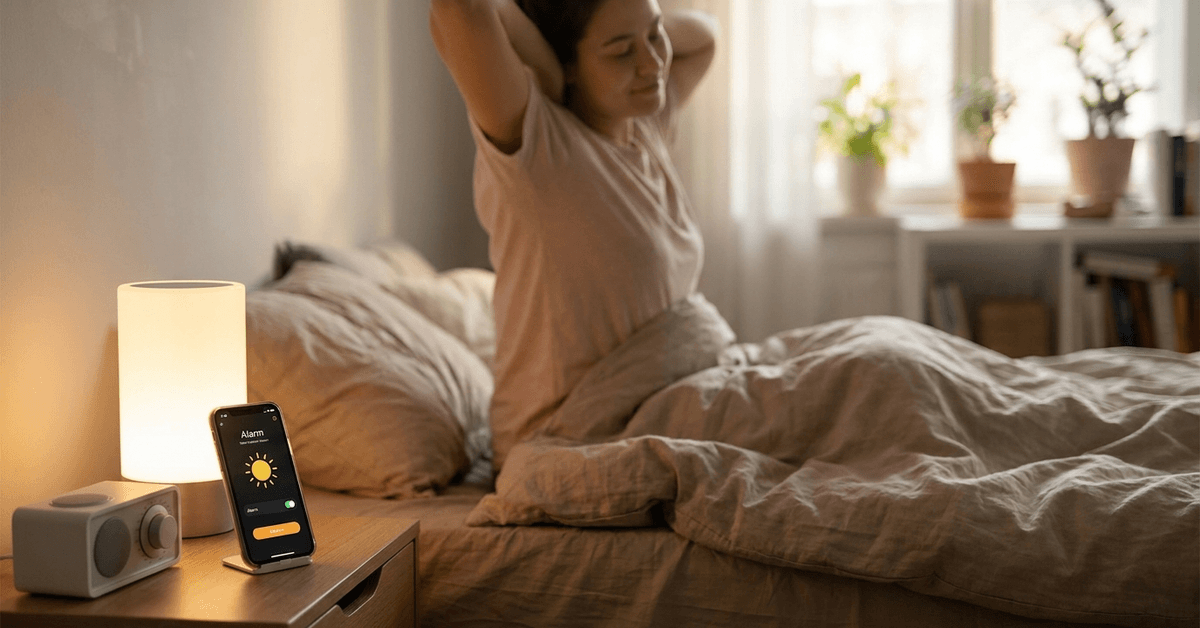
    One of the core reasons for syncing lights to alarms is improved wake-up comfort.

    Image 1

    This approach mimics sunrise, gradually increasing brightness and helping the body adjust more naturally.

    For anyone with a busy schedule or rooms that lack natural sunlight, this can offer a tangible mental boost. It also adds a layer of convenience and security to your daily pattern, especially when routines vary.

    What Equipment and Platforms Are Required?

    At the most basic level, a compatible smart light system and a programmable alarm or routine scheduler are needed.

    A few trusted options frequently integrated by enthusiasts include:

    • Philips Hue bulbs and Hue Bridge
    • LIFX WiFi-enabled lights
    • TP-Link/Kasa smart lighting
    • Google Nest Hub or Google Home environment
    • Amazon Echo devices for Alexa routines
    • Apple HomeKit-ready bulbs (Nanoleaf, Eve, or Hue)

    Most systems require either a proprietary hub (such as the Hue Bridge) or a WiFi connection with app support for automation.

    Essential Setup Steps for Light-Alarm Syncing

    Initial hardware installation

    Install compatible smart bulbs and connect them to the appropriate hub or directly to your wireless network.

    Power each bulb while ensuring a steady WiFi signal in the intended area to avoid drops or lag in the automation process.

    Integrate with your chosen smart home platform

    Link your lights to a central platform via their native app or through:

    • Google Home (works well across many brands)
    • Amazon Alexa app
    • Apple Home or HomeKit for iOS users

    Create groups or rooms in the app so specific lights can be addressed together or individually, offering flexibility later on.

    Routine or alarm automation configuration

    The core of synchronization happens through automation routines or alarm settings.

    • In Google Home, tap Routines in the app menu, then create a new routine that runs when your alarm triggers.
    • For Alexa, use the ‘Routines’ section and set the trigger as an alarm event rather than a set time.
    • Apple users often use the Home app’s ‘Automation’ tab, pairing a wake-up alarm with the “Turn on lights” scene.

    Timing and light selection are fully adjustable, so it’s easy to keep lights off on weekends or minimize disruptions for others sharing the space.

    Step-by-Step: Syncing Philips Hue With Your Morning Alarm

    1. Download and install the Philips Hue app on your mobile device.
    2. Ensure lights are added and named inside the app.
    3. Open the ‘Routines’ tab or ‘Automations’ (depending on app version).
    4. Select ‘Wake up’ or ‘Custom routine’ and choose the desired days and start time (ideally, match your alarm setting).
    5. Pick which bulbs or groups to activate and adjust the fade-in duration. Many find a 10–30 minute gradual light increase most lifelike.
    6. Finish by confirming and testing the automation by setting an alarm a few minutes ahead to watch the sync in action.

    Additional customization (optional)

    • Use color values or scenes for a softer or more vibrant start. Warm tones (orange or soft yellow) feel most natural for mornings.
    • Integrate with third-party platforms like IFTTT if extra logic or conditions are required (for example, only trigger lights on weekdays).

    Troubleshooting Common Syncing Issues

    WiFi and connectivity problems

    Unreliable WiFi is a top reason automations may fail.

    Test signal strength at each light installation site and reboot the router or hub if any devices regularly appear as “offline” in your app.

    Out-of-sync routines or alarms not activating lights

    Confirm the right triggers are selected in the app. Routines sometimes default to a strict time instead of using an actual alarm event.

    Update both the smart light and platform software for maximum reliability.

    Scene or brightness not matching the alarm

    Double-check that the selected scene or bulb group matches what’s specified in the automation.

    Some apps allow for fine-tuning. Experiment gradually for the best personal balance of comfort and alertness.

    Top Smart Lighting Protocols for Seamless Integration

    Homeowners often see better results by choosing indoor light systems that support widely recognized protocols.

    • Zigbee is common among popular bulbs and bridges like Philips Hue.
    • WiFi-only bulbs (LIFX or Kasa) work well for simple installations and often cost less.
    • Thread is emerging as a secure, low-latency standard for HomeKit-enabled devices.
    • Z-Wave is found mostly in more advanced home automation setups, sometimes requiring a dedicated hub like SmartThings.

    Each protocol has tradeoffs involving range, latency, and compatibility with other platforms. For most, Zigbee or WiFi remains the easiest for seamless alarm syncing.

    Recommended Apps to Streamline Light and Alarm Syncing

    • Philips Hue app : Best for users fully invested in Hue bulbs and bridges.
    • Google Home app: Broad support for multiple brands and adjustable routine triggers.
    • Amazon Alexa app: Strong for voice-activated routines and households with Echo devices.
    • Apple Home (HomeKit): Essential for iPhone users or those prioritizing privacy.
    • IFTTT: Advanced condition-based routines linking alarms and lights across apps or devices.

    All major platforms allow for gradual brightness increases, day-of-week settings, and integration with other morning tasks such as coffee makers, if desired.

    Security and Privacy Considerations

    Any device connected to WiFi or a smart home hub should be kept updated with the newest firmware.

    This reduces the risk of unauthorized network access or malfunctions at crucial moments such as your morning wake-up call.

    When possible, platforms like Apple HomeKit offer an added layer of end-to-end encryption for sensitive routines.

    Homeowners are also encouraged to use unique, strong passwords when setting up accounts for each app or brand ecosystem.

    Best Practices for a Reliable Smart Lighting Alarm Routine

    • Schedule a recurring app check-in weekly to verify automations run as expected and to install pending updates.
    • Consider setting a backup standard alarm in the first few weeks until the routine proves fully reliable.
    • Use scenes to customize for various seasons or wake-up preferences, testing adjustments on evenings to avoid disrupting genuine sleep cycles.
    • Document or screenshot your favorite settings so you can restore them if you switch phones or reset your smart home devices.

    Conclusion: Achieving Smoother Mornings With Synced Smart Lighting

    Synchronizing smart indoor lights with your daily alarm brings convenience, comfort, and a gentle start to everyday life.

    This setup is attainable using today’s leading bulbs, platforms, and customizable apps. Careful planning and routine verification safeguard against common tech hiccups.

    As home automation continues to evolve, linking lights to alarms remains a simple yet powerful way to enhance personal well-being while adding a polished touch to modern living spaces.

  • Tips for Cleaning Outdoor Security Camera Lenses Without Scratching Them

    Tips for Cleaning Outdoor Security Camera Lenses Without Scratching Them

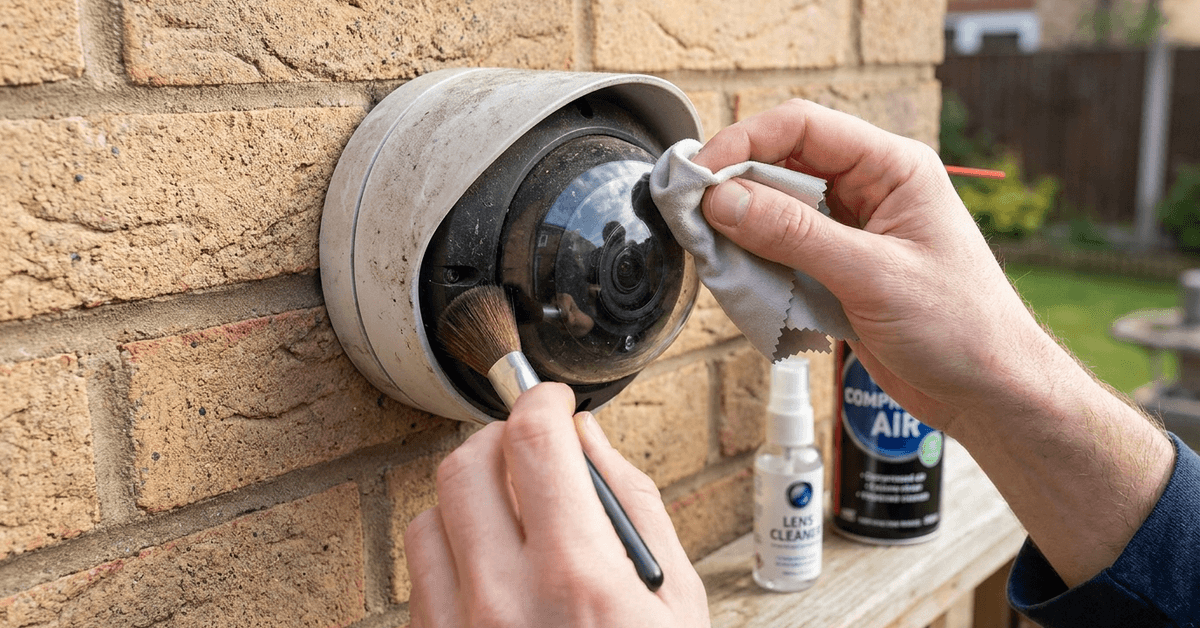
    Keeping outdoor security camera lenses clean is essential for sharp video and reliable motion alerts. This task matters for families using wireless cameras, property managers, and anyone securing their smart home.

    Clean lenses improve night vision, prevent false alarms, and help cameras record faces and license plates more clearly. Protecting the glass from scratches is just as critical as removing dirt.

    Why Proper Cleaning Matters for Camera Performance?

    Lenses attract dust, pollen, and water spots. Over time, these can blur images or block crucial evidence during incidents.

    Tips for Cleaning Outdoor Security Camera Lenses Without Scratching Them

    Even tiny scratches can permanently reduce clarity and lower resale value. Many camera warranties do not cover damage from improper cleaning.

    Understanding Camera Lens Materials

    Outdoor camera lenses are typically made from either tempered glass or durable polycarbonate plastic.

    Tempered Glass Lenses

    Tempered glass is harder to scratch but can shatter with the wrong tool or chemical exposure.

    This material is most common in premium security models from Arlo, Reolink, and Google Nest Cam.

    Polycarbonate Lenses

    Budget models, like Wyze or Eufy cams, often use polycarbonate. This material resists shattering, but it is slightly softer than glass.

    Using the correct cleaning technique is even more important on polycarbonate to avoid haze or micro-abrasions.

    Common Causes of Lens Damage

    • Wiping the lens while grit is present
    • Using paper towels or abrasive cloths
    • Spraying glass cleaner directly onto the lens
    • Cleansing with alcohol, ammonia, or rough chemicals

    Harsh weather can also leave behind minerals that etch lenses if not removed gently.

    Best Tools and Safe Products for Cleaning

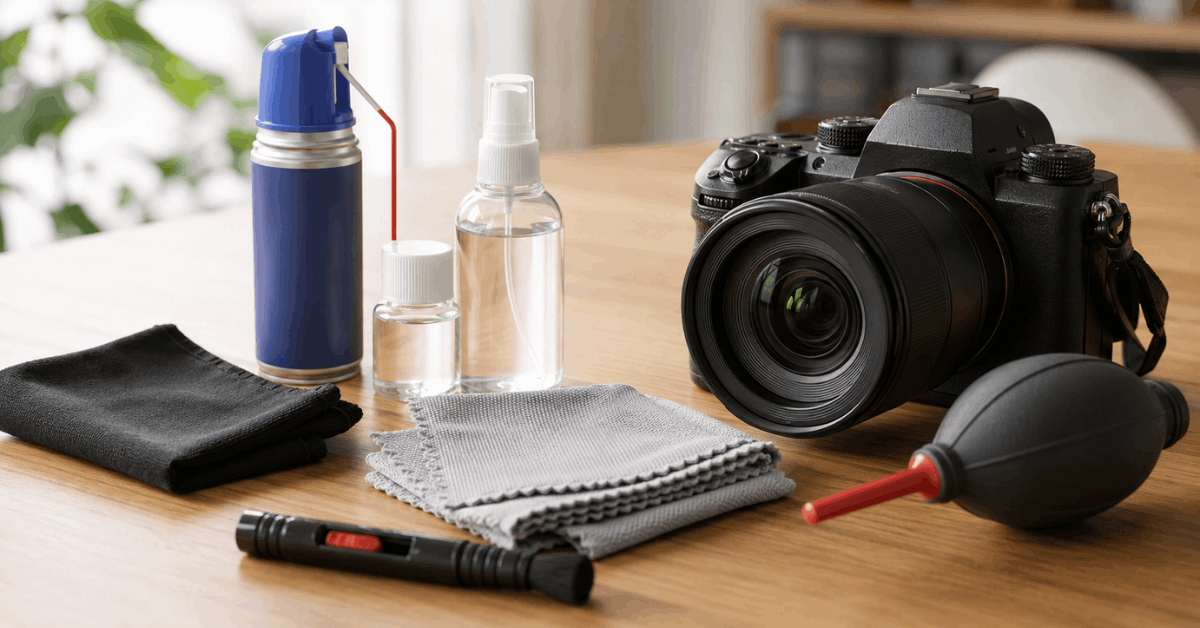
    Microfiber Lens Cloths

    The safest starting point is always a microfiber lens cloth designed for eyeglasses or DSLR cameras.

    Tips for Cleaning Outdoor Security Camera Lenses Without Scratching Them

    This material lifts dust without scratching sensitive coatings or plastics.

    Lens Cleaning Solution

    Many users prefer a water-based camera lens solution, such as Zeiss Lens Cleaner or Eco-Fused spray.

    It is important to apply cleaner to the cloth, not the lens itself, to prevent seepage into the camera body.

    Soft Lens Brush

    A soft lens brush, like those from Giottos or LensPen, removes pollen, sand, or cobwebs before wiping.

    Clean Compressed Air

    For dry dust, compressed air designed for electronics can blow away loose particles before contact cleaning.

    Safe Step-by-Step Lens Cleaning Process

    1. Switch off the camera system or set it to privacy mode for safety.
    2. Check the lens for sand, leaves, or visible particles. Gently use a soft lens brush to remove any debris sitting on the glass.
    3. Use a burst of compressed air from a safe distance to clear away hidden grit.
    4. Dampen a corner of a microfiber cloth with a manufacturer-approved lens cleaner or distilled water. Never use window/glass cleaner.
    5. Wipe the lens in gentle, circular motions starting at the center. Avoid strong pressure.
    6. Use a dry area of the cloth to buff the surface and remove streaks or residue.
    7. Check the lens for leftover smudges or spots. If needed, repeat with a new section of the cloth.
    8. Allow the lens surface to completely air dry before reconnecting the camera to power.

    What to Avoid When Cleaning Outdoor Camera Lenses

    • Paper towels are convenient but often cause micro-scratches and shed fibers.
    • Avoid rough kitchen sponges, even those labeled as ‘non-scratch’.
    • Steer clear of regular household glass cleaners (Windex, etc.), which may strip anti-reflective coatings.
    • Avoid using your breath to ‘fog’ the lens, as it introduces unknown residue.

    In many cases, trust only products recommended by your camera manufacturer in the user manual or on their official website.

    How Often Should You Clean Outdoor Security Camera Lenses?

    Outdoor camera placement impacts how often lenses need cleaning. Locations near plants, busy roads, or walkways usually require more frequent attention.

    • After storms or high pollen seasons: inspect and clean as soon as safe.
    • In dry or high-traffic areas: at least once per month.
    • For best security performance: review video footage weekly for signs of blurring.

    Installing a small camera hood or shield can help minimize buildup but is not foolproof.

    Advanced Tips for Preventing Recurring Smudges or Damage

    Use of Hydrophobic Sprays

    A hydrophobic lens spray such as Rain-X for Plastics can reduce water stains without harming coatings.

    Some users report that a very light mist keeps rain droplets from sticking, though it must be certified safe for cameras.

    Firmware Alerts for Lens Issues

    Platforms like Arlo or Eufy offer AI-powered blur detection and cleaning reminders in their companion apps.

    Enabling push alerts helps homeowners act quickly before image quality drops or false positives increase.

    Camera Placement and Mounting

    Adjusting the mounting angle, or moving the camera a few centimeters under an eave, usually reduces exposure to direct rain and dust.

    Upgrade to Self-Cleaning Covers

    Newer smart cameras sometimes come with self-cleaning mechanisms, such as a rotating glass disc or miniature wiper. Products like the Hikvision Smart Series offer this feature.

    If frequent cleaning is needed, a third-party weather shield or cover might be a worthwhile accessory.

    Conclusion

    Maintaining clear security camera lenses does not have to be complicated. The right cleaning tools, cautious handling, and regular checks prevent scratches that could jeopardize video quality or system reliability. 

    Consistency, gentle care, and product selection based on your camera’s manual offer the best results. Homeowners who follow these methods often notice easier video reviews and fewer missed events. Each safe cleaning step preserves both image sharpness and long-term smart home protection.

  • How to Configure Privacy Zones on Smart Camera Feeds

    How to Configure Privacy Zones on Smart Camera Feeds

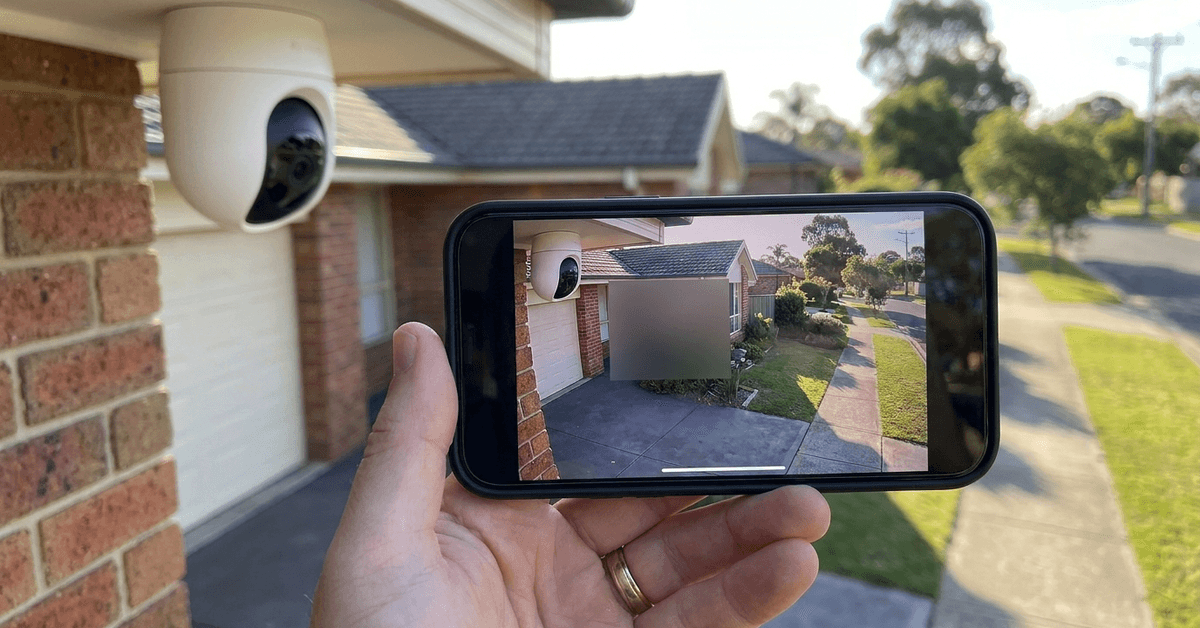
    Smart cameras offer robust monitoring, but they also raise valid privacy concerns. Privacy zones help users block out sensitive areas from video streams. Neighbors, private windows, and entrances are common examples.

    This article walks through configuring privacy zones for leading camera brands and platforms. Homeowners and renters can expect practical, field-tested steps for mainstream smart cameras.

    How to Configure Privacy Zones on Smart Camera Feeds

    Understanding Privacy Zones in Smart Camera Systems

    Privacy zones are digital overlays set up within camera software. Each selected region ignores motion, video recording, or even live viewing.

    Brands introduce slight variations. Some refer to them as “masking zones.” Others use “activity zones,” but this can mean something different.

    The goal remains the same: maintain surveillance for security while limiting unnecessary recording of personal or third-party spaces.

    When and Why Configure Privacy Zones?

    Setting privacy zones is most relevant for outdoor cameras facing a street or shared yard. It is similarly vital for indoor cameras positioned near bathrooms, bedrooms, or guest spaces.

    How to Configure Privacy Zones on Smart Camera Feeds

    Common motivations include:

    • Complying with local privacy regulations
    • Respecting the privacy of household members or neighbors
    • Eliminating unnecessary alerts or footage from non-critical areas
    • Enhancing personal comfort with in-home monitoring

    Supported Smart Camera Platforms

    Modern brands almost all support privacy zones, but the implementation varies.

    • Arlo (Pro, Ultra, Essential series)
    • Ring (Spotlight and Floodlight Cam, some Stick Up Cam models)
    • Google Nest Cam (wired and battery)
    • Eufy Security (via the Eufy Security app)
    • Dahua and Hikvision (with on-board firmware or monitoring software)

    Cloud-based video management systems, such as Blue Iris, also enable privacy masking for most ONVIF-compatible cameras.

    Requirements Before Starting

    • A smartphone or computer with the relevant camera app installed
    • Up-to-date device firmware ensuring max feature access
    • Physical access to the camera or video feed for accurate zone placement

    How to Configure Privacy Zones: Step-by-Step Instructions

    Step 1: Access the Camera’s App or Web Portal

    The process begins by logging into the brand’s official platform app (e.g., Arlo or Ring). Some cameras support configuration directly through a browser portal, which can be slightly faster for large-screen adjustments.

    Step 2: Locate the Privacy Zone Feature

    • On Arlo: Found in Settings > Video Settings > Privacy Zones 
    • Google Nest: Use the Home app > select camera > Settings > Activity Zones
    • Ring: Settings > Device Settings > Privacy Zones
    • Eufy: Open Device Settings, look for Privacy Masking

    Platforms often update menu names, so a brief scan of video/recording options is helpful.

    Step 3: Draw or Configure the Desired Zone

    Most interfaces display a preview image. The user draws rectangles or polygons directly onto the desired feed sections.

    It’s best to err on the conservative side, covering enough of the sensitive region rather than being overly precise and leaving gaps.

    Nest and Arlo both allow for adjustment of shapes. Some cameras require only rectangles, limiting complex boundary options.

    Step 4: Save and Test the Applied Zone

    After configuring, save the changes and check the live feed or a sample recording. A practical technique: walk through the masked area and ensure motion or activity does not trigger recordings or alerts.

    Step 5: Adjust If Needed

    Lighting conditions shift, and seasonal changes may require zone updates. Reviewing privacy region placement every 6–12 months is a good standard.

    Advanced Tips and Real-World Considerations

    Multiple Zones and Camera Placement

    Most platforms let users set up more than one privacy area per camera. This helps in complex scenes, such as backyards with multiple property lines.

    Firmware and Software Updates

    Occasionally, firmware updates may reset or modify zone settings. Regularly reviewing and re-applying zones maintains consistent privacy protection.

    Legal Considerations by Region

    European GDPR, UK DPA, and local U.S. state privacy laws can all impact requirements for recording, especially in shared spaces.

    Some locations mandate clear signage or consent for recording, regardless of online masking features.

    Common Troubleshooting Scenarios

    Zone Not Blocking Recording Properly

    This issue sometimes results from failed app updates, outdated firmware, or user setting errors.

    Software Glitches After Updates

    If zones disappear after updates, reinstalling or resetting the app usually restores function. Manufacturer support forums are often a helpful resource.

    Conclusion

    Privacy zones deliver an effective mix of security and discretion for smart home cameras. By thoughtfully configuring these protected areas, users maintain safety without overreaching into sensitive areas.

    Regularly reviewing zone placement, staying alert to legal changes, and updating device firmware ensures consistent and respectful monitoring.

    The result is a home that feels secure—and one where everyone’s privacy is taken seriously. Smart camera privacy features, when used correctly, keep households both safe and considerate.

  • How to Set Up a Smart Water Shutoff Valve for Emergencies

    How to Set Up a Smart Water Shutoff Valve for Emergencies

    Water leaks can cause major headaches. For many homeowners, setting up a smart water shutoff valve is a crucial step to avoid damage and stress when the unexpected happens.

    This guide is perfect for anyone interested in practical home safety upgrades, especially readers concerned with smart home security and automated protection.

    Why a Smart Water Shutoff Valve Matters?

    Traditional shutoff valves require manual intervention. In emergencies, time is often limited.

    How to Set Up a Smart Water Shutoff Valve for Emergencies

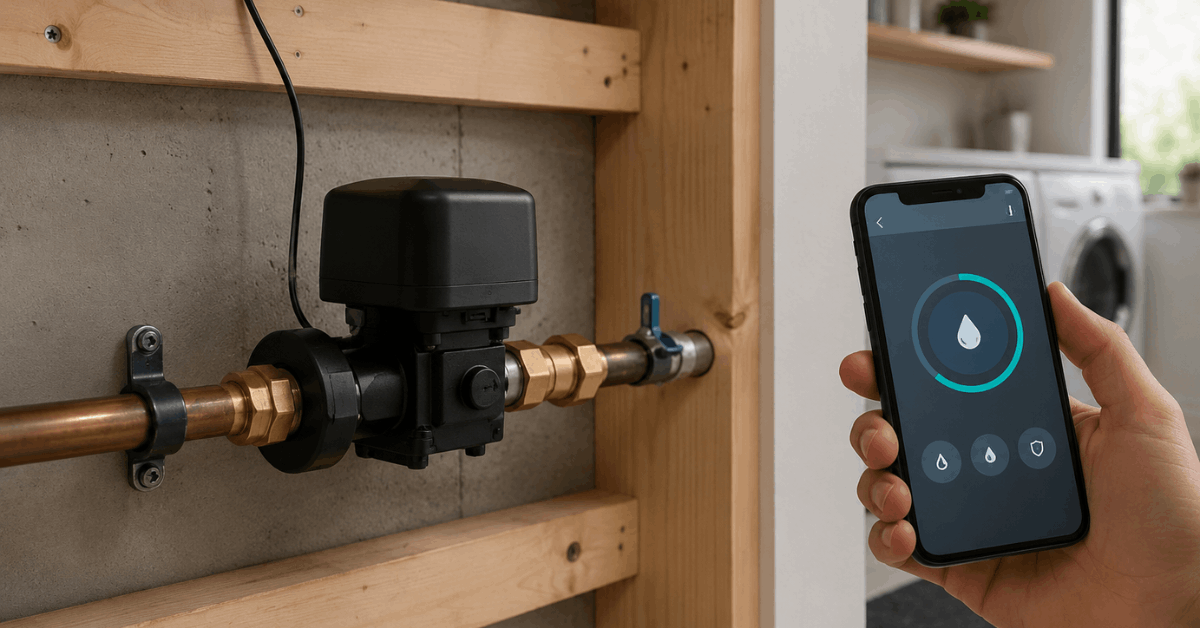
    Smart shutoff valves allow remote control. A system can react instantly when a leak is detected. Some insurance providers even offer reduced premiums for homes with smart shutoff technology installed.

    Main System Components

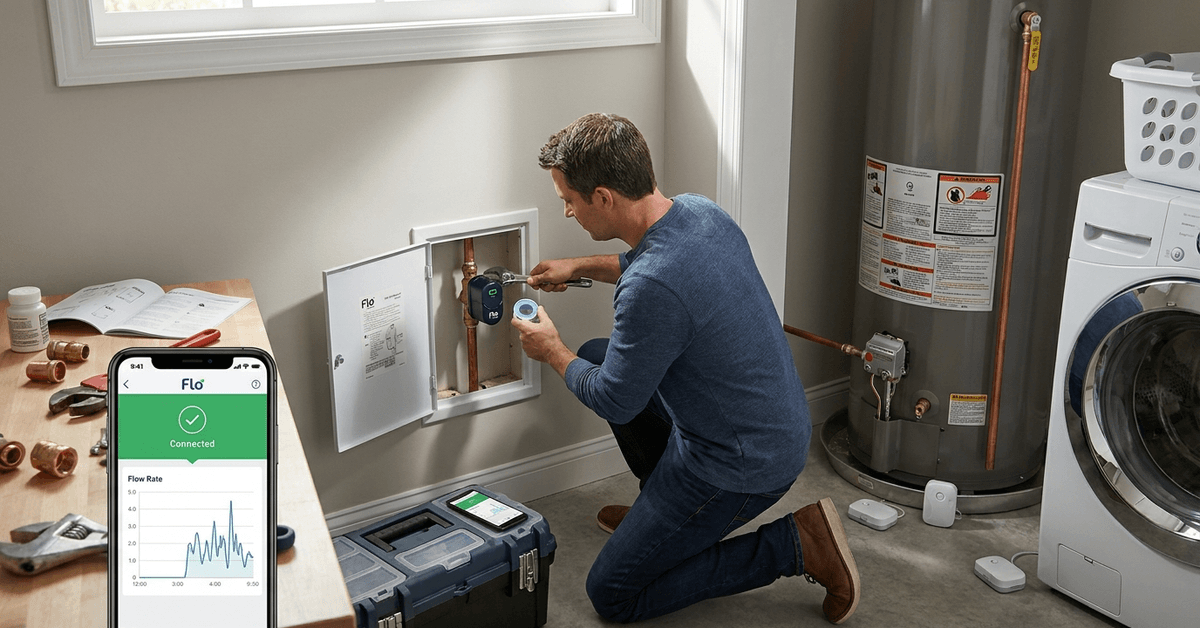
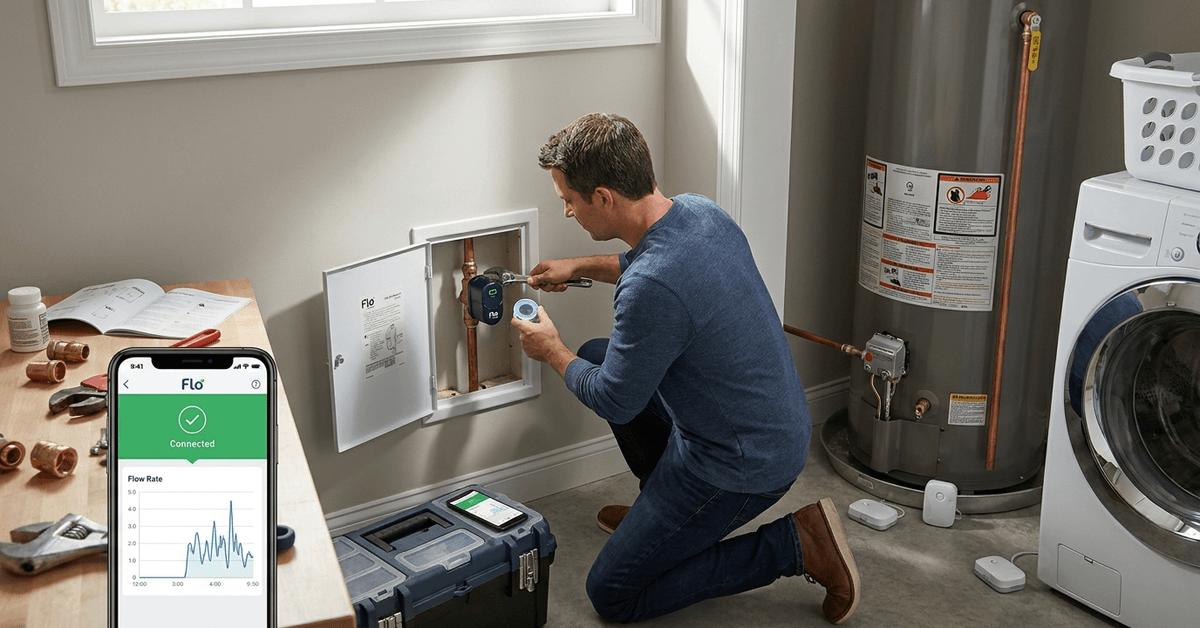
    • Smart water shutoff valve (example: Flo by Moen Smart Water Shutoff)
    • Leak sensors or detectors (commonly Zigbee, Z-Wave, or Wi-Fi-based)
    • Wi-Fi or wired home internet connection
    • Compatible app (e.g., Moen, Dome Home Automation, or Phyn) on your phone
    • Integration hub if preferred (like Samsung SmartThings or Home Assistant, for advanced setups)

    How Smart Water Shutoff Valves Work?

    The valve device is installed on your home’s main water line. In most cases, it physically moves or closes the pipe, stopping water flow if a leak or abnormal consumption is detected.

    How to Set Up a Smart Water Shutoff Valve for Emergencies

    The shutdown mechanism can be triggered by mobile app, schedules, or paired leak sensors.

    Step-by-Step Installation Process

    1. Planning the Installation

    • Evaluate your main water line location (typically in a basement or crawlspace).
    • Assess pipe compatibility (most valves fit ¾-inch or 1-inch pipes).
    • Confirm Wi-Fi coverage at the site to guarantee valve connectivity.
    • Review the manufacturer’s compatibility and app requirements.

    2. Required Tools and Materials

    • Pipe cutter or adjustable wrench
    • Pipe sealant or Teflon tape
    • Basic plumbing supplies (bucket, rags, flashlight)
    • Mobile phone with the recommended app installed
    • The chosen smart water shutoff valve (e.g., Flo by Moen or Phyn Plus)

    3. Turning Off Main Water Supply

    • Shut off the main valve to your entire home.
    • Open faucets to relieve pressure and drain the system before cutting the pipe.

    4. Installing the Device

    • Remove the correct pipe section (measure twice, cut once).
    • Position the smart valve according to manufacturer’s diagrams.
    • Use the appropriate fittings and apply pipe sealant or Teflon tape to each joint.
    • Tighten and align as directed. Most modern valves use simple screw-on connections.

    5. Connecting to Power and the Network

    • Plug in the valve if hardwired, or insert the included backup battery where available.
    • Activate the device using the manufacturer’s app (such as the **Moen app** for Flo valves or Phyn app for Phyn Plus).
    • Follow in-app prompts to add the device to your Wi-Fi network.

    6. App Configuration and Leak Sensor Setup

    • Link additional leak detectors around your home (near water heaters, under sinks, behind appliances).
    • Many sensors, like Samsung SmartThings Water Leak Sensor, connect via Zigbee or Z-Wave.
    • Assign zones in the app and set up notification preferences for leaks and auto-shutoff events.

    7. Testing the System

    • Slowly restore main water flow while watching for leaks at all pipe joints.
    • Trigger a test leak with a wet sponge or by gently wetting a leak sensor.
    • Observe the valve’s response. An immediate shutoff demonstrates proper operation.

    Smart Home Integration Options

    Many systems work with popular hubs or smart home platforms. Samsung SmartThings, Amazon Alexa, and Google Home can all accept water alerts or trigger routines.

    Homeowners can create custom automations. For example, set all water to shut off automatically if a leak is detected in any sensor zone.

    The most powerful routines often involve pairing the main shutoff valve with smart leak detectors throughout the house.

    Regular Maintenance and Best Practices

    Monthly System Checks

    • Test the valve remotely using the app or control panel.
    • Inspect pipe joints for corrosion or leaks.

    Firmware and App Updates

    • Check for periodic updates in the manufacturer’s app.
    • Apply updates to ensure the latest **security protocols** and features.

    Battery and Backup

    • If your system uses a backup battery, confirm its charge status monthly.
    • Consider a battery-operated leak sensor as a backup in case of power outages.

    Choosing the Right Smart Valve for Your Home

    Key Selection Criteria

    • Pipe size compatibility (check your supply line diameter first)
    • Brand reputation and customer support
    • Integration support (SmartThings, Alexa, Google Home, Apple HomeKit, etc.)
    • App usability and stability
    • Installation complexity and clear instructions

    Popular models include **Phyn Plus**, Dome Water Shut-Off, and Flo by Moen. Each has distinct strengths and app ecosystems.

    Potential Pitfalls and How to Avoid Them

    • If Wi-Fi drops, some valves lose remote access. Place a Wi-Fi extender if the basement signal is weak.
    • Improper fit or sealing can lead to leaks. Always double-check all joints before restoring water.
    • Not all systems are compatible with every smart home hub. Check the valve’s integration list before buying.

    Many users are surprised by small details, like notification delays, if their app notification settings are not correct.

    Data Privacy and Security Considerations

    With any connected home device, secure personal data and valve access. Use unique, strong passwords for your valve’s app accounts.

    Regularly update firmware to patch security vulnerabilities. Always prefer systems with encrypted cloud communication for alerts and remote commands.

    Most manufacturers now use secure protocols, but settings should be double-checked after installation for extra reassurance.

    Conclusion: Building Resilience Against Water Emergencies

    Upgrading your home with a smart water shutoff valve is a practical step. The approach combines modern convenience with genuine risk reduction.

    The time spent on careful installation and setup often pays for itself the first time a hidden leak is detected. The real peace of mind comes from knowing your home is protected even when you are away.

    Effective emergency preparedness in today’s smart homes means learning the systems and testing them periodically. A well-maintained, properly configured valve stands between your house and major damage, day or night.

  • How to mount solar panels for wireless outdoor cameras

    How to mount solar panels for wireless outdoor cameras

    Wireless outdoor cameras can be a game-changer for smart home security. Yet, battery life can hold them back. Solar panels offer a reliable way to keep these cameras powered 24/7 with little hands-on effort required.

    This article explains, step by step, how to set up solar panels for wireless outdoor cameras. Owners of battery-powered cameras seeking a set-and-forget power solution will find these mounting methods practical and safe.

    Why Use Solar Panels for Wireless Cameras?

    Many homeowners like solar panels because they reduce battery changes. The right setup can power cameras for months without manual charging.

    How to mount solar panels for wireless outdoor cameras

    For large properties or hard-to-reach cameras, solar power cuts hassle. It’s also eco-friendly and prevents outages caused by depleted batteries.

    Choosing a Compatible Solar Panel

    Check power requirements

    The output voltage of the panel must match your camera’s input. Most wireless outdoor cameras run on 5V, but some models may use 6V or 12V.

    How to mount solar panels for wireless outdoor cameras

    Matching the specs avoids damaging the camera or causing slow charging. Information is usually printed on the camera’s power port or in the manual.

    Connector and cable compatibility

    Most leading brands (like Arlo, Reolink, and Ring) offer their own solar accessories. These use specific cables and weatherproof connectors.

    For third-party panels, use an adapter designed for your camera’s charging port. Ensure the cable is rugged for outdoor use.

    Tools and Materials Needed for Mounting

    • Weatherproof solar panel suitable for your camera model
    • Adjustable outdoor mounting bracket (usually included with the panel)
    • Rust-resistant screws and wall anchors
    • Power drill with masonry or wood bits
    • Outdoor-rated zip ties or cable clips
    • Silicone caulk for sealing cable entries
    • Ladder for accessing mounting site

    Picking the Optimal Solar Panel Location

    Choose a site with maximum sun exposure

    The more direct sunlight your panel receives, the better its performance. South-facing walls or eaves are often best in the Northern Hemisphere.

    Avoid placing panels in shadow, under roof overhangs, or near trees. Even partial shade can sharply reduce charging efficiency.

    Consider cable length and camera position

    Shorter cables reduce power dropoff. It’s wise to keep your panel no more than 10 feet from the camera, if possible.

    The cable should reach the camera without sagging. Secure any excess cable neatly against the wall or roof.

    Step-by-Step: Mounting Your Solar Panel

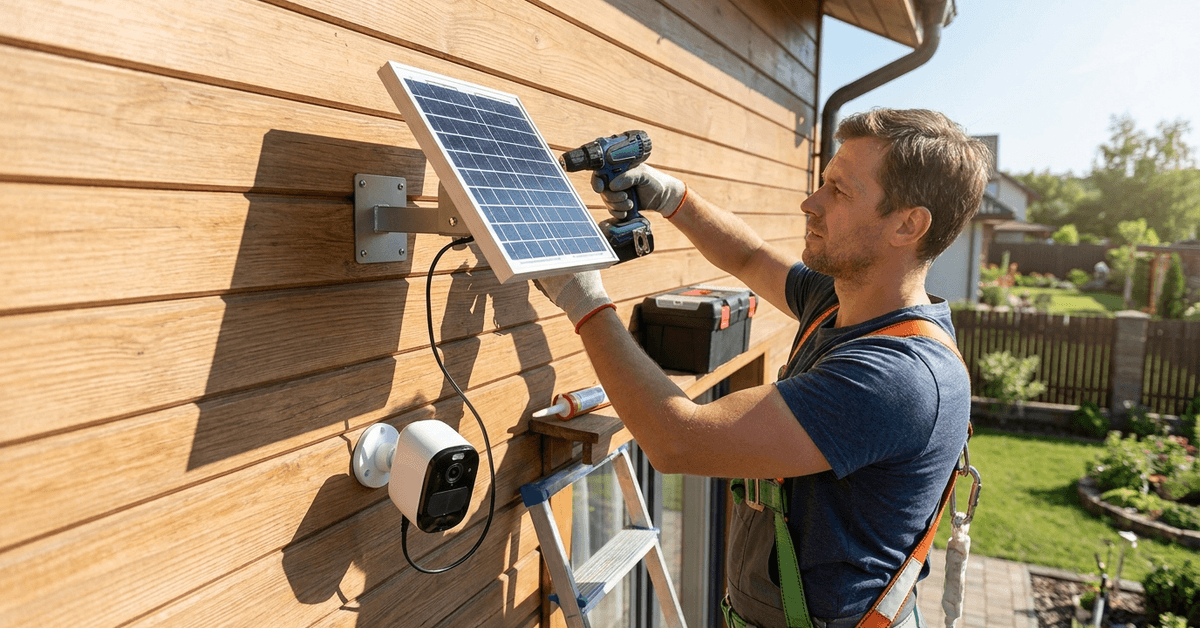
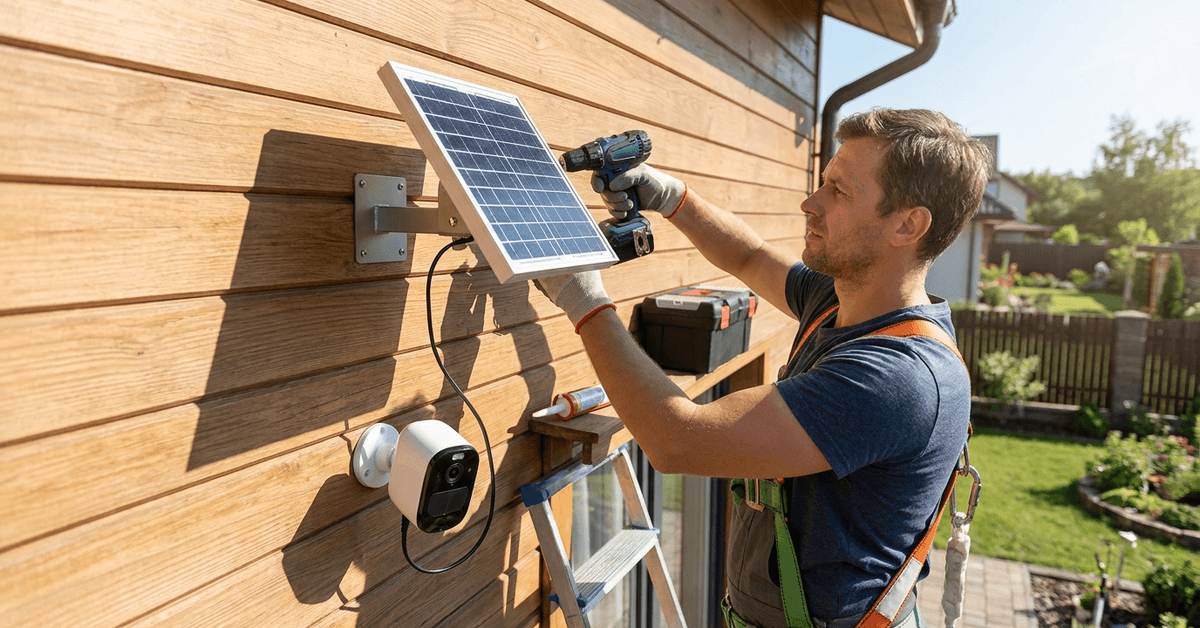
    1. Mark the drill holes for the bracket

    First, position the bracket on the chosen surface, aligning it to maximize sunlight. Homeowners often mark pilot holes using a pencil through the mounting plate.

    2. Drill and secure the bracket

    Use appropriate drill bits for your wall material. Brick, stucco, and siding may require different techniques.

    Secure the bracket tightly with included screws and wall anchors. The bracket should not wobble or tilt after tightening.

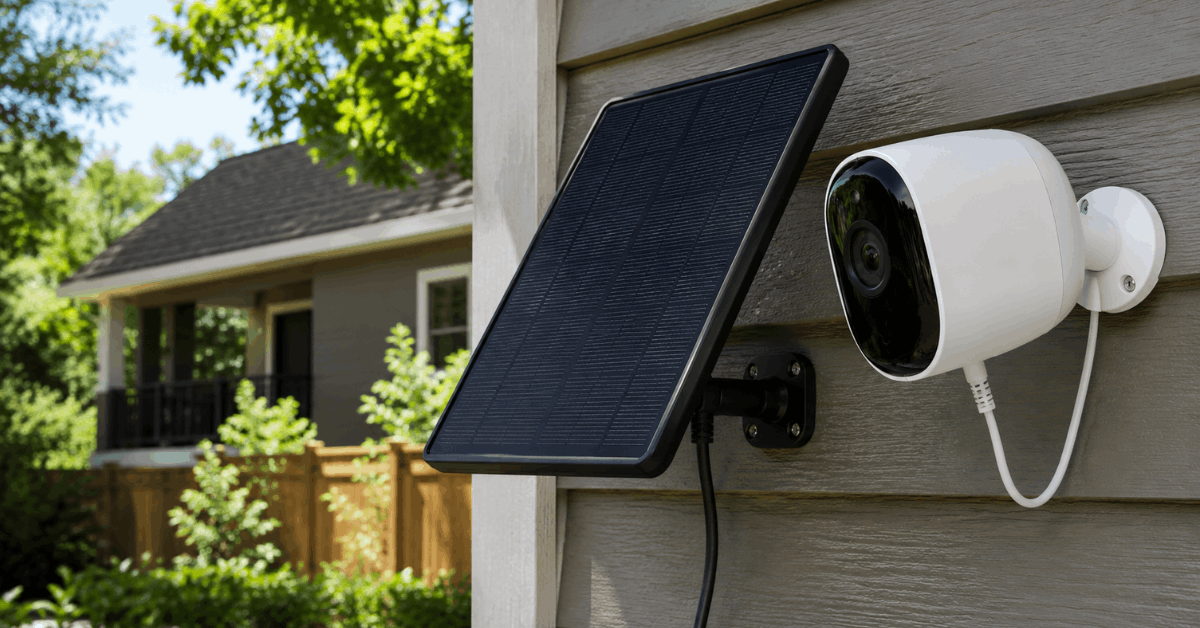
    3. Attach the solar panel to the bracket

    Insert the solar panel into the adjustable mount. Set it at an angle equal to your latitude for year-round performance.

    Most brackets allow tilt adjustment. After aiming it, hand-tighten the bolts to hold the angle steady.

    4. Run the cable to the camera

    Route the cable along eaves, siding, or roof lines. Using outdoor cable clips can secure the wire neatly and prevent snags or wind damage.

    If the camera is mounted on brick or concrete, self-adhesive cable organizers may help. Keep bends gradual to avoid pinching the wire.

    5. Seal any wall penetrations

    If you need to drill through a wall or soffit, seal the opening with weatherproof silicone caulk . Water intrusion can cause damage or reduce system life.

    Connecting and Testing the Panel

    Plug in the solar panel

    Match the plug to your camera’s charging port. Firmly push the connector until it ‘clicks’ (if the design supports it).

    Water-resistant connectors must be fully seated to keep moisture out. Double-check the fit, especially before rainy seasons.

    Power on and verify charging

    Apps from popular brands like Arlo, Reolink, and Ring provide live status updates. Look for a ‘charging’ icon or battery percentage increasing.

    Manuals typically show what the LED status lights mean, in case there is no app interface.

    Maintaining Your Solar-Powered Camera Setup

    Regular cleaning

    Dirt, dust, or bird droppings on the panel can dramatically impact charging. Occasionally, wiping the panel face with a microfiber cloth can boost performance.

    Some homeowners set reminders in their phone calendar every three months for cleaning tasks.

    Inspect cable and components

    Check for cracks in wires or loose mounting hardware after weather events. Re-tighten screws as needed and replace damaged cables quickly.

    Troubleshooting Common Issues

    Insufficient sunlight or low charge

    Panels in partial shade or on north-facing walls often struggle. If charging falls behind, relocating to a sunnier spot can help.

    Swapping to a higher-wattage panel may also solve the issue, especially during winter months.

    Loose connectors or faulty cables

    Intermittent charging is often traced to a connector that isn’t fully seated. Re-check the connection and swap cables if problems persist.

    Recommended Brands and Smart Features

    Brand-specific solar panel kits

    The Arlo Solar Panel and Reolink Solar Panel are both well-rated. Users often find installation easiest when sticking with their camera brand’s official accessories.

    Generic panels from brands like Wasserstein or Sunforce may also work for budget setups but require more care with compatibility checks.

    Monitoring with camera apps

    Most modern outdoor cameras now offer battery and charging stats in their companion apps. Reolink and Arlo users can receive low-battery alerts directly on their phones.

    Monitoring trends over time in the app helps spot issues early before battery drains too far.

    Best Practices for a Safe Installation

    Secure ladder placement

    Whenever mounting high, double-check your ladder footing on even ground. It is safest to have a second person present as a spotter, if possible.

    Avoid working in wet or windy conditions. Proper safety gear makes a big difference for roof projects.

    Weatherproofing tips

    Focus on fully seating all connectors and sealing cable entries. Exposed connectors or unsealed holes can let water in and shorten component life.

    A simple weatherproof box, sometimes called a junction box, can be used for more complex cable joins outside.

    Potential Apps and Smart Integrations

    • Arlo Secure: For real-time camera charging status and alerts
    • Reolink App: Battery health and live view, plus smart notifications
    • Ring App: Solar usage, health reports, and integration with Alexa routines

    Some homeowners link camera charging status to home automation hubs using IFTTT or similar services. This can trigger reminders or send custom alerts if panel output drops below a certain level.

    Conclusion

    Using solar panels to power wireless outdoor cameras is a practical way to boost security with less effort over time. Picking the right panel for your camera model, careful mounting, and ongoing maintenance help guarantee reliable performance in most climates.

    Brand-authentic panels are usually simplest for beginners. For advanced users, third-party solutions can be tailored for more powerful charging setups. Owners should expect to check their system a few times each year, but most agree it’s far easier than repeated battery swaps.

    Monitoring battery status via your camera’s app helps prevent surprises. Occasional cleaning and inspection take just a few minutes and can add years to your setup. Learn more about integrating smart devices or troubleshooting security tech in the fortressmate.com resource library. Solar-powered security is well within reach for most homeowners willing to try these proven methods.