Blog

  • The Right Way to Install Smart Window Blinds for Privacy Schedules

    The Right Way to Install Smart Window Blinds for Privacy Schedules

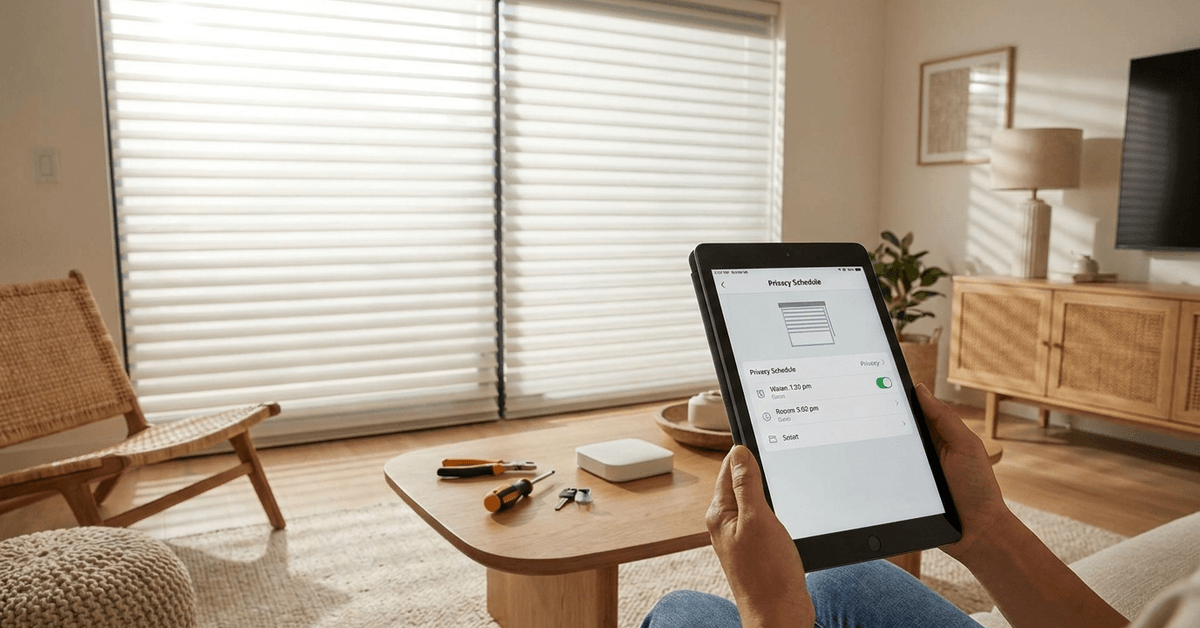
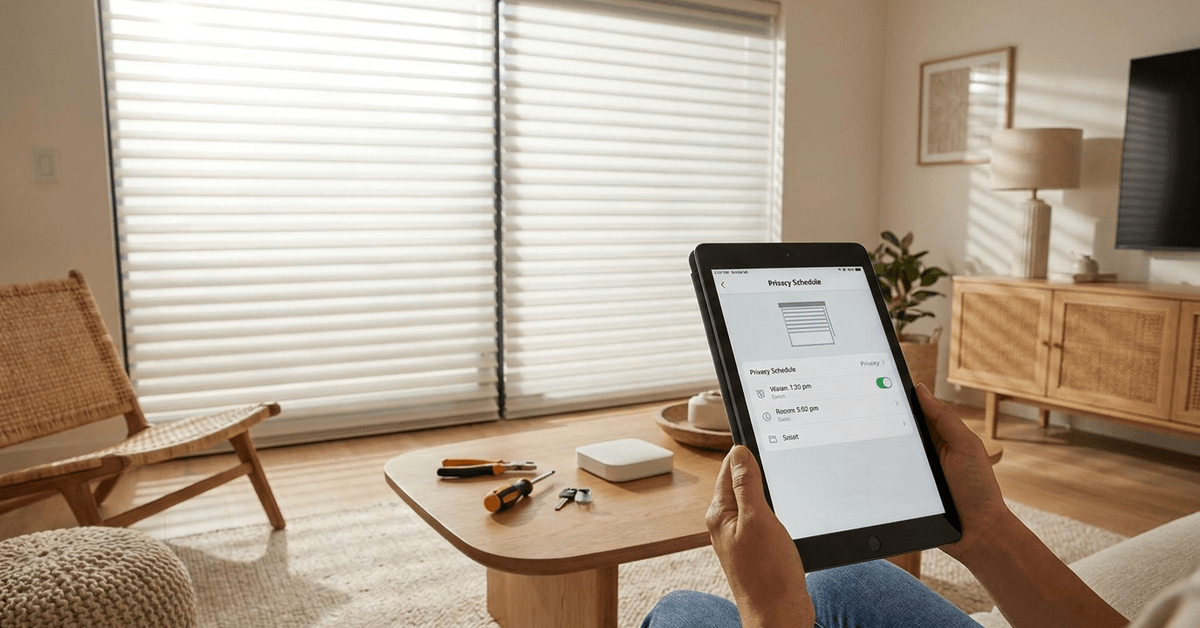
    Smart window blinds add a strong layer of convenience and control to modern homes. Automating your blinds can help safeguard privacy based on precise daily routines and settings. 

    For homeowners new to smart automation, the installation process can seem intimidating. However, with reliable planning and clear steps, it’s straightforward to achieve smooth, secure privacy scheduling.

    Understanding Smart Window Blinds and Privacy Scheduling

    Modern smart blinds integrate with Wi-Fi or Zigbee hubs. Smart schedules enable automatic adjustments at set times of day. Privacy is enhanced by syncing blind movement with your presence or lighting conditions.

    Main Smart Blind Protocols

    The two most common wireless technologies are Zigbee and Wi-Fi. Zigbee offers stable, low-power mesh networks. Wi-Fi provides direct app integration without extra hubs, but may be more power-hungry.
    The Right Way to Install Smart Window Blinds for Privacy Schedules

    Benefits for Privacy-Conscious Households

    • Customized privacy at different times, for example, closing blinds automatically every evening.
    • Syncing blind schedules with routines such as bedtimes or absences.
    • Reducing the risk of leaving blinds open accidentally.

    Choosing Compatible Smart Blinds

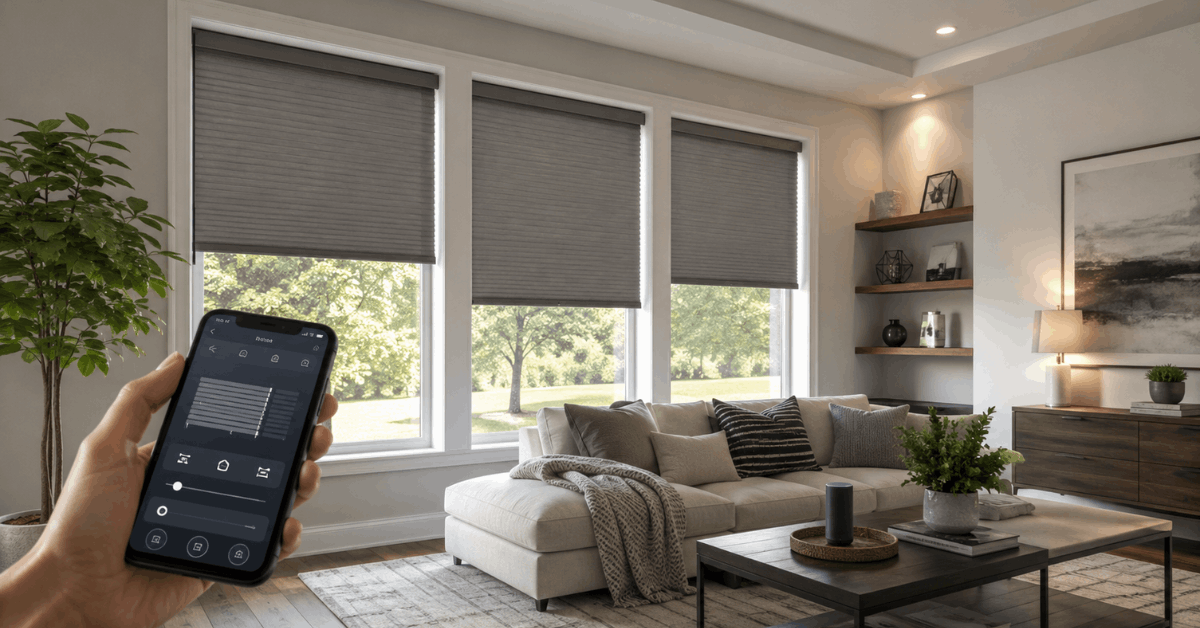
    Popular brands include Lutron Serena, Somfy, IKEA Fyrtur, and SwitchBot. Compatibility with your existing smart home platform is crucial. A home running Apple HomeKit, for instance, will require blinds certified for HomeKit connectivity.
    The Right Way to Install Smart Window Blinds for Privacy Schedules

    Factors to Consider

    • Supported protocol: Check if the blind supports Zigbee, Z-Wave, Matter, or Wi-Fi.
    • App compatibility: Confirm the blind integrates with Alexa, Google Home, or Apple HomeKit.
    • Power supply: Options include rechargeable batteries, plug-in, or solar panels.
    • Mounting style that fits your window and décor.

    Some blinds require a proprietary hub. IKEA Fyrtur, for example, operates best with the IKEA DIRIGERA or TRÅDFRI hub. Running through the proper control hub helps ensure reliable privacy routines.

    Pre-Installation Preparation

    Before beginning installation, measuring is essential. Proper alignment is necessary for effective coverage and seamless operation.

    What You’ll Need?

    • Smart blind kit (with motor, mounts, remote, and instructions)
    • Drill and screwdriver
    • Level tool for alignment
    • Measuring tape

    Surveying the Space

    Check for obstacles or uneven surfaces near your window. Walls with power outlets or strong Wi-Fi signal promote smooth blind operation. If windows are uniquely shaped, custom-cut blinds might be required for full privacy coverage.

    Step-by-Step Smart Blind Installation

    Proper installation begins with careful unboxing and inventory. Reviewing instructions and verifying kit contents helps minimize surprises later in the process.

    1. Mark Mount Locations

    • Hold up the mounting bracket to the window frame or wall.
    • Mark hole locations with a pencil using the level tool to ensure straight placement.

    2. Attach Mounting Brackets

    • Drill pilot holes for each bracket screw.
    • Use the screwdriver to secure brackets. Hand-tighten for a sturdy fit.

    3. Mount Blind and Motor

    • Snap or slide the blind into the brackets.
    • Attach the motor unit as described in the instructions.
    • Check stability by gently tugging the blind up and down.

    4. Connect Power Source

    • Install batteries, plug in the adapter, or attach the solar panel if applicable.
    • Confirm power indicator lights or listen for an activation sound.

    5. Initiate Pairing Mode

    • Press and hold the blind’s pairing button as specified in its manual.
    • Follow on-screen prompts in the manufacturer’s app to detect your device.

    Configuring Privacy Schedules in Your Smart Home App

    After installation, blinds must be added to your chosen app. Most major brands integrate with Alexa, Google Home, SmartThings, or Apple HomeKit. App features vary, and so do schedule options. Using the right app is crucial for a seamless privacy routine.

    Popular Smart Blind Apps

    • Home+ for Apple HomeKit users (compatible with Lutron Serena and some Eve MotionBlinds).
    • SwitchBot app: Works with SwitchBot blinds and infrared bridges.
    • IKEA Home Smart app for Fyrtur blinds and supported hubs.

    Setting Schedules in the App

    1. Open the app and locate your installed blind device.
    2. Tap the settings or automation icon, often represented by a gear or plus symbol.
    3. Find “Schedules” or “Automation” and set the time window for blinds to open/close.
    4. Save the privacy routine. Test the blind by setting a one-minute trigger to confirm reliable scheduling.

    Some systems support additional triggers, such as sunrise/sunset or occupancy sensors. This adds flexibility for households with irregular daily routines.

    Integrating Privacy Schedules With Home Automation Platforms

    Linking your blinds with automation routines can be individualized. For many, it’s efficient to tie window privacy to whole-home security modes, lighting scenes, or custom routines.

    Recommended Integrations

    • Apple HomeKit: Use the Automation tab to close blinds when everyone leaves home.
    • Amazon Alexa: Create routines to adjust blinds with voice commands or paired motion sensors.
    • SmartThings: Tie blinds to “Good Night” or “Away” scenes for instant privacy modes.

    Platforms like Home Assistant or Hubitat Elevation enable even more granular scheduling, incorporating weather status, guest mode, or time-of-year preferences for privacy.

    Troubleshooting Common Problems

    Even well-installed blinds can encounter issues. Typical problems include connectivity drops, schedule failures, or stuck movement.

    Diagnosing Issues

    • Reset Wi-Fi or Zigbee hubs if the app loses connection.
    • Verify batteries or adapter are supplying consistent power.
    • Recalibrate the blind’s upper and lower limits if movements are inconsistent.
    • Update device firmware within the app to resolve minor bugs.

    When to Contact Support?

    If the manufacturer’s troubleshooting steps do not resolve the issue, reaching out to the support team is usually productive. Major smart blind suppliers maintain clear support pages and phone assistance for common installation and app issues.

    Conclusion

    Smart window blinds bring automated privacy within easy reach, provided installation and configuration are handled with care. Accurately measuring windows, selecting a compatible brand, and following stepwise instructions are the first steps toward privacy scheduling that fits any household routine. 

    With effective app integration and solid troubleshooting, smart blinds deliver resilient, hassle-free privacy for years to come. 

    The peace of mind that follows is often worth the effort of careful setup. For many, it’s not just about automation, but about feeling secure at home—no matter the time of day.
  • How to Optimize Smart Lighting for Outdoor Pathways

    How to Optimize Smart Lighting for Outdoor Pathways

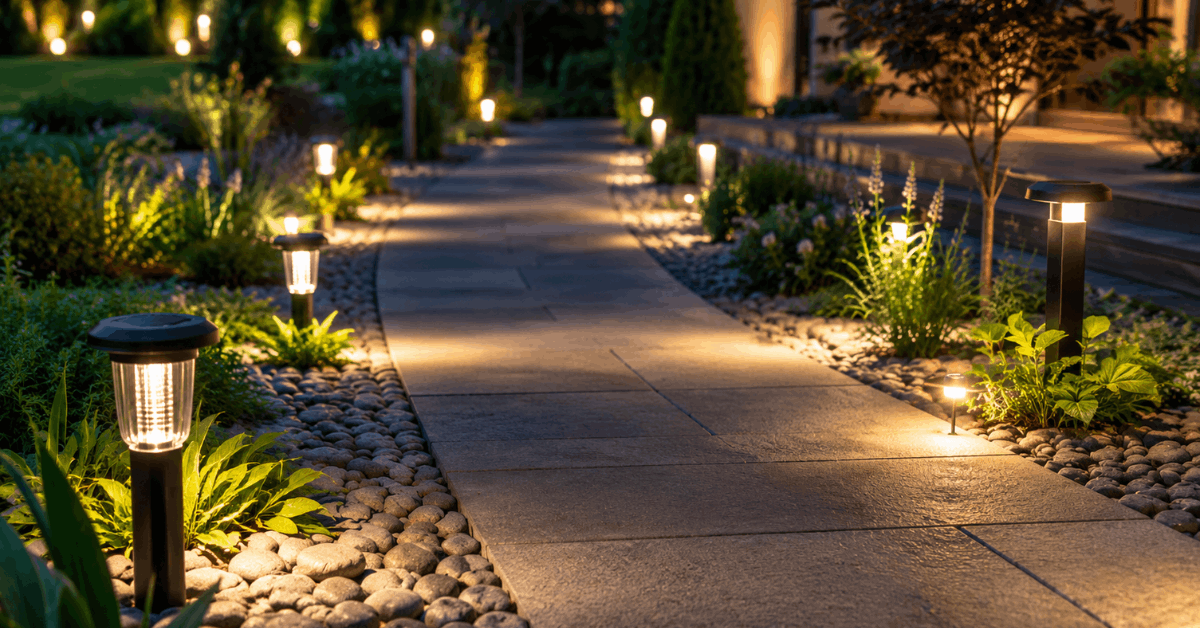
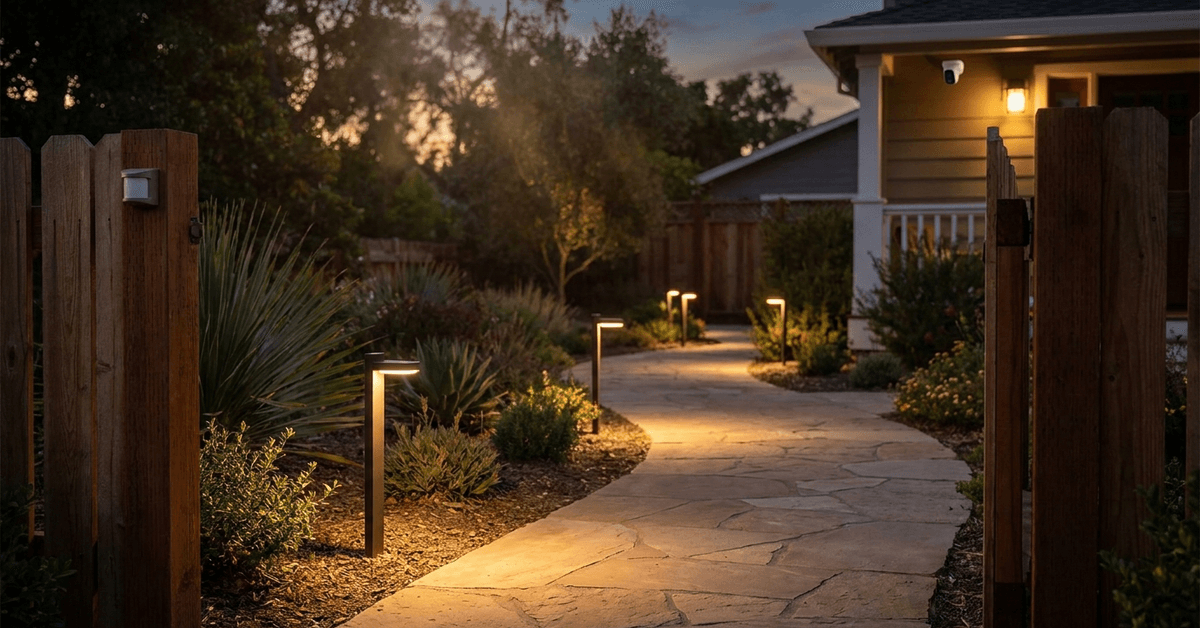
    Outdoor pathways offer more than scenery—they are core access points that shape how a home feels and functions at night.

    Smart lighting elevates this experience, bringing safety, convenience, and even a touch of automation magic.

    This guide explains how anyone can optimize smart lighting for outdoor walkways, focusing on practical setups and reliable technologies.

    How to Optimize Smart Lighting for Outdoor Pathways

    Understanding Smart Outdoor Pathway Lighting

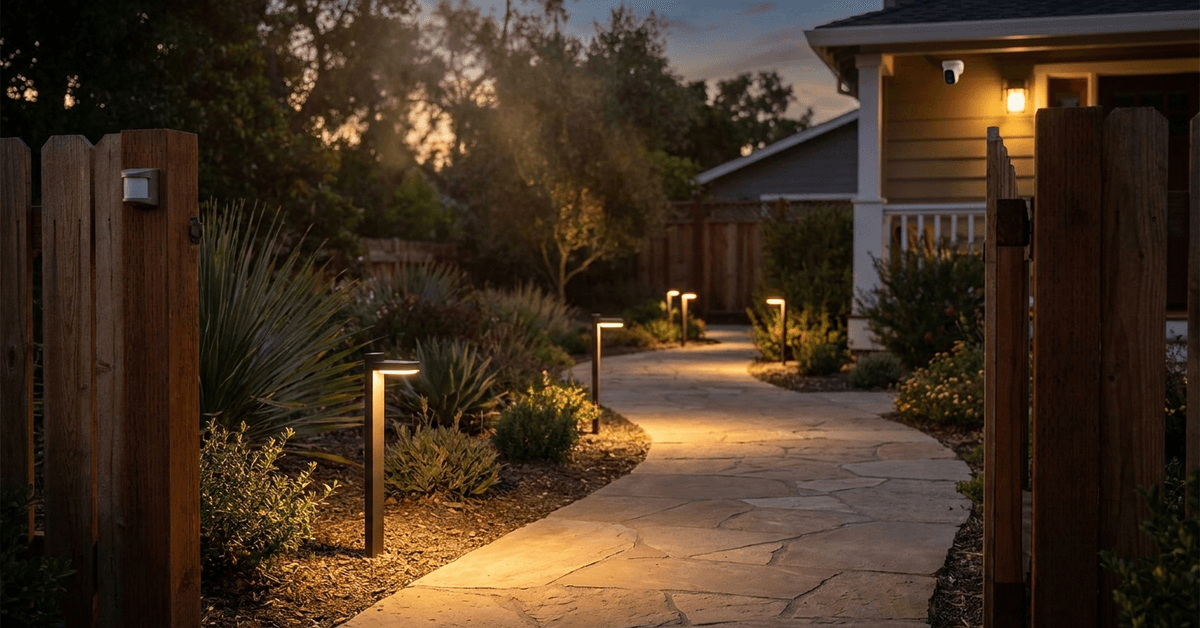
    Smart pathway lighting uses connected fixtures, controls, and sensors to automatically light up paths based on time, occupancy, or external conditions.

    The right approach can minimize energy waste while maximizing visibility and security near entrances or garden paths.

    Selecting the Best Smart Pathway Lights

    Choosing the right fixture is the foundation for long-term reliability and effective coverage outdoors.

    How to Optimize Smart Lighting for Outdoor Pathways

    Key Options for Smart Outdoor Lights

    • Wi-Fi connected stake lights
    • Zigbee or Z-Wave pathway fixtures
    • Solar-powered smart lights with integrated controllers
    • Hardwired low-voltage fixtures with smart bridge compatibility

    Popular brands like Philips Hue and Ring Pathlight offer solid choices. Each one supports different home automation ecosystems and protocols.

    What To Look For?

    • Water resistance rating (IP65 or higher)
    • Sturdy construction against weather and tampering
    • Wide, even light spread (avoid narrow beams for walkways)

    Choosing systems with reliable after-sales apps can minimize future headaches with syncing or group controls.

    Choosing The Right Smart Control Protocol

    Outdoors, wireless interference and range are major points to consider. Each protocol has pros and cons for outdoor areas.

    Understanding Smart Lighting Protocols

    • Zigbee: Popular due to mesh networking, solid for gardens and longer pathways
    • Z-Wave: Good for longer-range needs, but sometimes trickier to pair with some brands
    • Wi-Fi: Easy to add, but signal strength drops over distance and thick exterior walls
    • Bluetooth: Simple for a single fixture, but not ideal for multi-light pathway setups

    Installing a dedicated Zigbee bridge or strengthening outdoor access points often resolves weak connectivity.

    Smart Sensor Integration for Pathways

    Motion sensors help lights respond only when needed, keeping power usage low and startling intruders with sudden illumination.

    Sensor Types for Pathway Lighting

    • PIR (passive infrared) motion sensors
    • Ambient light (LUX) sensors
    • Door/contact sensors tied to entryways

    Smart sensors from Philips Hue Outdoor Sensor or Aqara can trigger pathway lights based on movement or darkness.

    Configuring Sensor Automation

    • Group related lights and assign sensors via native apps
    • Set up “if-then” rules (e.g., if motion is detected after sunset, turn on group for 5 minutes)
    • Adjust sensor sensitivity to minimize accidental triggers from pets or wildlife

    Occasionally, recalibrating sensors improves response times when environmental changes shift baselines.

    Optimizing Placement for Coverage and Efficiency

    Installing just any smart light can leave dark spots or waste energy. Strategic positioning plays a huge role in outcomes.

    Recommended Placement Strategies

    • Space fixtures every 6-8 feet along straight paths
    • Angle each light slightly away from eye-level to reduce glare
    • Position key sensors at path entrances and turns
    • Use lower lumens (around 100-250lm) to avoid over-lighting but still ensure visibility

    Testing positioning after dusk often reveals areas that need fine-tuning the most.

    Step-by-Step: Setting Up Smart Pathway Lighting

    1. Map out pathway areas needing coverage and note distances between fixtures
    2. Select compatible, weatherproof smart lights, sensors, and a control hub
    3. Check wireless range—test with a phone or Zigbee/Z-Wave plug at the furthest point
    4. Install the bridge or smart hub as close as possible to exterior walls
    5. Mount fixtures securely with correct-height stakes or flush to pathway borders
    6. Pair devices using the brand’s mobile app (Hue, SmartThings, or Home Assistant work well)
    7. Configure automation rules: set daily schedules, twilight sensors, or motion triggers
    8. Test entire group after sunset for dead zones or accidental shadows

    It can be helpful to update device firmware early, as this often fixes lag or glitchy behaviors in new outdoor installations.

    Effective Automation and Scheduling

    Automation brings key benefits by making sure lights react only when required, reducing unnecessary power draw.

    Popular Schedules and Triggers

    • “Sunset to sunrise” routines using built-in astro-timers ( Hue app excels here)
    • Motion-activated on/off in combination with ambient light (LUX) sensors
    • Vacation mode: randomizes on/off cycles to mimic occupancy

    Experimenting with staggered start times for different zones can make home exteriors look less uniform and more natural at night.

    Integrating Outdoor Lighting with Home Security Systems

    Smart pathway lighting can strengthen home security when paired with cameras, alarms, or smart locks.

    Integration Tactics

    • Link pathway lights to doorbell cameras or motion notifications
    • Configure scenes to switch on all pathway lights if perimeter sensors detect movement
    • Use integrations with SmartThings, Alexa Routines, or IFTTT for flexible control

    Brands like Ring and Philips Hue allow direct connections with many mainstream security devices and platforms.

    Maintenance for Long-lasting Performance

    Even weather-rated lights benefit from periodic cleaning and checkups for the best output.

    Simple Maintenance Tasks

    • Wipe lenses seasonally to remove dust, pollen, or water spots
    • Check stake stability and wiring insulation twice per year
    • Replace batteries or rechargeable cells as needed (solar models may require more regular attention)

    Setting low-key reminders via the lighting app often avoids accidental lapses in maintenance, especially with rechargeable setups.

    Top Smart Pathway Lighting Apps and Platforms

    Selecting an intuitive app makes configuring routines and troubleshooting easier year-round.

    Highly Rated Apps

    • Philips Hue app: User-friendly, with powerful group and time-based automations
    • Samsung SmartThings: Supports a wide mix of brands and can unify Zigbee/Z-Wave devices
    • Home Assistant: Open-source, ideal for custom routines and advanced users
    • Ring: Focused strongly on security, with reliable motion-triggered lighting options

    These platforms almost always support regular updates, which improves device stability and adds new automation functions over time.

    Tips for Better Smart Pathway Lighting

    A few adjustments can improve coverage, reliability, and nighttime safety.

    • Test lighting after sunset.
    • Keep sensors free of obstacles.
    • Use separate pathway zones.
    • Reduce glare near entrances.
    • Inspect outdoor connections regularly.

    Conclusion: Achieving Safer, Smarter Pathways

    Optimizing smart lighting along outdoor pathways is achievable for most homeowners and can make daily routines safer and more enjoyable.

    Thoughtful fixture selection, proper control protocol, and regular maintenance ensure the lighting works when it matters most.

    Integrated smart lights, when set up with sensors and accurate scheduling, can discourage intruders and highlight landscaping in a sophisticated way.

    Investing in a reliable system and platform, such as Philips Hue or SmartThings, brings flexibility and peace of mind for years ahead.

  • Step-By-Step Maintenance Checklist for Smart Home Hardware

    Step-By-Step Maintenance Checklist for Smart Home Hardware

    Reliable smart home hardware is essential for both peace of mind and daily convenience. Anyone managing smart lights, security cameras, thermostats, or sensors faces occasional glitches.

    But regular maintenance helps prevent breakdowns, ensures compliance with software updates, and improves long-term device performance. This step-by-step checklist walks smart homeowners through a repeatable process for keeping all key hardware healthy, secure, and functional.

    Essential Tools and Apps for Smart Home Maintenance

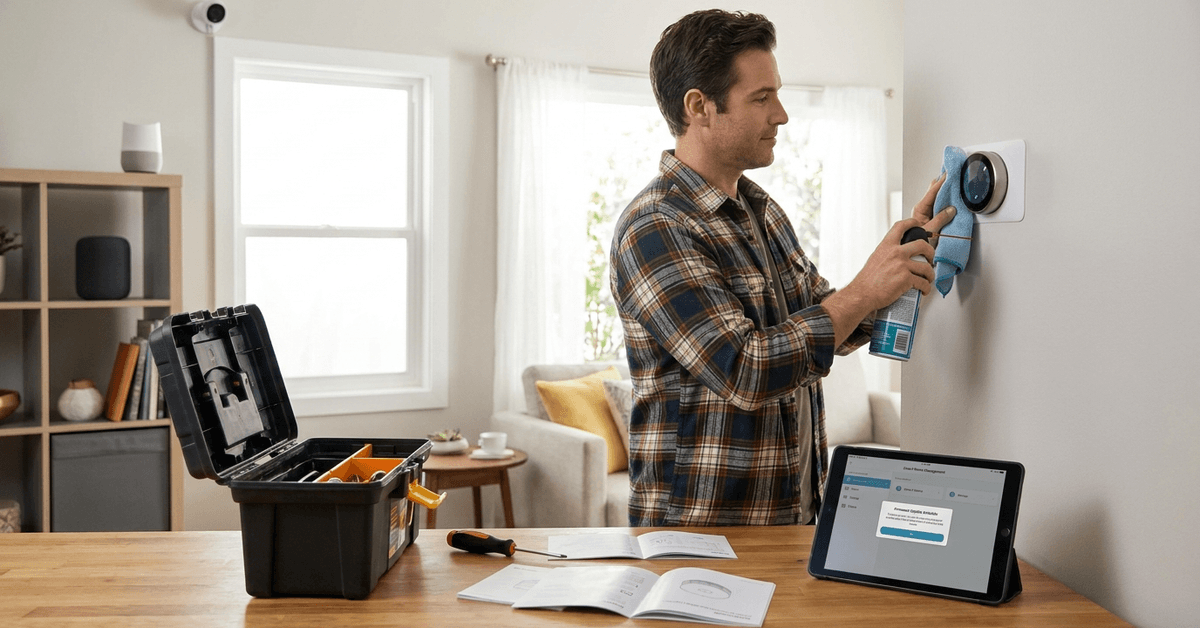
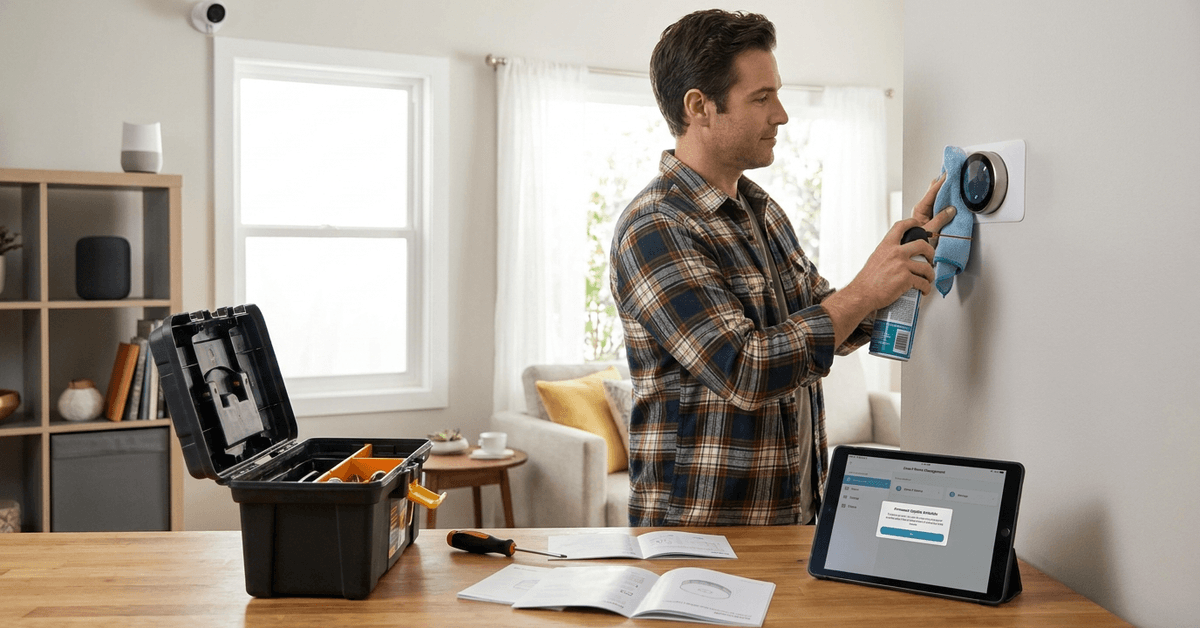
    Before starting, the right set of tools saves time and reduces risk of accidental device damage. Typically, homeowners rely on mobile device managers, vendor apps, and a few hardware tools.

    Step-By-Step Maintenance Checklist for Smart Home Hardware
    • Smart device manager app (such as Google Home or Apple HomeKit)
    • Set of mini screwdrivers (Phillips and flat)
    • Can of compressed air
    • Microfiber cleaning cloth
    • Label maker or masking tape

    Most device manufacturers offer their own setup apps; regularly checking these apps simplifies firmware and network status checks.

    Power and Connectivity Checks

    Power disruptions are a primary cause of smart device issues. Early detection improves uptime and reduces troubleshooting headaches later.

    Step-By-Step Maintenance Checklist for Smart Home Hardware

    Testing Power Supplies

    • Inspect device power adapters and plugs for any fraying or discoloration
    • Smart outlets can be tested via app power-cycling
    • Check for a secure fit in wall sockets, avoiding wobbly or loose connects

    Wi-Fi and Router Assessment

    • Run regular speed tests from your router admin page
    • Most brands recommend at least 2.4GHz Wi-Fi for stable device coverage
    • Check for firmware updates on your home router using its official app

    Firmware and Software Updates

    Regularly scheduled updates patch vulnerabilities and enhance device compatibility. Skipping updates risks security and performance.

    • Open each manufacturer’s management app to look for pending updates
    • Set device auto-updates if supported in app: Google Nest, Amazon Alexa, and Philips Hue support this
    • For manual update devices (e.g. some Zigbee or Z-Wave hubs), refer to the official website for files and instructions

    Allow devices a few extra minutes to reboot after a major update to avoid incomplete installation.

    Physical Cleaning and Inspection

    Dust, moisture, and accidental knocks all affect smart hardware lifespan. Short, routine physical checks go a long way.

    Contact and Surface Cleaning

    • Unplug and power down devices before cleaning to avoid electric shock
    • Wipe plastics and screens gently with a microfiber cloth
    • Camera lenses benefit from careful cleaning using lens wipes

    Check for Corrosion or Damage

    • Examine battery terminals in sensors and smart locks for corrosion (white/green residue)
    • Inspect cables and connectors for wear or exposed wiring
    • Replace worn batteries in all key security sensors or remotes annually

    Testing Core Functionality

    Partial device failures can be easy to miss if automations mask them. Monthly feature checks help spot failing sensors or relays early.

    • Test motion, window, and door sensors—use the companion app to confirm triggers register
    • Run a sample smart routine: for example, toggling all lights and checking result
    • Alarm systems often have a ‘test’ mode which notifies all connected components

    If an accessory fails a check, consult the hardware’s official troubleshooting guide. Some minor issues may require just a reset or firmware refresh.

    Network Security and Access Review

    Many smart hardware problems stem from poorly managed access or outdated passwords. Network hygiene acts as a strong first line of defense.

    • Login to the router admin panel to review connected devices
    • Remove any unknown or old smart devices
    • Change Wi-Fi and admin passwords every six months—random combinations are harder to breach
    • Regularly review app permissions granted on your phone and revoke unnecessary access

    Enabling two-factor authentication for device management apps (when supported) adds another layer of security.

    Automation and Integration Checks

    Smart home automations break when integrations go out of sync. Periodic routine checks help avoid surprises.

    • Test if automation rules (schedules or triggers) still activate as intended
    • Confirm integrations with third-party platforms like IFTTT or SmartThings
    • Check for missing devices in the main dashboard or automation app

    It’s common for manufacturers to issue compatibility updates, so reviewing rules after software updates is wise.

    Backup and Reset Protocols

    Sometimes, resets or restores are necessary for persistent problems or after hardware swaps. Not all users realize regular backups are possible—and smart.

    • Use device management apps that offer a backup and restore feature
    • Note the location of device reset buttons, usually recessed in the housing
    • After a reset, follow manufacturer pairing instructions to re-sync device to your network

    Keeping printed (or digital) records of device serial numbers and Wi-Fi credentials speeds up any recovery after a reset event.

    Annual Professional Inspection (Optional)

    For large smart home setups or critical security gear, annual third-party checkups can catch issues missed in DIY routines. This may seem cautious, but for some, the extra assurance is worth it.

    • Specialized technicians review wiring and network health
    • System upgrade advice is offered to maintain compatibility with new protocols

    Vetting technicians through recognized brands like Geek Squad, or directly from the device vendor, reduces the risk of improper handling.

    Comprehensive Conclusion

    Consistent smart home hardware maintenance delivers convenience, reliability, and peace of mind. While product manuals offer guidance, a personalized checklist like the one here translates technical jargon into real-world steps.

    Simple habits—regular cleaning, verifying power, updating firmware, and checking automations—prevent most issues before they begin. As smart hardware evolves, a careful approach ensures devices work together smoothly and safely.

    Homeowners who invest just a bit of attention each month enjoy more uptime, greater security, and better long-term performance from every smart device.

  • How to Configure Motion Detection Sensitivity to Ignore Pets

    How to Configure Motion Detection Sensitivity to Ignore Pets

    Smart home security cameras with motion detection are key for safety. However, pets can trigger unwanted alerts if sensitivity is not adjusted properly.

    This guide details practical steps for configuring motion sensor sensitivity, helping homeowners avoid false alarms caused by pets. It suits anyone with pets and a desire for reliable, focused home monitoring.

    Understanding Motion Detection Sensitivity

    Motion detection settings enable smart cameras to identify movement and send alerts. When sensitivity is too high, cats or dogs can set off the alarm frequently.

    How to Configure Motion Detection Sensitivity to Ignore Pets

    The challenge for pet owners is balancing detection accuracy and minimizing nuisance notifications. Each camera brand uses slightly different detection mechanisms and configurations.

    Common Technologies in Motion Sensors

    • PIR (Passive Infrared) Sensors: Detects heat signatures moving across the field of view.
    • Video-based Detection: Uses AI or pixel changes in video feeds.
    • Radar or Microwave Sensors: Less common, typically for advanced models.

    Knowing your hardware’s detection type helps when making adjustments.

    Why Pets Trigger False Alarms?

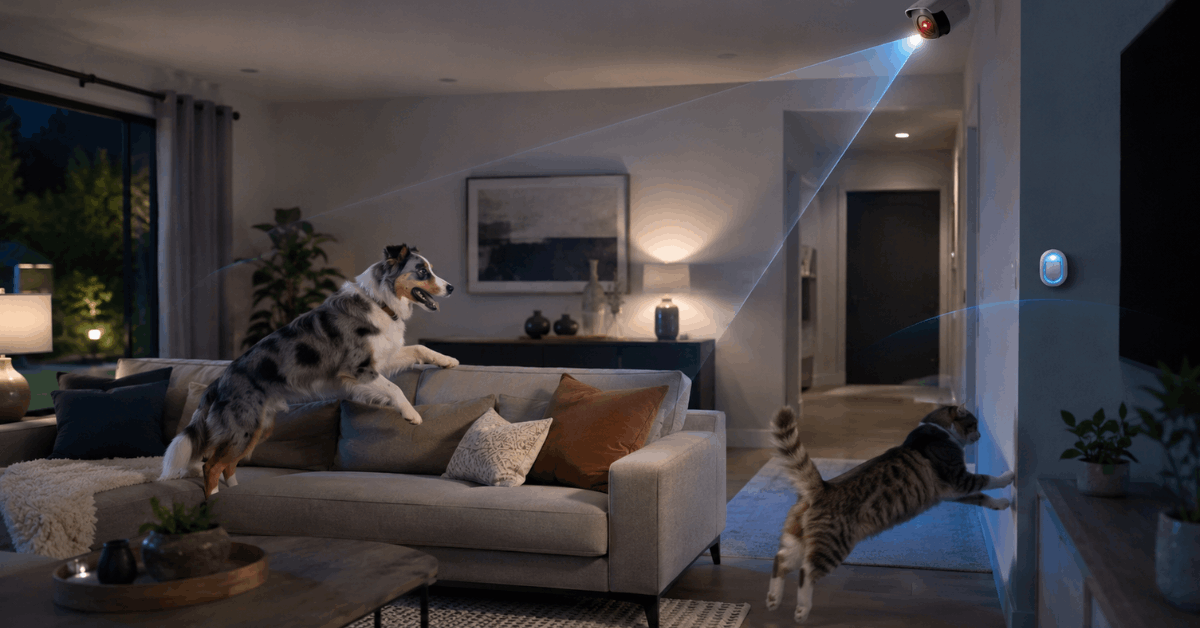
    Most pets—especially dogs and cats—are active indoors. Their heat and motion patterns resemble those of intruders on standard sensitivity.

    How to Configure Motion Detection Sensitivity to Ignore Pets

    Even small movements like a tail flick or a leap onto furniture can trigger alerts. Multiple pets can make this even more challenging.

    Factors Affecting Detection

    • Camera Placement: Height and angle affect what the sensor sees.
    • Pet Size: Larger breeds trigger sensors more frequently.
    • Activity Zones: Areas marked for detection may include pet hangouts.

    Evaluating these aspects first can streamline later configuration steps.

    Choosing the Right Camera Features

    Many popular brands, such as Arlo, Ring, Google Nest and Eufy, now provide pet-friendly features or smart detection routines.

    It is common to see models mention “pet immunity” or “advanced motion filtering” on their spec sheets or in their apps.

    Essential Pet-Related Camera Options

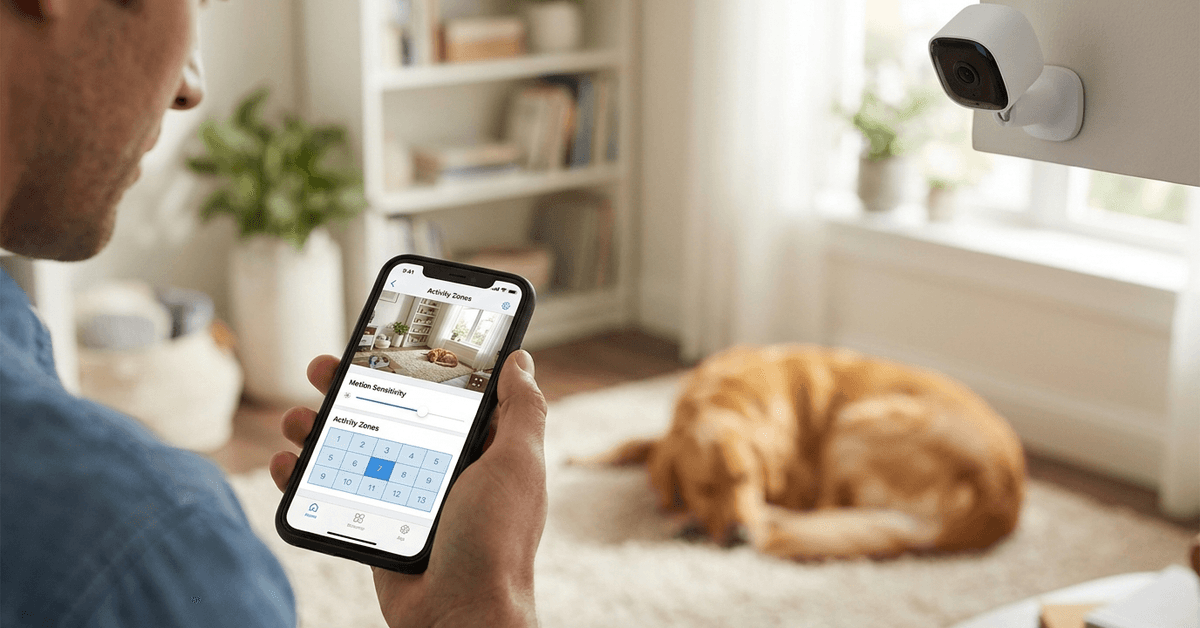
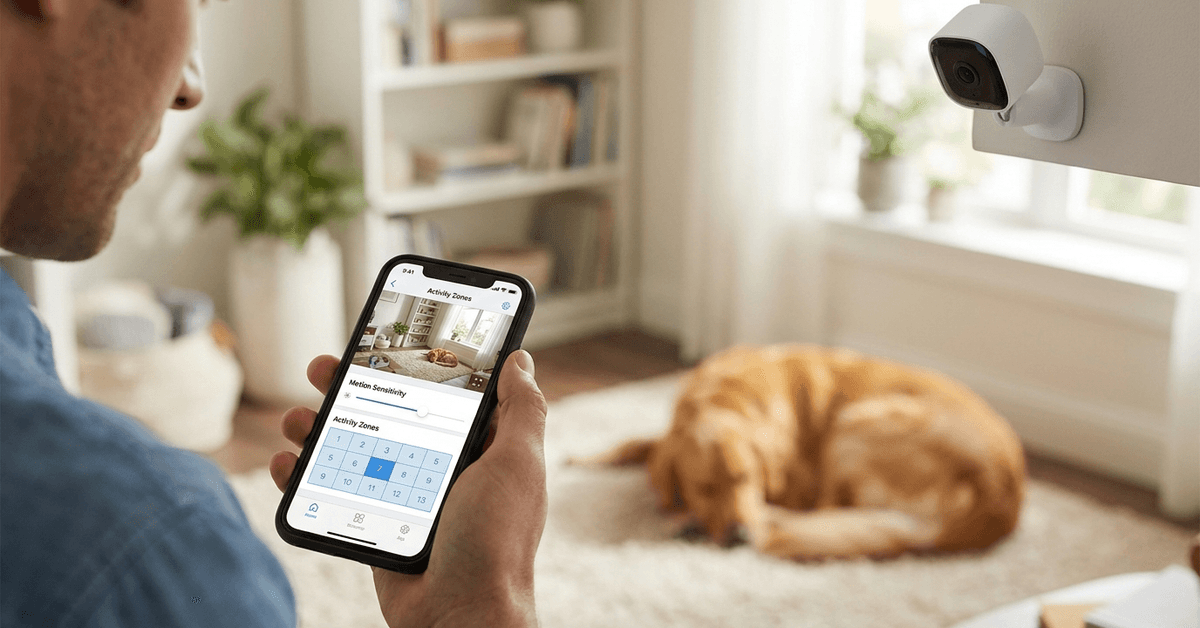
    • Adjustable Sensitivity Levels: Enables fine-tuning for smaller or larger motion events.
    • Person Detection AI: Distinguishes people from animal movement.
    • Activity Zones: Allows exclusion of pet-frequented areas from alerts.

    Homeowners often find better accuracy in models offering both AI and manual sensitivity adjustment.

    Step-by-Step: Adjusting Motion Detection Sensitivity

    Most smart camera apps allow you to tweak sensitivity directly. Steps and menu names may differ between manufacturers but core principles remain the same.

    Example Brands: Arlo, Ring, and Google Nest

    1. Open the App: Launch the specific mobile or web app for your camera brand.
    2. Go to Device Settings: Locate your device under “Cameras” or similar tab.
    3. Select Motion Settings: Common labels include “Motion Sensitivity” or “Detection Settings.”
    4. Adjust Sensitivity Level: Lower the slider or toggle until pet movement is no longer detected, but human motion still is.
    5. Create Activity Zones: Draw or select regions on the camera image that exclude places pets usually roam.
    6. Save Settings: Confirm the changes in the app.
    7. Test: Observe with pets present to check if alerts are reduced.

    Model-Specific Tips

    • Arlo: Offers 1-to-100 sensitivity scale and custom activity zones.
    • Ring: Includes “People Only” smart alerts with subscription, plus motion zone drawing.
    • Google Nest: Detects pets vs. people with Nest Aware plan.

    Advanced Solutions and Third-Party Tools

    Sometimes, even with optimal in-app settings, additional steps may be required for effective filtering.

    Integrations with Smart Home Platforms

    • IFTTT (If This Then That): Custom rules to silence alerts when pets are active (requires compatible cameras).
    • Home Assistant: Allows advanced automations, disabling notifications during known pet activity periods.
    • Apple HomeKit Secure Video: Leverages AI to distinguish animals, but works only with compatible models.

    Physical Camera Placement Strategies

    • Mount cameras at least 6 feet high and angle downward.
    • Keep sensors away from pet beds or play areas.
    • Avoid pointing cameras toward areas where pets jump frequently.

    Combined, these actions can notably reduce false positives from animals.

    Common Mistakes and How to Avoid Them

    Configuration is not always straightforward. Sometimes, over-tweaking or using the wrong settings can reduce home security effectiveness.

    Missteps in Sensitivity Adjustment

    • Setting Sensitivity Too Low: May result in missed real human movement.
    • Ignoring Firmware Updates: Outdated software may lack key AI features or bug fixes.
    • Not Testing with Actual Pets: Configurations made without observing live pet activity often miss edge cases.

    Small, ongoing tweaks are often the best way to dial in optimal performance.

    Routine Maintenance and Ongoing Adjustments

    Pets change routines, and homes evolve. Occasionally, a perfectly calibrated system begins reporting new false alerts.

    Regularly checking settings, reviewing alert logs, and updating software can sustain performance.

    Review Recommendations

    • Monthly log reviews can reveal undetected problems.
    • Schedule short tests each week to verify that people are detected but pets are not.
    • Update device software promptly for latest improvements.

    Legal and Privacy Considerations

    Security devices are subject to regional laws. Recording audio or video in shared spaces may require permission depending on jurisdiction.

    Adjusting sensitivity for privacy as well as convenience is a smart habit.

    Responsible Usage Tips

    • Check manufacturer guidance around legal compliance.
    • Avoid cameras facing into neighbors’ property or communal areas.
    • Consult local regulations if uncertain about recording rights.

    Maintaining ethical practices ensures smart home tech remains a positive presence.

    Conclusion

    Setting motion detection sensitivity to ignore pets requires a mix of the right hardware, thoughtful configuration, and an understanding of your home’s unique patterns.

    Most modern cameras have at least one tool or setting, such as person detection or custom zones, that can minimize pet-triggered alerts effectively. Additional routine checks and periodic fine-tuning keep systems performing as intended.

    Ultimately, the best results come from blending technology with a careful look at how your pets move and interact in your home. With conscientious setup, security does not need to clash with the daily lives of your furry family members.

  • How to Automate a Basement Dehumidifier Based on Weather Data

    How to Automate a Basement Dehumidifier Based on Weather Data

    Maintaining the right humidity level is crucial for any basement. High dampness can damage property and cause unhealthy mold.

    For homeowners wanting a set-and-forget system, automating a basement dehumidifier based on live weather conditions is a practical solution.

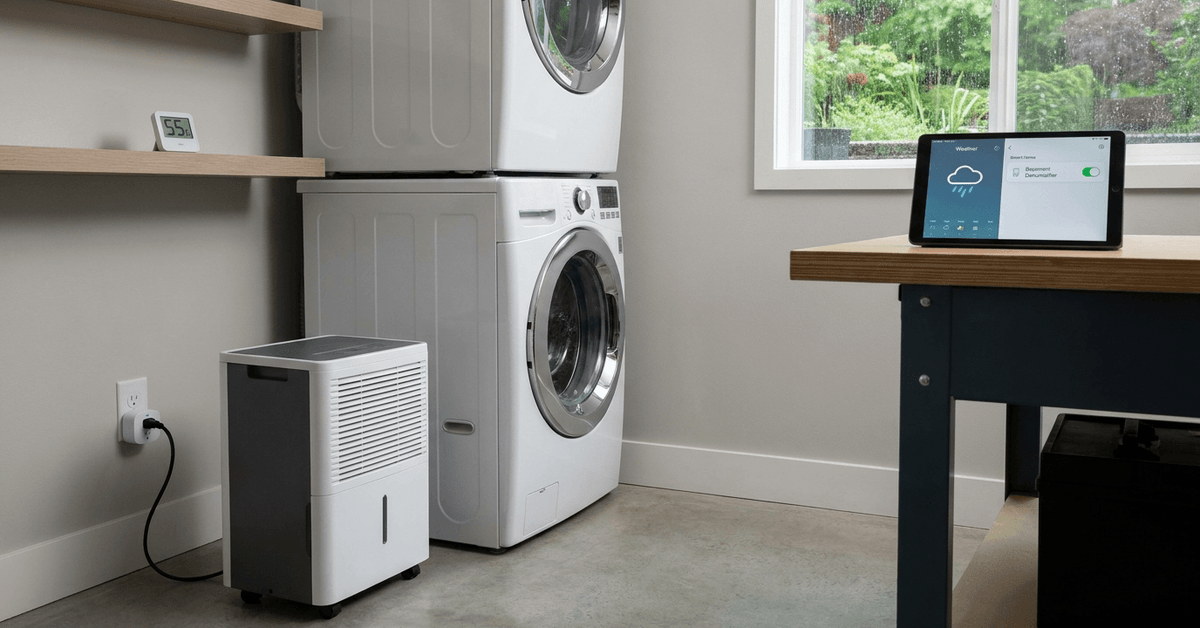
    This article offers a step-by-step breakdown for turning a regular dehumidifier into a smart, weather-responsive device. The process is easier than many expect.

    Image 1

    Why Automate Your Basement Dehumidifier?

    Humidity changes often happen before you even notice. External weather can directly affect your basement’s moisture.

    Automation means less manual checking and fewer surprises when summer storms or heavy rains spike humidity indoors.

    Consistent Air Quality

    Automating keeps conditions steady. You avoid drastic swings, which helps reduce risks of mold and chronic dampness.

    Energy and Cost Savings

    Many units run at full power needlessly. Turning on the dehumidifier only when necessary avoids wasted electricity and wear.

    Hands-Free Peace of Mind

    Once automated, you rarely need to monitor or adjust settings. The system does the thinking for you.

    Essential Components and Tools Needed

    Automating based on weather data requires a few specific items. Here’s what most enthusiasts use:

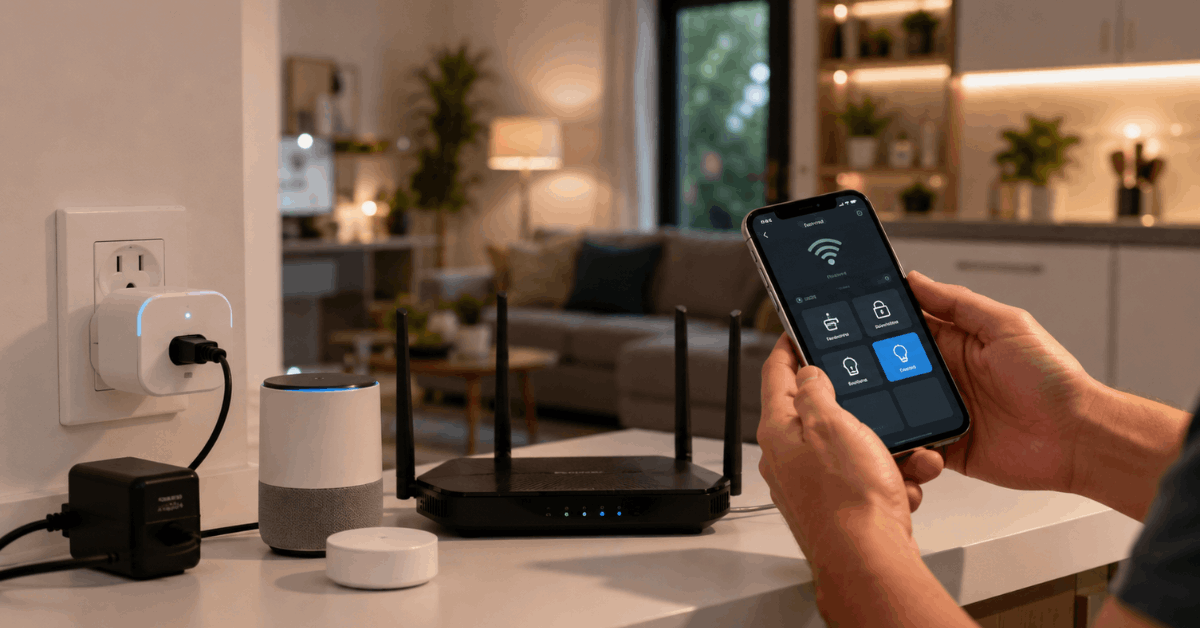
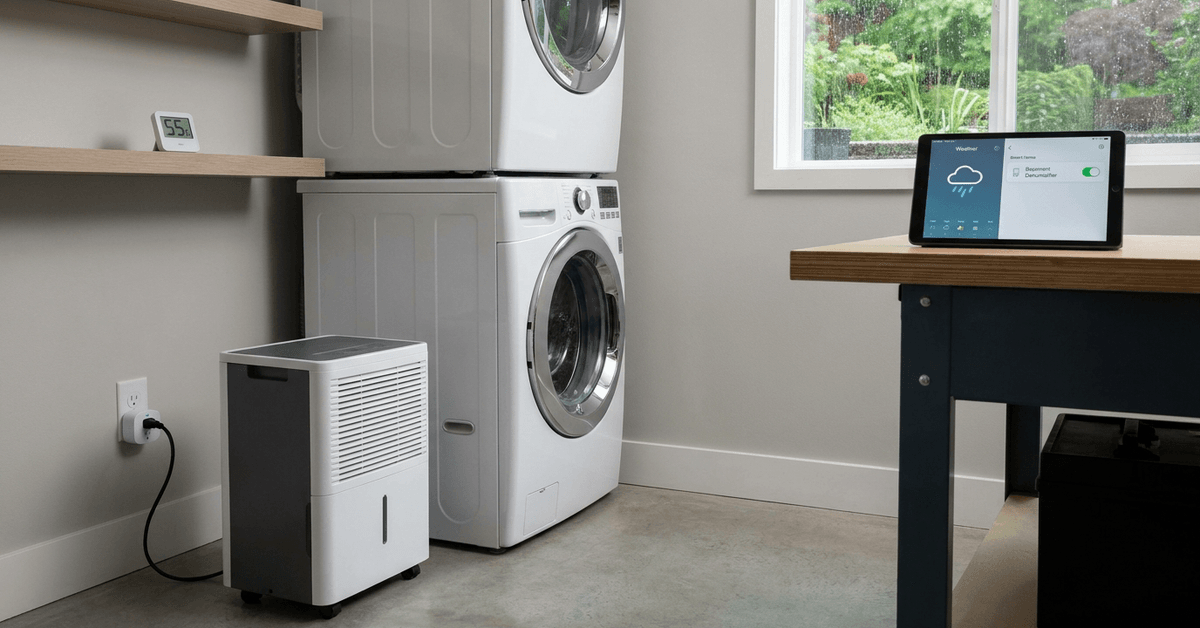
    • Smart Plug or Wi-Fi Outlet: Acts as a remote switch for your dehumidifier.
    • Indoor humidity sensor: Monitors real-time moisture in your basement.
    • Weather data integration tool (such as IFTTT, Home Assistant, or SmartThings): Links outside weather conditions to your smart plug.
    • Reliable home Wi-Fi network: Ensures consistent device communication.
    • Optional: Zigbee or Z-Wave hub for advanced automation and integration.

    Which Dehumidifiers Are Suitable?

    Almost any plug-in dehumidifier that works with a mechanical on/off switch will function. Digital-only models sometimes need extra configuration.

    When in doubt, checking if your unit resumes operation after a power loss helps determine compatibility.

    Step-by-Step: Automating with IFTTT and a Smart Plug

    One popular method uses IFTTT (If This Then That) paired with a smart plug. This cloud-based system links online weather feeds to physical devices.

    Create Accounts and Prep Devices

    • Sign up for free accounts on IFTTT and the smart plug’s app (such as Kasa, TP-Link, or Meross).
    • Install both apps on your phone.
    • Set up the smart plug on your home network and test manual control with your dehumidifier plugged in.

    Add a Weather Service to IFTTT

    • IFTTT features built-in integrations with popular weather APIs such as Weather Underground or OpenWeatherMap.
    • Connect your IFTTT account to one of these services by following prompts.

    Configure IFTTT Applets for Weather Triggers

    • Create a new applet beginning with a weather trigger (like “Current humidity rises above 70%” or “Rain is forecasted today”).
    • For the action, select “Turn on smart plug.”
    • Repeat for the reverse scenario—when dry weather returns, create another applet to turn the unit off.

    Test for Timing and Accuracy

    Set thresholds slightly below where problems usually start. Many find around 60-65% humidity is a safe upper limit for basements. Adjust as seasons change.

    Advanced Automation with Home Assistant

    For those wanting local control and deeper customization, Home Assistant is a popular open-source platform. It runs on a Raspberry Pi or any always-on PC.

    What Home Assistant Offers

    • Pulls in local and cloud weather data using integrations.
    • Supports Zigbee, Z-Wave, and Wi-Fi device automation through native add-ons.
    • Allows for multi-condition automations, like running the dehumidifier if both inside and outside humidity exceeds set points.

    Example Home Assistant Automation Flow

    1. Install Home Assistant and required add-ons (such as the Meteo-France or OpenWeather integration).
    2. Add the basement’s smart plug and humidity sensor as devices.
    3. Create automations using the visual editor: Set ‘if’ logic with weather and sensor readings, then an ‘action’ to activate the plug.
    4. Schedule checks as often as every few minutes for best responsiveness.

    Integrating With SmartThings or Google Home

    Commercial smart home hubs like SmartThings or Google Home also allow similar weather-based triggers.

    Almost all major plugs and many sensors are compatible with these systems. Custom routines often work through their respective apps.

    How SmartThings Helps

    • Detects both local weather and sensor input.
    • Can combine with other smart home routines (like HVAC or leak detection) for broader automation.

    Voice Assistant Tie-In

    Google Assistant routines let users run sequences based on weather, though advanced custom triggers may require third-party services.

    Important Safety and Maintenance Advice

    Even with automation, occasional manual checks are important for performance and safety. Filters collect dust quickly in basements.

    Backup systems are smart, especially in areas prone to outages. Battery-powered humidity sensors are an option for resilience.

    • Test your dehumidifier’s water reservoir or hose for clogs monthly.
    • Keep the sensor clear from vents or obstructions.
    • Avoid automating high-voltage or commercial-grade dehumidifiers unless specifically rated for smart outlets.

    Weather Data Sourcing Tips

    Online platforms like OpenWeatherMap offer reliable regional forecasts and real-time metrics, ideal for home automation.

    Some services update more frequently or allow tighter location pairing than others. Choosing a provider with up-to-the-minute readings is most effective for basements prone to quick swings.

    Conclusion

    Automating a basement dehumidifier by reacting to weather data is both practical and protective. The process provides peace of mind, helping avoid costly surprises tied to excess humidity.

    After setup, the comfort and preservation gains become clear over time. For anyone looking to add resilience to their home’s foundation, this is a reliable, field-tested upgrade well worth consideration.

  • The Beginner’s Guide to Automated Freeze Protection for Pipes

    The Beginner’s Guide to Automated Freeze Protection for Pipes

    Frozen pipes can create sudden, costly damage. Many smart home enthusiasts now look for automated freeze protection to stop this problem before it starts. Pipe bursts aren’t rare during cold snaps. 

    This guide is for homeowners seeking easy and effective smart tech solutions for pipe freeze prevention. Automated systems reduce manual work and provide peace of mind through real-time alerts and hands-off operation.

    Why automated freeze protection matters?

    Unprotected pipes are highly vulnerable in freezing temperatures. A single cold snap is sometimes all it takes for a pipe to burst. This can flood rooms and destroy property.

    Traditional insulation helps but isn’t perfect. Automated freeze protection adds a proactive layer. It often spots issues before they become critical. Many homeowners discover its value only after a close call or major repair bill.

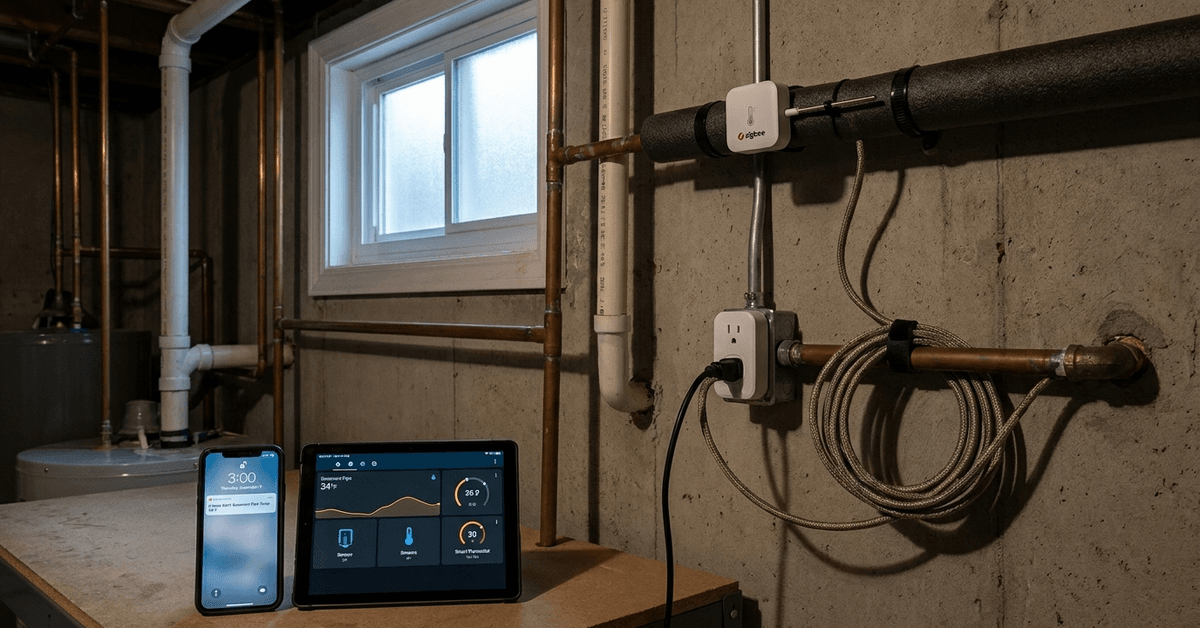
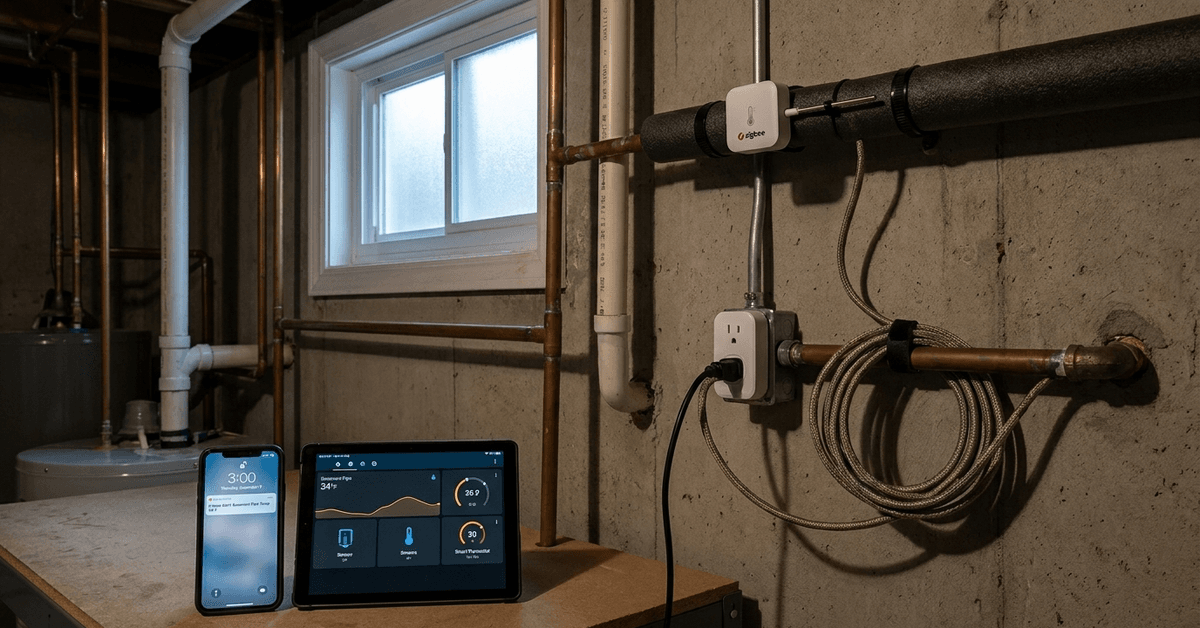
    Image 1

    How automated freeze protection solutions work

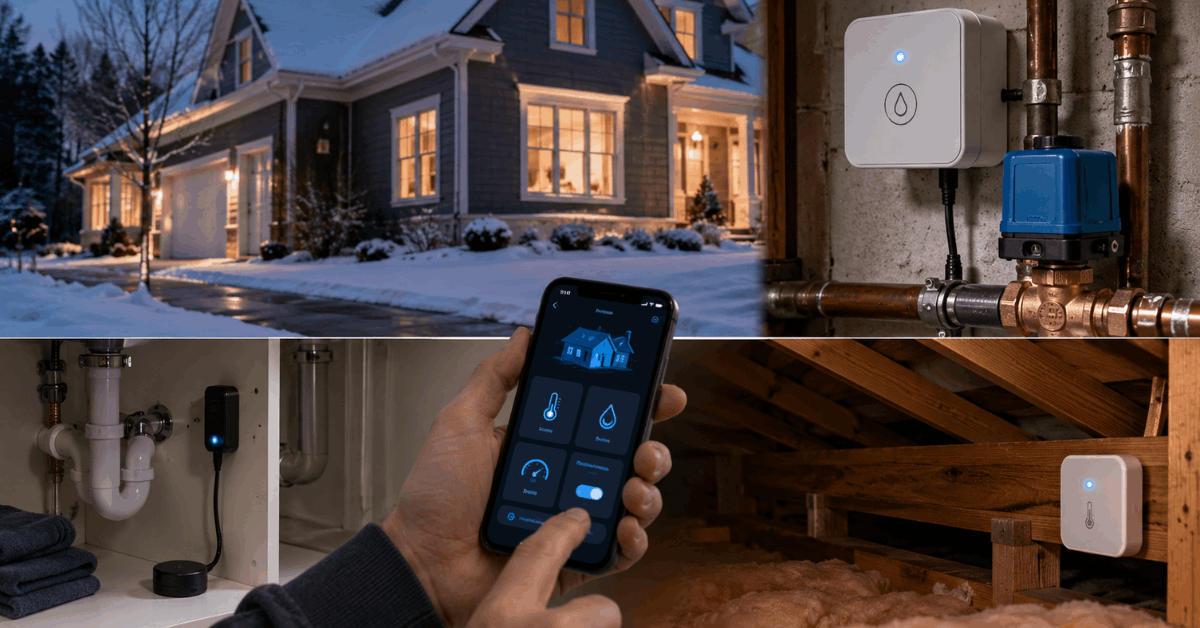
    Smart systems usually combine three core elements: temperature sensing, automated responses, and real-time alerts. Some setups use only one of these but most integrate all three for reliability.

    Remote temperature sensors

    Wireless sensors monitor pipe or room temperatures. Smart protocols like Zigbee and Z-Wave make it easy to deploy multiple sensors in cold spots. Products like Aqara Temperature and Humidity Sensor and Fibaro Z-Wave Sensor are well-known options.

    By tracking conditions in real-time, these sensors quickly reveal spots with impending freeze risks. Placing these sensors near exposed pipes or unheated basements is usually most effective.

    Automatic heating devices

    When a sensor registers a dangerously low temperature, automated systems can activate heat sources. The most common tool is a smart pipe heating cable or tape. Systems like the Easy Heat Freeze Free Cable can be plugged into a smart plug like TP-Link Kasa.

    Some smart thermostats, such as Ecobee or Nest, also offer custom automations to activate zone heating when specific temperature drops are detected.

    Real-time alerts and automation platforms

    If you’re away, being notified is crucial. Automation platforms, such as Home Assistant, allow users to set notifications via mobile, text, or email. These alerts mean action can be taken fast, sometimes remotely.

    Choosing the right smart freeze protection system

    Not every home or region needs the same type of freeze protection. The correct combination depends on factors like local climate, home layout, and existing smart devices.

    Evaluate climate risk and priorities

    • Colder climates require extensive sensor coverage, especially for exterior walls, crawl spaces, and attics.
    • Mild regions might only need monitoring under sinks or garages.
    • Consider if water shut-off automation adds extra safety.

    Compatible smart home ecosystems

    It’s helpful to match sensors and actuators with your current home automation hub. SmartThings and Home Assistant cover wide device compatibilities. 

    Apple HomeKit and Google Home support basic automations, although device choice is sometimes more limited.

    Zigbee and Z-Wave networks offer excellent reliability and battery life for remote sensors. Wi-Fi sensors are an alternative but may require more frequent battery changes.

    Budget and installation complexity

    • Simple plug-in pipe cables are affordable and straightforward to set up.
    • More complex setups with multiple sensors, smart valves, and remote monitoring cost and require more planning.
    • DIYers usually prefer devices with app-based configuration. Professional installs often include water shut-off kits or plumbing modifications.

    Step-by-step setup: DIY freeze protection automation

    For those starting out, here’s an approachable guide. It assumes a basic smart home hub like Home Assistant, but most methods translate to SmartThings or similar platforms.

    1. Select critical monitoring locations

    • Pipes near exterior walls
    • Unfinished basements or cellars
    • Sinks in rarely heated rooms

    2. Install wireless temperature sensors

    • Pair Zigbee/Z-Wave sensors with your home hub.
    • Test sensor reach and reliability at target locations.
    • Label sensors in the app for clear identification.

    3. Add a smart plug to power pipe heating cable

    • Attach a smart plug like TP-Link Kasa Smart Wi-Fi Plug to a standard heating tape or cable.
    • Set up app routines to turn the cable on or off based on temperature.

    4. Configure automations in smart home hub

    • Use Home Assistant’s “Automations” menu to trigger the smart plug at a set temperature (e.g., below 35°F / 2°C).
    • Optionally, add a push notification or SMS alert when the event triggers.
    • Consider an automatic water shut-off valve (such as the Dome Z-Wave Water Main Shut-Off) as a secondary fail-safe.

    5. Test your setup

    • Cools the sensor location with ice packs or by opening a window briefly.
    • Check if the cable and alert trigger as expected.
    • Modify settings as needed for your room or device specifics.

    Popular automated freeze protection products

    Product  Protocol  Best Feature 
    Aqara Temp & Humidity Sensor  Zigbee  Small size, reliable battery 
    Fibaro Z-Wave Sensor  Z-Wave  Strong automation support 
    Easy Heat Freeze Cable  Standard plug  Plug-and-play with smart plug 
    TP-Link Kasa Wi-Fi Plug  Wi-Fi  Easy integration, app routines 
    Dome Water Shut-Off Valve  Z-Wave  Remote valve control 

    Common installation mistakes and how to avoid them

    Poor sensor placement

    Accurate readings depend on sensor location. Placing a sensor in a warm or insulated area doesn’t show the risk zones’ actual temperature. Cold spots need direct monitoring.

    No redundancy or backup alerts

    If Wi-Fi goes down, notifications might fail. Redundant alerts sent via multiple channels (app, SMS, email) improve reliability. Consider using dual-notification automations in your hub settings.

    Forgetting manual overrides

    Sometimes, automation alone isn’t enough. Including a manual override button within your app or smart plug interface can help deal with unexpected events. It’s an extra layer of control for peace of mind.

    Routine maintenance tips for freeze protection

    • Check sensor batteries monthly in winter—low battery can disable vital protection.
    • Confirm that smart plugs and pipe cables remain securely plugged in and free of corrosion.
    • Review notification settings after updates to smart home apps or hubs.
    • If you plan extended absences, remote monitoring is valuable. Grant a trusted neighbor temporary app access if possible.

    Pros and cons of automated freeze protection

    Pros  Cons 
    Peace of mind and real-time alerts  Initial investment in smart devices 
    Continuous monitoring even when away  Setup may require patience or professional help 
    Customizable automation routines  Batteries or power outages reduce reliability 

    Conclusion

    Automated freeze protection for pipes transforms a vulnerable point in any home into a monitored, manageable part of your smart ecosystem. With a smart blend of temperature sensors, heating cables, and reliable automation, homeowners can avoid the sudden chaos of burst pipes even in severe cold. 

    Picking the right components, planning redundancy, and testing regularly are what make the difference between a near-miss and a disaster. The technology is mature, accessible, and, when set up thoughtfully, mostly hands-off. 

    For anyone new to smart home plumbing safety, a little planning and careful sensor placement go a long way to preserving both property and peace of mind.

  • How to Safely Store Backup Batteries for Home Tech Setups

    How to Safely Store Backup Batteries for Home Tech Setups

    Backup batteries are essential for smart home reliability. Power outages, surges, or simple connectivity issues can disrupt automation if backup energy isn’t ready and safe.

    Smart homeowners, tech enthusiasts, or anyone securing a digital lifestyle at home will benefit from learning effective battery storage methods. Proper storage keeps systems functional, prevents property risks, and even prolongs battery life.

    Why Safe Battery Storage Matters for Home Tech?

    Backup batteries power critical devices during outages. Improper storage can lead to malfunctions, overheating, or even fire hazards.

    How to Safely Store Backup Batteries for Home Tech Setups

    Many advanced home systems rely on battery backups: security cameras, smart locks, alarms, and network routers. Safe storage keeps these systems dependable.

    Risks Associated with Poor Storage

    • Short circuits and potential fires
    • Reduced battery lifespan
    • Voided warranty if manufacturer storage advice is not followed
    • Damage to expensive electronics

    Simple storage errors—like storing all battery types together—can be risky. Even forgetting temperature considerations can have consequences.

    Understanding Types of Backup Batteries

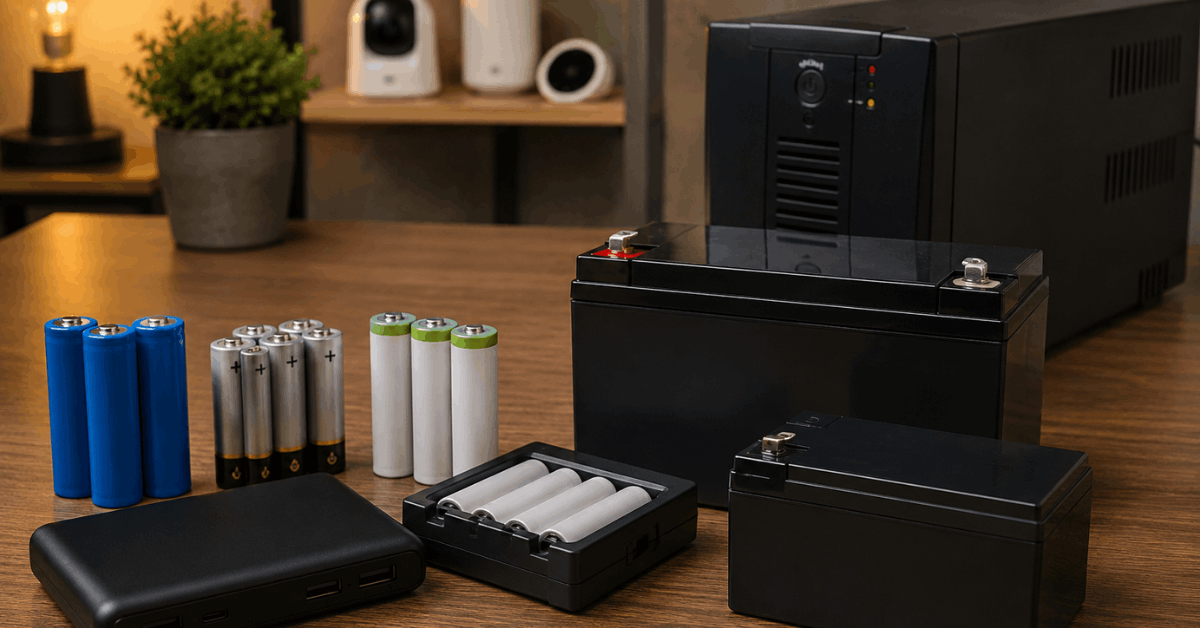
    The most common backup batteries in home setups are lithium-ion, alkaline, nickel-metal hydride, and sealed lead-acid types.

    How to Safely Store Backup Batteries for Home Tech Setups

    Each type has slightly different storage needs and safety protocols. In most smart home applications, lithium-ion batteries are the most common.

    Lithium-Ion Batteries

    Lithium-ion batteries are popular for compact devices. These need precise storage to remain safe and effective.

    • Store in a cool, dry area away from direct sunlight
    • Keep charge levels around 40% to 60% for long-term storage
    • Use battery management apps like Battery Guru for real-time health monitoring

    Alkaline Batteries

    Alkaline batteries are often used for remotes, door sensors, and backup keypads.

    • Store in original packaging or plastic containers
    • Avoid storing in the device for extended periods

    Nickel-Metal Hydride (NiMH) and Sealed Lead-Acid

    NiMH batteries appear in rechargeable gadgets. Sealed lead-acid options can power larger UPS units.

    • Store in a dry place with moderate temperature
    • Lead-acid batteries should be stored fully charged and topped up every few months

    Best Practices for Home Battery Storage

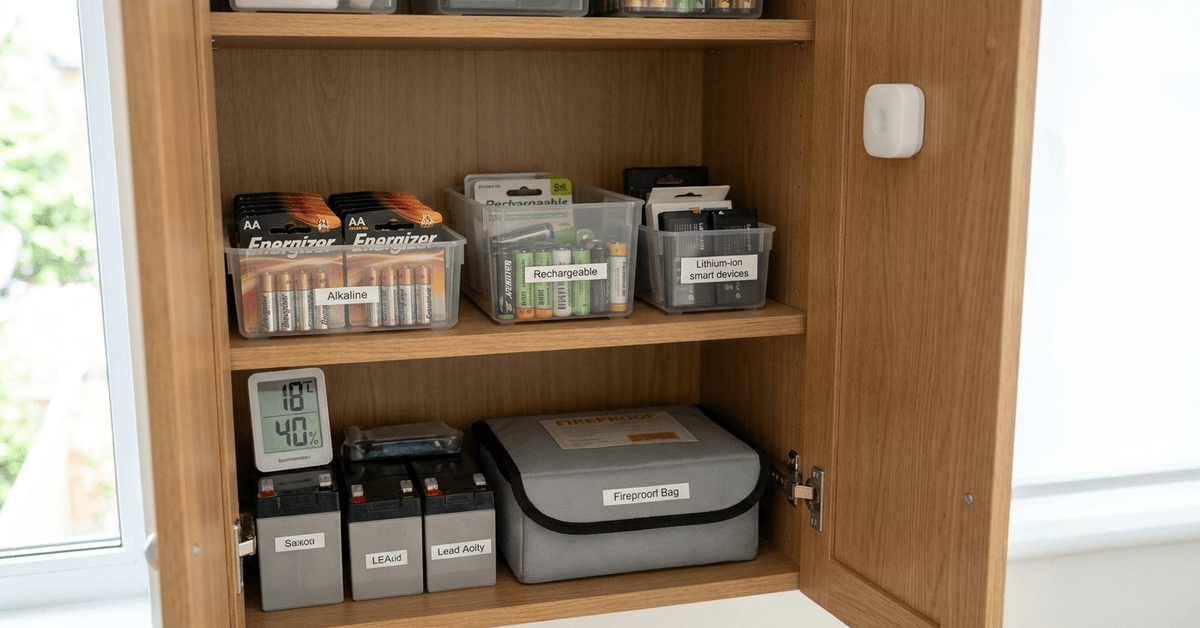
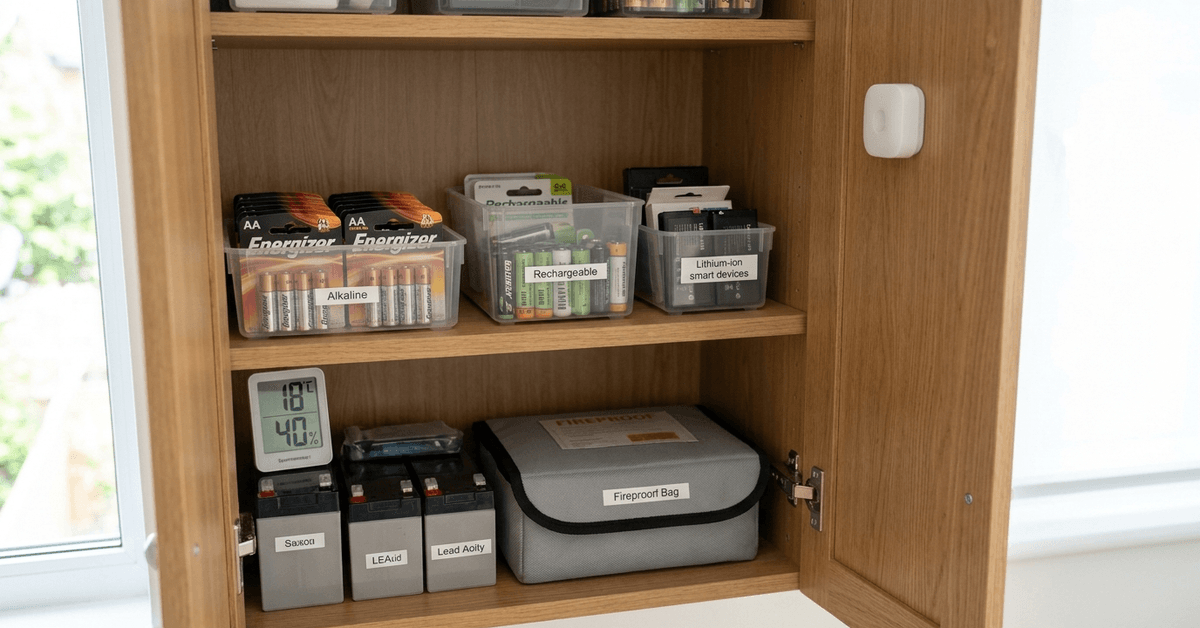
    A reliable storage method is placing backup batteries in a dedicated, well-ventilated, low-humidity cabinet. This reduces interference risks.

    • Store each battery type separately and label container contents
    • Keep out of reach of children and pets
    • Never store batteries in metal jars or drawers with loose coins, screws, or keys
    • Monitor temperature—most batteries perform best between 10°C and 25°C

    Some find value in using digital inventory systems to log battery purchase dates and expected shelf life, available via apps such as Sortly.

    Handling Damaged or Swollen Batteries

    Storing physically damaged or swollen batteries leads to serious hazards. Signs may include bulging, leaking, or excessive warmth.

    • Carefully isolate any suspect batteries using a non-flammable surface, like ceramic
    • Dispose according to local e-waste regulations

    Recommended Storage Products and Locations

    Smart battery cases and fireproof storage bags add another layer of security. Brands like DocSafe or SentrySafe produce certified containers made for battery protection.

    • Select ventilated metal or fire-retardant cabinets for bulk storage needs
    • Avoid storing batteries in attics, garages, or near windows where temperatures fluctuate

    Many users install cabinet locks or tamper alerts for extra safety, easily integrated with smart home sensors.

    Monitoring and Maintenance Tips

    Routine checks keep storage effective. Setting bi-monthly reminders is a habit that helps—smart home apps like Google Keep or Apple Reminders can assist with this.

    • Visually inspect for corrosion or leaks
    • Test capacity with battery testers such as the Klein Tools ET16
    • Rotate stock, using older batteries first to avoid past-expiry use

    Maintaining a record of installed and spare batteries makes tracking easier and prevents waste.

    Disposal and Recycling Guidelines

    Safe disposal is important for both safety and legality. Most local utilities or electronics retailers partner with battery recycling programs.

    • Never dispose of household batteries in regular trash
    • Use locator tools like Call2Recycle’s recycling finder for drop-off sites

    Rechargeable batteries almost always qualify for recycling. Alkaline or zinc-carbon batteries may follow local landfill rules but professional drop-off is still the safest.

    Software and Apps for Battery Management

    Several digital solutions exist to help families keep batteries tracked and maintained.

    • Battery Guru: For monitoring lithium-ion health and charge cycles on Android devices
    • Sortly: Inventory app for cataloging and organizing storage supplies
    • Klein Tools ET16: Hardware tester with optional logging via app

    By logging reminders or tracking charge status, battery health and backup readiness improve significantly.

    Final Thoughts on Safe Home Battery Storage

    Backup battery safety is foundational to secure, smooth-running smart homes. Accidents rarely happen by chance—most result from overlooked best practices or minor slips.

    Storing different battery types separately, keeping them cool and dry, and inspecting them regularly prevents the most common risks. Smart storage cabinets, fireproof containers, and digital tracking apps all add valuable layers of security.

    In the end, an organized approach is the best safeguard for your investment in smart home technology. Safe battery storage means peace of mind and round-the-clock home protection.

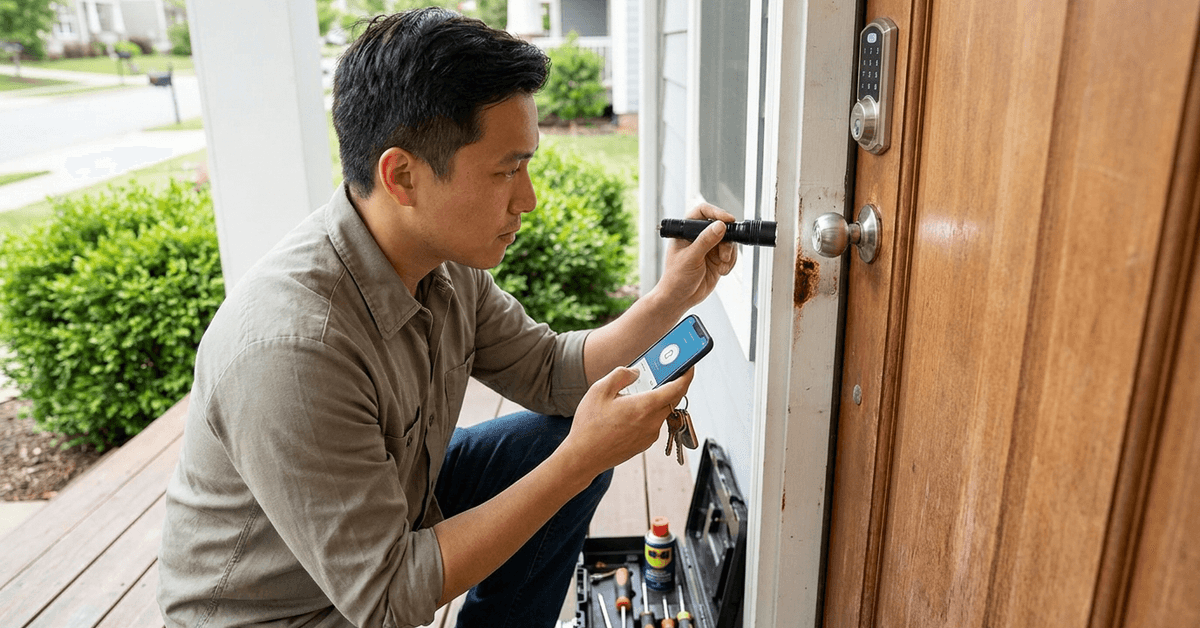
  • How to Test Your Home Door Locks for Wear and Tear

    How to Test Your Home Door Locks for Wear and Tear

    Reliable door locks are central to any home’s safety. When overlooked, small faults can lead to bigger risks. Well-maintained locks greatly enhance peace of mind for homeowners and renters alike.

    This article is tailored for smart home enthusiasts and those keen on proactive home maintenance. Recognizing signs of wear helps safeguard both traditional and smart locks. Here is a straightforward guide for testing your locks effectively and safely.

    Why Checking Door Locks Matters

    Damaged or worn locks compromise security. Over time, regular usage leads to internal fatigue. Minor wear is often ignored but can become a serious concern.

    How to Test Your Home Door Locks for Wear and Tear

    Common Causes of Door Lock Wear

    • Frequent key usage.
    • Lack of routine cleaning and lubrication.
    • Exposure to harsh weather.
    • Improper installation.

    Potential Risks of Ignoring Lock Wear

    • Locks become hard to turn or jam.
    • Increased chance of accidental lockouts.
    • Compromised break-in resistance.

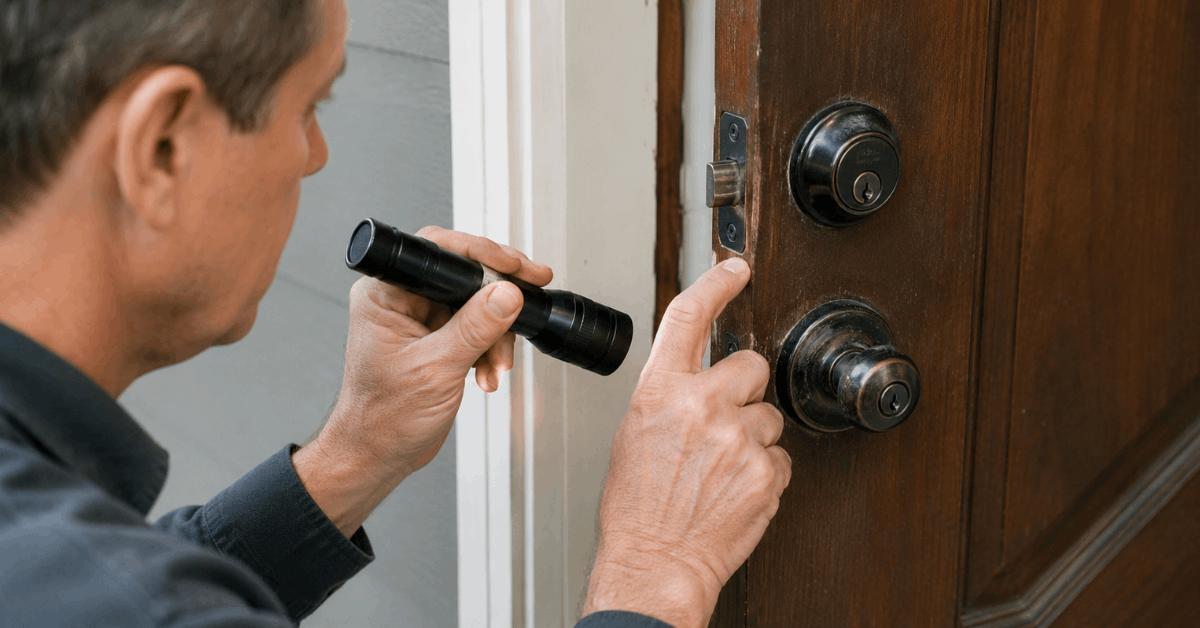
    How to Conduct a Visual Lock Inspection?

    A regular visual inspection identifies many problems. Observing your hardware closely reveals clues before functionality fails. Most issues are visible to the naked eye.

    How to Test Your Home Door Locks for Wear and Tear

    Exterior Signs of Damage

    • Corrosion near the keyhole or strike plate.
    • Scratches or dents on visible hardware.
    • Loose screws around the lockset.

    Internal Wear Signals

    • Sticky operation when inserting or removing the key.
    • Grinding or rough turning action.

    Homeowners may even hear unusual clicking or friction.

    Testing Functionality of Mechanical Door Locks

    Mechanical locks need hands-on testing. The most essential check is to operate the lock as usual several times, observing for hesitation or resistance.

    Step-by-Step Function Test

    1. Insert the main key fully.
    2. Turn the key while noting any catching or stiffness.
    3. Remove and reinsert the key, checking for snag points.
    4. Lock and unlock the door from both sides if possible.
    5. Examine the latch travel: it should retract and extend smoothly.

    Additional Mechanical Testing Tips

    • Testing at night, when temperatures drop, highlights metal contraction issues.
    • Checking with alternative keys can reveal worn cuts or burrs inside the lock.

    Testing Smart Locks for Wear and Failure Risks

    Smart locks require both physical and digital checks. Regular app-based diagnostics are a strong safeguard against undetected faults.

    Physical Smart Lock Health Check

    • Lightly press and pull the lock body for looseness.
    • Watch for battery indicator warnings on the lock or accompanying app.
    • Test backup key or override access in addition to app unlock.

    Digital/Systematic Health Scan

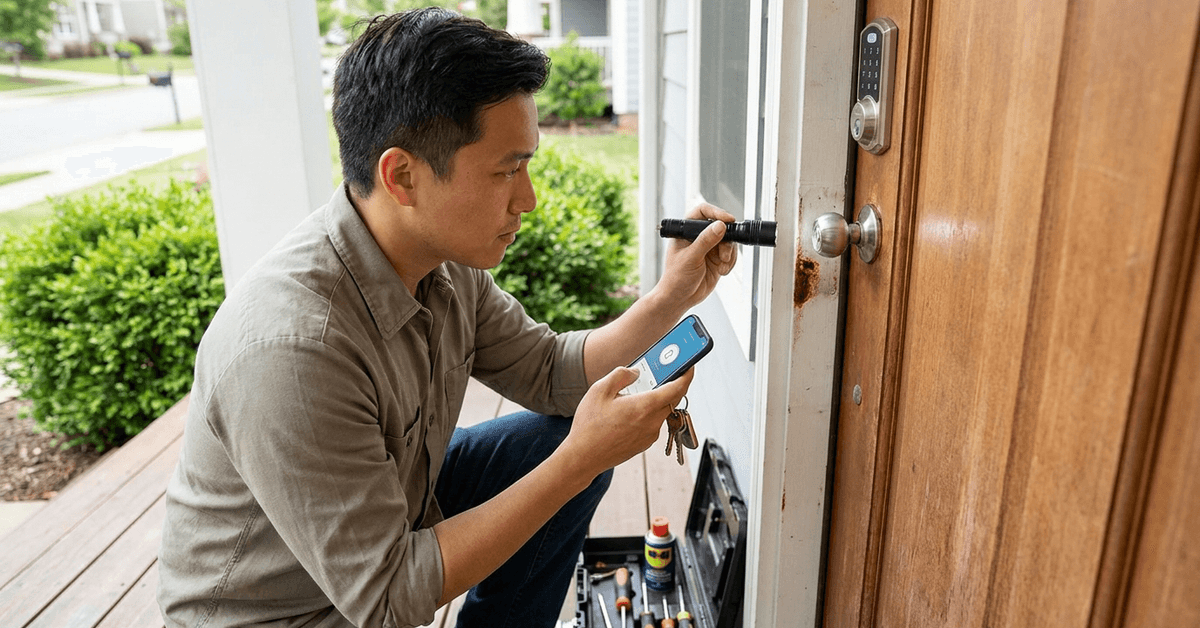
    • Use the manufacturer’s official app (such as August, Yale Access, or Schlage Home) to check for firmware updates.
    • Run built-in diagnostics where available.
    • Check for intermittent Bluetooth or Wi-Fi connectivity.

    Common Smart Lock Failure Indicators

    • Slow motor movement when locking or unlocking.
    • Frequent disconnections from the home network.
    • Random lock resets or error beeps.

    Using Diagnostic Tools and Apps

    Integrated health features in smart lock ecosystems simplify maintenance. These tools help track usage patterns and battery life efficiently.

    Recommended Diagnostic Features

    • Automated activity logs for tracking successful and failed entry attempts.
    • Push alerts for hardware or firmware updates.
    • Remote lock/unlock status monitoring.

    Manual Diagnostic Best Practices

    • Comparing manual operation to app triggers can expose hardware lag.
    • Reviewing monthly lock usage reports helps reveal declining performance.

    Maintenance Routines to Prolong Lock Life

    Good routines keep door locks functioning smoothly. Scheduled maintenance also reduces unexpected lock failures and extends hardware life.

    Physical Lock Maintenance Actions

    • Applying graphite powder or a silicone-based lubricant once every six months.
    • Tightening mounting screws.
    • Cleaning keyholes with compressed air.

    Smart Lock-Specific Tips

    • Replacing batteries generously before full depletion.
    • Applying firmware updates promptly using the lock’s app.

    When to Replace Instead of Repair?

    Some signs mean repairs are unlikely to help: excessive rust, bent internal parts, or repeated smart unlock failures. Safety is a priority, so proactively replacing hardware is wise.

    Replacement Triggers

    • Keys not turning even after cleaning or lubrication.
    • Cracked housing or severely worn key faces.
    • Smart lock app persistently reports errors after resets.

    DIY vs Professional Evaluation

    Basic tests cover most residential needs. But, persistent problems or advanced smart lock issues often call for expert support, especially when warranty coverage is at stake.

    When Professional Help Adds Value?

    • Identifying hidden mechanical failures invisible to the eye.
    • Updating complex smart locks where advanced tools are needed.
    • Ensuring compliance with insurance or smart home integration requirements.

    Conclusion

    Regular lock testing is foundational for home security. Spotting wear early reduces the risk of lockouts and unauthorized access. Smart home setups benefit from both physical checks and smart diagnostics. 

    Adopting these practical checklists goes a long way in making every entry point safer, more reliable, and future-ready.

  • How to Choose Heavy-Duty Deadbolts to Complement Smart Locks

    How to Choose Heavy-Duty Deadbolts to Complement Smart Locks

    Modern smart locks offer convenience, but many homeowners still value the mechanical strength of traditional deadbolts. 

    Combining both can give balanced, reliable protection. This article guides smart home enthusiasts and DIYers on realistically pairing heavy-duty deadbolts with popular smart lock systems, boosting overall security and peace of mind.

    Understanding the Role of Deadbolts in Smart Home Security

    A smart lock alone controls access digitally, but a deadbolt is still the primary barrier against forced entry. Many experienced homeowners realize a heavy-duty deadbolt can deter physical tampering where electronics alone might not.

    This defense is especially critical for entry doors, garage side doors, and basement entrances. Smart automation cannot replace the raw strength of steel or reinforced bolt throws.

    How to Choose Heavy-Duty Deadbolts to Complement Smart Locks

    Why Pair a Deadbolt with a Smart Lock?

    Pairing these two adds crucial redundancy. In power or network outages, the manual deadbolt remains functional. Smart features offer access tracking, while the deadbolt gives the assurance of mechanical resistance.

    It is becoming common to see both installed together on the same door, providing layers that act independently but in parallel.

    Key Factors When Choosing a Heavy-Duty Deadbolt

    Grade and Certification

    The ANSI/BHMA Grade 1 mark signals the highest level of residential deadbolt strength. Grade 1 deadbolts are tested for at least 250,000 open/close cycles and can withstand tough prying attempts.

    How to Choose Heavy-Duty Deadbolts to Complement Smart Locks

    Any deadbolt selected to pair with a smart lock should be rated at this level whenever possible. Lower grades may not be sufficient for main doors or vulnerable areas.

    Material and Build Quality

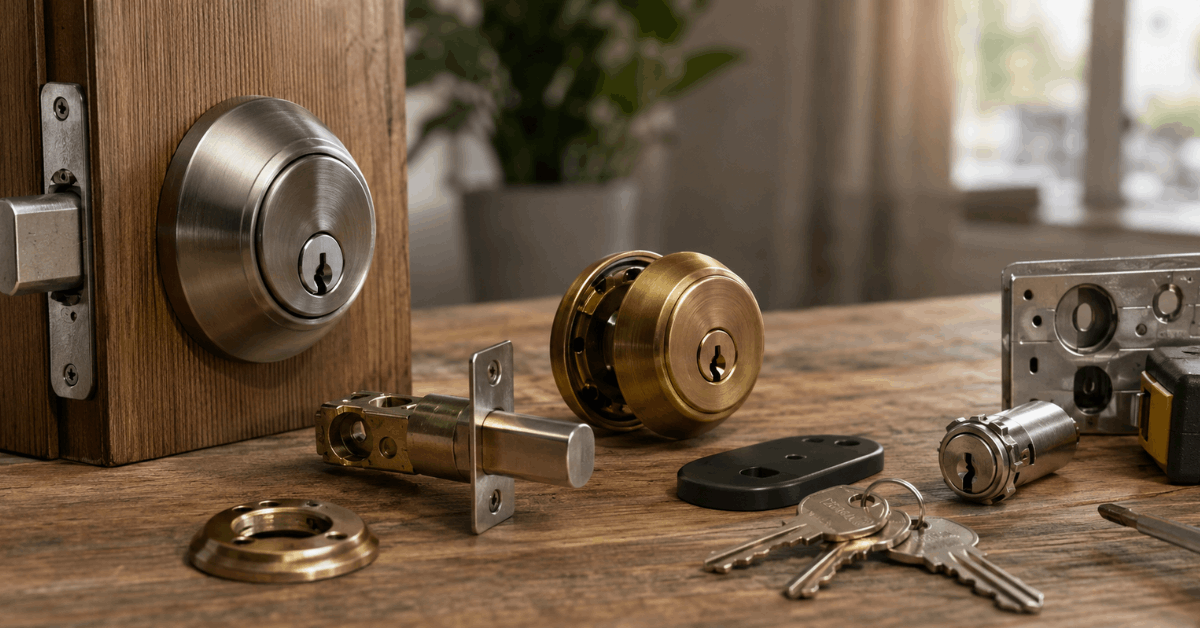
    Bodies made of solid brass or reinforced steel give better resistance to sawing and hammering. Parts with plastic housings may degrade over time, especially if exposed to weather.

    Look for features like anti-drill plates and 1-inch bolts. These prevent simple entry methods, supporting the lock’s long-term utility.

    Compatibility with Existing Hardware

    Deadbolts should physically fit alongside, above, or below the smart lock you have in mind. Measure center-to-center hole distances and thickness of your door before choosing.

    If unsure, many professional installers recommend using deadbolts that align with standard 2-3/8 or 2-3/4 inch backset measurements for US doors.

    Keyway and Key Control

    High-security cylinders with patented keyways are harder to pick or bump. Many locksmiths suggest brands like Schlage (Primus or Everest) or Medeco for improved key control.

    Restricted keyways also help limit unauthorized duplicates, which is sometimes overlooked when focusing only on smart features.

    Choosing Deadbolts That Don’t Interfere with Smart Locks

    Single vs. Double Cylinder Options

    Single cylinder deadbolts operate with a key outside and thumb-turn inside. Double cylinder models require a key on both sides, recommended mainly for doors with nearby glass.

    If pairing with a smart lock, single cylinders often work best since they don’t block quick exits. However, double cylinders do add extra safety for vulnerable glass doors, though fire safety should be considered first.

    Low Profile and Smart Lock Pairing

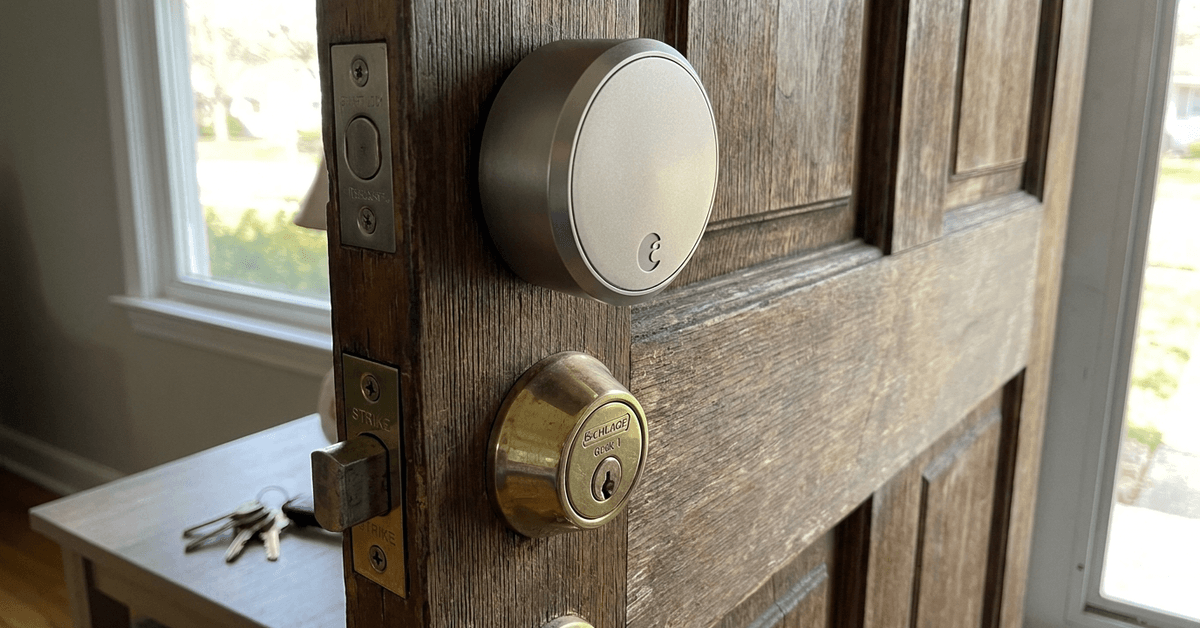
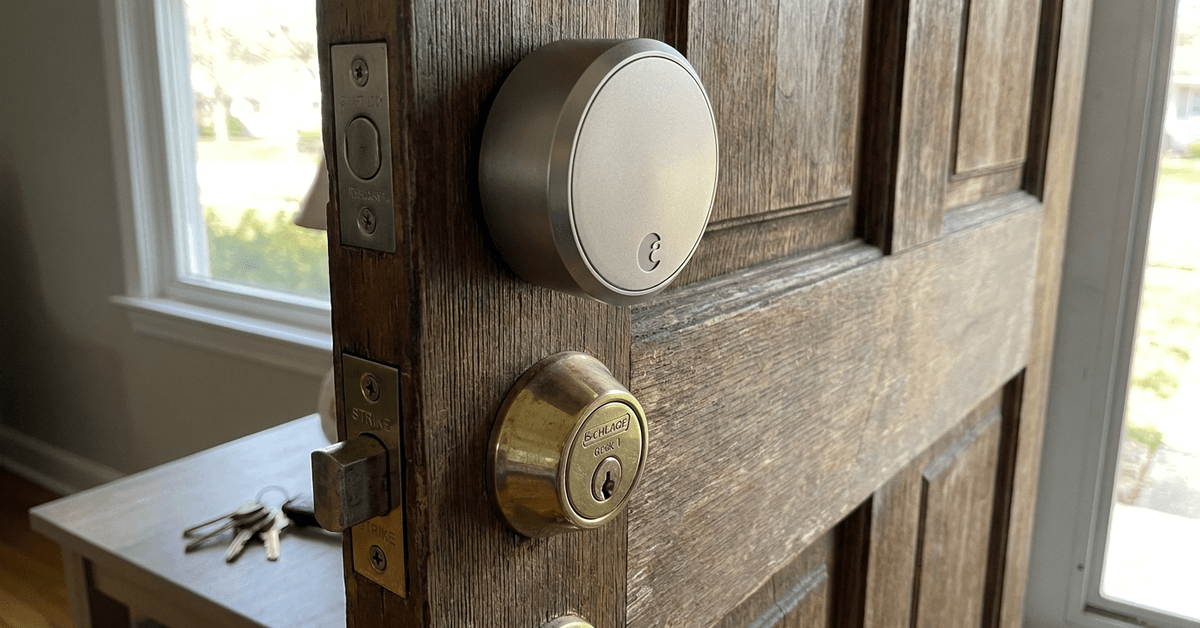
    Deadbolts with a low-profile thumb turn will allow some retrofit smart locks (like August or Yale Assure) to fit directly over the mechanism. Thicker or oddly-shaped deadbolts can create mounting headaches.

    It is often helpful to search compatibility charts on both the smart lock and deadbolt manufacturer’s websites or to call their tech support before purchasing.

    Matching Smart Features and Mechanical Security

    Not all smart locks include a built-in bolt that meets high-grade standards. When using add-on smart locks, the separate deadbolt provides the security backbone, while the motor or actuator delivers the remote unlock function.

    This setup requires a deadbolt with smooth throw action, as rough or stiff bolts can strain the motor in many smart locks, reducing life span or leading to jams.

    Popular Deadbolt Models That Pair Well With Smart Locks

    • Schlage B60N : Works with many retrofit smart lock products, widely installed by pros.
    • Kwikset 980: Compatible thumb turn, reliable ANSI Grade 1 rating.
    • Medeco Maxum: Patented high-security cylinder, fits many smart lock brackets.
    • Yale Real Living Deadbolt: Works natively with select smart lock systems, UL-certified hardware.

    Installation: Step-by-Step Process

    1. Check your door’s thickness and backset measurement to confirm fit for both the deadbolt and smart lock.
    2. Remove any old hardware. Clean the cavity to avoid sticking.
    3. Install the new deadbolt’s bolt assembly into the door edge, securing with provided screws.
    4. Mount the deadbolt’s exterior and interior components, ensuring the cylinder is aligned.
    5. Test the deadbolt’s manual operation for smooth throw before attaching the smart lock motor or adapter.
    6. Follow the smart lock manufacturer’s mounting guide—sometimes involving a bracket or direct rear attachment.
    7. Configure the smart lock via app, connecting it to Wi-Fi or your smart home controller (e.g., Apple HomeKit , Google Home, or Samsung SmartThings).
    8. Test both the smart unlock and the manual key operation several times to ensure there is no drag or misalignment.

    Smart Lock and Deadbolt Protocols: What to Look For

    Many find that interoperability matters. Smart locks using Z-Wave or Zigbee, like Yale or Schlage Encode, often integrate smoothly with major automation hubs.

    Wi-Fi-enabled smart locks, such as August Wi-Fi Smart Lock, offer direct voice assistant integration but may drain batteries faster. Either approach can pair well with mechanical deadbolts if installation allows.

    Some suggest using a Bluetooth-enabled smart lock for doors with unpredictable Wi-Fi coverage. The most important route is to review the manufacturer’s documentation regarding compatibility and installation quirks before buying any hardware.

    Tips to Maintain Maximum Security Using Both Systems

    • Change the mechanical deadbolt’s keys upon move-in for best key control.
    • Perform regular firmware updates to your smart lock via the official app.
    • Visually check hardware monthly for signs of tampering or misalignment.
    • Opt for deadbolts with anti-snap, anti-drill, and anti-bump features—especially for doors not monitored by cameras.
    • Avoid sharing digital codes via unsecured channels, and never leave backup keys hidden near the entrance.

    Recommended Apps and Management Tools

    The August app provides digital key sharing and access logs, useful for monitoring entry times. Schlage Home App lets users create time-limited access codes and check lock status remotely.

    Yale Access App integrates with several home automation routines and can trigger notifications whenever the bolt is thrown, either manually or via the smart system.

    Conclusion

    Combining a robust, certified deadbolt with a high-quality smart lock creates a defense-in-depth approach that meets both modern convenience and old-fashioned reliability. 

    The chosen deadbolt should always match or exceed the strength rating of the smart lock, work smoothly in tandem, and be installed correctly to avoid conflicts.

    Ultimately, real security comes from regular upkeep, choosing well-reviewed brands, and ensuring both electronic and mechanical components are working as intended. By following practical steps and keeping an eye on compatibility, homeowners can enjoy both safety and ease—without compromise.

  • How to Automate Your Pool or Hot Tub Temperature Efficiently

    How to Automate Your Pool or Hot Tub Temperature Efficiently

    Maintaining the ideal pool or hot tub temperature improves comfort and lengthens the swimming season. Smart automation technology now makes it practical to control heating efficiently without manually adjusting settings every day.

    This guide explores how modern homeowners and gadget fans can manage water temperatures with precision. The focus is efficient control, integration, and safety—suiting both tech enthusiasts and beginners.

    Why Automate Your Pool or Hot Tub Temperature?

    Automation makes sense for owners seeking consistent comfort while avoiding wasted energy. Traditionally, heaters cycle on and off without much logic.

    How to Automate Your Pool or Hot Tub Temperature Efficiently

    Smart control systems solve this problem. They monitor, adjust, and learn usage patterns over time. Results include real savings and fewer frustrating surprises.

    Energy Conservation

    Energy costs usually spike when heaters run longer than needed. Automated temperature management uses sensors to reduce unnecessary heating cycles throughout the day.

    Consistent Water Comfort

    With automation, the water stays ready at your preferred temperature. There is less risk of jumping in only to find your pool cold or your hot tub overheating.

    Convenience and Remote Access

    Mobile apps and voice controlled assistants make it possible to check and change temperatures from anywhere. This suits owners who travel or juggle busy routines.

    Choosing the Right Automation Equipment

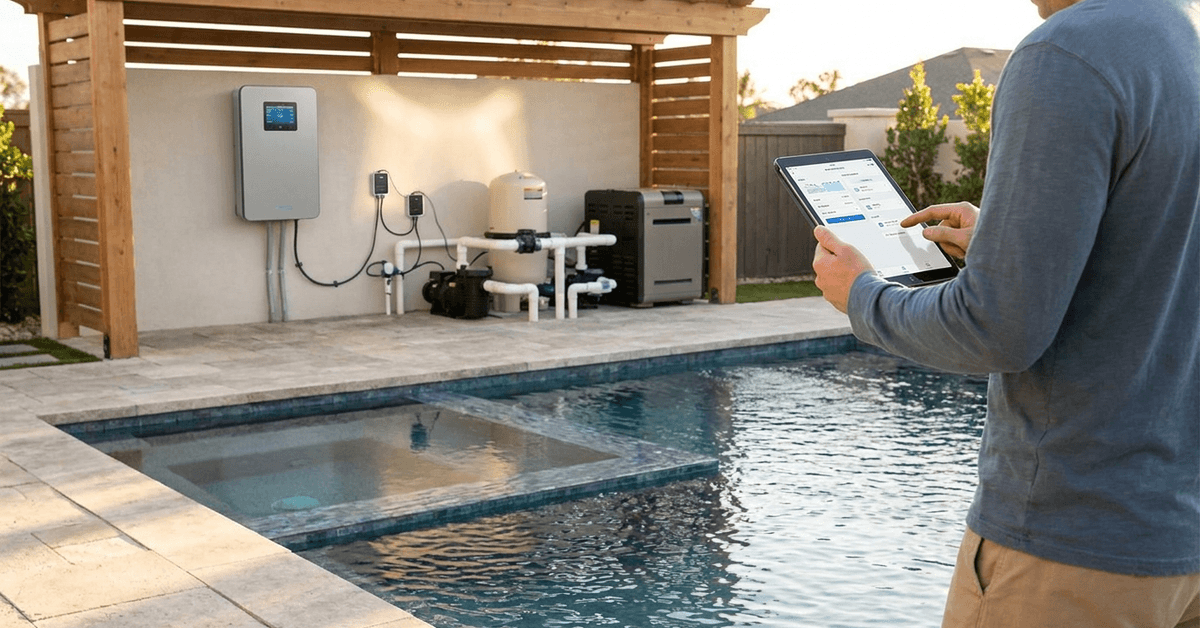
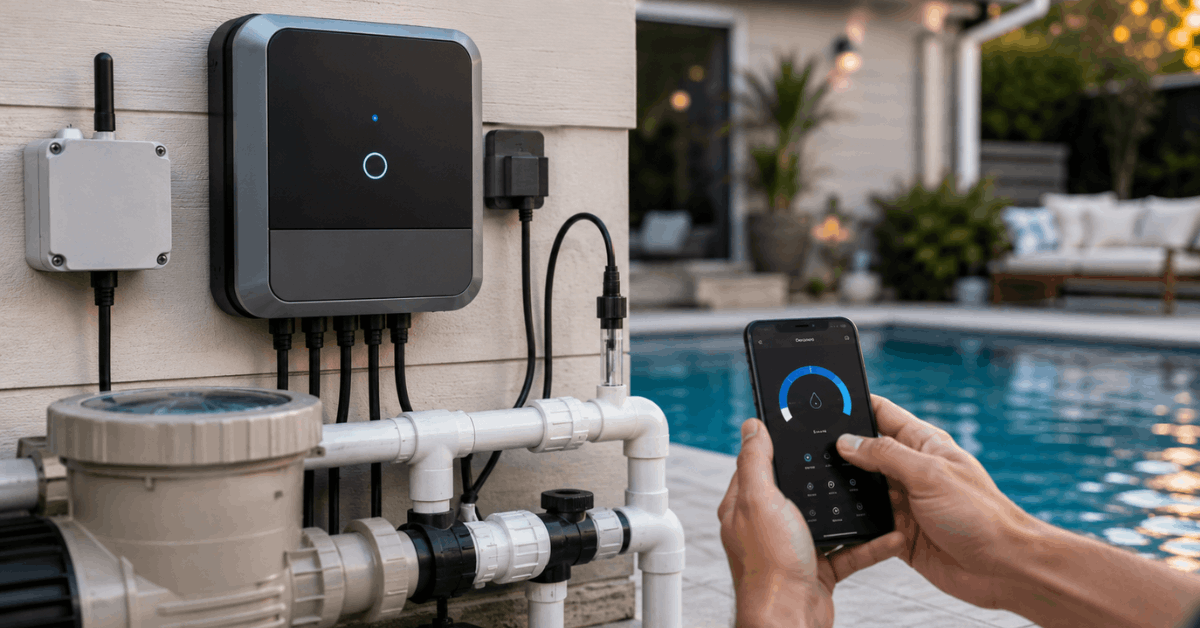
    The ideal solution blends well with your home ecosystem and existing pool or tub setup. A smart controller, thermostatic sensors, and network integration form the core components.

    Popular Smart Controllers

    Each option syncs with mobile apps and allows precise scheduling. They interface with pumps, heaters, and variable speed motors.

    Sensors and Remote Thermostats

    Accurate sensors are essential. Most smart controllers come with built-in support for digital water temperature probes.

    Wireless sensors extend your reach. Models from Honeywell and AquaCal are popular in residential pools.

    Integration Protocols

    • Z-Wave and Zigbee for broad smart home system compatibility
    • Wi-Fi for direct internet connectivity
    • Proprietary protocols unique to certain manufacturers

    Many premium kits are compatible with Alexa, Google Home, and Apple HomeKit. This opens voice activation and automations triggered by routines.

    Key Steps for Smart Temperature Automation

    Efficient automation requires careful planning and precise installation. Homeowners often find it useful to approach this as a phased project rather than all at once.

    How to Automate Your Pool or Hot Tub Temperature Efficiently

    Step 1: Assess Your Existing Equipment

    Inventory your heater, filtration, and existing wiring. If your heater supports digital inputs or relay control, integration is simpler.

    Step 2: Select a Compatible Smart Controller

    • Research compatibility with your heater brand
    • Confirm the number of circuit relays needed
    • Look for app support for both iOS and Android

    Step 3: Install Water Temperature Sensors

    • Probe style sensors are inserted in return lines or dedicated wells
    • Wireless sensors should have reliable signal strength in your pool area

    Step 4: Configure the Controller

    • Connect to home Wi-Fi or hub
    • Create an automation rule for target temperature
    • Set thresholds for heating and cooling triggers

    Step 5: Sync With Mobile Apps

    • Download the manufacturer’s app (e.g., Pentair Home )
    • Enable smart notifications and alerts
    • Allow remote or geofenced control

    Best Smart Devices and Apps for Pool Automation

    Reliable hardware and thoughtfully designed mobile apps make automation productive, not frustrating. Well-established manufacturers have the best support.

    Pentair IntelliCenter

    This system is popular for full-featured smart home pools. The mobile app provides granular schedules and alerts.

    Hayward OmniLogic

    OmniLogic integrates with Alexa and Google Home. Favorite routines include timer-based warmups before anticipated swims.

    Jandy iAquaLink

    iAquaLink suits mixed equipment brands and complex outdoor setups. The app allows device grouping for multi-pool estates.

    Advanced Automation Techniques

    Users looking for more than simple temperature on-off cycles can experiment with layered automation. The following approaches often yield above-average energy savings and comfort.

    Weather-Based Scheduling

    Some systems can be linked to weather API data. This helps anticipate cold fronts, preventing wasted energy on unnecessary heating.

    Occupancy and Proximity Sensors

    Presence sensors, such as those from Zooz or Fibaro, signal the controller to pre-heat water only if someone is nearby. This minimizes idle running.

    Multi-Zone Control

    Owners with both a pool and a connected standalone hot tub often configure separate zones. Each maintains its own temperature schedule for maximum efficiency.

    Tips for Efficient Temperature Management

    • Select a realistic target temperature based on season: 78-82°F for pools, 100-104°F for hot tubs
    • Schedule heat “ramps” only during anticipated usage times
    • Use covers routinely to prevent heat loss overnight
    • Monitor heater run times in your app dashboard
    • Limit remote adjustments to avoid accidental overuse

    Automation works best when paired with basic insulation and maintenance habits. Neglected covers or poor circulation often defeat even the smartest controller.

    Safety, Security, and Privacy Considerations

    Smart systems sometimes require users to register cloud accounts or expose devices to the internet. This introduces privacy considerations.

    Choose automation brands with a track record of prompt security updates. Using unique, strong passwords for your pool controller apps is a good idea.

    Physical Hardware Safety

    Professional installation is recommended for high-voltage equipment. Rooms with high humidity, such as pool pump sheds, need GFCI protection and corrosion-resistant hardware.

    Data Security

    Check for local control options, where temperature schedules stay within your home network and do not rely on cloud relays.

    Maintenance and Troubleshooting

    Smart gear needs occasional attention. Firmware updates should be completed via the official manufacturer’s app.

    • Test temperature sensors every few months for accuracy
    • Inspect physical wiring for corrosion or animal damage
    • Reboot controllers if apps disconnect frequently

    Major brands usually offer robust support forums or knowledge bases for self-help guides.

    Conclusion

    Automating pool or hot tub temperature offers a blend of comfort, efficiency, and peace of mind. The latest smart controllers now make it accessible for most homeowners—even those with modest tech skills.

    Equipment selection and careful setup are crucial. Brands such as Pentair IntelliCenter and similarly established names deliver reliable results with minimal daily oversight.

    Layering automations with weather-triggered routines or occupancy sensors further cuts costs and enhances convenience. Ensuring strong security and solid maintenance keeps your connected sanctuary safe and trouble-free.

    With the right tech, tedious temperature adjustments can become a thing of the past. Your pool or hot tub will always welcome you with perfect warmth, on demand and energy-smart.